Achieving a professional finish with wood trim caulk requires understanding the properties of acrylic latex, the most common type used. Selecting the appropriate caulk gun, a critical tool for application, ensures a consistent bead. Furthermore, surface preparation, including cleaning and sanding, directly impacts adhesion. The techniques taught by experienced carpenters often involve backfilling and tooling for a seamless result, ensuring longevity and aesthetic appeal when applying wood trim caulk.
Wood Trim Caulk: Pro Secrets for a Perfect Finish! – Article Layout Guide
This guide outlines the ideal layout for an informative article focusing on "wood trim caulk," aiming to provide readers with actionable advice and professional techniques for achieving a flawless finish. The structure emphasizes clarity, readability, and easy navigation.
Understanding Wood Trim Caulk: The Foundation
Begin by establishing a strong foundation of knowledge about wood trim caulk. This section will demystify the product and highlight its importance.
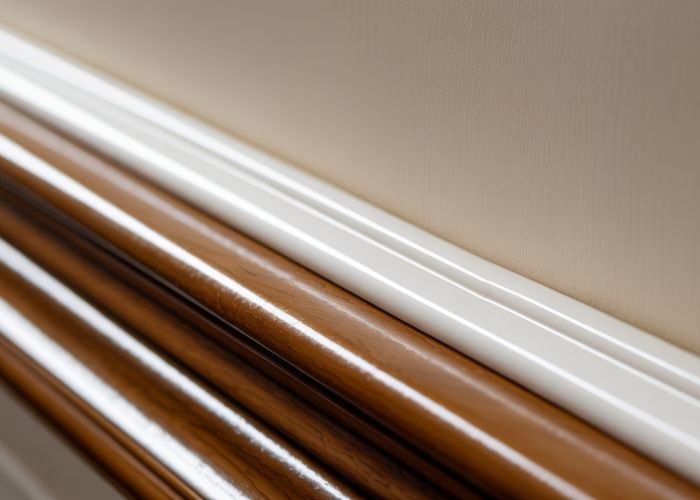
What is Wood Trim Caulk?
- Define "wood trim caulk" in simple terms.
- Explain its primary purpose: filling gaps and creating a seamless transition between wood trim and walls/ceilings.
- Mention its flexible nature, allowing for slight movement without cracking.
Why is Wood Trim Caulk Important?
- Aesthetics: Explain how caulk creates a professional, finished look by concealing imperfections.
- Protection: Describe how caulk prevents moisture, dust, and insects from entering gaps, protecting the wood and underlying structure.
- Insulation: Briefly mention how caulk can contribute to minor improvements in energy efficiency by sealing air gaps.
Types of Wood Trim Caulk
This section requires a table to best showcase the different types:
| Caulk Type | Pros | Cons | Best For |
|---|---|---|---|
| Acrylic Latex | Paintable, flexible, easy to clean up with water. | Less durable than silicone, may shrink or crack over time. | Interior trim, areas with low moisture exposure. |
| Silicone | Waterproof, very flexible, mold and mildew resistant. | Difficult to paint, can be messy to apply. | Bathrooms, kitchens, areas with high moisture exposure. |
| Acrylic Latex Plus Silicone | Combines benefits of both: paintable, flexible, durable. | More expensive than standard acrylic latex. | Versatile, suitable for most interior trim applications. |
Preparing for Caulking: Setting the Stage for Success
Proper preparation is key to achieving a professional finish.
Gathering Your Tools and Materials
- List all the necessary tools:
- Caulk gun
- Caulk (appropriate type for the project)
- Utility knife or caulk removal tool
- Damp cloth or sponge
- Caulk smoothing tool (optional)
- Painter’s tape (optional)
- Vacuum cleaner or brush
- Ladder or step stool (if necessary)
Cleaning the Area
- Explain the importance of a clean surface for proper adhesion.
- Detailed steps:
- Remove any existing caulk using a utility knife or caulk removal tool.
- Scrape away any loose paint or debris.
- Vacuum or brush away dust and dirt.
- Wipe the surface with a damp cloth and allow it to dry completely.
Taping (Optional but Recommended)
- Explain the benefits of using painter’s tape to create clean lines.
- Steps for applying tape:
- Apply painter’s tape along both sides of the gap to be caulked, leaving a narrow space exposed.
- Ensure the tape is firmly adhered to the surfaces.
The Caulking Process: Step-by-Step Guide
This is the core instructional section, focusing on the actual caulking technique.
Loading the Caulk Gun
- Detailed steps, possibly with an image or illustration:
- Retract the plunger fully.
- Insert the caulk tube into the gun.
- Push the plunger until it touches the back of the tube.
- Snip off the tip of the caulk tube at a 45-degree angle, starting with a small opening. You can always make it bigger if needed.
Applying the Caulk
- Explain the importance of a smooth, consistent bead.
- Detailed steps:
- Position the caulk gun at a 45-degree angle to the gap.
- Apply steady, even pressure to the trigger while moving the gun along the gap.
- Maintain a consistent speed to create a uniform bead.
- Overlap slightly with previous sections to ensure complete coverage.
Smoothing the Caulk
- Explain the purpose of smoothing: creates a neat finish and forces the caulk into the gap.
- Different methods:
- Finger Smoothing: Dip your finger in water and run it along the caulk bead, applying gentle pressure.
- Caulk Smoothing Tool: Use a specialized tool designed for smoothing caulk. Follow the tool’s instructions.
Removing the Tape (If Used)
- Importance of removing the tape while the caulk is still wet.
- Instructions:
- Carefully peel away the painter’s tape at a 45-degree angle.
- Wipe away any excess caulk that may have seeped under the tape.
Troubleshooting and Tips for Wood Trim Caulk
Address common problems and provide helpful tips.
Common Problems
- Cracking: Discuss potential causes (too little caulk, low-quality caulk, excessive movement) and solutions (reapply with a larger bead, use a more flexible caulk).
- Shrinkage: Explain why some caulk shrinks and suggest using a non-shrinking formula.
- Bubbles: Suggest techniques to minimize bubbles during application (apply caulk in a continuous bead, avoid overworking the caulk).
- Messy Application: Emphasize practice and the use of painter’s tape.
Pro Tips
- Practice: Practice on a scrap piece of wood before tackling the actual trim.
- Small Beads: Apply thin beads of caulk rather than trying to fill the entire gap at once.
- Warm Water: Keep a small container of warm water nearby to dip your finger or smoothing tool.
- Ventilation: Ensure good ventilation when working with caulk.
Aftercare: Ensuring a Long-Lasting Finish
Discuss how to maintain the caulk and ensure its longevity.
Painting (If Necessary)
- Allow the caulk to fully cure before painting (check the manufacturer’s instructions for drying time).
- Use a high-quality primer and paint suitable for the caulk type.
- Apply multiple thin coats for best results.
Regular Inspection
- Inspect the caulk regularly for cracks, gaps, or damage.
- Repair any damaged areas promptly to prevent moisture intrusion.
Cleaning
- Clean the caulk with a mild soap and water solution as needed.
- Avoid using harsh chemicals or abrasive cleaners, as they can damage the caulk.
Wood Trim Caulk: Frequently Asked Questions
Here are some common questions about using wood trim caulk to achieve a professional finish on your trim work.
What type of caulk is best for wood trim?
Acrylic latex caulk is generally the best choice for wood trim. It’s paintable, flexible, and easy to clean up with water. Silicone caulk is not recommended unless dealing with extremely wet conditions, as it’s difficult to paint and may not bond well. Always choose a high-quality wood trim caulk for optimal results.
How do I prevent caulk from cracking on my wood trim?
Proper surface preparation is key. Ensure the wood is clean, dry, and free of loose paint or debris. Apply the wood trim caulk in a thin, even bead, avoiding excessive buildup. Consider using a backer rod in larger gaps before applying the caulk.
What’s the best way to smooth out wood trim caulk for a clean look?
A wet finger or a specialized caulk smoothing tool works wonders. Immediately after applying the wood trim caulk, lightly dampen your finger or tool with water and gently run it along the bead to create a smooth, consistent finish. Wipe away any excess caulk with a damp cloth.
Can I paint wood trim caulk? How long should I wait?
Yes, most acrylic latex wood trim caulk is paintable. Check the manufacturer’s instructions for specific drying times, but typically you can paint it within 1-2 hours. Use a high-quality primer before painting to ensure proper adhesion and a uniform finish.
So, give these tips a try and transform your trim! Hope you found some helpful tricks for working with **wood trim caulk** to get that flawless look you’re after. Happy caulking!