Understanding the importance of a properly installed vinyl starter strip is crucial for any siding project. This seemingly simple component, when paired correctly with siding nails, ensures a secure and weatherproof foundation for your entire exterior. Incorrect installation, often stemming from a misunderstanding of best practices as outlined by the Vinyl Siding Institute (VSI), can lead to costly repairs. Therefore, mastering the installation of a vinyl starter strip, especially around critical areas like those addressed by expert Mike Guertin’s techniques, is an investment in the longevity and beauty of your home.
Vinyl Starter Strip: Master Install + Avoid Costly Mistakes!
This guide provides a comprehensive overview of installing a vinyl starter strip, ensuring a professional finish and preventing common pitfalls. We’ll cover essential tools, step-by-step installation instructions, and crucial tips for avoiding costly mistakes.
Understanding the Vinyl Starter Strip
Before diving into the installation, it’s important to understand the purpose and function of a vinyl starter strip.
What is a Vinyl Starter Strip?
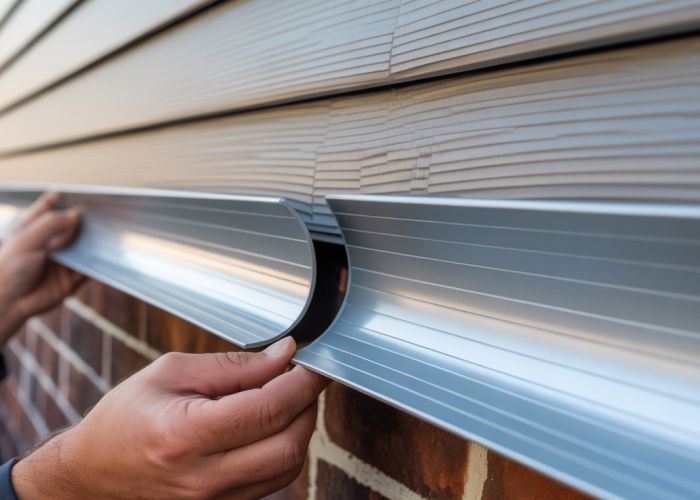
The vinyl starter strip is a crucial component for installing vinyl siding. It’s the first piece installed along the bottom edge of the wall and provides a secure and level base for the first row of siding panels. Think of it as the foundation for your vinyl siding.
Why is the Starter Strip Important?
- Secure Attachment: It provides a firm grip for the bottom course of vinyl siding, preventing it from detaching in wind or weather.
- Proper Alignment: Ensures the first row of siding is perfectly level, which is critical for the entire siding installation.
- Moisture Protection: Helps protect the wall from water intrusion by creating a proper overlap with the siding.
- Aesthetic Appeal: Creates a clean, finished look along the bottom edge of the siding.
Essential Tools and Materials
Having the right tools and materials will make the installation process smoother and more efficient.
- Vinyl Starter Strip: Choose a starter strip that matches the thickness and profile of your chosen vinyl siding.
- Measuring Tape: Accurate measurements are crucial for a level and properly aligned installation.
- Level: Use a spirit level or laser level to ensure the starter strip is perfectly horizontal.
- Snips or Utility Knife: For cutting the starter strip to the correct length.
- Drill with Screwdriver Bit: For fastening the starter strip to the wall.
- Galvanized or Stainless Steel Nails/Screws: Use corrosion-resistant fasteners appropriate for your siding and climate.
- Safety Glasses: Protect your eyes from debris.
- Gloves: Protect your hands.
Step-by-Step Installation Guide
Follow these steps for a successful vinyl starter strip installation:
-
Measure and Mark the Location:
- Determine the lowest point of the wall where the siding will be installed.
- Add the width of the starter strip to this measurement. This will be the top edge of your starter strip.
- Using a level, mark a horizontal line around the entire perimeter of the wall at this height. This line serves as your guide for installing the starter strip.
-
Cut the Starter Strip:
- Measure the length of each wall section.
- Cut the starter strip to the appropriate length using snips or a utility knife.
- For long runs, it’s best to use multiple pieces of starter strip, leaving a small gap (approx. 1/4 inch) for expansion and contraction.
-
Install the Starter Strip:
- Position the starter strip along the marked line, ensuring it’s level.
- Fasten the starter strip to the wall using galvanized or stainless steel nails or screws.
- Space the fasteners approximately 12 inches apart.
- Ensure the fasteners are driven in straight and flush with the surface of the starter strip. Avoid over-tightening, which can damage the strip.
Avoiding Costly Mistakes
Here are some common mistakes to avoid when installing a vinyl starter strip:
- Incorrect Measurement: Ensure accurate measurements to avoid uneven siding installation. Double-check your measurements before cutting.
- Unlevel Installation: A starter strip that is not level will result in an uneven and unprofessional-looking siding job. Use a level consistently during installation.
- Using the Wrong Fasteners: Using improper fasteners can lead to corrosion and failure of the installation. Always use galvanized or stainless steel fasteners.
- Over-Tightening Fasteners: Over-tightening fasteners can damage the starter strip and prevent proper siding installation. Drive fasteners in flush, not too tight.
- Ignoring Expansion and Contraction: Vinyl expands and contracts with temperature changes. Leaving small gaps between sections of starter strip will prevent buckling or warping.
- Skipping Safety Precautions: Always wear safety glasses and gloves to protect yourself from debris and sharp edges.
Troubleshooting Common Issues
Here’s a table outlining potential issues and their solutions:
| Issue | Possible Cause | Solution |
|---|---|---|
| Starter strip is not level | Inaccurate measurements or improper leveling | Remeasure and relevel the starter strip before fastening. |
| Siding won’t lock into strip | Starter strip installed too low or too high | Re-evaluate the placement of the starter strip based on the siding profile. |
| Fasteners are pulling out | Insufficient holding power | Use longer or more appropriate fasteners. Consider using screws instead of nails. |
| Starter strip is damaged | Over-tightening fasteners or rough handling | Replace the damaged section of the starter strip. Avoid over-tightening fasteners in the future. |
Vinyl Starter Strip Installation: FAQs
This FAQ addresses common questions about vinyl starter strip installation to help you avoid costly mistakes.
Why is a vinyl starter strip essential for vinyl siding?
A vinyl starter strip provides the crucial bottom support and correct angle for the first course of vinyl siding. Without it, the siding won’t lock properly, leading to potential issues like buckling, moisture damage, and an unappealing look.
Can I skip the starter strip and just nail the first row of siding directly to the wall?
No, you absolutely should not skip the vinyl starter strip. Direct nailing compromises the expansion and contraction allowance designed into vinyl siding. It will void warranties and cause serious installation problems.
How high above the ground should I install the vinyl starter strip?
Ideally, the bottom edge of the vinyl starter strip should be at least 6-8 inches above the ground to protect the siding from moisture and debris. Consider local building codes which may have specific height requirements.
What happens if I don’t install the vinyl starter strip perfectly level?
An unlevel starter strip will result in an uneven siding installation. Each subsequent course of vinyl siding will follow the uneven line, leading to a visibly crooked and unprofessional finish. Take extra care to ensure level installation.
Alright, you’ve got the basics down on getting that vinyl starter strip installed right! Now get out there and tackle that project. And remember, a little patience and attention to detail will save you headaches (and money!) down the road. Happy siding!