Discover the enchanting world of velvet nail art! Transforming your nails into miniature masterpieces is easier than you think. First, understanding the role of nail polish, the foundational layer for your design. Then, the application of flocking powder will give the nails unique velvet feel; the key ingredient for achieving the luxurious texture. Mastering these applications will help in showcasing styles from leading nail artists such as Jenny Bui, noted for her innovative techniques. Now, you can recreate salon-worthy home manicures using these simple steps and elevate your nail game to a whole new level.
Velvet Nail Art: Your Guide to a Luxurious Manicure at Home
Velvet nail art is a stunning way to add texture and sophistication to your nails. This guide will break down each step to help you achieve this look yourself, transforming your nails into mini masterpieces.
Understanding Velvet Nail Art
Before we dive into the process, let’s quickly understand what velvet nail art actually is.
What Makes Velvet Nail Art Special?
- Texture: The key to velvet nail art is its unique, soft texture, mimicking real velvet.
- Visual Appeal: It catches the light beautifully, adding depth and dimension to your nails.
- Elegance: Velvet nails instantly elevate your overall look, making them perfect for special occasions or adding a touch of luxury to your everyday style.
What You’ll Need
Here’s a breakdown of everything you’ll need to create your own velvet nail art:
- Base Coat: To protect your nails and help the polish adhere better.
- Nail Polish (Matching or Complementary): Choose a color that complements the velvet powder. A similar color will blend seamlessly, while a contrasting color will create a more dramatic effect.
- Velvet Powder (Flocking Powder): This is the star of the show! Choose your desired color and make sure the powder is finely milled for a smooth finish.
- Top Coat: A clear top coat is optional but can provide a slightly longer wear time. Be aware that it can reduce the velvet texture.
- Small Brush or Applicator: For applying the velvet powder.
- Tray or Paper: To catch any excess powder and prevent a mess.
Step-by-Step Guide to Velvet Nail Art
Now, let’s get to the fun part! Follow these steps carefully for flawless velvet nails.
1. Nail Preparation
As with any manicure, proper preparation is crucial for a lasting and beautiful result.
- Clean and Shape: Start by cleaning your nails with nail polish remover to remove any oils or residue. Then, shape your nails to your desired length and shape using a nail file.
- Apply Base Coat: Apply a thin, even layer of base coat to each nail. This will protect your natural nails from staining and create a smooth surface for the polish.
2. Applying the Base Color
The base color will influence the final look of your velvet nails, so choose wisely.
- Apply First Coat: Apply a thin layer of your chosen nail polish color to each nail. Allow it to dry completely.
- Apply Second Coat (If Needed): If the color is not fully opaque, apply a second coat of nail polish and allow it to dry completely. Ensure the polish is still slightly tacky before moving to the next step. This helps the velvet powder adhere.
3. Applying the Velvet Powder
This is where the magic happens!
- Prepare the Application Area: Place a tray or piece of paper underneath your hand to catch any excess powder.
- Apply Powder to Wet Polish: While the second coat of nail polish is still tacky (but not wet enough to smear), use your small brush or applicator to generously sprinkle the velvet powder over each nail. Make sure to completely cover the nail surface.
- Press Gently: Gently press the powder onto the nail to ensure it adheres well.
- Tap off Excess Powder: After a few moments, gently tap off any excess powder from your nail onto the tray or paper. You can collect and reuse this powder.
4. Clean Up and Finishing Touches
This step ensures a clean and professional-looking finish.
- Clean Edges: Use a clean brush or cotton swab dipped in nail polish remover to clean up any excess powder around your cuticles and edges of your nails.
- Optional Top Coat (With Caution): If you want to extend the wear time, you can apply a very thin layer of top coat. However, be aware that this will reduce the velvet texture. Apply only to the tips of the nails if possible, to avoid too much loss of the "velvet" feel.
- Allow to Dry Completely: Let your nails dry completely before using your hands. The drying time may be slightly longer than with regular nail polish.
Troubleshooting Tips
Sometimes, things don’t go exactly as planned. Here are a few tips to help you overcome common challenges:
Problem: Powder Isn’t Sticking
- Solution: Make sure your nail polish is still tacky when applying the powder. If it’s too dry, the powder won’t adhere properly. Apply another very thin coat of polish and immediately sprinkle the powder.
Problem: Uneven Texture
- Solution: Ensure you’re applying the powder evenly across the entire nail surface. Use a brush to gently distribute the powder and fill in any sparse areas.
Problem: Powder is Falling Off
- Solution: Press the powder firmly onto the nail to ensure it adheres well. Avoid excessive rubbing or friction, which can dislodge the powder.
Caring for Your Velvet Nails
To prolong the life of your velvet nail art, follow these tips:
- Avoid Water Exposure: Limit prolonged exposure to water, as it can loosen the powder. Wear gloves when washing dishes or doing other water-intensive tasks.
- Gentle Handling: Be gentle with your hands and avoid activities that might damage your nails.
- Touch-Ups: If you notice any sparse areas, you can touch up your velvet nails by applying a small amount of nail polish and sprinkling more powder on top.
Design Ideas for Inspiration
Ready to get creative? Here are some design ideas to inspire your velvet nail art journey:
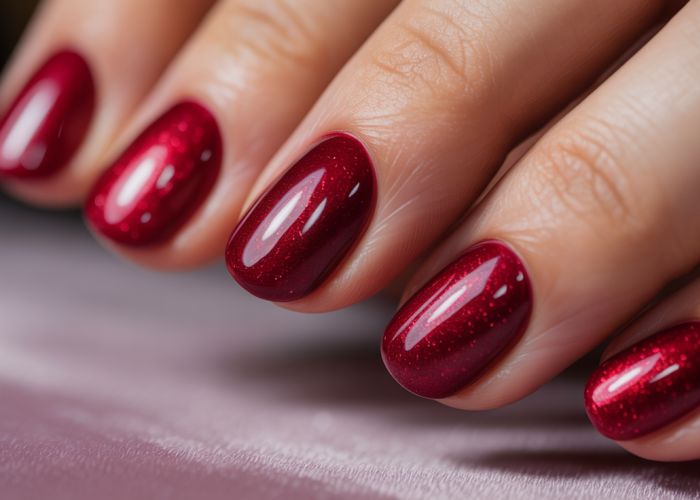
- Solid Colors: A classic choice for a sophisticated look. Deep jewel tones like emerald green, sapphire blue, and ruby red are particularly stunning.
- Ombre: Create a gradient effect by blending two complementary colors of velvet powder.
- Accent Nails: Apply velvet powder to just one or two nails on each hand for a subtle yet eye-catching detail.
- Geometric Designs: Use tape or stencils to create geometric patterns with velvet powder.
With a little practice, you’ll be creating stunning velvet nail art at home in no time! Enjoy the process and experiment with different colors and designs to find your perfect velvet manicure.
Velvet Nail Art: Frequently Asked Questions
Here are some common questions about creating velvet nail art at home. Hopefully, this helps clarify the process and addresses any concerns you might have.
What exactly is velvet nail art?
Velvet nail art creates a fuzzy, textured finish on your nails, mimicking the look and feel of velvet fabric. This is achieved by applying flocking powder (tiny synthetic fibers) to wet nail polish.
Can I use any nail polish color for velvet nail art?
Yes, you can use any nail polish color that you like. However, it’s recommended to choose a polish color that closely matches the flocking powder for the best, most seamless velvet effect.
How long does velvet nail art typically last?
Velvet nail art is not as durable as regular nail polish and typically lasts 1-3 days. To prolong its life, avoid prolonged exposure to water and use gloves when doing chores.
What if I don’t have flocking powder; can I use anything else?
Unfortunately, there isn’t a perfect substitute for flocking powder to achieve the authentic velvet nail art look. Other materials won’t provide the same soft, textured finish. Flocking powder is essential.
And that’s how you create gorgeous velvet nail art at home! Give it a try and show off your dazzling new look. Don’t be afraid to experiment and have fun with it!