Ensuring a properly sealed and aesthetically pleasing entrance requires meticulous trimming exterior door, and knowing the common pitfalls is crucial for a long lasting result. Incorrect miter cuts, often a consequence of rushing the job, can lead to unsightly gaps. Choosing the wrong type of caulk such as silicone in high traffic areas can leave space for water penetration later on. Homeowners frequently overlook the importance of properly preparing the surface on the brick mold before applying trim, affecting adhesion. Addressing these aspects avoids issues when trimming exterior door.
Trimming Your Door Right: Avoid These Common Mistakes!
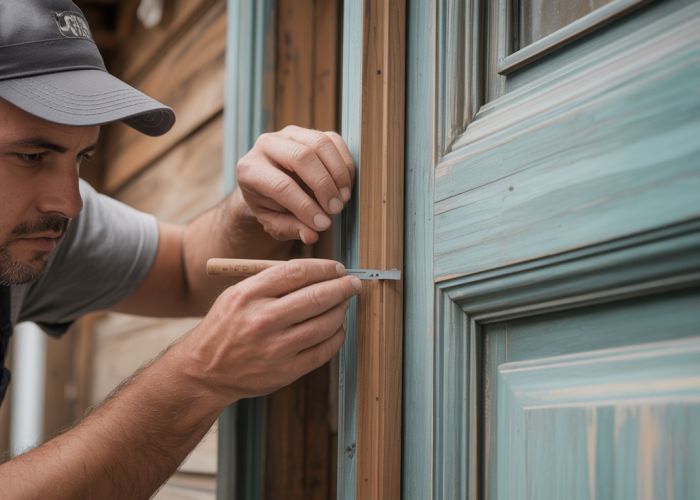
Trimming an exterior door can dramatically improve your home’s curb appeal and protect it from the elements. However, it’s easy to make mistakes that can lead to bigger problems down the road. This guide focuses on how to avoid those pitfalls and achieve a professional-looking result when trimming exterior door.
Understanding the Importance of Proper Trimming
Trimming isn’t just about aesthetics; it’s a vital element of weatherproofing. Properly installed trim:
- Seals gaps and prevents water infiltration.
- Protects the door frame from rot and insect damage.
- Adds a finished, polished look to your entryway.
- Contributes to better energy efficiency by reducing drafts.
Essential Tools and Materials
Before you begin trimming exterior door, ensure you have the necessary tools and materials. Being prepared will streamline the process and minimize errors.
- Measuring Tools: Tape measure, Speed square, Level.
- Cutting Tools: Miter saw (highly recommended), Hand saw (for small adjustments).
- Fastening Tools: Nail gun or hammer, Caulk gun.
- Materials:
- Exterior-grade trim boards (consider composite or PVC for longevity)
- Exterior-grade caulk
- Exterior-grade wood filler (if necessary)
- Nails or screws suitable for exterior use
- Primer and paint (if using unfinished trim)
Common Mistakes to Avoid When Trimming Exterior Door
Avoiding these mistakes will help you achieve a professional and long-lasting trim job.
1. Inaccurate Measurements
- Problem: Cutting trim boards to the wrong size, resulting in gaps or overlaps.
- Solution:
- Measure carefully and double-check your measurements before cutting.
- Use a speed square to ensure your cuts are square.
- Cut slightly longer than needed and then trim down for a perfect fit ("sneak up" on the measurement).
2. Using the Wrong Materials
- Problem: Using interior trim or caulk on an exterior door. This will quickly deteriorate due to weather exposure.
- Solution:
- Always use exterior-grade trim, caulk, and fasteners.
- Consider composite or PVC trim for superior weather resistance.
- Read the product labels carefully to ensure they are rated for exterior use.
3. Improper Miter Cuts
- Problem: Gaps at the corners of the trim due to poorly executed miter cuts.
- Solution:
- Set your miter saw to a precise 45-degree angle.
- Practice your cuts on scrap pieces of trim.
- Use a sharp saw blade for clean, smooth cuts.
- Apply wood glue to the mitered edges before joining them for a stronger bond.
- Clamping the mitered corners together while the glue dries will ensure a tight seam.
4. Neglecting to Caulk and Seal
- Problem: Failing to properly caulk and seal the trim, allowing water to penetrate and cause rot.
- Solution:
- Apply a bead of exterior-grade caulk along all seams where the trim meets the door frame and siding.
- Smooth the caulk with a wet finger or caulk smoothing tool.
- Recaulk as needed to maintain a watertight seal.
5. Ignoring the Substrate
- Problem: Applying trim to a rotten or damaged door frame.
- Solution:
- Inspect the door frame for any signs of rot or damage before trimming exterior door.
- Repair or replace the door frame as needed.
- Treat any affected areas with a wood preservative to prevent further damage.
6. Inadequate Nailing/Screwing
- Problem: Using too few nails or screws, or using fasteners that are too short, resulting in loose or detached trim.
- Solution:
- Use nails or screws that are long enough to penetrate the door frame studs.
- Space fasteners every 12-16 inches.
- Consider using construction adhesive in addition to nails/screws for added holding power.
Step-by-Step Installation Overview
This is a simplified overview. Always refer to specific manufacturer instructions for your chosen trim.
- Preparation: Remove any old trim and clean the area. Repair the door frame if necessary.
- Measuring and Cutting: Measure and cut the side pieces (the "legs") first. Then measure the top piece (the "head").
- Installing the Side Pieces: Attach the side pieces to the door frame, ensuring they are plumb.
- Installing the Top Piece: Attach the top piece, ensuring it is level and fits snugly against the side pieces.
- Nailing/Screwing: Secure all trim pieces with nails or screws.
- Caulking: Caulk all seams and gaps.
- Finishing: Prime and paint the trim (if necessary).
Trimming Your Door Right: FAQs
Here are some frequently asked questions to help you avoid common mistakes when trimming your door. We hope these answers clarify any confusion and guide you to a successful door trimming project.
What’s the biggest risk of not properly shimming before nailing trim?
Without shims, your trim might not sit flush against the wall or door frame. This can lead to gaps, uneven lines, and a less professional look. Plus, over-nailing to compensate can split the trim or damage the surrounding wall. Shims provide a stable base and ensure even pressure.
How important is the order of installing door trim pieces?
Very important! Generally, you want to start with the side casings first. Then, install the head casing (the trim piece above the door) on top of the side casings. This creates a clean, overlapping look that’s structurally sound. Proper overlap is key when trimming exterior door correctly to prevent water damage.
What type of nails should I use for door trim, and why?
Use finish nails, ideally 1 1/2 to 2 inches long. Finish nails have small heads that can be easily countersunk and filled, leaving a clean surface for painting. Avoid using larger nails that could split the trim. For trimming exterior door frames, consider galvanized or stainless steel nails.
Why is it important to caulk the door trim, and where should I caulk?
Caulking seals gaps between the trim and the wall or door frame. This prevents drafts, moisture, and insects from entering. Caulk along the top and sides of the trim where it meets the wall. Especially when trimming exterior door installations, caulking provides a weatherproof seal and improves energy efficiency.
Alright, feeling confident about avoiding those trimming exterior door mistakes now? Go get those doors looking sharp and functioning flawlessly! You got this!