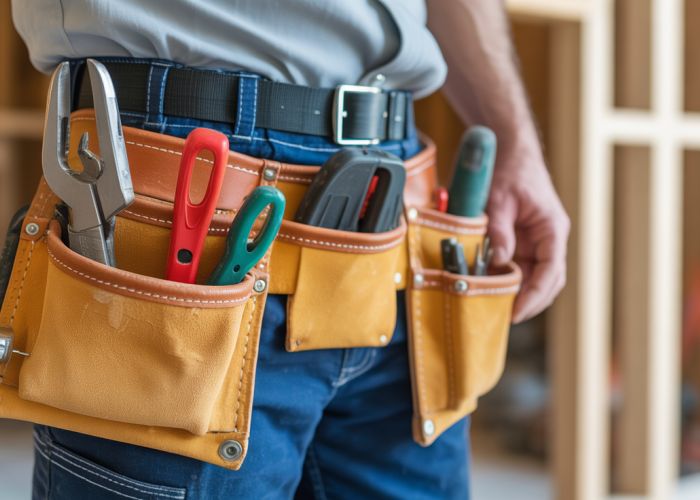
A well-organized tool belt setup is essential for any professional in construction. Ergonomics, a key factor in preventing strain, guides the optimal arrangement of tools within your belt. Many professionals favor brands like Occidental Leather, known for their durable and customizable designs. Properly configuring your tool belt setup enables easy access to crucial items like the hammer, improving efficiency on any job. A skilled carpenter understands that a customized tool belt setup significantly boosts productivity.
Optimizing Your Tool Belt Setup: A Practical Guide
This guide provides a comprehensive overview of how to optimize your tool belt setup, focusing on efficient organization, comfort, and safety. A well-arranged tool belt is crucial for any professional or serious DIY enthusiast, saving time, reducing strain, and improving overall productivity.
1. Understanding Your Needs: What Kind of Work Do You Do?
The first step in optimizing your tool belt setup is understanding the specific demands of your job or projects. Different trades and tasks require different tools, and your tool belt should reflect those specific needs.
1.1. Identifying Essential Tools
- List your most frequently used tools: Create a comprehensive list of the tools you use most often. This will form the foundation of your tool belt setup.
- Consider the environment: Think about the typical work environment. Do you need to carry specialized tools for working at heights, in confined spaces, or in wet conditions?
- Anticipate future needs: Think about upcoming projects and consider if any additional tools will be frequently used and thus should be included in your core tool belt setup.
1.2. Prioritizing Tool Accessibility
Prioritization is key for maximizing efficiency. Think about which tools you need to access immediately and which you can afford to keep in less accessible pockets.
- Immediate access tools: These are the tools you use constantly and need to grab without looking. Examples include a hammer, measuring tape, or utility knife.
- Secondary access tools: These tools are used frequently but not continuously. Examples include screwdrivers, pliers, or a level.
- Occasional use tools: These are tools used less often. Examples include specific fasteners, specialty tools, or a small notebook.
2. Choosing the Right Tool Belt System
The market offers a wide variety of tool belt systems. Consider factors like material, design, and comfort when making your selection.
2.1. Types of Tool Belts
- Traditional Leather Tool Belts: Durable and long-lasting, leather belts are a classic choice. However, they can be heavier and require a break-in period.
- Nylon Tool Belts: Lightweight and often more affordable than leather, nylon belts are a good option for those seeking comfort and versatility. They typically dry faster than leather.
- Suspension Systems: These systems distribute weight more evenly across your shoulders and hips, reducing strain on your lower back. They are ideal for carrying heavy loads for extended periods.
2.2. Key Features to Consider
- Pocket Configuration: Ensure the belt has enough pockets and holders for your essential tools, and that their sizes and orientations are appropriate.
- Material Quality: Look for durable materials and reinforced stitching to withstand the demands of daily use.
- Adjustability: The belt should be adjustable to fit your waist size comfortably, even with varying layers of clothing.
- Padding and Support: Padded belts and ergonomic designs can significantly improve comfort, especially when carrying heavy loads.
3. Optimizing Your Tool Belt Layout: A Step-by-Step Guide
Once you have a tool belt system, it’s time to organize your tools for maximum efficiency. This section provides practical steps for achieving the ideal tool belt setup.
3.1. The "Dominant Hand" Rule
Place your most frequently used tools on the side of your dominant hand. This allows for quicker and more intuitive access. For example, if you are right-handed, place your hammer and measuring tape on the right side of your belt.
3.2. Weight Distribution
Distribute the weight of your tools evenly around your waist. Avoid concentrating heavy tools on one side, as this can lead to discomfort and strain.
- Heavier Tools: Distribute the heaviest items symmetrically around the tool belt’s supporting sections.
- Lighter Tools: Fill remaining spaces with lighter and less used tools to optimize space.
3.3. Tool Placement Strategy
Use a logical and consistent system for placing your tools. Consider the order in which you typically use them, and position them accordingly.
- Measuring Tools: Tape measure, level (if small) should be easily accessible.
- Fastening Tools: Hammer, nail gun holster, screw driver.
- Cutting Tools: Utility knife, scissors.
- Holding Tools: Pliers, wire strippers.
- Miscellaneous: Fasteners, small notebook, pencil.
3.4. Minimizing Movement and Clutter
Ensure that tools are securely held in their designated pockets or holders to prevent them from shifting or falling out.
- Use dedicated tool holders: Avoid stuffing tools into pockets where they can get lost or damaged.
- Secure loose items: Use straps or loops to secure tools like hammers or screwdrivers.
- Regularly declutter: Remove unnecessary tools and debris from your belt to maintain a clean and efficient workspace.
4. Safety Considerations for Tool Belt Setup
Safety should always be a top priority when setting up your tool belt. A poorly organized belt can pose serious risks.
4.1. Preventing Falls
- Avoid sharp edges: Position tools with sharp edges away from your body to prevent accidental cuts or punctures.
- Secure tools at heights: If working at heights, use tethers or lanyards to prevent tools from falling and injuring those below.
4.2. Reducing Strain and Injury
- Maintain proper posture: A well-balanced tool belt can help you maintain good posture, reducing strain on your back and shoulders.
- Take breaks: Avoid wearing a heavy tool belt for extended periods without taking breaks to stretch and relax your muscles.
4.3. Emergency Preparedness
- First-aid essentials: Consider including a small first-aid kit with bandages, antiseptic wipes, and pain relievers in your tool belt.
- Personal protective equipment (PPE): Ensure that your tool belt does not interfere with your ability to wear and use PPE such as safety glasses, gloves, or a hard hat.
5. Fine-Tuning Your Setup: Ongoing Optimization
Your tool belt setup isn’t static; it should evolve as your needs change. Regularly evaluate your tool belt layout and make adjustments as needed.
5.1. Evaluating Efficiency
- Track your workflow: Observe how you use your tools during a typical workday or project. Identify any inefficiencies or areas for improvement.
- Seek feedback: Ask colleagues or mentors for their feedback on your tool belt setup. They may offer valuable insights you haven’t considered.
5.2. Adapting to New Tasks
- Adjust for specific projects: Modify your tool belt layout to accommodate the specific tools and tasks required for each project.
- Experiment with different configurations: Don’t be afraid to try different tool placements and organization strategies to find what works best for you.
5.3. Maintaining Your Tool Belt
- Regular Cleaning: Clean your tool belt regularly to remove dirt, debris, and moisture, which can damage tools and materials.
- Inspect for Wear and Tear: Inspect your tool belt regularly for signs of wear and tear, such as frayed stitching or damaged pockets. Replace worn or damaged components promptly to ensure safety and functionality.
Tool Belt Setup: FAQs
Here are some frequently asked questions about setting up your tool belt for maximum efficiency and comfort.
What are the most important factors to consider when choosing a tool belt?
Comfort, durability, and the specific tools you use most often are key. Look for a tool belt with good padding, strong stitching, and pouches that fit your tools securely. Consider the weight of the tool belt once fully loaded.
How should I distribute the weight in my tool belt?
Balance is crucial. Distribute heavier tools evenly around your waist to avoid strain on one side. Keep frequently used items in easy-to-reach locations. Proper tool belt setup prevents back pain and improves efficiency.
How often should I reorganize my tool belt?
Reorganize as needed based on the project. If you find yourself constantly searching for tools or struggling to reach them, it’s time for a change. Regular tool belt setup adjustments will save time and frustration.
Can wearing a tool belt cause health problems?
Yes, improper use can lead to back pain, hip problems, and other musculoskeletal issues. Ensure a snug but not overly tight fit. Take breaks and adjust your tool belt setup to evenly distribute the weight throughout the day.
Alright, folks, that wraps up our ultimate guide to **tool belt setup!** Hopefully, you’ve picked up some tips to make your workday smoother and less back-breaking. Now go out there and build something amazing with that perfect **tool belt setup!**