Proper surface preparation is paramount before beginning any tiling project, and tiling backer board is your key to success. This guide will demonstrate that understanding the Mortar you chose is crucial for compatibility with your tiling backer board. Professionals like those from the National Tile Contractors Association (NTCA) recommend tiling backer board over drywall in wet areas, ensuring a long-lasting tile installation, which is what makes it the perfect choice for ensuring a long lasting tiling. Learn the benefits of utilizing HardieBacker tiling backer board and how it contributes to a professional finish.
Tiling Backer Board: Your COMPLETE Guide!
Choosing the right backer board is crucial for a successful and long-lasting tile installation. This guide walks you through everything you need to know about tiling backer board, from understanding what it is to installing it properly.
What is Tiling Backer Board?
Tiling backer board provides a stable and moisture-resistant substrate for tiling. Unlike drywall or plywood, which can warp and deteriorate when exposed to moisture, backer board is designed to withstand wet environments like bathrooms and kitchens. It creates a solid, even surface that ensures your tiles adhere properly and remain intact for years to come.
Why Use Backer Board?
- Moisture Resistance: Backer board resists water damage, preventing mold and mildew growth behind your tiles.
- Stability: It provides a strong, rigid base that prevents tiles from cracking or shifting due to subfloor movement.
- Tile Adhesion: Backer board’s textured surface provides a superior bonding surface for tile adhesives.
- Durability: It lasts much longer than alternative materials like drywall in wet environments.
Types of Tiling Backer Board
Several types of backer board are available, each with its own properties and suitability for different projects.
Cement Board
Cement board is one of the most common and versatile types of backer board. It’s made from cement, reinforced with fiberglass mesh.
- Pros: Highly durable, extremely moisture-resistant, suitable for floors and walls.
- Cons: Can be heavy and difficult to cut, produces a lot of dust when cut.
Fiber Cement Board
Similar to cement board, fiber cement board includes cellulose fibers to make it lighter and easier to work with.
- Pros: Lighter than cement board, good moisture resistance, easier to cut.
- Cons: Still relatively heavy, requires proper ventilation during cutting.
Glass-Mat Backer Board
Glass-mat backer board consists of a gypsum core coated with a fiberglass mat. It is often used in areas where moisture is a concern.
- Pros: Lightweight, easy to cut and install, mold-resistant.
- Cons: Less impact resistance than cement board, may require special fasteners.
Foam Backer Board
Foam backer board is made from extruded polystyrene foam coated with a cementitious surface.
- Pros: Very lightweight, waterproof, easy to cut, provides insulation.
- Cons: Less rigid than cement board, typically more expensive.
Choosing the Right Tiling Backer Board
Selecting the appropriate backer board depends on several factors, including the location, type of tile, and budget.
Location Matters
- Floors: Cement board or fiber cement board are generally preferred for their strength and rigidity.
- Walls (Showers/Bathrooms): All types are suitable, but consider ease of installation and moisture resistance. Foam backer board offers excellent waterproofing.
- Walls (Kitchen Backsplashes): Glass-mat or cement boards are appropriate.
Tile Type
- Large Format Tiles: Require a very rigid and stable substrate like cement board.
- Small Mosaics: Most backer boards are suitable.
Budget
- Cement board and fiber cement board are often the most affordable options. Foam backer boards tend to be more expensive.
Installing Tiling Backer Board: Step-by-Step
Proper installation is essential to maximize the benefits of tiling backer board.
-
Preparation:
- Ensure the subfloor or wall is clean, level, and structurally sound.
- Remove any debris, loose paint, or wallpaper.
- For floors, ensure the subfloor is properly screwed or nailed down to prevent movement.
-
Cutting the Backer Board:
- Measure and mark the backer board.
- Use a scoring knife and straight edge to score the surface, then snap the board along the score line.
- For cement board, you may need a power saw with a specialized blade for cutting masonry. Always wear eye protection and a dust mask.
- Fiber cement can also be cut using a utility knife for smaller cuts, or a saw with a fiber cement blade for larger cuts.
-
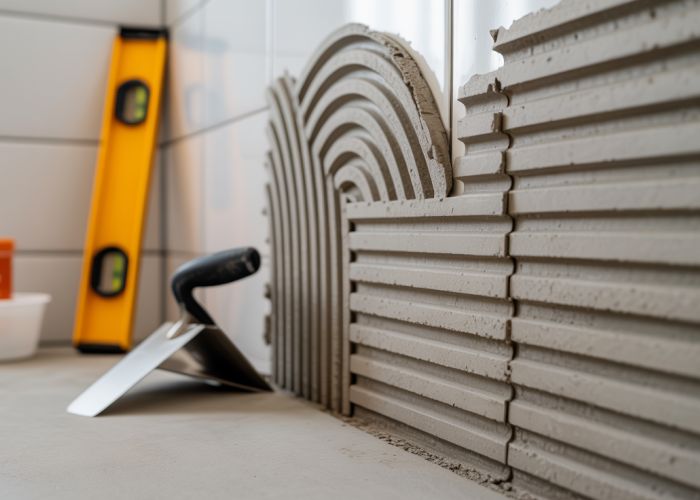
Applying Thin-Set Mortar:
- Apply a layer of thin-set mortar to the subfloor or wall using a notched trowel. Ensure the notches are sized correctly for the tile you plan to use (consult the tile adhesive’s instructions).
- Only apply mortar to an area that you can cover with backer board within 15-20 minutes.
-
Installing the Backer Board:
- Place the backer board onto the mortar bed, ensuring it is firmly seated.
- Use backer board screws to secure the board to the studs or subfloor.
- Space the screws every 6-8 inches along the edges and every 8-12 inches in the field of the board. The type of screw will vary on the type of material you are securing to (wood or metal).
- Leave a small gap (approximately 1/8 inch) between the boards to allow for expansion and contraction.
-
Taping the Seams:
- Apply thin-set mortar to the seams between the backer boards.
- Embed fiberglass mesh tape into the mortar, ensuring it is smooth and flat.
- Apply a second coat of thin-set mortar over the tape to completely cover it.
-
Curing: Allow the thin-set mortar to cure completely (typically 24-48 hours) before tiling.
Tools and Materials
- Tiling backer board of your choice
- Thin-set mortar
- Notched trowel (size appropriate for tile)
- Backer board screws
- Fiberglass mesh tape
- Utility knife
- Scoring tool
- Straight edge
- Drill or screw gun
- Measuring tape
- Pencil
- Safety glasses
- Dust mask
- Optional: Power saw with appropriate blade
Tiling Backer Board Troubleshooting
| Problem | Possible Cause | Solution |
|---|---|---|
| Cracking tiles | Inadequate backer board thickness or support | Reinforce the subfloor or replace with thicker backer board; ensure adequate screw spacing. |
| Loose or shifting tiles | Poor adhesion due to improper mortar application | Ensure thorough and even thin-set application; use the correct trowel size. |
| Mold or mildew growth | Moisture penetration | Seal seams and edges properly; ensure adequate ventilation in the room. |
| Uneven tile surface | Uneven subfloor or backer board installation | Level the subfloor before installing backer board; shim as necessary. |
Tiling Backer Board FAQs
Here are some frequently asked questions about tiling backer board to help you better understand its use and benefits.
What exactly is tiling backer board?
Tiling backer board is a cement-based or fiber-cement sheet material used as a substrate for tile installations. It provides a stable, water-resistant surface that’s ideal for tiling floors, walls, and countertops. It is more stable and durable than drywall.
Why use tiling backer board instead of drywall?
Drywall is susceptible to moisture damage, which can cause tiles to crack or detach. Tiling backer board is specifically designed to withstand moisture, preventing these issues and ensuring a longer-lasting tile installation.
Can I install tiling backer board myself?
Yes, with the right tools and instructions, installing tiling backer board is a DIY-friendly project. However, it’s essential to follow proper installation techniques to ensure a successful and durable result. Always consult manufacturer instructions.
What thickness of tiling backer board should I use?
The ideal thickness depends on the application. For floors, thicker backer board (1/2 inch or more) is typically recommended for added support. Walls may use thinner options like 1/4 inch. Always check local building codes for requirements.
So there you have it – everything you need to know about tiling backer board! We hope this helps you tackle your next tiling project with confidence. Happy tiling!