Thorogood boots, known for their durability, sometimes require maintenance. Addressing issues like sole separation is crucial for preserving your investment. Understanding the role of barge cement in adhesion techniques can significantly improve your thorogood boots repair process. Ultimately, familiarizing yourself with resources from organizations like the Boot Repair Association will equip you to either confidently tackle repairs yourself or seek assistance from trained professionals, ensuring your boots remain a reliable part of your gear.
The Enduring Legacy of Thorogood Boots: Craftsmanship, Durability, and Sustainable Repair
Thorogood boots aren’t just footwear; they are a testament to American craftsmanship and enduring quality. For generations, they have been a reliable companion for workers, adventurers, and anyone who appreciates a well-made product. Their reputation is built on a foundation of durable materials, meticulous construction, and a design philosophy that values longevity.
But in a world increasingly dominated by disposable goods, the enduring legacy of Thorogood boots stands out even more. It’s a legacy that embraces sustainability through the conscious choice to repair, rather than replace.
A Brief History of Quality
Thorogood has built a stellar reputation through unwavering commitment to quality and durability. Their boots are constructed to withstand demanding conditions, using high-quality materials like full-grain leather and employing robust construction techniques like Goodyear welting.
This construction isn’t just about toughness; it’s about repairability.
The ability to disassemble and reassemble a boot is critical to its lifespan and overall value. This emphasis on quality from the very beginning contributes significantly to the longevity of Thorogood boots.
The Sustainable Choice: Repair, Don’t Replace
In an era of fast fashion and disposable goods, the option to repair Thorogood boots presents a refreshing and sustainable alternative. Instead of contributing to landfills with worn-out footwear, repairing extends the life of a valuable asset.
This reduces environmental impact and conserves resources used in manufacturing new boots.
Furthermore, repairing boots makes economic sense. The cost of repairing is often significantly less than the price of a new pair, making it a financially prudent decision for budget-conscious individuals. By choosing to repair, you’re not only saving money but also investing in the ongoing legacy of your boots.
Your Comprehensive Guide to Thorogood Boot Repair
This guide serves as your comprehensive resource for mastering the art of Thorogood boot repair. Whether you’re a seasoned DIY enthusiast or a complete beginner, we’ll provide you with the knowledge and skills you need to keep your boots in top condition.
We will cover everything from basic cleaning and conditioning to more advanced repairs like stitching and sole replacement.
We aim to empower you to tackle repairs yourself while also providing guidance on when to seek professional help. With the information presented here, you can extend the life of your Thorogood boots, preserving their quality, character, and value for years to come.
The emphasis on quality from the very beginning contributes significantly to the longevity of Thorogood boots. But simply knowing that Thorogood boots are well-made isn’t enough. To truly appreciate their resilience and understand how to maintain and repair them effectively, we need to delve into the specifics of their construction.
Deconstructing Durability: Understanding Thorogood Boot Construction
Thorogood boots owe their impressive lifespan to a careful selection of materials and time-tested construction methods. Understanding these elements is crucial for anyone looking to repair or maintain their boots. It gives you the knowledge to diagnose problems accurately and choose the right repair solutions.
Material Matters: The Foundation of Quality
The choice of materials is paramount in determining a boot’s durability. Thorogood utilizes various types of leather, each with unique properties that contribute to the overall performance and longevity of their footwear.
Full-Grain Leather
Full-grain leather is widely considered the highest quality leather available. It’s derived from the top layer of the hide and retains all of its natural grain. This makes it incredibly strong and resistant to wear and tear.
Full-grain leather develops a beautiful patina over time, enhancing its character and appeal. Thorogood often uses full-grain leather in high-stress areas of their boots, such as the uppers, to ensure maximum durability.
Oil-Tanned Leather
Oil-tanned leather is another popular choice for Thorogood boots. It undergoes a tanning process that infuses the leather with oils and waxes. This makes it exceptionally supple, water-resistant, and resistant to drying out.
Oil-tanned leather is ideal for work boots that are exposed to harsh conditions. It can withstand moisture, dirt, and grime without becoming stiff or brittle.
Other Leather Types
Thorogood might also incorporate other leather types, such as roughout leather (suede) or split-grain leather, in certain areas of their boots. These leathers offer unique aesthetic qualities or specific performance characteristics.
However, full-grain and oil-tanned leathers remain the cornerstones of Thorogood’s commitment to quality.
Anatomy of a Boot: A Blueprint for Longevity
Beyond the choice of leather, the way a boot is assembled significantly impacts its durability and repairability. Let’s examine the key components of a Thorogood boot:
Boot Soles
The sole is the part of the boot that comes into direct contact with the ground. Thorogood boots feature durable soles made from materials like rubber or polyurethane.
These soles are designed to provide traction, cushioning, and resistance to abrasion. The type of sole and its construction method play a crucial role in the boot’s overall lifespan and repair options.
Welt Construction: The Key to Repairability
Welt construction is a traditional shoemaking technique that connects the upper, insole, and outsole of a boot. In a Goodyear welt, a strip of leather (the welt) is stitched to the upper and insole. The outsole is then stitched to the welt.
This construction method offers several advantages.
It creates a strong and durable bond between the components of the boot. More importantly, it allows the sole to be replaced without damaging the upper. This is a critical factor in the longevity and repairability of Thorogood boots.
Stitching
Stitching is used to join various parts of the boot together. Thorogood employs high-quality stitching with strong threads. This ensures that the seams are durable and resistant to breakage.
The type of stitching used and its density can also impact the boot’s overall strength and water resistance.
Heel Structure
The heel provides support and stability. Thorogood boots feature sturdy heels made from stacked leather or rubber. The heel is attached to the sole using nails, screws, or adhesives.
A well-constructed heel is essential for maintaining proper posture and preventing foot fatigue. The heel is also a common area that requires repair or replacement over time.
The meticulous construction and quality materials certainly give Thorogood boots a head start when it comes to durability. But even the best-made boots aren’t immune to the rigors of daily wear and tear. So, what happens when your trusty Thorogoods start showing their age? The good news is, many common issues are easily addressed with the right knowledge and a little bit of elbow grease.
Troubleshooting Thorogoods: Common Problems and Practical Solutions
Even with high-quality construction, Thorogood boots can encounter various issues over time. Understanding these common problems and their solutions is crucial for maintaining your boots’ longevity and performance. Let’s explore some of the most frequent issues and how to address them effectively.
Boot Sole Issues
The sole of your boot is the first point of contact with the ground, making it susceptible to wear and tear. Recognizing the type of sole damage is key to choosing the right repair.
Wear Patterns:
Different wear patterns can indicate different issues.
Wear concentrated on the heel or ball of the foot is common, while uneven wear might suggest gait imbalances.
Detachment:
Sole detachment can range from small separations to complete ungluing.
This often occurs due to moisture exposure, flexing, or simply the breakdown of adhesives over time.
Damage:
Cuts, punctures, and significant abrasion can compromise the sole’s integrity.
These types of damage can reduce traction and leave your foot vulnerable to the elements.
Repairing or Replacing Boot Soles:
Repairing a sole often involves re-gluing detached sections, patching small holes, or applying protective coatings to worn areas.
This is suitable for minor damage and can extend the life of the sole.
Replacing the sole is necessary when the damage is extensive or the sole is significantly worn.
This can be done by a professional and restores the boot’s functionality.
The type of sole and the boot’s construction influence the repair or replacement process.
Stitching Issues
Stitching holds the various components of the boot together. When stitching fails, it can compromise the boot’s structure and water resistance.
Types of Stitching Problems:
Broken stitches are easily identifiable and can lead to separation of materials.
Loose stitches may appear as gaps or exposed threads along seams.
Frayed stitches indicate wear and tear and can eventually lead to breakage.
Causes of Stitching Problems:
Constant flexing, abrasion, and exposure to harsh elements can weaken the threads.
Poor quality thread or improper stitching techniques can also contribute to failures.
Assessing the Damage:
Carefully inspect the stitching to determine the extent of the damage.
Note the location and severity of the issue, as this will influence the repair approach.
Determining the Best Repair Approach:
Minor stitching issues can often be repaired with a simple needle and thread.
More extensive damage may require professional repair or replacement of entire sections.
Choosing the Right Thread:
Using a thread that matches the original thread’s strength and material is important.
Waxed nylon or polyester threads are good choices for durability and water resistance.
Heel Replacement
The heel provides support and stability. Wear or damage to the heel can affect your balance and comfort, and even lead to ankle strain.
Signs Indicating Heel Replacement is Needed:
Uneven wear on the heel can cause instability and discomfort.
Detachment of the heel from the sole is a clear sign of needed repair.
Cracked or crumbling heel material indicates that the heel’s integrity has been compromised.
Options for Heel Replacement:
Simple heel lifts can be added to correct minor wear and restore balance.
Full heel replacements involve removing the old heel and attaching a new one.
This is necessary when the damage is extensive or the heel is significantly worn.
Professional Heel Replacement:
Heel replacement often requires specialized tools and expertise.
A professional boot repair service can ensure the heel is properly attached and aligned.
Investing in timely repairs and maintenance for your Thorogood boots will significantly extend their lifespan and keep them performing at their best. Addressing these common issues promptly will save you money in the long run and keep your feet comfortable and protected.
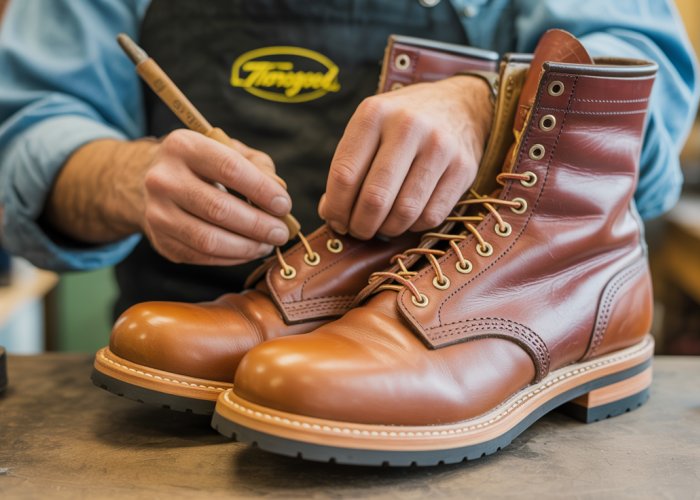
DIY Boot Revival: Your Guide to Home Repairs
The meticulous construction and quality materials certainly give Thorogood boots a head start when it comes to durability. But even the best-made boots aren’t immune to the rigors of daily wear and tear. So, what happens when your trusty Thorogoods start showing their age? The good news is, many common issues are easily addressed with the right knowledge and a little bit of elbow grease.
While some boot repairs demand the expertise of a skilled cobbler, many common issues can be tackled right in your own home. This section aims to empower you with the knowledge and practical steps necessary to breathe new life into your beloved Thorogood boots. With the right tools, materials, and a bit of patience, you can extend the life of your boots and save money in the process.
Essential Tools and Materials for DIY Boot Repair
Before diving into specific repair techniques, it’s crucial to assemble a well-stocked toolkit. Having the right tools will not only make the job easier but also ensure a more professional and lasting repair. Here’s a breakdown of essential items:
-
Needles: Heavy-duty needles designed for leather are a must. Glover’s needles, with their triangular points, are particularly effective for piercing tough leather.
-
Thread: Choose a strong, waxed thread specifically designed for leatherwork. Nylon or polyester threads are excellent options due to their durability and resistance to abrasion.
-
Awls: An awl is used to create pilot holes in the leather, making it easier to pass a needle and thread through. A diamond-pointed awl is versatile for various tasks.
-
Adhesives: High-quality contact cement or leather glue is essential for re-attaching soles or securing patches. Be sure to select an adhesive that is flexible and waterproof.
-
Leather Patches: Keep a selection of leather patches in various colors and thicknesses on hand for repairing tears and abrasions. You can often source these from leather scraps or old belts.
-
Sole Materials: Depending on the type of sole repair you’re undertaking, you may need materials like rubber sheeting, replacement heel caps, or specialized sole adhesives.
-
Leather Knife or Utility Knife: A sharp knife is crucial for trimming patches, skiving edges, and making precise cuts.
-
Hammer or Mallet: A hammer or mallet is useful for setting stitches, bonding adhesives, and shaping leather.
-
Edge Finishing Tools: Tools like edge bevelers and burnishers can help create a clean, professional finish on repaired edges.
Step-by-Step Guides to Common Repairs
With your toolkit assembled, you’re ready to tackle some common Thorogood boot repairs. Always work in a well-lit and ventilated area, and take your time to ensure a quality repair.
Stitching Repairs
Loose or broken seams can compromise the integrity of your boots. Re-stitching is a relatively straightforward repair that can significantly extend their lifespan.
-
Prepare the Area: Clean the area around the broken seam with a damp cloth and allow it to dry completely.
-
Thread the Needle: Thread your leather needle with a length of waxed thread that is several times longer than the length of the seam you need to repair.
-
Secure the Beginning: Start by backstitching a few times at the beginning of the existing seam to secure the new thread.
-
Follow the Original Stitch Line: Carefully follow the original stitch line, using the existing holes as a guide. If necessary, use an awl to create new holes.
-
Stitch Technique: Use a saddle stitch technique for maximum strength. This involves passing the needle through each hole twice, once from each direction.
-
Secure the End: Once you reach the end of the broken seam, backstitch a few times to secure the thread.
-
Trim and Finish: Trim the excess thread close to the leather and use a lighter to melt the ends slightly, preventing them from unraveling.
Patching Leather
Small tears, abrasions, or cuts can often be repaired with a leather patch.
-
Prepare the Area: Clean the damaged area thoroughly and trim any loose or frayed edges.
-
Cut the Patch: Cut a leather patch that is slightly larger than the damaged area. Round the corners of the patch to prevent them from catching.
-
Skive the Edges (Optional): Skiving the edges of the patch (thinning them with a leather knife) will create a smoother transition and prevent the patch from looking bulky.
-
Apply Adhesive: Apply a thin, even layer of contact cement to both the back of the patch and the damaged area on the boot.
-
Allow to Dry: Let the adhesive dry for the recommended time, usually a few minutes, until it is tacky.
-
Apply the Patch: Carefully align the patch and press it firmly onto the damaged area. Use a roller or hammer to ensure good adhesion.
-
Trim Excess (if needed): If necessary, trim any excess patch material with a sharp knife.
-
Finish the Edges: Use edge finishing tools to smooth and burnish the edges of the patch for a professional look.
Sole Re-attachment
Detached soles are a common problem, often caused by moisture exposure or the breakdown of adhesives.
-
Prepare the Surfaces: Clean both the sole and the boot thoroughly, removing any old adhesive or debris. A wire brush can be helpful for this step.
-
Apply Adhesive: Apply a thin, even layer of contact cement to both the sole and the boot.
-
Allow to Dry: Let the adhesive dry for the recommended time, until it is tacky.
-
Align and Attach: Carefully align the sole with the boot and press them firmly together.
-
Clamp or Weight: Clamp the sole to the boot or place a heavy weight on top to ensure good adhesion. Allow the adhesive to cure for the recommended time, usually 24-48 hours.
-
Stitching (Optional): For added security, you can stitch the sole back onto the boot using an awl and waxed thread.
These DIY repairs can significantly extend the life of your Thorogood boots, but remember to assess the damage carefully before attempting a repair. If the damage is extensive or if you’re not comfortable performing the repair yourself, it’s always best to seek the help of a professional boot repair service.
The satisfaction of a well-executed DIY repair is undeniable, and as we’ve explored, many common boot issues can be addressed with the right tools and techniques. However, there comes a time when even the most enthusiastic DIYer must recognize the limitations of their skills and equipment. Knowing when to entrust your beloved Thorogoods to a professional is crucial for ensuring a lasting and high-quality repair, preserving the integrity of your boots for years to come.
Calling in the Experts: Professional Boot Repair Services
While the prospect of tackling repairs yourself can be appealing, certain boot ailments demand the skilled hands and specialized equipment of a professional. This section will guide you through recognizing these situations, finding reputable repair services, and understanding the associated costs, so you can confidently make informed decisions about your Thorogood boot repairs.
When to Seek Professional Help
Not all boot repairs are created equal. Some issues are simply too complex, require specialized machinery, or pose potential safety risks for the average DIY enthusiast. Knowing when to step aside and enlist the help of a professional is essential to avoid causing further damage or injury.
Consider professional repair if:
-
The damage is extensive: Major structural damage, such as a broken shank, severely damaged welt, or a completely detached sole, often requires specialized equipment and expertise to repair correctly.
-
The repair requires specialized machinery: Resoling, complex stitching patterns, and certain types of patching often necessitate industrial sewing machines or other tools that are not typically found in a home workshop.
-
You lack the necessary skills or experience: If you’re uncomfortable working with leather, unsure about specific repair techniques, or simply don’t have the time to dedicate to a complex project, it’s best to leave it to the professionals.
-
The boot has sentimental or historical value: If your Thorogoods are a vintage pair or hold significant personal meaning, entrusting them to a skilled cobbler can ensure they are treated with the utmost care and restored to their former glory.
-
Safety Concerns: Repairs involving structural integrity or potential hazards, like replacing a shank, are best left to experts. Improper repairs could compromise the boot’s safety and your well-being.
In short, if you’re unsure about any aspect of the repair process, it’s always better to err on the side of caution and seek professional assistance. A skilled cobbler can assess the damage, recommend the appropriate course of action, and ensure that your boots are repaired to the highest standards.
Finding Reputable Boot Repair Services
Locating a qualified boot repair service can feel daunting, but with a bit of research, you can find a cobbler who will treat your Thorogoods with the care they deserve. Here’s how to find the right fit:
-
Online Research and Reviews: Start with online searches for "boot repair near me" or "[your city] cobbler." Pay close attention to online reviews on platforms like Google, Yelp, and Facebook. Look for consistent feedback regarding the quality of work, customer service, and turnaround time.
-
Ask for Recommendations: Seek recommendations from friends, family, or colleagues who have had positive experiences with boot repair services. Word-of-mouth referrals can be invaluable.
-
Check for Experience with Thorogood Boots: When contacting potential repair shops, specifically ask if they have experience working with Thorogood boots. Familiarity with the brand’s construction and materials is a major plus.
-
Assess the Shop’s Cleanliness and Organization: A well-maintained and organized workshop is often a sign of a professional and detail-oriented cobbler.
-
Inquire About Materials and Techniques: Ask about the types of materials they use (e.g., leather, soles, threads) and the repair techniques they employ. A reputable cobbler should be transparent and willing to explain their processes.
-
Request a Quote and Timeline: Obtain a detailed quote for the repair work, including a breakdown of labor and materials costs. Also, inquire about the estimated turnaround time, so you know when to expect your boots back.
-
Look for Certifications or Associations: Membership in professional organizations like the Shoe Service Institute of America (SSIA) can indicate a commitment to quality and ethical business practices.
-
Trust Your Gut: Ultimately, choose a repair shop where you feel comfortable and confident in their abilities. If something feels off, don’t hesitate to seek a second opinion.
Understanding the Cost of Professional Boot Repair Services
The cost of professional boot repair can vary depending on the type of repair, the materials used, and the location of the repair shop. Understanding general pricing structures can help you anticipate costs and budget accordingly.
-
Basic Repairs: Simple repairs, such as re-stitching a loose seam or replacing a heel cap, typically range from \$20 to \$50.
-
Sole Replacement: Replacing the entire sole of a boot can cost anywhere from \$80 to \$200 or more, depending on the type of sole and the complexity of the construction.
-
Welt Repair: Repairing or replacing a damaged welt is a more involved process that can cost between \$100 and \$300.
-
Custom Work: Complex or custom repairs, such as creating a custom footbed or altering the boot’s fit, will generally be more expensive.
Factors that can influence the cost:
-
The complexity of the repair
-
The quality of the materials used
-
The cobbler’s experience and skill
-
The location of the repair shop
It’s always a good idea to obtain a detailed quote from several repair shops before committing to any work. Don’t be afraid to ask questions about the pricing and to negotiate if necessary. Remember that investing in professional boot repair can extend the life of your Thorogoods and save you money in the long run compared to constantly replacing worn-out boots.
Calling in a professional is sometimes unavoidable, but taking proactive steps to care for your boots will significantly reduce the frequency of major repairs. Think of it like preventative medicine for your feet; consistent care ensures they remain in top shape for the long haul. Let’s explore the essential practices that will keep your Thorogoods in prime condition for years to come.
The Key to Longevity: Maintaining Your Thorogood Boots
The lifespan of your Thorogood boots is not predetermined; it’s a direct reflection of the care and attention you invest in them. Regular maintenance is the shield that protects against premature wear and tear, extending the life of your boots and preserving their value. This section offers a comprehensive guide to establishing a maintenance routine that keeps your Thorogoods ready for any challenge.
Regular Cleaning: The Foundation of Boot Care
Consistent cleaning is the bedrock of any good boot maintenance plan. Dirt, grime, and debris, if left unchecked, can act as abrasives, slowly degrading the leather and stitching over time. Cleaning removes these harmful elements, preserving the integrity of your boots.
The Cleaning Process: A Step-by-Step Guide
-
Remove loose dirt: Use a soft-bristled brush to gently sweep away any loose dirt, mud, or debris from the entire surface of the boot. Pay close attention to the seams, welts, and any areas where dirt tends to accumulate.
-
Prepare a cleaning solution: Mix a small amount of mild soap (such as dish soap or leather soap) with lukewarm water. Avoid using harsh detergents or solvents, as these can strip the leather of its natural oils.
-
Apply the solution: Dampen a clean cloth with the soapy water and gently wipe down the entire surface of the boot. Avoid soaking the leather, as excessive moisture can be damaging.
-
Rinse (if necessary): If you used a significant amount of soap, you can lightly rinse the boots with a damp cloth and clean water to remove any residue.
-
Air dry: Allow the boots to air dry naturally in a cool, well-ventilated place, away from direct sunlight or heat. Stuffing the boots with newspaper can help them retain their shape and absorb excess moisture.
Leather Conditioning: Nourishing the Leather
Leather is a natural material that requires regular conditioning to maintain its suppleness and prevent cracking. Leather conditioners replenish the oils that are lost over time due to wear, exposure to the elements, and cleaning.
Choosing the Right Conditioner
Selecting the right leather conditioner is crucial for optimal results. Look for conditioners specifically formulated for work boots or heavy-duty leather. Avoid products containing silicone or petroleum-based ingredients, as these can clog the pores of the leather and prevent it from breathing.
The Conditioning Process
-
Clean the boots: Ensure your boots are clean and dry before applying any conditioner.
-
Apply the conditioner: Apply a small amount of conditioner to a clean cloth and gently massage it into the leather, using circular motions. Pay particular attention to areas that are prone to drying, such as the toe box and heel.
-
Allow absorption: Allow the conditioner to absorb into the leather for at least 15-20 minutes.
-
Buff the leather: Use a clean cloth to buff the leather, removing any excess conditioner and restoring its natural shine.
Proper Storage: Protecting Your Investment
How you store your Thorogood boots when they’re not in use can significantly impact their lifespan. Improper storage can lead to cracking, drying, and other forms of damage.
Ideal Storage Conditions
- Cool, dry place: Store your boots in a cool, dry place away from direct sunlight, heat sources, and humidity.
- Boot trees or shapers: Use boot trees or shapers to help the boots retain their shape and prevent creasing.
- Avoid plastic bags: Do not store your boots in plastic bags, as this can trap moisture and lead to mildew growth.
Addressing Minor Issues Promptly: A Stitch in Time
Small problems, if left unattended, can quickly escalate into major repairs. Regularly inspect your boots for loose stitching, minor tears, or worn areas, and address these issues promptly.
- Loose stitching: Use a needle and thread to re-stitch any loose seams before they unravel further.
- Minor tears: Apply a small amount of leather adhesive to repair small tears or abrasions.
- Worn areas: Consider using leather patches or reinforcing materials to protect areas that are prone to wear.
By integrating these maintenance practices into your routine, you’re not just cleaning and conditioning; you’re actively investing in the longevity and performance of your Thorogood boots, ensuring they stand the test of time.
Calling in a professional is sometimes unavoidable, but taking proactive steps to care for your boots will significantly reduce the frequency of major repairs. Think of it like preventative medicine for your feet; consistent care ensures they remain in top shape for the long haul. Let’s explore the essential practices that will keep your Thorogoods in prime condition for years to come.
Beyond the Basics: Advanced Repair and Restoration Techniques
While basic maintenance and minor repairs can significantly extend the life of your Thorogood boots, some issues require a more in-depth approach. This section delves into advanced repair and restoration techniques, designed for those with established DIY skills or a strong desire to understand the intricacies of boot construction and repair. We’ll explore procedures that demand precision, patience, and a higher level of expertise, providing the knowledge to tackle complex challenges or better communicate with professional repair services.
Repairing Welt Construction: A Stitch in Time
The welt is the unsung hero of boot construction, connecting the upper leather, insole, and outsole. Its integrity is paramount for durability and water resistance. Damage to the welt, such as cracking, separation, or excessive wear, can compromise the entire boot.
Repairing the welt is a delicate process that often requires specialized tools and techniques.
It’s generally recommended for experienced DIYers or best left to professionals.
Partial Welt Replacement: In some cases, only a section of the welt needs replacement. This involves carefully cutting away the damaged portion, preparing the new welt section, and stitching it securely to the upper and insole.
Full Welt Replacement: A complete welt replacement is a more extensive undertaking, requiring the removal of the entire old welt and the precise stitching of a new one. This demands a high level of skill and attention to detail.
The Soleful Truth: A Detailed Look at Sole Replacement
Replacing the sole of your Thorogood boots is a significant undertaking, but it can breathe new life into a well-worn pair. The process involves several key steps:
- Removing the Old Sole: This often requires specialized tools to separate the sole from the welt without damaging the surrounding leather or stitching.
- Preparing the Welt: The welt must be thoroughly cleaned and any remaining adhesive or debris removed.
- Applying Adhesive: A high-quality adhesive designed for boot repair is applied to both the welt and the new sole.
- Attaching the New Sole: The new sole is carefully aligned and pressed firmly onto the welt, ensuring a secure bond. Clamping is often necessary during the curing process.
- Stitching (Optional): For added durability, the new sole can be stitched to the welt using a lockstitch sewing machine.
- Finishing: Excess material is trimmed, and the edges are sanded and finished for a clean, professional look.
Choosing the Right Sole: Consider the intended use of your boots when selecting a replacement sole. Options range from lug soles for heavy-duty work to softer, more flexible soles for everyday wear.
Leather’s Best Friend: Conditioning for Longevity
Leather conditioners are vital for maintaining the suppleness and preventing cracking in your Thorogood boots. Different types of leather benefit from different conditioners.
Types of Leather Conditioners:
- Oil-based conditioners are excellent for rejuvenating dry, cracked leather.
- Cream-based conditioners provide a balance of hydration and protection.
- Wax-based conditioners offer excellent water resistance and a protective barrier.
Application Techniques:
- Clean your boots thoroughly before applying any conditioner.
- Apply a small amount of conditioner to a clean cloth.
- Rub the conditioner into the leather in a circular motion.
- Allow the conditioner to absorb for several hours or overnight.
- Buff the leather with a clean cloth to remove any excess conditioner.
Boot Oil: The Elixir of Leather Life
Boot oil serves a different purpose than leather conditioner. While conditioners focus on moisturizing, boot oil primarily protects and waterproofs.
Types of Boot Oil:
- Neatsfoot oil is a traditional choice, known for its penetrating and protective properties.
- Mink oil offers excellent water resistance and helps to soften leather.
Application Tips:
- Apply boot oil sparingly, as excessive application can over-soften the leather.
- Use a clean cloth or applicator brush to apply the oil evenly.
- Allow the oil to fully absorb into the leather before wearing your boots.
- Regularly oil your boots, especially after exposure to water or harsh conditions.
Thorogood Boots Repair FAQs
Here are some frequently asked questions about repairing your Thorogood boots, as discussed in our guide. We hope these clarify any remaining questions.
Can I repair my Thorogood boots myself, even if I’m not a cobbler?
Yes, many Thorogood boots repairs can be done at home with the right tools and a little patience. Our guide covers several DIY fixes, from cleaning to replacing laces. More complex repairs, however, like resoling, are best left to professionals for optimal results and to avoid damaging your boots further.
What kind of glue is best for Thorogood boots repair?
For adhering leather or rubber components on your Thorogood boots, a high-quality contact cement designed for shoe repair is recommended. Look for brands specifically formulated for leather and rubber, ensuring a strong and durable bond. Always follow the manufacturer’s instructions carefully.
How often should I condition my Thorogood boots?
Conditioning frequency depends on how often you wear your Thorogood boots and the conditions they’re exposed to. Generally, conditioning every 1-3 months is a good practice. If your boots get wet or are used in harsh environments, condition them more frequently to prevent the leather from drying out and cracking.
What’s the best way to clean my Thorogood boots?
Start by brushing off loose dirt and debris. Then, use a damp cloth and a mild leather cleaner to wipe down the boots. Avoid using harsh soaps or detergents, as they can strip the leather’s natural oils. Once cleaned, allow your Thorogood boots to air dry completely before conditioning.
So, there you have it – your ultimate guide to thorogood boots repair! Hope this helps you keep your boots kicking for a long time to come. Now get out there and put those newly-repaired boots to good use!