Achieving a flawless finish often hinges on proper paint preparation, and thinning latex paint is a crucial step. Many homeowners find themselves needing to adjust the viscosity of their paints, especially when using an HVLP sprayer. The need for paint viscosity to be spot on often comes up. Knowing how to properly do so can save time and frustration. Benjamin Moore paints, for instance, are renowned for their quality, but even these premium paints may require thinning for optimal application in various conditions. Ultimately, mastering the art of thinning latex paint ensures a smooth, even coat, preventing brush marks and optimizing coverage regardless of whether you are using a paint conditioner or not.
Thinning Latex Paint Like a Pro: Simple Steps & Expert Tips
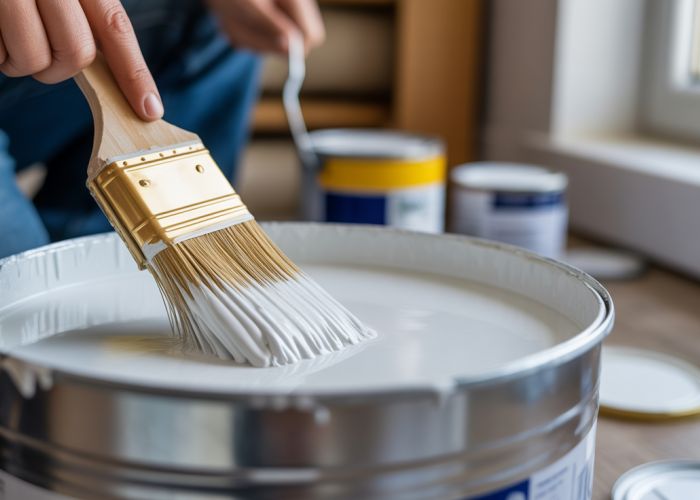
Thinning latex paint properly can significantly improve its application and finish. It’s a cost-effective way to extend paint, reduce brush marks, and achieve a smoother, more professional look. This guide walks you through the process of thinning latex paint like a seasoned painter, providing step-by-step instructions and expert tips.
Understanding Why Thinning Latex Paint Matters
Before diving into the "how-to," let’s consider the "why." Thinning latex paint can address several common painting problems:
- Improved Flow and Leveling: Thinned paint flows more easily, minimizing brushstrokes and roller marks.
- Enhanced Coverage: It can help paint spread further, especially on porous surfaces.
- Reduced Spatter: Less viscous paint is less likely to splatter when using a roller.
- Better Adhesion: Properly thinned paint penetrates porous surfaces better, improving adhesion.
- Optimal Spraying: Necessary for using latex paint in sprayers to prevent clogging.
Gathering Your Supplies
Having the right tools is crucial for successful thinning latex paint. You’ll need:
- Latex Paint: Obviously! Ensure it’s the right type and color for your project.
- Water: Clean, tap water is usually sufficient for thinning latex paint. Distilled water is recommended if your tap water is hard or heavily mineralized.
- Measuring Cups or Spoons: Accurate measurements are key to avoiding over-thinning.
- Stir Sticks: For thoroughly mixing the paint and water.
- Clean Bucket or Container: A dedicated container for thinning and mixing paint. Avoid using the original paint can to prevent contamination.
- Paint Strainer (Optional): Can remove any lumps or imperfections after thinning.
- Personal Protective Equipment (PPE): Gloves and eye protection are always recommended when working with paint.
Step-by-Step Guide: Thinning Latex Paint
Follow these steps for effectively thinning latex paint.
-
Determine the Thinning Ratio: The general rule is to not exceed ½ cup (4 oz) of water per gallon of paint. However, the ideal ratio depends on the paint’s viscosity and the application method.
- For brushing or rolling, start with a smaller amount (e.g., ¼ cup per gallon).
- For spraying, you may need slightly more (up to ½ cup per gallon), but always start conservatively.
- Prepare Your Mixing Container: Pour the desired amount of paint into your clean bucket. Avoid filling it to the very top to prevent spills when mixing.
- Add Water Gradually: Slowly add the measured amount of water to the paint.
- Mix Thoroughly: Use a stir stick to mix the paint and water completely. Ensure there are no streaks or pockets of unmixed water. The mixture should be homogenous. Stir for at least 2-3 minutes.
- Test the Consistency: Dip the stir stick into the paint and observe how it flows off. The paint should flow smoothly and evenly, without being too watery or thick. It should coat the stick uniformly.
- Strain the Paint (Optional): If you notice any lumps or debris, pour the thinned paint through a paint strainer into another clean container.
- Test on a Hidden Area: Before applying to the main surface, test the thinned paint in an inconspicuous area. This allows you to evaluate the coverage, adhesion, and overall finish. Let it dry completely to assess the final result.
- Adjust if Necessary: If the paint is still too thick, add a small amount of water (e.g., 1 tablespoon per gallon) and repeat steps 4-7. Be careful not to over-thin. If the paint is too thin, you will need to add more paint to reach the desired consistency.
Expert Tips for Successful Thinning
Here are some extra tips to help you master thinning latex paint:
- Don’t Over-Thin: Adding too much water will compromise the paint’s binding properties and lead to poor coverage and adhesion. Always err on the side of caution and add water gradually.
- Consider Temperature and Humidity: In hot, dry conditions, paint tends to dry faster, so slight thinning can help prevent brushstrokes. In humid conditions, be careful not to over-thin, as the paint may take longer to dry.
- Use the Right Water: While tap water is generally acceptable, distilled water is preferred, especially for high-quality finishes. Hard water can sometimes affect the paint’s color or performance.
- Mix Small Batches: If you’re unsure about the ideal thinning ratio, mix small batches of thinned paint and test them before thinning the entire can.
- Document Your Ratios: Keep a record of the amount of water you add to each gallon of paint. This will help you achieve consistent results in the future.
- Be Aware of Paint Type: Different latex paints (e.g., flat, eggshell, semi-gloss) may respond differently to thinning. Always follow the manufacturer’s recommendations as a starting point.
Thinning for Specific Application Methods
The amount of water needed for thinning latex paint varies depending on how you plan to apply the paint.
Thinning for Brushing and Rolling
- Typically requires minimal thinning.
- Aim for a consistency that allows the paint to flow smoothly without dripping.
- Start with ¼ cup of water per gallon and adjust as needed.
Thinning for Spraying
- Requires more thinning to prevent clogging in the sprayer.
- Check the sprayer manufacturer’s instructions for recommended thinning ratios.
- A common starting point is ½ cup of water per gallon, but may vary.
Thinning for Airless Sprayers
- Airless sprayers can handle slightly thicker paint than HVLP sprayers.
- Start with a smaller amount of water and gradually increase until the paint sprays evenly.
Thinning for HVLP Sprayers
- HVLP (High Volume Low Pressure) sprayers require well-thinned paint to function properly.
- Follow the sprayer manufacturer’s guidelines carefully.
Troubleshooting Common Issues
Even with careful planning, you might encounter some issues when thinning latex paint. Here are some common problems and solutions:
| Issue | Possible Cause | Solution |
|---|---|---|
| Paint is too watery | Over-thinning | Add more unthinned paint to the mixture. |
| Paint is still too thick | Insufficient thinning | Add a small amount of water (1 tablespoon per gallon) and re-mix. |
| Poor coverage | Over-thinning | Apply additional coats of paint. Consider not thinning the next batch. |
| Streaks or uneven finish | Insufficient mixing or over-thinning | Ensure thorough mixing and avoid over-thinning in future batches. |
FAQs About Thinning Latex Paint
This FAQ section addresses common questions about thinning latex paint for better application and results.
Why should I thin latex paint?
Thinning latex paint improves its flow and leveling capabilities. It helps reduce brushstrokes and roller marks, leading to a smoother, more professional finish. It’s especially useful when spraying or painting in hot weather.
How much water should I add to thin latex paint?
Generally, start with a small amount, no more than ½ cup of water per gallon of latex paint. Mix thoroughly and test the consistency. You can add a little more, but don’t exceed the manufacturer’s recommended limit (usually around ½ pint per gallon) to avoid compromising the paint’s properties.
Can I use something other than water to thin latex paint?
While water is the most common and recommended thinner for water-based latex paint, you can also use a latex paint thinner or conditioner specifically designed for this purpose. These products can improve flow without significantly affecting the paint’s dry time or durability. Be sure to read the product label to find its compatibility with latex paint.
What happens if I add too much water when thinning latex paint?
Adding too much water when thinning latex paint can make the paint runny and prone to dripping. It can also weaken the paint film, leading to poor coverage, reduced durability, and potential adhesion issues. It’s crucial to add water gradually and test the consistency to avoid over-thinning.
So, go ahead and put these tips for thinning latex paint to good use! Happy painting, and may your projects always have a smooth, beautiful finish!