Effective construction practices demand robust strategies against subterranean pests. Termite shield flashing, a critical component of integrated pest management, serves as a physical barrier against termite ingress. The International Code Council (ICC) mandates specific installation guidelines for termite shield flashing to ensure structural integrity and prevent costly damage. Typically fabricated from galvanized steel or aluminum, termite shield flashing’s proper installation, particularly at the foundation level, directly correlates with the longevity of a building’s defenses, offering homeowners vital protection against these destructive insects.
Understanding Effective Article Layout: Termite Shield Flashing
This outlines an article structure designed to comprehensively cover the topic of termite shield flashing, focusing on informative and practical guidance for homeowners.
Why Termite Shield Flashing Matters
This introductory section explains the essential function of termite shield flashing as a preventative measure against termite infestations.
- The Problem: Discuss the significant damage termites can inflict on residential structures, highlighting the financial burden and potential health hazards associated with termite infestations. Include statistics about termite damage costs.
- The Solution: Introduce termite shield flashing as a crucial component of a comprehensive termite control strategy. Explain how it acts as a physical barrier.
- Key Benefit: Emphasize the long-term cost-effectiveness of installing termite shield flashing compared to dealing with the expense and disruption of termite treatment and structural repairs.
Types of Termite Shield Flashing
This section categorizes and describes different types of termite shield flashing materials and designs.
Material Types
- Metal (Aluminum, Galvanized Steel): Discuss the durability, corrosion resistance, and lifespan of metal flashing options. Explain differences in cost and installation methods. Mention that aluminum is generally preferred due to its inherent termite resistance and resistance to corrosion from treated lumber.
- Plastic (Polypropylene, PVC): Describe the properties of plastic flashing, including its resistance to moisture and its suitability for specific applications. Emphasize any potential limitations, such as susceptibility to UV degradation or lower overall durability compared to metal.
- Composite Materials: Briefly introduce any emerging composite materials used in termite shield flashing. Note advantages such as enhanced durability or specific performance characteristics.
Design Types
- Vertical Flashing: Explain the function of vertical flashing installed on foundation walls, posts, or piers to prevent termites from accessing wooden structures.
- Horizontal Flashing: Describe horizontal flashing installed under siding, above foundations, or around windows and doors to deter termites from climbing behind exterior finishes.
- Termite Caps: Detail the use of termite caps on posts and piers, showing how they create a visual barrier allowing for easy termite detection.
A table summarizing the common types:
| Flashing Type | Material Examples | Application | Pros | Cons |
|---|---|---|---|---|
| Vertical | Aluminum, Galvanized Steel | Foundation Walls, Posts | Durable, Effective barrier | Potential for corrosion (galvanized steel), Cost |
| Horizontal | Aluminum, Plastic | Under Siding, Above Foundations | Prevents access behind siding, Resistant to moisture | Plastic may degrade, less durable than metal |
| Termite Caps | Metal, Plastic | Posts, Piers | Visual inspection aid, Provides a physical barrier | Only suitable for post/pier applications, may be visible |
Installation Best Practices
This section provides detailed instructions and considerations for properly installing termite shield flashing.
Preparation
- Surface Preparation: Emphasize the importance of clean, dry, and level surfaces for proper flashing installation. Explain the need to remove any debris, existing damage, or uneven areas.
- Material Selection: Reinforce the importance of choosing the correct type and size of flashing based on the specific application and building codes.
- Tool Requirements: List the necessary tools, including measuring tape, cutting tools (tin snips, utility knife), sealant gun, fasteners (nails, screws), and safety equipment (gloves, safety glasses).
Installation Steps
- Measure and Cut: Accurately measure the area where the flashing will be installed and cut the flashing material to the required size.
- Apply Sealant (if required): Apply a bead of sealant along the surface where the flashing will be installed to create a watertight seal (depending on the application).
- Position and Secure: Position the flashing correctly and secure it in place using appropriate fasteners. Ensure proper overlap at seams and corners.
- Inspect and Seal: Thoroughly inspect the installed flashing to ensure it is properly positioned and securely attached. Seal any gaps or seams with sealant to prevent water penetration.
Common Mistakes to Avoid
- Improper Overlap: Explain the importance of adequate overlap between flashing sections to prevent water infiltration.
- Incorrect Fasteners: Emphasize the need to use corrosion-resistant fasteners compatible with the flashing material and the surrounding building materials.
- Lack of Sealing: Highlight the importance of properly sealing all seams, gaps, and penetrations to create a watertight barrier.
- Damaged Flashing: Warn against using damaged or bent flashing, which can compromise its effectiveness.
Integrating with Other Termite Control Measures
This section outlines how termite shield flashing complements other preventative techniques.
- Soil Treatment: Describe how soil treatment around the foundation of the house creates a chemical barrier against termites.
- Wood Treatment: Explain the use of treated lumber that is resistant to termite attack.
- Regular Inspections: Emphasize the importance of annual termite inspections by a qualified pest control professional.
- Moisture Control: Discuss the importance of proper drainage, ventilation, and gutter maintenance to minimize moisture levels around the foundation, as termites thrive in damp environments.
Termite Shield Flashing: Frequently Asked Questions
Here are some frequently asked questions about termite shield flashing and how it can protect your home.
What exactly is termite shield flashing?
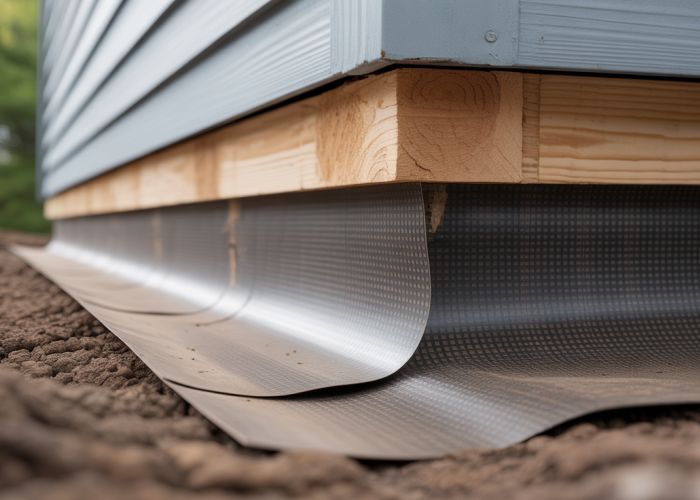
Termite shield flashing is a physical barrier made of metal or other impermeable materials, installed during construction. It prevents termites from gaining hidden access to the wooden structure of your home, forcing them to surface where they can be detected.
Where is termite shield flashing typically installed?
It’s usually placed between the foundation and the sill plate of your home, around plumbing penetrations, and any other potential entry points where termites could sneak in unnoticed. Correct installation is crucial for effective protection.
How does termite shield flashing actually deter termites?
Termites can’t tunnel through the solid flashing. This forces them to build mud tubes to bypass it, making their presence visible during routine inspections. This early detection allows for timely termite treatment.
Is termite shield flashing a replacement for regular termite inspections?
No, it’s an important preventative measure, but it’s not a substitute for professional termite inspections. Regular checks by a qualified pest control professional are still vital for comprehensive termite control, even with termite shield flashing in place.
So, you’re now armed with some insights about termite shield flashing! Hopefully, this has given you a better understanding of how to protect your home. Remember to always prioritize safety, and good luck with your pest prevention efforts!