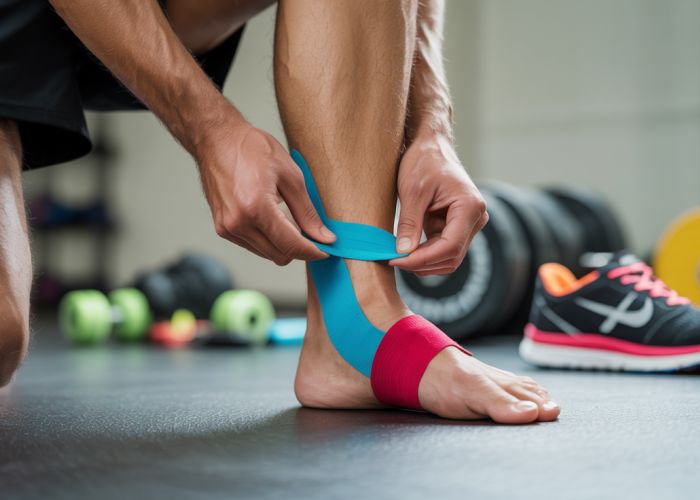
Achilles tendonitis, a common ailment affecting athletes and active individuals, often requires strategic support. Effective strapping achilles tendon can significantly aid recovery and prevent further injury. Proper technique, as taught in the physiotherapy field, focuses on limiting movement and providing compression. This guide demonstrates how to apply athletic tape correctly, providing stability and promoting healing. Ignoring proper taping could lead to chronic pain, and seeking guidance from a sports medicine professional is always advisable when pain persists. Kinesiology provides the framework for understanding the biomechanics involved, ensuring your strapping technique is both safe and effective.
Mastering Achilles Tendon Strapping: A Comprehensive Guide Layout
This guide will walk you through the best article layout for teaching readers how to effectively strap an Achilles tendon. The focus is on clear instruction and visual support to help them understand and perform the technique correctly. Our primary keyword is "strapping achilles tendon," which will be incorporated naturally throughout the text.
1. Introduction: Understanding Achilles Pain and the Role of Strapping
This section provides context and introduces the benefits of strapping.
- Hook: Start with a relatable opening. Examples: "Is Achilles pain slowing you down?" or "Tired of Achilles tendon discomfort hindering your activities?"
- Brief Explanation of Achilles Tendonitis/Tendinopathy: Briefly explain what Achilles pain is, touching on potential causes like overuse, improper footwear, or sudden increase in activity. Avoid overly technical jargon.
- Benefits of Strapping: Outline how strapping can help.
- Reduce pain
- Support the tendon
- Limit excessive movement
- Allow for continued activity (within reason)
- Promote healing
- Disclaimer: Always include a disclaimer stating that this guide is for informational purposes only and does not constitute medical advice. Advise readers to consult a healthcare professional for diagnosis and treatment.
- Brief Overview of What the Guide Covers: Tease the sections that follow.
2. Assessing Your Pain and When to Strap
This section helps readers determine if strapping is appropriate for their situation.
2.1. Recognizing Achilles Pain Symptoms
- Common Symptoms List: Use bullet points to list common symptoms:
- Pain in the back of the heel
- Stiffness, especially in the morning
- Tenderness to the touch
- Swelling
- Pain that worsens with activity
2.2. When to Use Strapping
- Suitable Situations: Explain scenarios where strapping can be beneficial:
- Mild to moderate Achilles tendon pain
- During and after exercise or activity
- As part of a comprehensive treatment plan (alongside rest, ice, etc.)
2.3. When NOT to Use Strapping
- Contraindications: Clearly outline situations where strapping is not recommended and professional medical attention is required:
- Severe pain
- Suspected Achilles tendon rupture (sudden, sharp pain with a popping sound)
- Visible deformity or swelling
- Signs of infection (redness, warmth, pus)
- Numbness or tingling
- Underlying medical conditions that may be contributing to the pain (e.g., rheumatoid arthritis)
3. Gathering Your Supplies
This section ensures readers have everything they need before starting.
-
List of Materials:
- Zinc Oxide Tape: The primary tape for support.
- Pre-Wrap (Optional): Provides a protective layer between the skin and the tape.
- Scissors: For cutting the tape.
- Alcohol Wipe (Optional): For cleaning the skin before application.
-
Images: Include clear photos of each item.
4. Step-by-Step Strapping Techniques: "Strapping Achilles Tendon"
This is the core of the guide and requires the most detail.
4.1. Basic Strapping Technique
-
Preparation:
- Clean and dry the area around the Achilles tendon. If using pre-wrap, apply it now, covering the heel and lower calf.
- Position the foot in slight dorsiflexion (toes pulled upwards). This puts the Achilles tendon on a slight stretch. Include an image demonstrating this position.
-
Application:
- Anchor Strip: Start by applying an anchor strip of zinc oxide tape around the lower calf, just above the ankle. Ensure it’s snug but not too tight. Include an image.
- Stirrup Strips: Begin at the anchor strip on one side of the calf, run the tape down the side of the heel, under the heel, and up the other side of the heel to meet the anchor strip. Apply this strip with gentle tension, pulling upwards to support the tendon. Include an image, ideally showing the tension.
- Repeat step 2, overlapping each stirrup strip by about half its width. Apply 3-4 stirrup strips, ensuring the entire Achilles tendon is supported. Include an image showing multiple stirrup strips.
- Figure-of-Six: Starting at the anchor strip, run the tape diagonally down the back of the heel, under the arch of the foot, around the front of the ankle, and back up to the anchor strip. This provides additional support. Include an image showing the figure-of-six pattern.
- Repeat the Figure-of-Six 2-3 times, slightly overlapping each strip. Include an image showing multiple repetitions.
- Closing Strips: Finish by applying closing strips of tape around the anchor strip on the calf to secure all the underlying strips. Include an image.
-
Key Considerations:
- Tape should be applied firmly but not so tightly that it restricts circulation.
- Avoid wrinkles in the tape.
- Smooth down the edges of the tape to prevent it from peeling.
4.2. Advanced Strapping Techniques (Optional)
- Heel Lock Technique: Explain and illustrate a heel lock technique for added stability.
- Combination Techniques: Discuss when and how to combine different strapping approaches.
4.3. Video Demonstration
- Embed a Video: Ideally, include a video demonstration of the strapping technique to visually guide the reader. This is extremely helpful for understanding the process. The video should clearly show each step described above. Mention the video in the text, e.g., "Watch the video below for a visual demonstration of the strapping technique."
5. Post-Strapping Care and Maintenance
This section focuses on what to do after applying the tape.
- Checking Circulation: Explain how to check for adequate circulation after applying the tape (e.g., checking the color and temperature of the toes).
- Wearing Time: Recommend a wearing time (e.g., "The strapping can typically be worn for [X] hours, or until it loses its support.").
- Removing the Tape: Explain how to safely remove the tape to avoid skin irritation (e.g., using tape remover, peeling slowly and carefully).
- Skin Care: Advise on skin care after tape removal (e.g., moisturizing the skin).
- Reapplication: Discuss how often to reapply the tape (e.g., "Reapply as needed, but avoid wearing strapping continuously for extended periods.").
- Potential Problems: Explain potential problems and how to address them (e.g., skin irritation, tape peeling).
6. Troubleshooting Common Issues
This section addresses common problems and provides solutions.
- Problem: Tape is too tight. Solution: Remove the tape immediately and reapply with less tension.
- Problem: Tape is peeling off. Solution: Ensure the skin is clean and dry before application. Use a stronger adhesive tape or pre-wrap.
- Problem: Skin irritation. Solution: Use pre-wrap, avoid over-tightening the tape, and consider using a hypoallergenic tape.
- Problem: Strapping doesn’t provide enough support. Solution: Use a more advanced strapping technique or consult with a healthcare professional.
7. Seeking Professional Help
Reiterate the importance of consulting a healthcare professional if pain persists or worsens. This is crucial for ethical and legal reasons.
- When to See a Doctor/Physiotherapist:
- If pain doesn’t improve with rest and strapping
- If you suspect a more serious injury
- If you have any concerns about your Achilles tendon pain
Achilles Pain Strapping: Your Questions Answered
Got questions about strapping your Achilles tendon? Here are some common queries to help you understand the process better.
Why is strapping important for Achilles pain?
Strapping helps support the Achilles tendon, reducing stress and pain. It limits excessive movement and provides compression, aiding the healing process. Effectively strapping Achilles tendon problems can make daily activities and recovery more comfortable.
How long should I wear the strapping?
Wear the strapping during activities that aggravate your pain. It’s generally recommended to remove it at night to allow your skin to breathe. The duration for strapping Achilles tendon depends on the severity of your injury and healing progress.
Can I reuse the strapping tape?
No, strapping tape is designed for single use. Reusing it can reduce its effectiveness and increase the risk of skin irritation. For optimal support when strapping Achilles tendon issues, always use fresh tape.
When should I seek professional help instead of just strapping?
If your pain is severe, doesn’t improve with strapping, or is accompanied by other symptoms like swelling or numbness, consult a doctor or physical therapist. Strapping Achilles tendon provides temporary relief, but professional guidance is essential for a proper diagnosis and comprehensive treatment plan.
So, feeling more confident about strapping your achilles tendon? Give it a try, be patient, and remember, a little practice goes a long way in getting back on your feet (literally!). Keep moving, and listen to your body!