Embarking on a home improvement journey? The application of polyurethane ensures durable protection for your newly achieved stained plywood floors. Achieving beautiful stained plywood floors requires careful consideration, and Minwax products are known for their consistent finish. Remember, proper surface preparation is crucial; it is an important step before applying any stain to your stained plywood floors. Discover how a relatively inexpensive material like plywood, when combined with professional staining techniques, can produce results that truly defy expectations.
Prepare to be surprised. What if I told you that the key to stunning, magazine-worthy floors might be hiding in plain sight at your local lumber yard?
Forget expensive hardwood or trendy tiles. We’re diving into the world of stained plywood floors, an option that delivers shocking results without breaking the bank.
This isn’t your grandfather’s subflooring. With the right techniques and a creative eye, plywood can be transformed into a beautiful and remarkably affordable flooring solution.
Plywood: The Unexpected Flooring Star
Stained plywood floors are rapidly gaining popularity as a customizable and budget-friendly alternative to traditional flooring options. They offer a unique blend of cost-effectiveness, DIY potential, and undeniable aesthetic appeal.
Imagine the warmth and character of hardwood, but at a fraction of the price. Think of the satisfaction of creating a truly unique floor with your own two hands.
That’s the promise of stained plywood.
Unlocking the Potential: Key Benefits at a Glance
Let’s briefly touch on the core advantages that make stained plywood floors so compelling:
-
Cost-Effectiveness: The most significant draw is the price point. Plywood is substantially cheaper than hardwood, tile, or even laminate flooring. This makes it an ideal choice for budget-conscious homeowners.
-
DIY Potential: Installing and staining plywood floors is a manageable project for DIY enthusiasts. It allows for a high degree of customization and personal expression.
-
Unique Aesthetics: Forget cookie-cutter floors. With a wide range of stain colors and finishing techniques, you can create a floor that perfectly complements your personal style and interior design.
The Thesis: Transformation Through Stain
At its core, this is about reimagining the ordinary. It’s about seeing the potential in humble materials and transforming them into something extraordinary.
Our thesis is simple: Plywood and wood stain can transform ordinary materials into extraordinary flooring solutions.
We’re here to guide you through the process, equipping you with the knowledge and inspiration to unlock the hidden beauty of plywood. Get ready to redefine your floors and your budget.
Forget cookie-cutter floors and exorbitant price tags. The allure of stained plywood lies in its unexpected advantages, challenging conventional notions of what constitutes beautiful and durable flooring. It’s time to delve deeper into the reasons why this humble material is capturing the hearts of homeowners and DIY enthusiasts alike.
The Allure of Plywood: Unveiling the Unexpected Advantages
Why plywood? The answer lies in a potent combination of practicality, affordability, and creative freedom. It’s a chance to break free from the ordinary and embrace a flooring solution that’s as unique as you are.
Affordability: Flooring on a Budget
Let’s face it: flooring can be expensive. Hardwood floors, while stunning, often come with a price tag that leaves a significant dent in your budget. Tile installation can quickly add up in labor costs.
This is where plywood shines. It’s significantly cheaper than most traditional flooring options, freeing up your resources for other home improvement projects.
Think of it as a smart investment – achieving a high-end look without the high-end cost. This makes it an accessible option for first-time homeowners, those on a tight budget, or anyone looking to maximize their renovation dollars.
Unleash Your Inner Artisan: The DIY Dream
The DIY aspect of stained plywood flooring is a major draw for many. Unlike complex installations that require specialized tools and professional expertise, working with plywood is remarkably straightforward.
Cutting, sanding, staining, and sealing are all manageable tasks for the average homeowner. With readily available online tutorials and a little patience, you can transform your floors yourself.
The potential for customization is virtually limitless. You have complete control over the stain color, the finishing technique, and the overall aesthetic. This allows you to create a truly unique floor that reflects your personal style and complements your home’s decor.
Imagine the satisfaction of stepping back and admiring a floor that you created with your own two hands.
Sustainability Considerations: A Responsible Choice?
In an era of increasing environmental awareness, sustainability is a key consideration for many homeowners. While plywood isn’t inherently the most sustainable material, it can be a responsible choice when sourced properly.
Look for plywood that is certified by the Forest Stewardship Council (FSC). This ensures that the wood comes from sustainably managed forests. These forests are managed to protect biodiversity, water quality, and soil health.
Furthermore, plywood can be a good way to use wood efficiently. Because it’s made from thin layers of wood glued together, it can make use of parts of the tree that might otherwise be discarded.
Consider reclaimed plywood or plywood made from rapidly renewable resources for an even more eco-friendly option. With careful sourcing, you can create beautiful floors and minimize your environmental impact.
The DIY aspect of stained plywood flooring is a major draw for many. Unlike complex installations that require specialized tools and professional expertise, working with plywood is remarkably straightforward.
Cutting, sanding, staining, and sealing are all manageable tasks for the average homeowner. With readily available online tutorials and a little patience, you can transform your space. The secret to achieving that coveted, professional finish isn’t about innate talent; it’s about meticulous preparation.
Preparation is Key: Laying the Groundwork for Stunning Results
Imagine commissioning a master painter for a portrait, but handing them a canvas riddled with bumps, dust, and imperfections. No matter their skill, the final result would be compromised. The same principle applies to staining plywood.
Proper preparation is non-negotiable if you’re aiming for a floor that looks professionally done. It’s the foundation upon which your beautiful stain will rest, and shortcuts taken here will inevitably show through in the final product. This phase is about creating the perfect canvas.
Sanding: Creating a Smooth and Even Canvas
Sanding is arguably the most crucial step in preparing plywood for staining. The goal is to create a surface that’s not only smooth to the touch but also evenly textured.
This ensures uniform stain absorption, preventing blotchiness and highlighting the natural grain of the wood.
Start with a coarser grit sandpaper (80-grit or 100-grit) to remove any existing finish, scratches, or imperfections. Work your way up to finer grits (120-grit, then 180-grit, and finally 220-grit) for a silky-smooth finish.
Always sand in the direction of the wood grain to avoid leaving swirl marks. A random orbital sander will make the job faster and more efficient, but sanding by hand is perfectly acceptable, especially for smaller areas or intricate details.
Remember to thoroughly vacuum up the sanding dust between each grit to prevent it from clogging the sandpaper and scratching the surface.
Addressing Imperfections: Filling Knots and Gaps
Plywood, being a natural material, often contains knots, small gaps, and other imperfections. While some may appreciate the rustic charm of these features, they can detract from the overall look of a stained floor if left untreated.
Filling these imperfections creates a flawless, uniform surface that enhances the stain’s beauty.
Use a wood filler that’s stainable and closely matches the color of your plywood. Apply the filler generously to the knots and gaps, slightly overfilling them to compensate for shrinkage during drying.
Once the filler is completely dry, sand it smooth with fine-grit sandpaper (220-grit) until it’s flush with the surrounding surface. Again, be mindful to sand in the direction of the wood grain.
The Final Clean: Removing Dust and Debris
After sanding and filling, it’s crucial to remove every trace of dust and debris from the plywood surface. Even the smallest particles can interfere with stain adhesion, resulting in an uneven and unprofessional finish.
Start by thoroughly vacuuming the entire surface, paying close attention to corners and edges. Follow up with a tack cloth, a slightly sticky cloth designed to pick up any remaining dust particles.
Alternatively, you can use a damp cloth (wrung out very well to avoid excessive moisture) to wipe down the surface.
Allow the plywood to dry completely before proceeding to the staining step. This final cleaning ensures a pristine surface, ready to embrace the stain and reveal its full potential.
Proper preparation is non-negotiable if you’re aiming for a floor that looks professionally done. It’s the foundation upon which your beautiful stain will rest, and shortcuts taken here will inevitably show through in the final product. This phase is about creating the perfect canvas.
Now, with your plywood sanded to a buttery smoothness and free of any imperfections, the real fun begins: choosing and applying your stain. This is where you transform that blank canvas into a work of art, infusing your floor with personality and style.
Stain Selection and Techniques: Unlocking the Magic of Color
The world of wood stain is vast and varied, offering a spectrum of colors, types, and finishes to suit any taste. Navigating this landscape can feel overwhelming, but understanding the fundamentals empowers you to make informed choices and achieve your desired look.
Exploring the Spectrum of Wood Stains
Let’s delve into the diverse world of wood stains.
Oil-based stains are prized for their rich color and ability to penetrate deeply into the wood, enhancing the grain. They offer a longer working time, allowing for smoother application and blending. However, they require mineral spirits for cleanup and have a longer drying time.
Water-based stains are a more environmentally friendly option, with low VOCs and easy soap-and-water cleanup. They dry quickly, which can be an advantage but also requires a faster application technique to avoid lap marks. The color may not be as deep or vibrant as oil-based stains, but they are steadily improving.
Gel stains are thicker than other types of stain and are ideal for vertical surfaces or woods that are prone to blotching, like plywood. They sit on the surface of the wood rather than penetrating deeply, providing more uniform color.
Choosing the Perfect Hue for Your Space
Selecting the right stain color is crucial for achieving a cohesive and visually appealing result.
Consider the existing elements in your room: wall color, furniture, and decor. Do you want to create a warm and inviting atmosphere with rich, dark tones, or a bright and airy feel with light, natural shades?
Think about the undertones in your wood and how they will interact with the stain color. Test different stains on scrap pieces of plywood to see how they look before committing to the entire floor. This is a critical step.
Don’t be afraid to experiment!
Mix different stains to create custom colors that perfectly match your vision.
Mastering the Art of Stain Application
The key to a flawless stained plywood floor lies in even and consistent application.
Here are a few popular methods:
-
Brushing: Best for smaller areas and detailed work, providing control and precision. Use a high-quality brush with natural or synthetic bristles, depending on the type of stain.
-
Rolling: Efficient for covering large areas quickly. Use a short-nap roller designed for staining to prevent excessive dripping and ensure even coverage.
-
Wiping: Ideal for achieving a uniform color and preventing blotchiness. Apply the stain liberally and then wipe off the excess with a clean cloth.
Layering for Depth and Durability: The Power of Multiple Coats
Applying multiple coats of stain can enhance the color intensity and durability of your floor.
Allow each coat to dry completely before applying the next, and lightly sand between coats with fine-grit sandpaper (220-grit or higher) to create a smooth surface for better adhesion.
Remember, patience is key. Building up the color gradually will result in a richer, more even finish that will stand the test of time. Rushing this process can lead to unevenness and disappointment.
With the stain now beautifully accentuating the plywood’s grain and character, you might be tempted to step back and admire your handiwork. However, this is not the time to rest on your laurels. The stain alone, while visually stunning, offers limited protection against the rigors of daily life. The next crucial step is sealing your newly stained plywood floor, a process that will transform your beautiful surface into a resilient and long-lasting masterpiece.
Sealing for Success: Protecting Your Investment with Sealers
Think of sealing as applying a protective shield over your carefully crafted floor. It’s the unsung hero that ensures your investment remains beautiful and functional for years to come. Without it, your stain is vulnerable to moisture damage, scratches, and the relentless wear and tear of daily life.
The Vital Role of Sealers
Sealers, especially polyurethane-based options, act as a durable barrier. They shield the stained wood from moisture penetration, preventing warping, swelling, and unsightly water stains. They also provide a tough, scratch-resistant surface. This protects the stain from scuffs, scrapes, and the inevitable mishaps that occur in a busy household.
Moreover, certain sealers offer UV protection, preventing the stain from fading or discoloring over time due to sun exposure. This is particularly important in rooms with large windows or direct sunlight.
In essence, a sealer is the key to longevity, preserving the beauty and integrity of your stained plywood floor for years to come.
Unveiling the Benefits: More Than Just Protection
The benefits of sealing extend beyond simple protection. A good sealer enhances the color and depth of the stain, bringing out its richness and luster. It creates a smooth, even surface that is easy to clean and maintain.
Consider these key advantages:
- Moisture Resistance: Prevents water damage and warping.
- Scratch Resistance: Protects against everyday wear and tear.
- UV Protection: Prevents fading and discoloration.
- Enhanced Appearance: Deepens color and adds luster.
- Easy Maintenance: Simplifies cleaning and upkeep.
By investing in a quality sealer, you’re not just protecting your floor; you’re enhancing its beauty and simplifying its care.
Step-by-Step Sealing: A Guide to Flawless Application
Applying a sealer might seem daunting, but with the right preparation and technique, it’s a manageable DIY task. Here’s a step-by-step guide to help you achieve a flawless finish:
-
Preparation is Key: Ensure the stained surface is completely dry and free of dust or debris. Lightly sand the surface with fine-grit sandpaper (220-grit or higher) to create a smooth base for the sealer. Vacuum thoroughly and wipe down with a tack cloth.
-
Choose Your Weapon: Select a high-quality brush, roller, or paint pad designed for applying sealers. A brush is ideal for intricate areas and corners, while a roller or pad is more efficient for larger surfaces.
-
Application Technique: Apply a thin, even coat of sealer, following the grain of the wood. Avoid applying too much sealer at once, as this can lead to drips and uneven drying. Work in manageable sections, overlapping each stroke slightly to ensure complete coverage.
-
Mind the Drips: Regularly check for drips and runs, especially along edges and corners. Use a brush to smooth out any imperfections before the sealer begins to dry.
-
Curing Time is Crucial: Allow the sealer to dry completely according to the manufacturer’s instructions. This may take several hours or even overnight. Avoid walking on the floor during the curing process.
-
Multiple Coats for Maximum Protection: Apply at least two coats of sealer for optimal protection and durability. Lightly sand between coats with fine-grit sandpaper to create a smooth surface for the next coat. Remember to vacuum and wipe down with a tack cloth before each application.
-
Final Inspection: Once the final coat is dry, inspect the floor for any imperfections. If necessary, lightly sand and touch up any areas that need attention.
Choosing the Right Sealer: Tailoring Protection to Your Lifestyle
The best sealer for your plywood floor depends on your lifestyle and the expected level of foot traffic. Polyurethane is a popular choice for its durability and resistance to scratches and moisture. It’s available in oil-based and water-based formulations, each with its own advantages.
-
Oil-based polyurethane offers excellent durability and a warm, amber hue. However, it has a strong odor and requires mineral spirits for cleanup.
-
Water-based polyurethane is low-odor and easy to clean up with soap and water. It dries quickly and is more environmentally friendly.
For high-traffic areas, consider a polyurethane sealer specifically designed for floors. These sealers are formulated to withstand heavy use and provide long-lasting protection.
Ultimately, selecting the right sealer is about matching the product’s capabilities with the demands of your space. Consider your daily routines, pet activity, and the potential for spills and accidents when making your decision.
By carefully selecting and applying a high-quality sealer, you’re not just protecting your stained plywood floor; you’re ensuring its beauty, longevity, and resilience for years to come. It’s the final touch that transforms your DIY project into a lasting investment.
With a robust sealant diligently applied, your stained plywood floor now boasts a stunning visual appeal, ready to become a captivating focal point of your home. But the journey doesn’t end there. Like any investment, its longevity depends on how well it’s cared for. Let’s explore how to ensure your plywood floor retains its beauty and withstands the test of time.
Durability and Maintenance: Ensuring Longevity for Years to Come
While the initial installation and sealing are crucial, understanding the long-term care requirements of your stained plywood floor is paramount. When properly installed, sealed, and consistently maintained, plywood floors can offer impressive durability and years of reliable service.
Understanding Plywood’s Natural Resilience
Plywood, by its very construction, is surprisingly resilient. The cross-layered plies provide exceptional strength and dimensional stability, resisting warping and twisting better than solid wood in many cases.
However, it’s important to remember that wood, regardless of its form, is a natural material susceptible to certain types of damage. Taking preventative measures is key.
Preventing Damage: Practical Tips for Everyday Life
Protecting your floor from everyday wear and tear is easier than you think. A few simple strategies can significantly extend its lifespan and preserve its aesthetic appeal.
-
Felt Pads are Your Friends: Apply felt pads to the bottom of all furniture, especially chairs and tables that are frequently moved. This simple step prevents scratches and dents from heavy objects.
-
Area Rugs in High-Traffic Zones: Strategically placed area rugs in high-traffic areas, such as hallways and entryways, can absorb much of the impact and abrasion, shielding the floor from excessive wear.
-
Mindful Pet Care: Trim your pet’s nails regularly to minimize scratching. Consider providing designated scratching posts for cats to divert their attention away from the floor.
-
High Heel Havoc: While stilettos can add a touch of elegance, they can also wreak havoc on wood floors. Encourage guests to remove their shoes or provide shoe covers to protect the surface.
Addressing Moisture Concerns: A Proactive Approach
One common concern surrounding wood floors, including plywood, is moisture resistance. While plywood itself is more dimensionally stable than solid wood when exposed to moisture, excessive water can still cause damage over time.
-
Prompt Spill Cleanup: Immediately wipe up any spills with a clean, dry cloth. The faster you act, the less chance the moisture has to penetrate the sealant and affect the wood.
-
Strategic Use of Doormats: Place doormats at all entrances to trap dirt, water, and snow before they can be tracked onto the floor.
-
Humidifier Control: Maintain a consistent humidity level in your home to prevent excessive expansion or contraction of the wood. A dehumidifier can be helpful in damp climates.
-
Waterproof Sealant in Vulnerable Areas: In areas prone to moisture, such as bathrooms or kitchens, consider using a waterproof sealant specifically designed for wood floors.
Regular Cleaning and Maintenance: A Key to Longevity
Consistent cleaning and maintenance are essential for preserving the beauty and integrity of your stained plywood floor. Establish a routine to keep your floors looking their best.
-
Regular Sweeping or Vacuuming: Sweep or vacuum your floor regularly to remove dust, dirt, and debris that can scratch the surface. Use a soft-bristle brush or a vacuum cleaner with a felt head attachment.
-
Damp Mopping with Care: Occasionally damp mop your floor with a pH-neutral wood floor cleaner. Avoid using excessive water, and always wring out the mop thoroughly to prevent water from seeping into the seams.
-
Avoid Harsh Chemicals: Never use harsh chemicals, abrasive cleaners, or scouring pads on your stained plywood floor, as these can damage the sealant and the stain.
-
Periodic Reapplication of Sealant: Depending on the level of foot traffic and the type of sealant used, you may need to reapply a fresh coat of sealant every few years to maintain optimal protection. Consult the sealant manufacturer’s recommendations for specific guidance.
By understanding plywood’s inherent qualities and implementing these simple yet effective maintenance practices, you can ensure that your stained plywood floor remains a stunning and durable centerpiece of your home for years to come.
With a robust sealant diligently applied, your stained plywood floor now boasts a stunning visual appeal, ready to become a captivating focal point of your home. But the journey doesn’t end there. Like any investment, its longevity depends on how well it’s cared for. Let’s shift our focus to the magic of witnessing firsthand how this transformation plays out.
Showcase the Transformation: Before & After Gallery
Words can only convey so much. To truly grasp the remarkable potential of stained plywood floors, let’s immerse ourselves in a gallery of stunning before-and-after transformations. These visuals speak volumes, illustrating the dramatic impact that can be achieved with a little ingenuity and elbow grease.
The Power of Visual Evidence
Seeing is believing, and in the realm of home improvement, this adage rings especially true. The "Before & After" gallery is not just about pretty pictures; it’s about inspiring confidence and showcasing the versatility of this flooring solution.
These images serve as tangible proof that ordinary plywood can be transformed into a visually stunning and durable surface. It’s about validating the effort and choices you are about to invest in.
Witnessing the Dramatic Impact
Each set of photos in our gallery tells a story. It’s a story of vision, creativity, and the sheer transformative power of wood stain and plywood.
The "before" shots often depict bare, uninspiring plywood subfloors, perhaps slightly worn or simply lacking character.
Then comes the "after" – a reveal of warm, inviting floors that exude personality and style. Colors pop, wood grain patterns emerge, and the entire room is elevated.
Inspiring Design Ideas: A Kaleidoscope of Styles
One of the most compelling aspects of stained plywood flooring is its adaptability to virtually any design aesthetic. Our gallery aims to showcase this versatility, offering a diverse range of inspiring examples.
-
Farmhouse Charm: Discover how a warm, honey-toned stain can create a rustic and inviting atmosphere, perfect for a cozy farmhouse-style interior.
-
Modern Minimalism: See how cool gray or dark ebony stains can lend a sleek and sophisticated edge to contemporary spaces.
-
Coastal Chic: Explore the possibilities of whitewashed or light blue stains for a breezy and relaxed coastal vibe.
Beyond Color: Room Settings and Applications
It’s not just about the color of the stain; it’s also about how the flooring complements the entire room. The gallery features examples of stained plywood floors in various settings, including:
-
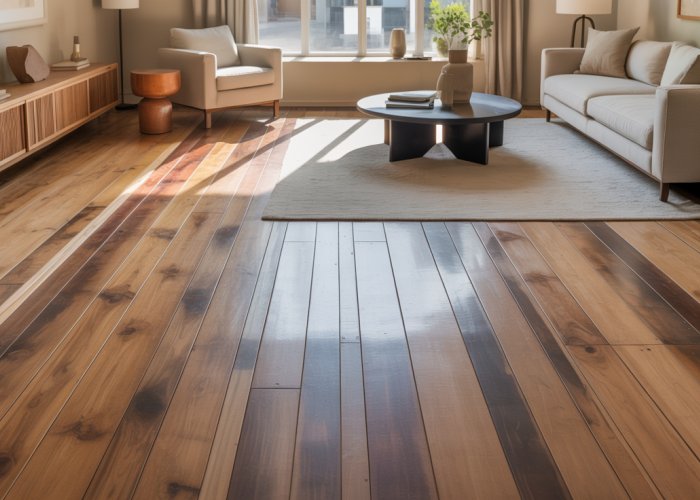
Living Rooms: Showcasing how stained plywood can create a warm and inviting space for relaxation and entertainment.
-
Bedrooms: Demonstrating how different stain colors and finishes can contribute to a serene and stylish bedroom retreat.
-
Kitchens: Illustrating the practicality and beauty of stained plywood in a high-traffic area.
These examples are here to spark your imagination and help you visualize the potential of stained plywood in your own home. They are also examples to showcase that all rooms can benefit from this style.
With these stunning transformations now imprinted in your mind, the question likely isn’t if you can achieve similar results, but how. Let’s dispel any lingering doubts and equip you with the confidence and resources to embark on your own DIY plywood flooring adventure.
DIY Triumph: Empowering You to Take the Plunge
The DIY Advantage: A Project Within Reach
The beauty of stained plywood flooring lies not only in its aesthetic appeal but also in its inherent accessibility for DIY enthusiasts.
Unlike some home improvement projects that demand specialized skills and expensive equipment, staining plywood floors is a task that most homeowners can tackle with a bit of patience and careful planning.
It’s about empowerment. It’s about taking control of your living space and creating something beautiful with your own two hands.
Addressing Your Concerns: Overcoming the Hurdles
Hesitation is natural. Perhaps you’re worried about imperfections, uneven staining, or simply not having the "knack" for DIY. Let’s address those concerns head-on.
-
Imperfections: Remember, even hardwood floors have natural variations. Slight imperfections in the plywood can add character and authenticity to your finished floor. Embrace the unique grain patterns and knots; they tell a story.
-
Uneven Staining: This is easily avoided with proper preparation and technique. Sanding thoroughly, applying stain in thin, even coats, and wiping off excess stain are key to achieving a consistent color. Practice on a scrap piece of plywood first to perfect your technique.
-
Lack of Experience: Everyone starts somewhere. This project is a fantastic way to build your DIY skills and gain confidence. There are countless online resources available to guide you through every step of the process.
Your Toolkit for Success: Essential Resources
The right tools and materials are essential for a smooth and successful project. Here are some recommendations to get you started:
-
Sanding: Invest in a good quality orbital sander and a variety of sandpaper grits (80, 120, 220).
-
Stain: Choose a high-quality wood stain in your desired color. Consider oil-based stains for durability and rich color, or water-based stains for easier cleanup and lower VOCs. Brands like Minwax, Varathane, and General Finishes are popular choices.
-
Sealer: Polyurethane is a durable and water-resistant sealer that will protect your stained plywood floors. Opt for a water-based polyurethane for low odor and easy cleanup. Brands like Rust-Oleum and Minwax offer excellent options.
-
Application Tools: Use high-quality brushes or foam rollers for applying stain and sealer. Have plenty of clean rags on hand for wiping off excess stain.
Helpful Tutorials and Guides
Don’t reinvent the wheel! Take advantage of the wealth of online resources available.
-
YouTube: Search for videos on "staining plywood floors" for visual demonstrations and step-by-step instructions.
-
DIY Blogs: Many home improvement blogs offer detailed tutorials and tips on staining plywood floors.
-
Manufacturer Websites: Stain and sealer manufacturers often provide detailed product information and application guides on their websites.
The Reward: A Floor You Created
Imagine stepping back and admiring a beautifully stained plywood floor that you created with your own hands. The sense of accomplishment is unparalleled.
You’ve not only added value and beauty to your home, but you’ve also saved money, learned new skills, and unleashed your creativity.
The satisfaction of knowing that you transformed ordinary plywood into a stunning flooring solution is a reward that will last for years to come. So, take the plunge. Embrace the DIY spirit. Your dream floor awaits!
Stained Plywood Floors: Frequently Asked Questions
[Briefly introduce what these FAQs will cover, e.g., "Here are some common questions people have about staining plywood floors and the surprising results you can achieve."]
Are stained plywood floors durable enough for high-traffic areas?
While not as inherently durable as hardwood, stained plywood floors can hold up well in high-traffic areas with proper preparation and a durable topcoat. Choose a high-quality, polyurethane finish designed for floors, and reapply as needed to maintain protection.
What’s the key to achieving a good stain finish on plywood?
Proper sanding and sealing are crucial. Plywood can be uneven and prone to absorbing stain unevenly. Sand thoroughly, apply a wood conditioner to promote even stain penetration, and test your stain on a scrap piece first.
Can any type of plywood be used for stained plywood floors?
No, not all plywood is suitable. Opt for a hardwood plywood with a smooth, knot-free surface for the best results. Furniture-grade or cabinet-grade plywood is usually the best choice for a visually appealing stained plywood floors.
How does the cost of stained plywood floors compare to other flooring options?
Stained plywood floors are generally a more budget-friendly alternative to hardwood or engineered wood flooring. The material costs are lower, but remember to factor in the cost of stain, sealant, and potentially professional installation if you choose not to DIY.
So, what do you think? Pretty impressive, right? Give stained plywood floors a try and see the difference for yourself. Happy DIY-ing!