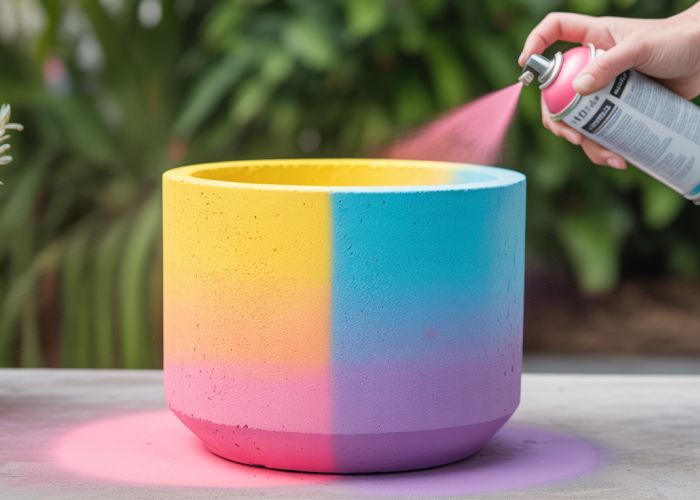
Achieving a professional finish when you spray paint concrete requires understanding key factors. Proper surface preparation, a crucial first step, significantly impacts adhesion. Krylon, a leading manufacturer of spray paints, offers product lines specifically designed for concrete applications. Knowing the characteristics of these products, such as their opacity and drying time, is essential for a successful outcome. Concrete patios, a common area for this type of project, often present unique challenges related to existing sealants and surface imperfections. So, let’s delve into how to effectively spray paint concrete like a seasoned pro.
Spray Paint Concrete Like a Pro: The Only Guide You Need – Article Layout
This guide aims to equip you with all the knowledge necessary to successfully spray paint concrete surfaces. We will cover everything from preparation to application, ensuring a professional-looking and durable finish. Our primary focus is on providing practical and actionable advice.
1. Understanding Spray Painting Concrete
This section introduces the core concepts and advantages of using spray paint on concrete.
1.1. Why Spray Paint Concrete?
- Speed and Efficiency: Spray painting is significantly faster than using brushes or rollers, especially for large areas.
- Even Coverage: Achieves a more consistent and uniform finish, minimizing streaks and brush marks.
- Hard-to-Reach Areas: Easily covers textured or uneven surfaces that are difficult to access with traditional methods.
- Cost-Effective: Can be more economical than other concrete finishing methods, especially for DIY projects.
1.2. Types of Spray Paint for Concrete
Explain the different types of spray paint suitable for concrete, highlighting their properties and best uses.
- Acrylic Latex: Water-based, durable, and suitable for interior and exterior applications. Excellent UV resistance.
- Epoxy: Highly durable and chemical-resistant, ideal for high-traffic areas and industrial settings.
- Polyurethane: Provides a tough, flexible finish and excellent abrasion resistance.
- Concrete Stains (Sprayable): Penetrate the concrete surface, creating a translucent, decorative effect.
Use a table to compare the paint types.
| Paint Type | Durability | Best Use | Pros | Cons |
|---|---|---|---|---|
| Acrylic Latex | Moderate | Interior/Exterior walls, floors | Good UV resistance, easy to apply, water-based | Less durable than epoxy or polyurethane |
| Epoxy | High | Garages, workshops, industrial floors | Extremely durable, chemical-resistant, strong adhesion | More complex application, requires specific safety measures |
| Polyurethane | High | High-traffic areas, floors, decks | Excellent abrasion resistance, flexible | Can be expensive, may require specialized equipment |
| Concrete Stains | Moderate | Decorative concrete surfaces, patios | Creates a natural, translucent look, penetrates the surface | Offers limited color options, requires a sealed finish |
2. Preparation is Key
A thorough preparation process is crucial for a successful spray paint job.
2.1. Gathering Your Supplies
A checklist of necessary materials and tools:
- Spray paint (appropriate type for concrete)
- Spray paint respirator mask
- Safety glasses
- Gloves
- Drop cloths or plastic sheeting
- Painter’s tape
- Wire brush or scraper
- Concrete cleaner or degreaser
- Pressure washer (optional, but highly recommended)
- Concrete primer (recommended for better adhesion)
- Paint thinner or mineral spirits (for cleaning equipment)
2.2. Cleaning the Concrete Surface
Detailed instructions on how to properly clean the concrete:
- Remove Debris: Use a wire brush or scraper to remove loose dirt, debris, and flaking paint.
- Degrease: Apply a concrete cleaner or degreaser to remove any grease, oil, or stains. Follow the manufacturer’s instructions.
- Pressure Wash: Use a pressure washer to thoroughly clean the concrete surface. This will remove any remaining dirt and grime and open the pores for better paint adhesion.
- Rinse Thoroughly: Ensure all cleaning solutions are completely rinsed away.
- Allow to Dry: Let the concrete dry completely before proceeding to the next step. This may take 24-48 hours, depending on the weather conditions.
2.3. Repairing Cracks and Imperfections
Steps to fix any imperfections in the concrete:
- Inspect the Concrete: Identify any cracks, holes, or other imperfections.
- Clean the Cracks: Clean out any debris from the cracks using a wire brush or vacuum.
- Apply Concrete Patching Compound: Fill the cracks with a concrete patching compound according to the manufacturer’s instructions.
- Smooth the Surface: Use a trowel or putty knife to smooth the patching compound flush with the surrounding concrete surface.
- Allow to Cure: Let the patching compound cure completely before proceeding.
- Sand the Patched Areas: Lightly sand the patched areas to ensure a smooth and even surface.
2.4. Protecting Surrounding Areas
- Use drop cloths or plastic sheeting to protect any areas you don’t want to be painted, such as walls, landscaping, or furniture.
- Apply painter’s tape to create clean lines and protect edges.
3. The Spray Painting Process
This section provides step-by-step instructions on how to properly spray paint concrete.
3.1. Priming the Concrete (Optional, but Recommended)
Explain the benefits of using a primer and how to apply it.
- A primer will improve paint adhesion, especially on porous concrete surfaces.
- Choose a primer specifically designed for concrete.
- Apply the primer in thin, even coats, following the manufacturer’s instructions.
- Allow the primer to dry completely before applying the paint.
3.2. Setting Up Your Spray Equipment
Different spray painting tools are available; focus mainly on standard spray cans.
- Shake the spray paint can vigorously for at least one minute before use.
- Attach the appropriate nozzle to the spray paint can.
- Test the spray pattern on a piece of cardboard or scrap material to ensure proper coverage and avoid sputtering.
3.3. Applying the Spray Paint
Detailed instructions on spray painting techniques:
- Hold the Can Properly: Hold the spray paint can about 8-12 inches away from the concrete surface.
- Use a Consistent Motion: Use a smooth, even, back-and-forth motion, overlapping each pass slightly.
- Apply Thin Coats: Apply several thin coats rather than one thick coat. This will prevent drips and runs and ensure a more even finish.
- Maintain a Consistent Speed: Maintain a consistent speed while spraying to avoid uneven coverage.
- Work in Sections: Work in small sections at a time, overlapping each section slightly.
- Allow to Dry Between Coats: Allow each coat to dry completely before applying the next coat. This may take 30 minutes to an hour, depending on the paint and weather conditions.
3.4. Troubleshooting Common Issues
Offer solutions to problems that may arise:
- Runs and Drips: If you experience runs or drips, stop spraying immediately and wipe away the excess paint with a clean cloth. Allow the area to dry completely before reapplying a thin coat.
- Sputtering: If the spray paint is sputtering, try shaking the can more vigorously or cleaning the nozzle.
- Uneven Coverage: If you notice uneven coverage, apply another thin coat, focusing on the areas that need more paint.
4. Finishing Touches and Maintenance
Tips on sealing, cleaning, and caring for your newly spray-painted concrete.
4.1. Applying a Sealer (Optional)
- Explain the benefits of using a concrete sealer.
- Recommend appropriate sealers for different applications.
- Provide instructions on how to apply the sealer.
4.2. Cleaning and Maintaining Your Spray-Painted Concrete
- Regularly sweep or vacuum the concrete surface to remove dirt and debris.
- Clean spills immediately with a mild detergent and water.
- Avoid using harsh chemicals or abrasive cleaners.
- Reapply the sealer every few years to maintain the protective coating.
FAQ: Spray Paint Concrete Like a Pro
This FAQ addresses common questions about how to successfully spray paint concrete, ensuring a long-lasting and professional finish.
What type of spray paint is best for concrete?
Acrylic-latex spray paints formulated for masonry are ideal. They adhere well to porous concrete surfaces and provide a durable, weather-resistant finish. Always check the label to ensure the paint is specifically designed for concrete.
How important is surface preparation before spray painting concrete?
Surface preparation is critical. Thoroughly clean the concrete, remove any loose debris, and repair cracks. A clean, sound surface ensures the spray paint concrete adheres properly and prevents premature peeling or chipping.
Can I spray paint concrete that has already been sealed?
It’s generally not recommended to spray paint over an existing sealer unless you know what type of sealer was used. Incompatible paints and sealers can lead to adhesion problems. Lightly sanding the sealed surface may help, but testing a small area first is crucial.
How many coats of spray paint should I apply to concrete?
Two thin, even coats are typically recommended for optimal coverage and durability. Multiple light coats prevent drips and ensure the spray paint concrete bonds effectively with the surface. Allow each coat to dry completely before applying the next.
Alright, you’ve got the know-how to really make your project shine! Go get ’em and **spray paint concrete** with confidence. Can’t wait to see what you create!