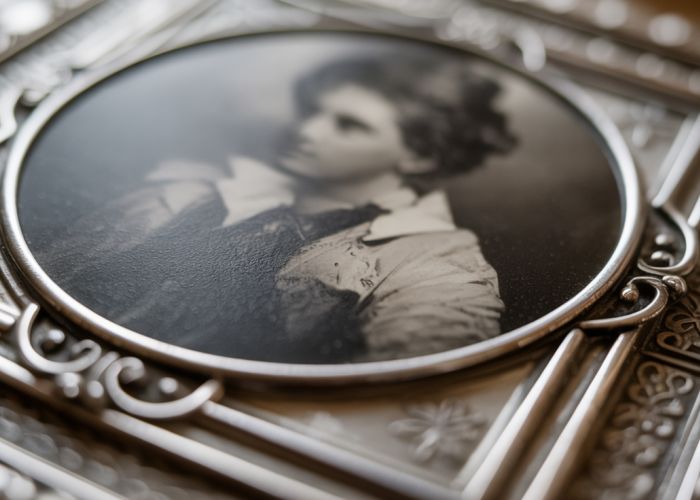
Embark on an enchanting journey into the heart of silver salts photography! Daguerreotypes, the early photographic process, demonstrate the enduring allure of this art form. The magic unfolds as silver halides, light-sensitive compounds, react to create stunning images. Institutions like George Eastman House preserve and celebrate the history of this captivating medium. Many professionals, such as Ansel Adams, mastered its complex techniques. Dive in to discover how you can unleash the power of silver salts photography to capture the world in a whole new light!
Crafting the Perfect Article Layout: Silver Salts Photography – Unleash the Magic! (Guide)
Let’s map out a captivating and informative article layout that will truly engage readers interested in "silver salts photography". The goal is to provide a comprehensive guide, spark enthusiasm, and make the process accessible to everyone.
Understanding the Core: What is Silver Salts Photography?
Before diving into the practical aspects, we need to establish a solid foundation.
- Introduction to the Magic: Start with a hook that captures the allure of silver salts photography. Think along the lines of: "Ever wanted to create images imbued with a timeless quality? Silver salts photography offers a journey into the heart of photographic creation."
- Defining Silver Salts Photography: Clearly explain what it is. Avoid jargon; instead, describe it as a process that uses the light sensitivity of silver salts to capture images on a variety of surfaces.
- Historical Context (Briefly): Briefly touch upon the history, mentioning pioneering figures and early applications. Just a paragraph or two to provide context.
Essential Materials and Equipment
This section details everything needed to embark on this photographic journey.
Core Ingredients
- Silver Nitrate: Briefly describe its role and safety precautions.
- Halides (e.g., Potassium Bromide, Sodium Chloride): Explain how these react with silver nitrate to form light-sensitive silver halides.
- Gelatin or other Binding Agents: Explain their function in suspending and supporting the silver halide crystals.
- Water: Highlight its crucial role in dissolving chemicals and washing the final print.
Darkroom Essentials
- Darkroom: Emphasize the necessity of a completely light-tight space. Offer suggestions for temporary darkroom setups.
- Red Safelight: Explain the importance of using a safelight that doesn’t affect the light-sensitive materials.
- Trays: List the necessary trays for each step of the process (sensitizing, developing, fixing, washing).
- Graduates and Measuring Tools: Highlight the importance of accurate measurements for consistent results.
- Timer: Essential for precise control during development and fixing.
Substrates and Tools
- Paper, Glass, Metal, etc.: Explain the variety of surfaces suitable for coating with silver salts.
- Brushes or Rods: Describe methods for applying the emulsion evenly.
- Contact Printing Frame (Optional): Explain how this can be used for contact printing negatives.
- Enlarger (Optional): Mention its role in creating larger prints from negatives.
The Process: A Step-by-Step Guide
This section forms the heart of the article, providing detailed instructions.
Step 1: Preparing the Silver Halide Emulsion
- Detailed Instructions: Provide a precise recipe for creating a basic silver halide emulsion. Use clear, concise language.
- Safety Precautions: Emphasize the importance of wearing gloves and eye protection. Properly dispose of any chemical waste.
- Troubleshooting: Address common problems encountered during emulsion preparation (e.g., grain size issues, sensitivity problems).
Step 2: Coating the Substrate
- Choosing the Right Technique: Discuss different coating methods (brushing, pouring, dipping).
- Ensuring Even Coverage: Provide tips for achieving a uniform layer of emulsion.
- Drying the Coated Surface: Explain the importance of proper drying and the impact of temperature and humidity.
Step 3: Exposing the Image
- Contact Printing vs. Enlargement: Explain the two primary methods of exposing the coated surface.
- Determining Exposure Time: Offer guidance on calculating the appropriate exposure time based on light source and emulsion sensitivity.
- Using Negatives: Describe how to prepare and position negatives for contact printing or enlargement.
Step 4: Developing the Image
- Developer Solution: Provide a recipe for a suitable developer.
- Development Process: Explain the steps involved in developing the image, including immersion time and agitation.
- Stop Bath: Highlight the importance of using a stop bath to halt the development process.
Step 5: Fixing the Image
- Fixer Solution: Provide a recipe for a suitable fixer.
- Fixing Process: Explain the steps involved in fixing the image, ensuring the silver halides are permanently removed.
- Testing for Fixer Residuals: Explain how to check if the fixing process has been completed correctly.
Step 6: Washing and Drying
- Washing the Print: Explain the importance of thoroughly washing the print to remove all residual chemicals.
- Drying Techniques: Discuss different drying methods (air drying, blotter drying) and their impact on the final print.
- Finishing Touches: Mention potential toning or archival treatments.
Troubleshooting and Tips
This section addresses common issues and provides helpful advice.
- Common Problems: List common problems encountered in silver salts photography (e.g., uneven coating, fogging, stains).
- Solutions and Prevention: Offer practical solutions and preventative measures for each problem.
- Experimentation: Encourage readers to experiment with different materials and techniques to discover their own unique style.
Inspiration and Resources
This section provides further avenues for exploration.
- Showcasing Exemplary Work: Include images of stunning silver salts photographs to inspire readers. Cite the artists if possible.
- Books and Websites: Recommend reputable books and online resources for further learning.
- Workshops and Communities: List any workshops or online communities dedicated to silver salts photography.
Safety First!
- Chemical Handling: Reiterate the importance of safe chemical handling practices.
- Ventilation: Emphasize the need for adequate ventilation when working with chemicals.
- Disposal: Provide guidelines for safely disposing of chemical waste.
This structured layout will guide readers through the fascinating world of silver salts photography, equipping them with the knowledge and inspiration to unleash their own creative magic!
FAQs: Silver Salts Photography
Got questions about silver salts photography? Here are some common ones:
What are the main advantages of using silver salts in photography?
Silver salts are incredibly light-sensitive, which allows for relatively short exposure times. This sensitivity makes them ideal for capturing details quickly. Furthermore, they produce images with excellent tonal range and archival stability when properly processed.
Can I do silver salts photography at home?
Yes, but it requires specialized equipment and chemicals. You’ll need a darkroom, specific safety gear, and a solid understanding of the chemical processes involved. While DIY silver salts photography is possible, it’s not recommended for complete beginners.
What types of film are considered silver salts photography?
Essentially, all traditional black and white and color negative films rely on silver salts. The light-sensitive layer of the film contains silver halide crystals. After exposure and development, these crystals form the image you see.
Is silver salts photography environmentally friendly?
The chemicals used in silver salts photography can pose environmental risks if not handled properly. Responsible disposal of chemicals and careful consideration of waste reduction are essential to minimize environmental impact. Many resources are available to help photographers practice more eco-friendly darkroom methods.
So, ready to create some magic with silver salts photography? Go forth and experiment, have fun, and see what amazing images you can conjure up!