Experiencing pain along your shinbone? Shin splints, a common ailment among athletes and runners, can significantly hinder your performance. Effective shin splint taping techniques, such as those utilizing kinesiology tape, offer a promising solution. Understanding the biomechanics involved in activities, where shin splints frequently occur, and the proper application of shin splint taping is key. Moreover, consulting with a physical therapist who specializes in sports injuries can provide personalized guidance for optimal recovery and preventing the recurrence of shin splints and ensure you master shin splint taping.
Shin Splint Taping: Your Must-See Guide to Relief & Prevention
Experiencing shin splints? You’re not alone! This guide will walk you through the effective technique of shin splint taping to help ease pain and prevent future flare-ups. We’ll cover everything from understanding shin splints to mastering the taping process. Let’s get started!
Understanding Shin Splints
Shin splints, medically known as medial tibial stress syndrome (MTSS), cause pain along the shinbone (tibia). It’s often caused by repetitive stress on the bone and connective tissues.
What Causes Shin Splints?
Common culprits include:
- Increased Activity: Suddenly increasing running distance or intensity.
- Improper Footwear: Worn-out or unsupportive shoes.
- Flat Feet or Overpronation: Excessive inward rolling of the foot.
- Hard Surfaces: Running on concrete or other hard surfaces.
- Weak Muscles: Weak calf muscles or core muscles.
Recognizing the Symptoms
Shin splint pain typically:
- Develops gradually along the inside of the shinbone.
- Is worse after exercise.
- May improve with rest.
- Can be tender to the touch.
Why Shin Splint Taping Works
Shin splint taping provides support to the muscles and tissues surrounding the shinbone. It can help:
- Reduce stress on the tibia.
- Alleviate pain.
- Improve muscle function.
- Support the arch of the foot (if needed).
Preparing for Taping
Proper preparation is crucial for effective taping.
Gathering Your Supplies
You’ll need:
- Athletic Tape: Rigid, non-stretch tape is best. Aim for 1.5-inch width.
- Pre-Wrap (Optional): To protect the skin from irritation, especially if you have sensitive skin.
- Scissors: For cutting the tape.
- Rubbing Alcohol & Cotton Pad: To clean the skin.
Skin Preparation
- Clean the Area: Use rubbing alcohol and a cotton pad to clean the skin along the shinbone. This removes oils and dirt, allowing the tape to adhere better.
- Shave (If Needed): If you have a lot of hair on your lower leg, shaving the area can improve tape adhesion and reduce discomfort upon removal.
- Apply Pre-Wrap (Optional): If using pre-wrap, apply it smoothly from just above the ankle to just below the knee. Avoid creases and wrinkles.
The Shin Splint Taping Technique: Step-by-Step
This technique is designed to provide support and reduce stress on the shinbone.
-
Anchor Strip:
- Start by applying an anchor strip of athletic tape around the calf, just below the knee. Don’t pull too tight – it should be snug, but comfortable. Overlap the ends slightly.
-
Foot Position:
- Slightly flex your foot upward (dorsiflexion). This helps stretch the muscles and tendons in your lower leg.
-
First Support Strip:
- Start at the inside of your foot, near the arch.
- Apply the tape upwards along the inside of your shinbone, overlapping the previous layer by approximately half the width of the tape.
- Continue taping up the shinbone, applying slight tension as you go.
- End at the anchor strip below the knee.
-
Second and Subsequent Support Strips:
- Repeat step 3, applying additional strips of tape alongside the first strip.
- Each strip should overlap the previous one by about half the width of the tape.
- Continue until you’ve covered the area where you feel the most pain. Typically, 3-5 strips are sufficient.
-
Closing Strip:
- Apply another anchor strip of tape over the ends of the support strips, below the knee, similar to the first anchor strip. This secures the support strips in place.
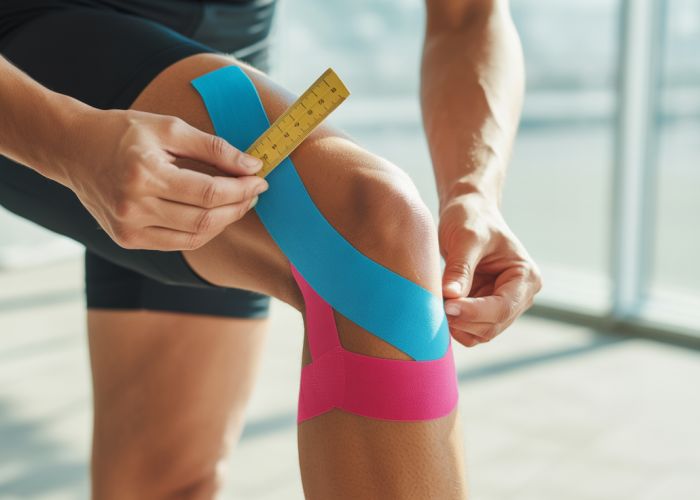
Visual Representation
While we can’t include an actual image, imagine a table showing the taping pattern with arrows indicating the direction of the tape application. It would visually clarify the steps above.
Tips for Effective Taping
- Tension is Key: Apply slight tension (but not too much) to the support strips. This provides support and helps lift the tissues.
- Smooth Application: Avoid creases and wrinkles in the tape, as these can cause irritation.
- Listen to Your Body: If the tape feels too tight or restricts circulation, remove it immediately and reapply with less tension.
Post-Taping Care & Considerations
How Long Should You Wear the Tape?
- Typically, you can wear the tape for 1-3 days, depending on your activity level and skin sensitivity.
- Remove the tape if you experience any skin irritation, numbness, or tingling.
Removing the Tape Safely
- Slow and Steady: Gently peel the tape off, moving slowly to avoid pulling the skin.
- Oil-Based Remover: Consider using an oil-based adhesive remover to help dissolve the adhesive and minimize discomfort.
When to Seek Professional Help
- If your shin splint pain persists or worsens despite taping and other conservative treatments, consult a doctor or physical therapist. They can assess your condition and recommend appropriate treatment options.
- If you experience numbness, tingling, or significant swelling in your lower leg, seek immediate medical attention. This could indicate a more serious condition.
Preventing Future Shin Splints
Taping can provide temporary relief, but preventing shin splints is crucial for long-term comfort.
Key Prevention Strategies
- Gradual Progression: Increase your activity level gradually to avoid overloading your lower legs.
- Proper Footwear: Wear supportive shoes that fit well and are appropriate for your activity. Replace your shoes regularly.
- Strengthening Exercises: Strengthen your calf muscles, core muscles, and foot muscles.
- Stretching: Regularly stretch your calf muscles and Achilles tendon.
- Orthotics (If Needed): If you have flat feet or overpronation, consider using orthotics to support your arches.
- Vary Training Surfaces: Avoid running exclusively on hard surfaces. Mix in softer surfaces like trails or grass.
Shin Splint Taping: Frequently Asked Questions
Here are some common questions about shin splint taping to help you understand how it works and if it’s right for you.
What exactly does shin splint taping do?
Shin splint taping provides support to the muscles and tendons surrounding the shinbone. It helps to reduce the stress and impact on the area, alleviating pain and promoting healing. The tape can also improve proprioception, helping you be more aware of your body’s position.
Is shin splint taping a permanent solution?
No, shin splint taping is a temporary measure. It provides support and relief while you address the underlying causes of your shin splints, such as improper footwear, overtraining, or muscle imbalances. Consistent rest, stretching, and strengthening exercises are crucial for a long-term solution.
How long should I wear the shin splint tape?
Generally, shin splint tape can be worn for up to 2-3 days, depending on your activity level and skin sensitivity. Remove the tape if you experience any irritation, itching, or blistering. Ensure your skin is clean and dry before reapplying fresh tape.
Can I do shin splint taping myself, or do I need a professional?
While you can learn to apply shin splint tape yourself, it’s best to consult with a physical therapist or athletic trainer for proper technique. They can assess your specific condition and teach you the most effective taping method for your needs. Incorrect shin splint taping can be ineffective or even cause further discomfort.
Alright, that wraps it up for our deep dive into shin splint taping! Hope this helped you understand how to tackle those pesky shin splints. Give these techniques a try, and remember, always listen to your body. Happy taping!