Understanding the structure of SF2 soundfonts is essential for anyone serious about digital audio creation. Vienna Symphonic Library (VSL), known for its meticulously sampled instruments, demonstrates the high bar for sound quality achievable using this format. The SF2 file format itself, originally developed by E-mu Systems, organizes musical data into hierarchical containers called chunks, which are defined by RIFF (Resource Interchange File Format) specifications. By grasping these core elements, developers can unlock the full potential of programs like Polyphone, a free SF2 editor, and deeply influence sonic characteristics through detailed manipulation of the soundfont’s inner structure of sf2.
Unlocking the Secrets of SF2 Soundfonts
SoundFonts, specifically those adhering to the SF2 format, represent a powerful and enduring technology in the world of music production.
Despite the rise of more sophisticated sampling techniques and virtual instruments, SoundFonts maintain a significant presence, offering a unique blend of simplicity, portability, and customizability.
This section serves as an introduction to the world of SF2 SoundFonts, exploring their function and underlining the advantages of understanding their internal structure.
What are SoundFonts? A Definition
At their core, SoundFonts are sample-based synthesizers encapsulated within a single file.
Unlike purely synthesized sounds, SoundFonts rely on recordings of real instruments or other audio sources as their building blocks.
These recordings, known as samples, are then processed and manipulated to create a wide array of sounds.
The SF2 format, in particular, provides a standardized way to store these samples along with instructions on how to play them back, including parameters like pitch, volume, and filtering.
This makes SoundFonts incredibly versatile.
The Enduring Role in Music Production
SoundFonts have played a crucial role in democratizing music creation, particularly in the early days of computer-based music production.
They offered a relatively affordable and accessible way to obtain a diverse library of sounds, ranging from orchestral instruments to electronic textures.
Even today, SoundFonts remain relevant for several reasons.
Their small file size makes them ideal for mobile music production and situations where storage space is limited.
Their simplicity allows for straightforward editing and customization, and a vast library of free and commercial SoundFonts are readily available, catering to diverse musical genres and styles.
Why Understand the SF2 Structure?
While using SoundFonts is relatively straightforward, a deeper understanding of the SF2 file structure unlocks a wealth of possibilities for sound designers, musicians, and anyone interested in pushing the boundaries of sonic creation.
There are distinct benefits to understanding the structure:
-
Customization: Dive into the inner workings of a SoundFont, and you can modify existing sounds to your exact specifications. Adjust parameters, swap samples, and create entirely new instruments from existing material.
-
Sound Design: By understanding how samples are organized and processed within an SF2 file, you gain the ability to design your own unique sounds from scratch. Craft custom instruments tailored to your specific musical needs.
-
Troubleshooting: Encountering problems with a SoundFont? Knowing the SF2 structure allows you to diagnose and fix issues, ensuring optimal performance and sound quality. This could include fixing looping issues or correcting sample assignments.
-
Optimization: A deep understanding of the SF2 structure can help you create more efficient and streamlined SoundFonts, optimizing them for performance and reducing file size.
Scope of This Guide: A Comprehensive Exploration
This guide aims to provide a comprehensive exploration of the SF2 file format.
We will delve into the technical details of its structure, explaining how samples are stored, how instruments and presets are defined, and how parameters are used to shape the final sound.
Whether you are a seasoned sound designer or a curious musician, this guide will equip you with the knowledge and skills needed to master the art of SF2 SoundFont creation and manipulation.
SoundFonts, with their readily available sample libraries and customizable nature, open a world of possibilities for both amateur and professional music producers. To truly harness the power of SF2 SoundFonts, one must first understand the architecture upon which they are built.
The Foundation: RIFF and the SF2 File Format
The SF2 file format, the backbone of SoundFonts, doesn’t exist in a vacuum. It stands firmly on the shoulders of another, more fundamental format: the Resource Interchange File Format (RIFF). Understanding RIFF is crucial to grasping how SF2 files are structured and, consequently, how to manipulate them effectively.
RIFF: The Underlying Framework
RIFF, short for Resource Interchange File Format, is a versatile container format developed by Microsoft and IBM.
Its primary purpose is to provide a standardized way to store various types of multimedia data, such as audio, video, and MIDI, within a single file.
Think of RIFF as a universal packaging system.
Instead of rigidly defining the contents of a file, RIFF provides a flexible structure that allows different types of data to be organized and accessed.
This flexibility is achieved through the use of "chunks," the fundamental building blocks of any RIFF file, including SF2 SoundFonts.
Chunks: The Building Blocks of RIFF Files
At its core, a RIFF file is a hierarchical arrangement of chunks.
Each chunk is a self-contained unit of data, identified by a unique four-character code (Chunk ID) and accompanied by a size indicator specifying the amount of data it contains.
This structure allows programs to parse the file and extract specific pieces of information without needing to understand the entire file format.
The key benefit is the ability to skip over chunks that are not relevant to the current application.
Nested Chunks in SF2 Files
SF2 files leverage the RIFF format’s ability to nest chunks within other chunks.
This nesting creates a tree-like structure, where the main RIFF chunk acts as the root, and subsequent chunks branch out, each containing specific categories of data.
This organization is essential for managing the complex information stored within a SoundFont, such as sample data, instrument definitions, and preset parameters.
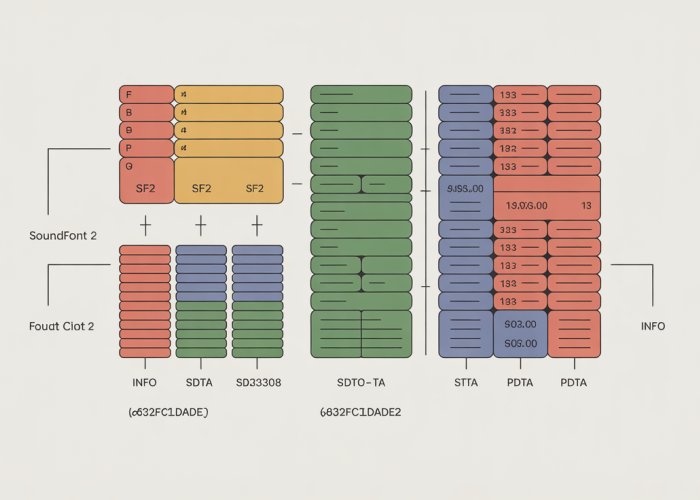
Key Chunks in SF2 Files: INFO, sdta, and pdta
While an SF2 file can contain various types of chunks, three are absolutely essential for proper function:
-
INFO: This chunk stores metadata about the SoundFont, such as the author, copyright information, and version number. It’s like the label on the package, providing identifying details.
-
sdta (Sample Data): This chunk contains the raw audio data, the actual sound samples that the SoundFont will use. This is the heart of the instrument, the raw material from which sounds are crafted.
-
pdta (Preset Data): This chunk defines the instruments and presets that use the samples stored in the
sdtachunk. It holds all the parameters that determine how the samples are played, modulated, and processed. This is the instruction manual for how to use the raw sound materials.
Understanding these core chunks is the first step toward unlocking the secrets of SF2 SoundFonts. We will delve into each of these chunks in detail in the coming sections.
RIFF provides the skeletal structure, but the real magic of SoundFonts lies within the data housed inside its chunks. The SF2 format carves out specific chunks for different purposes, and it’s the interaction of these core components that ultimately defines the sonic capabilities of a SoundFont.
Dissecting the Chunks: The Core Components of an SF2 File
At the heart of every SF2 file lie three crucial chunks: the INFO chunk, which contains metadata; the sdta chunk, housing the raw audio samples; and the pdta chunk, which defines the instruments and presets. These chunks work in concert to bring a SoundFont to life, each playing a distinct and vital role. Understanding their individual functions and how they relate to one another is key to mastering the SF2 format.
INFO Chunk: Metadata and Identification
The INFO chunk serves as the identity card of the SoundFont. It’s where descriptive and copyright information is stored. Think of it as the "about" section of a SoundFont, providing valuable context and provenance.
Content of the INFO Chunk
Inside the INFO chunk, you’ll typically find various text strings providing details about the SoundFont.
This includes the author’s name, the SoundFont’s version number, and any relevant copyright notices.
Other common pieces of information include a description of the SoundFont’s intended use and creation date.
This information is crucial for proper attribution and usage rights management. It also enables users to easily identify and organize their SoundFont libraries.
sdta Chunk (Sample Data Chunk): The Audio Heart of the SoundFont
The sdta chunk is arguably the most vital, as it contains the raw audio data that forms the foundation of the SoundFont’s sounds. Without the sdta chunk, a SoundFont would be nothing more than an empty shell.
Sample Data Format
The audio data within the sdta chunk is typically stored in 16-bit PCM (Pulse Code Modulation) format, which is a standard for digital audio representation. This format specifies how audio waveforms are digitally encoded.
The sample rate, measured in Hertz (Hz), determines the number of audio samples taken per second. Common sample rates for SoundFonts include 44.1 kHz (CD quality) and 48 kHz.
The sdta chunk also specifies whether the audio is mono (single channel) or stereo (two channels). This impacts the perceived spatial width of the sound.
Loop Points and Sustained Sounds
A crucial aspect of the sdta chunk is the inclusion of loop points. Loop points are markers within the audio sample that define a section of the audio to be looped seamlessly.
This is vital for creating sustained sounds (e.g., held notes on a synthesizer). Without looping, the sound would abruptly cut off after the initial sample playback.
By carefully setting loop points, sound designers can create the illusion of a continuous sound, even though the underlying audio sample is finite. This dramatically enhances the playability and expressiveness of SoundFonts.
pdta Chunk (Preset Data Chunk): Defining Instruments and Presets
The pdta chunk is where the magic truly happens. It’s the blueprint that defines the instruments and presets that constitute a SoundFont’s sonic palette. This chunk contains a complex structure of interconnected tables that dictate how the raw audio samples are processed and manipulated to create the final sound.
The Complex Structure of the pdta Chunk
The pdta chunk is organized into a series of tables, each serving a specific purpose in defining the characteristics of presets and instruments. Here’s a breakdown of the key tables:
-
PHDR (Preset Header): Contains overall information about each preset, such as its name, MIDI bank, and MIDI program number. The preset header acts as the entry point for accessing all the parameters associated with a specific preset.
-
PBAG (Preset Bag): Defines groupings of modulators and generators for presets. It essentially organizes how modulation and sound generation are applied to a preset.
-
PMOD (Preset Modulator): Specifies modulation parameters for presets. Modulation refers to the dynamic alteration of sound characteristics over time, such as vibrato or tremolo.
-
PGEN (Preset Generator): Contains generators that define the core sound of a preset. These generators control parameters like volume, pan, pitch, and filtering. These generators are the building blocks of the sound.
-
IHDR (Instrument Header): Similar to the PHDR, but for instruments. It contains overall information about each instrument, providing a starting point for accessing its parameters.
-
IBAG (Instrument Bag): Defines groupings of modulators and generators for instruments, organizing how they are applied to shape the instrument’s sound.
-
IMOD (Instrument Modulator): Specifies modulation parameters for instruments, allowing for dynamic changes in the instrument’s sound over time.
-
IGEN (Instrument Generator): Contains generators that define the core sound of an instrument, controlling parameters like volume, pan, pitch, and filtering. These generators are fundamental to shaping the instrument’s sonic character.
-
SHDR (Sample Header): Contains information about the samples used by the instruments, such as the sample’s name, loop points, and sample rate. This table links the instrument definitions to the actual audio data stored in the sdta chunk.
The intricate relationships between these tables within the pdta chunk are what give SoundFonts their power and flexibility. By carefully manipulating these parameters, sound designers can create a vast array of sounds from a relatively small set of audio samples.
Dissecting the INFO chunk, sdta chunk, and pdta chunk gives us a view of the SoundFont’s individual components. But to truly grasp how these elements come together to produce sound, we must understand the hierarchical relationship between them. This section delves into how presets, instruments, and samples interact to bring an SF2 file to life.
Presets, Instruments, and Samples: The SoundFont Hierarchy
SoundFonts aren’t just collections of audio files. They are carefully constructed ecosystems where presets, instruments, and samples work in harmony. Understanding this hierarchy is crucial for anyone looking to tweak, customize, or create their own SoundFonts.
The Hierarchical Structure Explained
The relationship between presets, instruments, and samples can be visualized as a pyramid:
- Presets: Residing at the top, presets are what users directly select and play.
- Instruments: Beneath presets lie instruments, which define how the samples are played.
- Samples: At the base, samples are the raw audio recordings that form the building blocks of sound.
Think of it this way: the preset is the finished song, the instrument is the musician, and the sample is the individual note they play.
Presets: The User Interface
Presets are the gateway to the SoundFont.
They are the named entities that appear in your music software, representing a specific sound, such as "Grand Piano," "String Section," or "Synth Pad."
Presets combine one or more instruments and determine which instruments are triggered based on incoming MIDI data.
They also manage the overall sonic characteristics of the sound, applying effects and adjusting volume and pan.
Instruments: Shaping the Sound
Instruments define how the samples are played.
They act as intermediaries between the raw audio data and the MIDI input, applying various transformations to shape the sound.
Instruments control parameters such as pitch, volume, filtering, and envelope characteristics.
This allows a single sample to be used in multiple instruments, each with a unique sonic personality.
For example, the same acoustic drum kick sample could be used to create a booming 808 or a punchy electronic kick.
Samples: The Raw Material
Samples are the fundamental audio recordings.
They represent the basic sound events that comprise the SoundFont’s sonic palette.
These can be recordings of acoustic instruments, synthesized waveforms, or any other type of audio.
Samples are stored in the sdta chunk and are referenced by instruments, forming the basis of the sound.
MIDI’s Role: Triggering and Controlling Sounds
MIDI (Musical Instrument Digital Interface) is the language that allows your keyboard, sequencer, or other MIDI controller to communicate with the SoundFont.
MIDI data is used to trigger specific presets within the SoundFont.
Key presses, velocity, and other MIDI controllers are interpreted by the SoundFont engine.
These parameters control which samples are played, and how instruments are manipulated, shaping the final sound that you hear.
For example, the velocity of a key press might control the volume of the sample, while a modulation wheel might control the filter cutoff frequency.
Synthesis Parameters: Fine-Tuning the Sound
The generators and modulators within the pdta chunk provide the means to precisely sculpt the sound.
These parameters, accessible through SoundFont editors, allow for detailed control over the sound’s characteristics.
Generators control static parameters, like volume, pan, and pitch.
Modulators, on the other hand, allow for dynamic control, changing these parameters over time in response to MIDI input or other factors.
Together, generators and modulators unlock a wide range of sonic possibilities, enabling you to create nuanced and expressive sounds.
Dissecting the INFO chunk, sdta chunk, and pdta chunk gives us a view of the SoundFont’s individual components. But to truly grasp how these elements come together to produce sound, we must understand the hierarchical relationship between them. This section delves into how presets, instruments, and samples interact to bring an SF2 file to life.
Understanding Voice Architecture and Parameters
The journey into the heart of the SoundFont (.SF2) format now brings us to the individual voice architecture, where the sonic DNA of each sound resides. Here, we’ll explore how the crucial parameters shape the final sound we hear. Think of it as understanding the individual brushstrokes that make up a masterpiece painting.
Each "voice" within a SoundFont is a self-contained synthesis unit. It dictates the behavior of a single note when triggered. It includes parameters that control its amplitude over time, its timbral qualities, and its response to various modulations. Understanding voice architecture allows one to fine-tune sounds, creating subtle nuances or dramatic transformations.
The Concept of a "Voice" in SF2
Within the SF2 context, a "voice" is not just an abstract idea. It represents the complete signal processing chain for a single note. When a MIDI note is received, a voice is activated, bringing the associated sample to life.
This voice applies all the defined parameters – envelopes, filters, and modulations – to the underlying sample. In essence, the voice defines how the sample is played and manipulated.
Key Voice Parameters and Their Sonic Impact
Several key parameters define the character and behavior of each voice within a SoundFont. Each parameter contributes to the overall sound in unique ways. The sections below explore the most vital of these:
Envelopes (ADSR): Shaping the Sound’s Contour
Envelopes, specifically ADSR (Attack, Decay, Sustain, Release) envelopes, are fundamental in shaping a sound’s amplitude over time. They dictate how the volume of a sound changes from the moment it’s triggered until it fades away.
-
Attack determines how quickly the sound reaches its peak volume. A fast attack creates a sharp, percussive sound. A slow attack results in a gradual, swelling sound.
-
Decay controls how long it takes for the sound to drop from its peak level to the sustain level.
-
Sustain defines the volume level held while the key is pressed. A high sustain creates a constant, sustained sound, while a low sustain results in a sound that quickly fades.
-
Release determines how long it takes for the sound to fade away after the key is released.
By carefully adjusting these four parameters, one can sculpt a sound’s volume contour, creating everything from short, snappy percussions to long, evolving pads.
LFO (Low-Frequency Oscillator): Adding Movement and Texture
Low-Frequency Oscillators (LFOs) introduce movement and variation into a sound. These oscillators generate signals at sub-audio frequencies. This means their effect isn’t directly heard as a pitch, but rather as a modulation of other parameters.
LFOs can be used to modulate various aspects of the sound, including:
- Pitch: Creating vibrato or warbling effects.
- Volume: Producing tremolo or pulsating sounds.
- Filter Cutoff: Sweeping the filter frequency for dynamic timbral changes.
The LFO’s rate and depth (amount of modulation) significantly affect the resulting sound. A slow rate creates subtle, gradual changes, while a faster rate produces more dramatic, rhythmic effects.
Filtering: Sculpting the Sound’s Timbre
Filters are essential tools for shaping a sound’s timbre by selectively attenuating certain frequencies. The most common type is a low-pass filter. Low-pass filters allow frequencies below a certain cutoff point to pass through while attenuating frequencies above it.
By adjusting the cutoff frequency, the brightness or dullness of a sound can be altered. Filters are essential for removing unwanted frequencies, creating smooth transitions, or generating resonant sweeps.
Other filter types, such as high-pass, band-pass, and notch filters, offer even greater control over the frequency spectrum.
Modulation: The Key to Dynamic Expression
Beyond LFOs, the overall modulation capabilities within a voice architecture define the extent to which a sound can be dynamically altered. Modulation refers to the process of using one signal to control or modify another.
In SoundFonts, this could involve using velocity (how hard a key is pressed) to control volume or filter cutoff. It could also involve using aftertouch (pressure applied to a key after it’s pressed) to add vibrato or other effects. The possibilities are vast.
By understanding and manipulating these modulation parameters, sound designers can create incredibly expressive and responsive instruments that react dynamically to a performer’s input.
SF2 Soundfonts: Frequently Asked Questions
Here are some common questions readers have about the structure of SF2 soundfonts after reading our definitive guide. We hope these FAQs help clarify any remaining points.
What exactly is an SF2 Soundfont file?
An SF2 Soundfont is a sample-based instrument file format. It contains digital audio samples and instructions on how to play them back, effectively recreating musical instruments or sounds. Understanding the structure of SF2 is key to working with them.
What are the key components within the structure of SF2?
The main components include the INFO list (containing file metadata), the SDATA list (housing the audio samples), and the PDTA list. The PDTA list is particularly important, as it defines the instruments, presets, and layers that make up the playable sound.
Why is understanding the structure of SF2 important?
Understanding the internal structure of SF2 soundfonts allows you to edit, customize, and even create your own soundfonts from scratch. You can fine-tune instruments, adjust samples, and optimize the overall sound.
Can I open and view the structure of SF2 files directly?
While you can’t directly "open" an SF2 file like a document, specialized soundfont editors and tools let you inspect its internal structure. These tools can display the lists, samples, and instruments within the SF2 file, enabling you to modify the sound.
So there you have it – a deep dive into the structure of SF2 soundfonts! Hopefully, this has demystified things and you’re feeling empowered to tweak and experiment. Happy creating!