LTspice, a powerful simulation tool from Analog Devices, empowers engineers to design and analyze electronic circuits efficiently. Understanding fundamental techniques, like how to rotate component LTspice, is crucial for optimal schematic creation. Proper component orientation not only enhances readability but also streamlines the simulation process, contributing to accurate results. Effective use of LTspice, along with a strong foundation in electrical engineering principles, directly translates to improved circuit design outcomes.
In the intricate world of circuit design, clarity and efficiency are paramount. The orientation of components within your schematic diagrams plays a surprisingly crucial role in achieving both. Using tools like LTspice for simulation adds another layer to the importance of precise component placement.
Think of a circuit schematic as a visual language. Misaligned or poorly oriented components create visual clutter, making it difficult to understand the circuit’s functionality at a glance. This can lead to wasted time, increased error rates, and a less professional presentation of your work.
The Significance of Proper Component Orientation
Why does proper component orientation truly matter? It’s more than just aesthetics; it’s about optimizing the entire circuit design process.
-
Enhanced Readability: Well-oriented components allow for a clear signal flow. The logical arrangement makes it easier to understand the circuit’s operation and debug any issues.
-
Reduced Errors: When components are logically placed, it becomes easier to trace connections and identify potential errors. This is especially critical in complex circuits where mistakes can be easily overlooked.
-
Improved Collaboration: Clear, well-organized schematics facilitate collaboration among engineers. Others can quickly understand your design, leading to more efficient teamwork and knowledge sharing.
LTspice: A Powerful Tool from Analog Devices
LTspice, a high-performance SPICE simulation software, is a powerful tool for circuit designers. Provided free of charge by Analog Devices, it offers a comprehensive suite of features for simulating and analyzing electronic circuits.
Its intuitive interface and robust simulation capabilities have made it a favorite among hobbyists and professionals alike.
However, even with the best simulation software, the effectiveness of your design process relies on creating clear and understandable schematics.
Purpose of This Guide
This guide is designed to equip you with the knowledge and skills necessary to master component rotation within LTspice.
We’ll explore various techniques, from the fundamental "Control + R" shortcut to advanced methods for precise placement.
By the end of this guide, you’ll be able to create visually appealing, easy-to-understand schematics that streamline your design process and enhance your overall LTspice experience.
In the intricate world of circuit design, clarity and efficiency are paramount. The orientation of components within your schematic diagrams plays a surprisingly crucial role in achieving both. Using tools like LTspice for simulation adds another layer to the importance of precise component placement.
Think of a circuit schematic as a visual language. Misaligned or poorly oriented components create visual clutter, making it difficult to understand the circuit’s functionality at a glance. This can lead to wasted time, increased error rates, and a less professional presentation of your work.
Why Proper Component Rotation Matters in LTspice
But why spend precious time meticulously rotating components within LTspice? The benefits extend far beyond mere aesthetics. Correct component orientation is an integral part of creating schematics that are easy to understand, efficient to work with, and present a professional image. The advantages gained ripple through the entire design process, from initial concept to final simulation.
Improved Schematic Readability
A well-organized schematic, achieved in part through proper component rotation, is significantly easier to read and understand. Consider the flow of signals through your circuit. When components are oriented to align with this flow, the circuit’s operation becomes immediately apparent.
Visual cues, such as components facing the direction of signal travel, guide the eye and reduce cognitive load. This enhanced readability is crucial for quickly grasping the circuit’s functionality and identifying potential problems. A jumbled mess of components, on the other hand, forces the reader to spend extra time deciphering the connections and overall purpose of the circuit.
Efficient Circuit Design
Time is a valuable resource in any engineering project. Properly oriented components contribute to a more efficient design process in several ways. Clear schematics make it easier to trace connections, minimizing the risk of errors during layout and simulation. Mistakes are costly, in terms of time and resources.
When debugging a circuit, a well-organized schematic allows you to quickly locate and isolate the source of the problem. The time saved on debugging directly translates to faster design cycles and improved productivity.
Professional Presentation
The visual appearance of your schematics reflects your professionalism and attention to detail. A clean, well-organized schematic inspires confidence and demonstrates a commitment to quality.
This is particularly important when sharing your designs with colleagues, clients, or potential employers. A professional-looking schematic makes a positive impression and enhances your credibility. In academic settings, clear and aesthetically pleasing schematics can also contribute to higher grades and a better overall evaluation of your work. Do not underestimate the power of visual appeal in technical communication.
Schematic Editor Optimization
LTspice’s Schematic Editor is a powerful tool, but its true potential is unlocked when combined with thoughtful component placement and rotation. Consider how thoughtful component rotation influences wire routing. When components are properly oriented, wires can be connected with clean, direct lines, minimizing crossings and clutter. This improves the overall clarity of the schematic and makes it easier to modify and update the design.
By optimizing your use of the Schematic Editor through strategic component rotation, you can streamline your workflow and maximize your productivity. This allows you to focus on the core design challenges rather than struggling with a poorly organized schematic. In short, mastering component rotation is a key step toward becoming a more proficient and effective LTspice user.
In the pursuit of crafting clear and efficient circuit schematics, the ability to manipulate component orientation becomes more than just a cosmetic concern. It’s about optimizing the flow of information and minimizing cognitive load. In LTspice, while alternative rotation methods exist, mastering the "Control + R" shortcut is your key to efficient and precise component manipulation.
The Core Technique: Rotating Components with Control + R
The cornerstone of efficient component rotation in LTspice lies in a simple yet powerful keyboard shortcut: Control + R.
It’s a command that, once ingrained in your muscle memory, will dramatically accelerate your workflow.
Think of it as the digital equivalent of a draftsman’s rotating protractor, always at your fingertips and ready for immediate use.
The Power of Keyboard Shortcuts
Keyboard shortcuts are the unsung heroes of any software interface, and LTspice is no exception. They allow you to bypass cumbersome menu navigation and execute commands with lightning speed.
By minimizing mouse movement and clicks, shortcuts like Control + R contribute to a more fluid and intuitive design experience.
Mastering these shortcuts is paramount to becoming a proficient LTspice user.
They are a crucial ingredient for staying focused and maintaining a steady pace in your design workflow.
Control + R: Your Rotation Command
The Control + R shortcut in LTspice is specifically assigned to the rotation function.
Each time you press Control + R while a component is selected, that component will rotate 90 degrees counter-clockwise around its center point.
This allows for precise alignment with connecting wires or other components.
It is essential for creating visually coherent and logically structured schematics.
The "Control + R" function is your most efficient way to rotate selected components.
The keyboard in this shortcut plays a role in facilitating efficient and precise design.
Step-by-Step Instructions
Here’s a breakdown of how to effectively use the Control + R shortcut in LTspice:
- Select the component: Using your mouse, click on the component you wish to rotate. The component should now be highlighted.
-
Press "Control + R": Press and hold the "Control" key on your keyboard.
Then, while holding "Control," press the "R" key.
- Observe the rotation: The selected component will rotate 90 degrees counter-clockwise.
- Repeat as needed: Continue pressing Control + R until the component is oriented as desired.
- Placement: Once the component is oriented correctly, place the component on the canvas.
Remember to select the component first before using the Control + R function.
Visual Aid
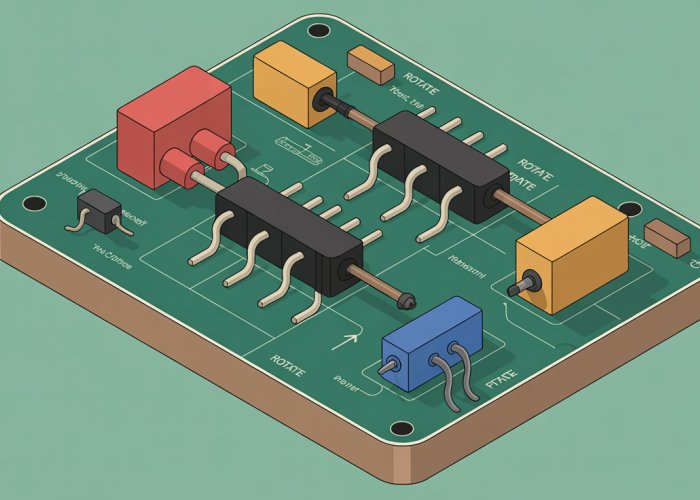
[Include a screenshot or GIF here showing a component being selected and then rotated using the Control + R shortcut. The visual aid should clearly demonstrate the rotation occurring with each press of the shortcut.]
A visual demonstration of the shortcut in action will further solidify your understanding of this core technique.
The Control + R shortcut provides an intuitive and fast means to rotate components while building schematics. However, LTspice, in its commitment to user accessibility and diverse workflows, provides alternative avenues for achieving the same result. These methods, while perhaps less efficient than the keyboard shortcut, offer flexibility and cater to users who prefer mouse-driven interactions or those who are still learning the software’s intricacies.
Alternative Rotation Methods Within the Schematic Editor
While the "Control + R" shortcut reigns supreme for its speed and efficiency, LTspice offers alternative methods for rotating components through the schematic editor’s menus and context menus. These methods, although often less direct, can be valuable for users who are still getting acquainted with the software or who prefer a more visual approach.
Rotating Through the Edit Menu
LTspice provides a menu option for rotating components, though its location and specific nomenclature might vary slightly depending on the version. Typically found under the "Edit" menu, users can look for options like "Rotate," "Rotate Clockwise," or similar phrasing.
Selecting this menu item after selecting a component will perform the rotation, mirroring the action of the "Control + R" shortcut.
Keep in mind that navigating through menus requires more steps than using a keyboard shortcut, making it a less efficient option for frequent rotations. However, it serves as a discoverable and accessible alternative, especially for new users.
Context Menu Options
The context menu, accessed by right-clicking on a selected component, often contains a "Rotate" option. This provides a convenient way to access the rotation function directly from the component itself.
Right-clicking on the component brings up a menu, and within that menu, you should find a "Rotate" option.
Similar to the Edit menu option, selecting "Rotate" from the context menu will rotate the selected component 90 degrees counter-clockwise. The availability and specific wording of this option might vary between LTspice versions, but the principle remains the same: a right-click provides quick access to component-specific actions, including rotation.
While these menu-based methods offer viable alternatives to the "Control + R" shortcut, their reliance on mouse navigation makes them less efficient for users aiming for a streamlined workflow. However, they serve as valuable options for those who prefer a visual interface or are still developing their muscle memory for keyboard shortcuts.
Context menus offer a visually driven alternative, particularly helpful when initially learning LTspice. However, beyond mere aesthetics and ease of use, proper component orientation holds significant implications for simulation accuracy. The direction in which you place a component can drastically affect how LTspice interprets the circuit, potentially leading to inaccurate results or even simulation failures.
Understanding Component Orientation and Its Impact on Simulation
Component orientation in LTspice is more than just a matter of visual preference; it’s a critical factor in ensuring accurate circuit simulation. The correct placement of components, especially those with polarity or specific pin configurations, directly affects how the simulator interprets the circuit’s behavior. Ignoring this aspect can lead to erroneous results, wasted time, and a frustrating simulation experience.
Orientation Matters: Polarity, Pin Placement, and Circuit Behavior
The orientation of a component dictates how it interacts with the rest of the circuit. Components like diodes, electrolytic capacitors, and integrated circuits have specific polarities and pin assignments that must be respected.
Reversing a diode, for instance, will prevent current from flowing in the intended direction, effectively disabling that part of the circuit. An incorrectly oriented electrolytic capacitor can lead to its failure in a real-world circuit, a condition LTspice can simulate if the component models are configured appropriately.
Integrated circuits often have numerous pins with designated functions. Placing an IC incorrectly will scramble these functions, leading to unpredictable and often nonsensical simulation results.
Properly orienting components ensures that the simulator accurately represents the intended circuit behavior. It is an essential step in the design process.
Common Mistakes: How Orientation Errors Impact Simulation Results
Several common orientation errors can lead to incorrect simulation results. One frequent mistake involves reversing polarized components like diodes or electrolytic capacitors. This often results in a complete lack of expected behavior or, in some cases, can even trigger error messages during simulation.
Another common error arises when dealing with transistors or integrated circuits. Incorrectly placing these components can misconfigure their pins, leading to bizarre and incorrect circuit operation.
Even seemingly minor misalignments can sometimes cause issues, especially in complex circuits where subtle interactions between components are crucial. Always double-check the orientation of your components before running a simulation.
Component-Specific Considerations: Best Practices for Directionality
Certain components demand extra attention when it comes to orientation. Diodes, as mentioned earlier, require careful consideration of their anode and cathode terminals.
Electrolytic capacitors also have a positive and negative terminal that must be correctly oriented to avoid damaging the component. Similarly, LEDs (Light Emitting Diodes) only allow current to flow in one direction and must be placed accordingly.
Transistors (BJTs and MOSFETs) have specific pinouts (collector, base, emitter or drain, gate, source) that dictate their function within the circuit. The datasheets for these components provide crucial information regarding pin assignments and polarity.
Always consult the datasheet for each component to confirm the correct orientation and pin configuration. Adhering to these best practices minimizes the risk of simulation errors and ensures accurate results, saving time and frustration in the long run.
Tips and Tricks for Streamlined Component Rotation
Once you’re comfortable with the fundamental rotation techniques in LTspice, it’s time to optimize your workflow. These tips and tricks are designed to improve efficiency and precision, ultimately leading to faster and cleaner schematic designs. By integrating these practices with the Schematic Editor and its rotation functions, you can significantly enhance your overall design process.
Pre-Rotating for Efficiency
One of the most effective ways to speed up your schematic creation is to rotate components before you place them on the workspace. This seemingly small adjustment can save valuable time and reduce the need for corrections later.
Rather than dragging a component onto the schematic and then rotating it to the desired orientation, take a moment to rotate it directly after selecting it from the components menu. Each press of "Control + R" will re-orient the component before it’s placed, streamlining the placement process.
This is especially useful when you know you’ll need multiple components with the same specific orientation. This preemptive approach minimizes interruptions to your design flow and fosters a more fluid creative process.
The Power of Group Rotation
LTspice, like many sophisticated EDA tools, allows for the simultaneous rotation of multiple components. This is an invaluable feature when dealing with circuit sections that require uniform adjustments.
To rotate a group of components, first, select them using a bounding box or individual clicks while holding down the "Shift" key. Once your selection is complete, simply press "Control + R," and all selected components will rotate together around a common point (usually the center of the selection).
However, it’s important to note that group rotation can sometimes lead to unexpected results if components have drastically different anchor points. Always double-check the final orientation to ensure everything is aligned as intended.
Careful component selection is vital for ensuring accurate group rotation.
Mastering Keyboard Navigation for Precise Control
While the mouse is essential for many LTspice operations, the keyboard offers a level of precision that can be difficult to achieve with a mouse alone. Leveraging keyboard navigation in conjunction with rotation commands can dramatically improve the accuracy and efficiency of your component placement.
After rotating a component, use the arrow keys to nudge it into its final position. This allows for incredibly fine adjustments, ensuring that connections are clean and that components are perfectly aligned with the grid.
Furthermore, you can combine keyboard navigation with the "Control + R" command. This is especially useful for making minor angular adjustments or for rotating components in very tight spaces. By tapping the arrow keys immediately after rotating, you can "walk" the component into the perfect position.
By mastering keyboard navigation, you transform the schematic editor into a precision instrument, allowing for meticulous and professional circuit designs. This skill becomes increasingly valuable as circuit complexity grows.
The standard rotation techniques, like using "Control + R," handle the basics of component orientation effectively. However, LTspice offers more nuanced capabilities to refine schematic presentation and ensure clarity. By mastering these advanced techniques, you can achieve a polished, professional look that significantly enhances the readability and impact of your circuit designs.
Advanced Rotation Techniques
Beyond the standard "Control + R" rotation, LTspice offers advanced techniques that allow for greater control over component appearance and schematic clarity. This includes rotating text labels in conjunction with components and manipulating the orientation of components around different axes. Mastering these techniques ensures that your schematics are not only functional but also visually clear and professionally presented.
Rotating Text Labels with Components
Text labels are essential for identifying component values, part numbers, and other relevant information. When rotating a component, it’s often desirable to have the associated text label rotate along with it. This maintains readability and prevents labels from overlapping or becoming misaligned with the component.
Ensuring Text Label Co-Rotation
Unfortunately, LTspice doesn’t automatically rotate text labels when you rotate components. However, there is a method to achieve this effect by using a specific technique during component placement and editing. To ensure a label rotates with its component, you must first attach the label directly to the component.
- Place the component on the schematic.
- Add the text label near the component.
-
Use the "Drag" tool (F7) to carefully drag the text label until it snaps and attaches to the component’s body. The cursor will change to indicate a successful attachment.
It’s important to move the text until it is attached to the main component body.
- Now, when you rotate the component using "Control + R," the attached text label will rotate along with it.
Benefits of Co-Rotation
Co-rotating text labels with components offers several advantages:
- Improved Readability: Ensures that labels remain aligned with the component, regardless of its orientation.
- Reduced Clutter: Prevents labels from overlapping other components or wires, maintaining a clean and organized schematic.
- Professional Appearance: Contributes to a polished and professional look, enhancing the overall quality of your designs.
Component Orientation and Axes of Rotation
LTspice primarily rotates components in 90-degree increments around their center point. However, understanding how components orient relative to the axes can be crucial for creating complex and symmetrical designs.
Understanding the Coordinate System
The LTspice schematic editor operates on a coordinate system. When placing a component, its orientation is defined relative to this system. The "Control + R" command rotates the component counter-clockwise around its insertion point. Understanding this default behavior is crucial.
Utilizing Mirroring for Alternative Orientations
While direct rotation around other axes isn’t a built-in feature, you can achieve the desired effect by combining rotation with mirroring. The "Edit > Mirror Horizontally" and "Edit > Mirror Vertically" commands can be used to flip components along their respective axes.
By strategically combining rotation (Control + R) with mirroring, you can precisely position components in virtually any orientation.
For example, if you need a component rotated 180 degrees and mirrored horizontally, you would first rotate it twice (two presses of "Control + R") and then apply the "Mirror Horizontally" command.
Practical Applications
These advanced techniques are particularly useful in scenarios where you need to create symmetrical circuits, implement specific layout requirements, or optimize signal flow. For example, when designing differential amplifiers or balanced circuits, mirroring components ensures that the layout is symmetrical, which can improve performance and reduce noise.
By mastering these advanced rotation techniques, you can elevate your LTspice skills and create schematics that are not only functional but also visually appealing and easy to understand. This ultimately leads to more efficient circuit design and improved communication of your ideas.
The standard rotation techniques, like using "Control + R," handle the basics of component orientation effectively. However, LTspice offers more nuanced capabilities to refine schematic presentation and ensure clarity. By mastering these advanced techniques, you can achieve a polished, professional look that significantly enhances the readability and impact of your circuit designs. Now, let’s explore how to address common rotation-related issues that may arise while working in LTspice, ensuring a smooth and frustration-free design experience.
Troubleshooting Common Rotation Issues
Even with a firm grasp of component rotation techniques, you might occasionally encounter unexpected issues. Addressing these problems efficiently can save time and prevent frustration. This section provides solutions to common rotation problems, helping you maintain a seamless workflow.
Component Not Rotating
One of the most frustrating issues is when a component refuses to rotate despite your best efforts. Several factors can cause this, and systematically addressing each will help you pinpoint the problem.
Possible Causes
-
Component Locking: The component might be locked in place, preventing any modifications, including rotation. This often happens when a component is part of a larger, protected block or subcircuit.
-
Incorrect Selection: Ensure you’ve actually selected the component before attempting to rotate it. A common mistake is clicking near the component but not directly on it, leading to the command being applied to the background instead.
-
LTspice Glitch: Occasionally, LTspice may experience a temporary glitch. While rare, it’s a possibility.
Solutions
-
Check for Locks: If the component is part of a larger block, investigate the block’s properties to see if it’s locked. Unlock the block or component if necessary.
-
Verify Selection: Carefully click on the component’s body or one of its pins to ensure it’s highlighted. A clear visual indication of selection is crucial.
-
Restart LTspice: If you suspect a glitch, save your work and restart LTspice. This often resolves temporary software issues.
-
Try Alternative Methods: Attempt rotating the component using the Edit menu or the right-click context menu as alternatives to the "Control + R" shortcut. This can help determine if the issue is specific to the shortcut.
Accidental Rotation
Accidental rotations can disrupt your schematic layout, especially when dealing with complex circuits. Fortunately, LTspice offers several ways to undo these unwanted changes.
Undoing Rotations
-
Control + Z (Undo): The most straightforward method is using the Undo command (Control + Z). This will revert the schematic to its previous state, undoing the accidental rotation.
-
Edit Menu -> Undo: The Undo command is also available in the Edit menu, providing an alternative for users who prefer not to use keyboard shortcuts.
-
Careful Component Handling: Being mindful during component selection and placement can prevent accidental rotations. Avoid inadvertently pressing "Control + R" while the cursor is near a component.
Compatibility Issues
While LTspice is generally reliable, compatibility issues can arise, particularly when working with older schematic files or older versions of the software.
Potential Conflicts
-
Older Schematic Formats: Schematics created in significantly older versions of LTspice might not be fully compatible with newer versions, potentially leading to unexpected behavior, including rotation problems.
-
Custom Symbols: Custom symbols or models designed for older LTspice versions may not function correctly in newer versions, causing rotation or placement issues.
Mitigation Strategies
-
Update LTspice: Ensure you are using the latest version of LTspice. Analog Devices frequently releases updates that address bugs and improve compatibility.
-
Resave in Current Format: Open the older schematic and resave it in the current LTspice version. This can update the file format and resolve compatibility issues.
-
Review Custom Symbols: Carefully examine any custom symbols or models used in the schematic. Ensure they are compatible with the current LTspice version and update them if necessary. Consider recreating them if updates are unavailable.
By understanding these common rotation issues and their solutions, you can confidently navigate any challenges that arise, ensuring a smooth and efficient LTspice experience. Regular practice and familiarity with these troubleshooting steps will further enhance your ability to create clear, accurate, and professional circuit schematics.
FAQs: Mastering Component Rotation in LTspice
Got questions about rotating components in LTspice? Here are some answers to help you get started and refine your circuit designs.
Why should I rotate components in LTspice?
Rotating components in LTspice allows for neater and more logical schematic layouts. Correct orientation simplifies tracing signal flow and enhances readability, especially in complex circuits. Learning how to rotate component LTspice makes your designs easier to understand and debug.
What are the different ways to rotate a component in LTspice?
You can rotate a component using Ctrl+R after selecting it, or by right-clicking and choosing "Rotate". Another option is to use the "Edit" menu and select "Rotate". All methods achieve the same result: to rotate component LTspice.
Can I rotate a component by a specific angle instead of just 90 degrees?
No, LTspice only allows for 90-degree rotations. There is no built-in feature to rotate components by arbitrary angles. You’ll need to adjust the position manually.
What if I accidentally rotate a component and want to undo it?
You can use the standard "Undo" function (usually Ctrl+Z) immediately after rotating a component to revert it to its previous orientation. This will undo the latest rotate component LTspice action.
Alright, you’ve now got the knowledge to rotate component LTspice like a seasoned pro! Go forth and create some amazing circuit simulations. Happy designing!