Achieving a flawless finish often relies on mastering the right techniques. Woodworking professionals consistently seek superior methods for enhancing the beauty of their projects, and one such technique involves the application of a rich chocolate stain. A key component in achieving this desired aesthetic frequently involves the utilization of specific finishing tools. The quality of the Minwax product line offers reliable solutions for this endeavor, ensuring a consistent and even application of the *rich chocolate stain*, ultimately contributing to the secret of a flawless finish.
Achieving a Flawless Finish with Rich Chocolate Stain: A Comprehensive Guide
This guide will walk you through everything you need to know to use rich chocolate stain to achieve a beautiful and durable finish on your wood projects. We’ll cover preparation, application techniques, and maintenance tips to ensure your project turns out exactly as you envisioned.
Understanding Rich Chocolate Stain
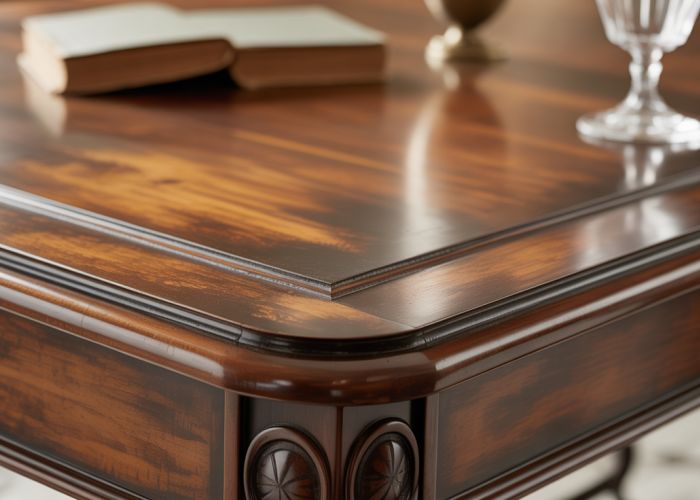
Rich chocolate stain is a type of wood finish known for its deep, warm brown color, reminiscent of dark chocolate. Its popularity stems from its ability to enhance the natural grain of the wood while providing a sophisticated and timeless look.
Benefits of Choosing Rich Chocolate Stain:
- Aesthetic Appeal: Offers a luxurious and elegant color that complements a wide range of design styles.
- Versatility: Works well on various wood types, from hardwoods like oak and maple to softwoods like pine.
- Grain Enhancement: Accentuates the natural beauty of the wood grain, adding depth and character to the finished piece.
- Protection: Provides a protective layer against moisture, scratches, and UV damage, extending the lifespan of your project.
Types of Rich Chocolate Stain:
There are primarily two categories:
- Oil-Based Stains: Known for their deep penetration and rich color. They typically require mineral spirits for cleanup.
-
Water-Based Stains: Offer easier cleanup with soap and water and tend to dry faster. They also produce fewer fumes, making them a more environmentally friendly option.
A side-by-side comparison is below:
Feature Oil-Based Stain Water-Based Stain Color Richness High Moderate Drying Time Longer Shorter Cleanup Mineral Spirits Soap and Water Odor Strong Mild Environmental Impact Higher Lower
Preparing Your Wood for Staining
Proper preparation is crucial for achieving a flawless finish with rich chocolate stain. Failing to prepare adequately can lead to uneven color, blotching, and poor adhesion.
Sanding the Surface:
- Start with a Coarse Grit: Begin sanding with 120-grit sandpaper to remove any imperfections, such as scratches or old finishes.
- Progress to Finer Grits: Gradually move to finer grits like 180-grit and finally 220-grit sandpaper. This will create a smooth and even surface that readily accepts the stain.
- Sanding Direction: Always sand in the direction of the wood grain to avoid creating unsightly scratches.
Cleaning the Wood:
After sanding, thoroughly clean the wood to remove any sanding dust or debris.
- Vacuuming: Use a vacuum cleaner with a brush attachment to remove loose dust.
- Tack Cloth: Wipe down the surface with a tack cloth to pick up any remaining fine particles.
Pre-Stain Conditioner (Optional):
Using a pre-stain wood conditioner is highly recommended, especially when working with softwoods like pine. It helps to:
- Prevent Blotching: Ensures even stain absorption, preventing blotchy areas.
-
Seal the Wood: Reduces the wood’s natural tendency to absorb stain unevenly.
- Application: Apply the conditioner according to the manufacturer’s instructions. Typically, you’ll apply a thin, even coat with a brush or cloth and let it dry for the recommended time before applying the stain.
Applying Rich Chocolate Stain
Now that your wood is properly prepared, it’s time to apply the rich chocolate stain.
Choosing Your Application Method:
There are several methods for applying stain, each with its own advantages:
- Brush: Ideal for smaller projects and intricate details. Use a high-quality brush with natural or synthetic bristles.
- Cloth: Provides excellent control and is great for applying thin, even coats. Use lint-free cloths to avoid leaving fibers on the surface.
- Foam Brush: A cost-effective option for applying stain to larger surfaces.
- Spray: Suitable for large projects and achieving a consistent finish. Requires proper ventilation and safety precautions.
Application Steps:
- Stir the Stain: Thoroughly stir the stain to ensure the pigment is evenly distributed. Do not shake the stain as this can create air bubbles.
- Apply a Thin, Even Coat: Apply the stain in the direction of the wood grain, using your chosen application method. Avoid applying too much stain at once, as this can lead to uneven drying and a blotchy finish.
- Allow to Penetrate: Let the stain penetrate the wood for the recommended time, as specified by the manufacturer.
- Wipe Off Excess Stain: Use a clean, lint-free cloth to wipe off any excess stain. This is a crucial step for achieving a consistent color and preventing the finish from becoming sticky.
- Dry Completely: Allow the stain to dry completely before applying a topcoat. Drying times vary depending on the type of stain and environmental conditions.
Finishing Your Project
Once the stain is completely dry, it’s time to apply a topcoat to protect the stained wood and enhance its durability.
Choosing a Topcoat:
- Polyurethane: A durable and water-resistant option that provides excellent protection against scratches and wear. Available in oil-based and water-based formulas.
- Varnish: Offers a classic look and excellent protection against UV damage.
- Lacquer: Dries quickly and provides a smooth, glossy finish. Typically used for furniture and interior projects.
Applying the Topcoat:
- Lightly Sand: Lightly sand the stained surface with 320-grit sandpaper to create a smooth base for the topcoat.
- Clean the Surface: Remove any sanding dust with a tack cloth.
- Apply a Thin, Even Coat: Apply the topcoat in thin, even coats, following the manufacturer’s instructions.
- Allow to Dry: Let each coat dry completely before applying the next.
- Sand Between Coats (Optional): Lightly sand between coats with fine-grit sandpaper (400-grit or higher) to remove any imperfections and create a smoother finish.
- Apply Multiple Coats: Apply at least two to three coats of topcoat for optimal protection and durability.
Maintaining Your Rich Chocolate Stain Finish
Proper maintenance will help to keep your rich chocolate stain finish looking its best for years to come.
Cleaning:
- Dust Regularly: Dust your stained wood projects regularly with a soft cloth to prevent dust buildup.
- Clean with a Damp Cloth: For heavier cleaning, use a damp cloth with a mild soap solution. Avoid using harsh chemicals or abrasive cleaners, as these can damage the finish.
- Dry Immediately: After cleaning, dry the surface thoroughly with a clean, dry cloth.
Avoiding Damage:
- Use Coasters and Placemats: Protect your furniture from spills and heat damage by using coasters and placemats.
- Avoid Direct Sunlight: Prolonged exposure to direct sunlight can cause the stain to fade over time. Use curtains or blinds to protect your furniture from excessive sunlight.
Rich Chocolate Stain: FAQs for a Flawless Finish!
Need some quick answers about applying your rich chocolate stain? Here are some common questions.
What type of wood works best with rich chocolate stain?
Hardwoods like oak, maple, and cherry tend to show off the depth and richness of the chocolate color best. Softer woods can work too, but may require a wood conditioner beforehand to ensure even stain absorption.
How many coats of rich chocolate stain should I apply?
Generally, one or two coats are sufficient. Applying more than two can obscure the wood grain and result in a finish that’s too dark or muddy. Always test the stain on a hidden area first to determine the ideal number of coats.
How long should I let rich chocolate stain dry between coats?
Follow the manufacturer’s instructions on the stain can. Typically, this is between 4-8 hours. Ensure the first coat is completely dry to the touch before applying a second. Allowing proper drying time is crucial for a smooth, even finish.
What’s the best way to apply a topcoat after staining with rich chocolate stain?
Wait at least 24 hours after the final coat of stain before applying a topcoat. Lightly sand the stained surface with fine-grit sandpaper (220 or higher) to ensure proper adhesion, then apply your chosen topcoat (polyurethane, lacquer, etc.) following its specific instructions.
So, go ahead and give that *rich chocolate stain* a try! I’m betting you’ll be thrilled with the results. Happy staining!