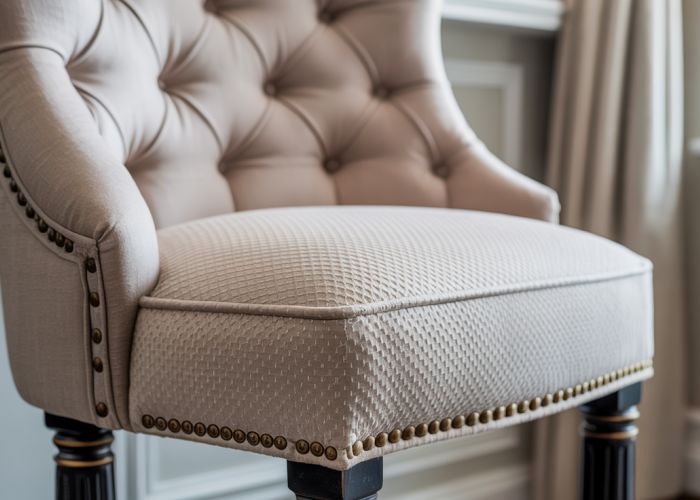
Embarking on bar stool reupholstery doesn’t require prior expertise, just enthusiasm and a bit of patience. The transformation you can achieve with a simple staple gun – the most important tool in your arsenal – is truly remarkable. Thinking about giving your kitchen a refresh? Local fabric stores like Joann Fabrics offer an incredible selection of materials to perfectly match your décor. Even renowned interior designers, such as Nate Berkus, often highlight the impactful nature of updated furnishings like expertly reupholstered bar stools. The process of bar stool reupholstery, while seemingly complex, offers a rewarding experience and gives your home a touch of personalized elegance similar to designs seen on HGTV.
Crafting the Perfect "Reupholster Bar Stool Like A Pro!" Article Layout
Let’s break down how to create an engaging and easy-to-follow article about bar stool reupholstery. Our aim is to guide readers through the process, making them feel confident and capable every step of the way.
I. Introduction: Hooking the Reader and Setting the Stage
The introduction is crucial. It needs to grab the reader’s attention and convince them that this guide is worth their time.
-
Start with a relatable scenario: "Are your bar stools looking a little worse for wear? Don’t throw them out! You can easily revitalize them with a little DIY magic." This sets a problem the reader likely faces.
-
Highlight the benefits: Briefly mention cost savings ("Save money on new furniture!"), customization options ("Customize your bar stools to perfectly match your decor!"), and the satisfaction of a DIY project ("Enjoy the satisfaction of creating something yourself!").
-
Introduce the article’s purpose: "This easy-to-follow guide will walk you through the entire bar stool reupholstery process, from gathering your materials to the final finishing touches. No prior experience needed!"
-
Briefly preview the steps: "We’ll cover everything from removing the old fabric and foam to cutting new fabric and securing it in place." This gives readers a roadmap of what to expect.
II. Gathering Your Supplies: The Toolkit for Success
This section focuses on assembling everything needed before starting the bar stool reupholstery project.
A. Essential Tools and Materials:
Use a table for clarity.
| Item | Description | Quantity (Approximate) | Where to Find |
|---|---|---|---|
| New Fabric | Your chosen fabric, consider durability and style | Enough to cover stool + extra | Fabric stores, online retailers |
| New Foam (optional) | If the existing foam is worn out, replace it. | Same size as original | Craft stores, online retailers, upholstery supply stores |
| Staple Gun | Heavy-duty staple gun designed for upholstery. | 1 | Hardware stores, online retailers |
| Staples | Staples compatible with your staple gun. | Plenty | Hardware stores, online retailers |
| Screwdriver (various) | To remove the bar stool seat. | Set | Hardware stores |
| Pliers | To remove old staples. | 1 | Hardware stores |
| Scissors/Utility Knife | For cutting fabric and foam. | 1 | Hardware stores, craft stores |
| Measuring Tape | For accurate measurements. | 1 | Hardware stores |
| Marker/Pen | For marking fabric. | 1 | Stationery stores, craft stores |
| Seam Ripper (optional) | For easier removal of old fabric. | 1 | Craft stores |
B. Choosing the Right Fabric:
- Durability: Consider fabrics like canvas, denim, or upholstery-grade vinyl for high-traffic areas.
- Style: Think about your existing decor. Do you want a bold statement piece or something more subtle?
- Ease of Cleaning: Choose a fabric that’s easy to clean, especially if you have kids or pets.
- Testing: Order samples to see how the fabric looks and feels in your space.
III. Step-by-Step Guide to Bar Stool Reupholstery
This is the heart of the article! Break down each step into manageable chunks.
A. Removing the Old Fabric:
- Detach the Seat: Use a screwdriver to carefully detach the bar stool seat from the base.
- Remove Old Staples: Use pliers and/or a seam ripper to remove all the old staples holding the fabric in place. This can be tedious but is essential for a clean finish. Be careful not to damage the wood.
- Carefully Remove Fabric: Peel off the old fabric, taking care not to rip it (you can use it as a template).
B. Preparing the Seat:
- Inspect the Foam: Check the condition of the foam. If it’s crumbling or flattened, replace it.
- Replacing Foam (if necessary):
- Trace the outline of the old foam onto the new foam.
- Cut the new foam using a utility knife or scissors.
- Adhere the new foam to the seat base with spray adhesive.
- Cleaning the Base: Wipe down the bar stool seat base with a damp cloth to remove any dust or debris.
C. Cutting the New Fabric:
- Use the Old Fabric as a Template: Lay the old fabric on top of the new fabric and trace around it, adding a few extra inches (2-3 inches) on all sides for securing.
- Alternatively, Measure and Cut: Measure the dimensions of the seat and add the extra inches. Cut the fabric using scissors or a utility knife.
D. Securing the New Fabric:
- Position the Fabric: Center the new fabric over the bar stool seat, ensuring it’s evenly distributed.
- Start Stapling:
- Pull the fabric taut and staple it to the underside of the seat. Start in the center of one side, then staple the opposite side, pulling taut.
- Repeat this process for the remaining sides.
- Work your way outwards from the center, evenly spacing the staples and maintaining tension.
- Corners: This is where it gets tricky!
- Fold the corners neatly and securely, creating clean lines. You may need to experiment with different folding techniques to achieve the desired look.
- Staple the corners in place, ensuring the fabric is smooth and wrinkle-free.
- Trim Excess Fabric: Once the fabric is securely stapled, trim any excess fabric with scissors or a utility knife, leaving a clean edge.
E. Reattaching the Seat:
- Position the Seat: Carefully align the reupholstered seat with the bar stool base.
- Reattach with Screws: Secure the seat to the base using the original screws. Make sure they are tightened properly.
IV. Finishing Touches and Troubleshooting:
A. Checking for Loose Staples:
- Inspect the stapled edges for any loose staples. If you find any, add extra staples to secure them.
B. Addressing Wrinkles or Unevenness:
- If you notice any wrinkles or unevenness in the fabric, try loosening the staples in that area, re-adjusting the fabric, and re-stapling.
- Sometimes a little steam from an iron (on a low setting, with a cloth barrier) can help remove stubborn wrinkles.
C. Displaying Your Work:
- Take a picture of your finished bar stool!
- Share it online and inspire others to tackle their own bar stool reupholstery projects.
V. Alternative Techniques (Optional)
This section can briefly mention variations of the reupholstery process.
- Using a sewing machine to create a custom-fitted slipcover: Briefly describe this as an alternative for more experienced sewers.
- Adding decorative trim or buttons: Mention these as options for embellishment.
So, ready to give your old stools a fresh, new look? Go ahead and tackle that bar stool reupholstery project! You might just surprise yourself with what you can create. Happy crafting!