Experiencing issues with your vacuum cleaner? A damaged vacuum plug often leads to frustrating interruptions in cleaning. The electrical outlet, a common household component, interacts directly with your vacuum’s power cord. If you’re facing this issue, you might need to replace vacuum plug. Fortunately, with the right wire strippers, and careful adherence to safety guidelines, you can usually resolve this problem yourself and keep your cleaning routine on track.
Vacuum Plug Problems? The Easiest Replacement Guide!
Vacuum cleaners are indispensable tools, but a faulty plug can render them useless. If you’re experiencing issues like a frayed cord, loose connection, or even a completely broken plug, learning how to replace vacuum plug can save you money and extend the life of your appliance. This guide provides a straightforward, step-by-step approach to safely and effectively replacing your vacuum plug.
Identifying Vacuum Plug Problems
Before you decide to replace vacuum plug, it’s important to accurately diagnose the issue. Look for these common signs of a faulty plug:
- Visible Damage: Obvious cracks, breaks, or exposed wires on the plug itself.
- Loose Connection: The plug feels wobbly in the outlet or easily falls out.
- Burning Smell: A burning odor emanating from the plug or outlet during use. This is a serious hazard and warrants immediate attention.
- Intermittent Power: The vacuum turns on and off unexpectedly while the cord is still plugged in.
- Tripped Breakers: The circuit breaker trips frequently when you use the vacuum cleaner.
Safety First: Preparation is Key
Working with electricity demands caution. Prioritize your safety before you even think about how to replace vacuum plug.
- Unplug the Vacuum: This is the most crucial step. Ensure the vacuum cleaner is completely disconnected from the power outlet. Double-check!
- Gather Your Tools & Materials: Having everything on hand will streamline the replacement process. You’ll need:
- New Replacement Plug (Ensure it’s compatible with your vacuum’s voltage)
- Screwdrivers (Typically Phillips and/or Flathead – check the existing plug)
- Wire Strippers
- Utility Knife or Scissors (Optional, for trimming cord)
- (Optional) Electrical Tape
Step-by-Step Guide to Replace Vacuum Plug
This section provides the detailed steps on how to replace vacuum plug safely and effectively.
-
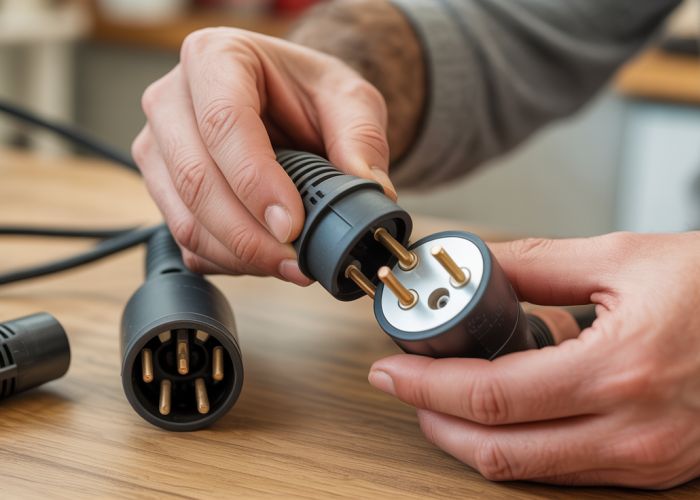
Examine the Old Plug:
- Carefully inspect the old plug to determine the type of wiring connections it uses. Note the positions of the wires and how they are connected. Take a picture with your phone if necessary for reference. This will help you replicate the connections on the new plug.
- Note if the wires are connected using screws, clamps, or by being inserted into holes.
-
Prepare the Cord:
- Using a utility knife or scissors (carefully!), cut the cord straight across just above the damaged section, ensuring you have enough cord to work with. Consider cutting back further if the damage extends a significant distance up the cord.
- Gently score the outer insulation of the cord a few inches from the cut end. Be careful not to cut into the individual wires inside.
-
Strip the Outer Insulation:
- Carefully remove the outer insulation to expose the individual wires inside. This might involve bending the cord to create a break in the insulation, then pulling it away.
- You will typically find two or three wires inside. These are usually covered in colored insulation (e.g., black, white, green).
-
Strip the Wire Ends:
- Using your wire strippers, carefully remove about ½ inch of insulation from the end of each individual wire. Choose the correct gauge setting on the wire strippers to avoid cutting the wires themselves. You should now have exposed copper wire at the end of each insulated wire.
-
Connect the Wires to the New Plug:
-
Consult the instructions that came with your new plug. The wire connections may vary slightly depending on the plug type. Generally, you’ll need to:
- Loosen the terminal screws on the new plug.
- Insert the bare end of each wire into the corresponding terminal. The color-coding often matches (e.g., black wire to brass screw, white wire to silver screw, green/ground wire to green screw). If your old plug had a ground wire (green or bare copper), ensure you connect it to the ground terminal on the new plug.
- Tighten the terminal screws securely to clamp the wires in place. Make sure no stray strands of wire are sticking out.
-
If the plug uses a different connection method (e.g., pushing wires into holes), follow the manufacturer’s instructions carefully.
-
-
Secure the Cord Restraint:
- Most replacement plugs have a cord restraint or clamp designed to prevent the cord from being pulled out of the plug. Ensure the cord is properly positioned within the restraint and tighten the screws that secure it. This is crucial for preventing strain on the wire connections.
-
Reassemble the Plug:
- Carefully reassemble the plug housing, ensuring that all the wires are neatly tucked inside and that the two halves of the plug fit together securely. Tighten any screws that hold the plug together.
Understanding Wire Color Coding
While not always followed perfectly, here’s a general guideline for wire color coding:
| Wire Color | Typically Connects To |
|---|---|
| Black | Hot/Live |
| White | Neutral |
| Green (or Bare) | Ground |
Always verify the connections on your old plug before making any connections.
Testing the New Plug
Before using the vacuum cleaner, test the new plug:
- Visual Inspection: Double-check that all screws are tight, the cord restraint is secure, and the plug housing is properly assembled.
- Plug It In: Carefully plug the vacuum cleaner into an outlet.
- Turn It On: Turn the vacuum cleaner on to see if it operates normally.
- Monitor for Problems: Watch and listen for any signs of trouble, such as sparks, smoke, or unusual noises. If you observe any of these issues, immediately unplug the vacuum cleaner and re-examine your work.
Vacuum Plug Replacement: Frequently Asked Questions
[Vacuum plugs often cause frustration. Here are some quick answers to common questions about diagnosing and replacing them.]
How do I know if my vacuum plug needs to be replaced?
Look for these signs: frayed or cracked wires near the plug, a loose connection where the cord enters the plug, burning smells when the vacuum is plugged in, or if the vacuum only works when the cord is held in a specific position. All these suggest it is time to replace vacuum plug.
What tools do I need to replace a vacuum plug?
You’ll generally need a new replacement plug (correct amp/voltage), a screwdriver (usually Phillips or flathead, depending on the vacuum), wire strippers, and possibly pliers. Some electrical tape is also helpful for extra security.
Is it safe to replace a vacuum plug myself?
Yes, as long as you unplug the vacuum completely from the outlet first. If you’re uncomfortable working with electrical wiring, it’s always best to consult a qualified electrician to replace vacuum plug.
Where can I buy a replacement vacuum plug?
You can find replacement plugs at most hardware stores, home improvement centers, or online retailers like Amazon. Make sure you get the right amp rating for your vacuum model.
Alright, you should be all set to tackle that vacuum plug replacement! Hopefully, this guide made the process a little less daunting. Now go forth and conquer those cleaning challenges… with a fully functioning vacuum, of course! If you do need to replace vacuum plug again, remember to come back and revisit this guide!