Is your door giving you the blues with that unsightly sag? A common issue for homeowners, the need to repair sagging door often arises from factors like hinge wear and tear or even seasonal shifts affecting the door frame. Before you call in a professional carpenter and face a hefty bill, know that many of these repairs are well within the capabilities of the average DIY enthusiast using the right tools and knowledge. The proper technique is the attribute that will influence if you need to invest in shims to fix your door.
Stop That Sag! Fix Your Door Like a Pro (Easy Steps): The Ideal Article Layout
This guide outlines a layout designed to help readers effectively repair sagging door problems. The aim is to provide clear, concise, and easy-to-follow instructions so anyone can tackle this common household issue.
Understanding the Sag: Why Doors Droop
Before diving into the fix, it’s crucial to understand why doors sag. This helps readers diagnose the problem accurately and apply the correct solution.
-
Reasons for Sagging:
- Loose Screws: Over time, screws holding hinges in place can loosen, causing the door to droop. This is the most common cause.
- Stripped Screw Holes: If screws are repeatedly tightened into damaged holes, they’ll lose their grip.
- Warped Door or Frame: Changes in humidity or settling of the house can cause warping.
- Heavy Door: Extremely heavy doors put extra stress on hinges.
- Weak Frame: A weakened door frame can contribute to sagging.
-
Identifying the Culprit:
- Visually inspect the door and frame. Look for gaps, uneven lines, or signs of damage.
- Check the hinges. Are they loose? Are any screws missing?
- Gently push and pull on the door to feel for movement in the hinges.
Tools and Materials You’ll Need
This section clearly lists all necessary tools and materials. Use visuals (images or illustrations) to accompany each item where possible.
-
Essential Tools:
- Screwdriver (Phillips and Flathead)
- Drill (with drill bits)
- Wood glue
- Wood filler (optional)
- Hammer
- Level
- Measuring tape
- Pencil
-
Materials:
- New screws (longer screws are often recommended)
- Wood shims
- Wooden dowels (if screw holes are stripped)
- Sandpaper (if using wood filler)
The Repair: Step-by-Step Instructions
This is the heart of the article and should be meticulously structured.
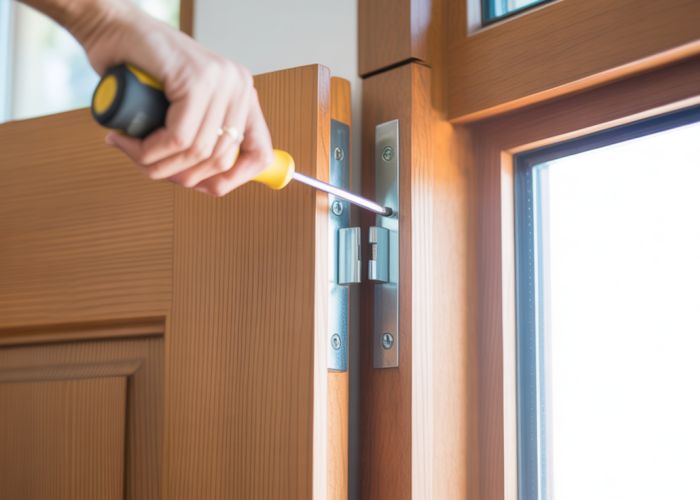
Step 1: Tighten Loose Screws
- Identify loose screws on the hinges.
- Use the appropriate screwdriver to tighten them.
- If the screw spins freely, it means the hole is stripped (see Step 2).
Step 2: Repair Stripped Screw Holes
This section breaks down the process of fixing stripped screw holes using wooden dowels.
- Enlarge the Hole: Drill out the stripped screw hole slightly larger.
- Glue in the Dowel: Apply wood glue to a wooden dowel and insert it into the hole.
- Cut and Sand: Once the glue is dry, cut off the excess dowel flush with the frame and sand it smooth.
- Pre-drill: Pre-drill a pilot hole for the new screw.
- Re-attach: Re-attach the hinge with the new screw.
Step 3: Shim Behind the Hinge Plate
If the door is still sagging after tightening screws and fixing stripped holes, shimming the hinge plate might be necessary.
- Identify the Gap: Determine where the gap is between the hinge plate and the door frame.
- Create a Shim: Cut a thin shim from wood or cardboard.
- Insert the Shim: Place the shim behind the hinge plate.
- Re-attach: Re-attach the hinge with the shim in place.
Step 4: Adjust the Door Frame (If Necessary)
This section addresses more complex situations where the frame itself might be contributing to the sag. This should be presented as an advanced option.
| Action | Description |
|---|---|
| Tighten Frame Screws | Check all screws holding the door frame together and tighten them. |
| Shim Behind Frame | If the frame is separating from the wall, insert shims between the frame and the wall and secure them with long screws. |
| Replace Frame Section | If a section of the frame is significantly damaged, consider replacing it. This requires more advanced carpentry skills and may warrant hiring a professional. |
Preventing Future Sagging
Offer preventative measures to minimize the risk of future sagging issues.
- Use Longer Screws: Replacing short screws with longer ones provides a stronger hold.
- Reinforce the Frame: Add additional support to the door frame, especially for heavy doors.
- Regular Maintenance: Periodically check and tighten screws on the hinges and frame.
- Control Humidity: Proper ventilation can help prevent warping caused by humidity fluctuations.
Stop That Sag! FAQ: Fixing Your Door Like a Pro
Here are some frequently asked questions about repairing a sagging door. We hope these answers help you get your door swinging smoothly again!
Why is my door sagging in the first place?
Sagging doors are usually caused by loose or stripped hinge screws. Over time, the weight of the door can weaken the wood around the screws, leading to the door dropping. Sometimes the frame itself can shift, also causing issues. This is why a sagging door repair is often needed.
How do I know if I need longer screws to fix my sagging door?
Examine the existing screws. If they are easily removed or feel loose when you tighten them, they likely aren’t gripping the wood properly. Longer screws that can reach the door frame studs will provide much better support for the door. You’ll know they are working if the door stop sagging!
What if longer screws don’t solve the problem?
If longer screws aren’t enough, the screw holes may be too stripped to hold anything. In this case, you can try using wood filler or toothpicks and wood glue to fill the holes before re-drilling and installing the screws. In severe cases, you may need to replace the door frame itself, or consider other sagging door repair methods.
Is it possible to fix a sagging door myself, or should I call a professional?
Many sagging door repairs are simple enough to handle yourself with basic tools and some patience. However, if the problem is severe – like a significantly warped door or a severely damaged frame – calling a professional carpenter might be the best option to ensure a proper and lasting fix.
So, there you have it! Hopefully, you’re now feeling confident enough to tackle that sagging door. Remember, a little effort goes a long way in preserving your home’s value and aesthetic. Happy repairing that sagging door!