Considering removing drywall ceiling yourself? Many homeowners find themselves at this point, drawn in by the allure of a DIY project and potential cost savings. However, improper safety gear selection, a common mistake, can lead to serious injury. The Environmental Protection Agency (EPA) emphasizes asbestos concerns, so understanding the risks is paramount before beginning the task of removing drywall ceiling. This guide prepares you with the necessary knowledge to navigate the complexities and avoid potential DIY disasters during the removing drywall ceiling process.
Removing a drywall ceiling might seem like a daunting task, conjuring images of clouds of dust and potential structural mishaps. However, with careful planning and execution, it’s a project many homeowners can successfully tackle themselves. This section offers a foundational understanding of the drywall removal process, carefully weighs the advantages and disadvantages of DIY versus professional help, and emphasizes the paramount importance of safety and meticulous planning.
Understanding the Drywall Removal Process: A Bird’s-Eye View
The core of removing a drywall ceiling involves a few key steps. First, the area is prepped and protective measures are taken.
Then, the drywall is carefully scored and detached from the ceiling joists.
Fasteners like screws and nails are removed, and the debris is disposed of responsibly.
While seemingly straightforward, each step requires attention to detail and adherence to safety protocols.
DIY vs. Hiring a Contractor: A Cost-Benefit Analysis
The decision to DIY a drywall removal project often hinges on a balance between cost savings and peace of mind.
Choosing the DIY route can save significant money on labor costs. These savings can then be allocated to other renovation needs.
However, DIY also demands a significant investment of your time and effort.
Moreover, it carries the risk of errors that could lead to further expenses down the line, or even injuries if precautions are not taken.
Hiring a contractor, on the other hand, offers expertise and efficiency. Contractors bring years of experience to the table. They also possess the right tools and manpower to complete the job quickly and safely.
The downside is the higher upfront cost. This might deter some homeowners, especially those working with a tight budget.
Ultimately, the best choice depends on your budget, skill level, and tolerance for risk.
The Cornerstones of Success: Safety, Planning, and Preparation
Regardless of your chosen path, safety should always be the top priority. Drywall removal can expose you to dust and potential hazards. Hazards can include hidden wiring or even asbestos in older homes.
Thorough planning is equally critical.
This includes assessing the project, identifying potential obstacles, and ensuring you have the right tools and materials.
Adequate preparation, such as protecting your floors and furniture, and ensuring proper ventilation, will not only streamline the removal process. It will also minimize the mess and potential health risks.
By prioritizing safety, planning, and preparation, you’ll set the stage for a successful and stress-free drywall removal project.
The decision to tackle a drywall removal project has been weighed, the pros and cons carefully considered. Now, before even thinking about lifting a tool, a crucial phase begins: assessment and preparation. This stage is about more than just gathering supplies; it’s about understanding the hidden dangers lurking within your ceiling and taking the necessary steps to mitigate them.
Project Assessment and Preparation: Unveiling the Ceiling’s Secrets
This stage focuses on essential pre-removal steps.
It covers identifying potential hazards like asbestos and lead paint, locating hidden utilities, gathering necessary tools, and properly preparing the work area to minimize risks and ensure a smooth removal process.
Asbestos and Lead Paint Concerns: A Silent Threat
Older homes, particularly those built before the 1980s, may contain asbestos in drywall joint compound or textured coatings, and lead-based paint. Disturbing these materials during demolition can release harmful fibers and particles into the air, posing serious health risks.
The Imperative of Testing
Testing is not optional. Before commencing any drywall removal in older homes, have the materials tested for asbestos and lead paint by a certified professional. This is a non-negotiable step to protect your health and the health of your family.
Visual Clues: What to Look For
While testing is essential, there are some visual clues that might suggest the presence of asbestos or lead paint.
Asbestos-containing materials often have a fibrous or textured appearance. Lead paint may present as multiple layers of paint, with the older layers potentially exhibiting a chalky or alligator-skin-like texture.
However, visual identification is not a substitute for professional testing.
When to Call the Experts: Professional Remediation
If testing confirms the presence of asbestos or lead paint, do not attempt to remove the drywall yourself. Professional remediation is required. Certified asbestos and lead abatement contractors have the training, equipment, and expertise to safely remove and dispose of these hazardous materials, ensuring compliance with all applicable regulations.
Locating and Identifying Obstructions: Peeking Behind the Surface
Before you start tearing down drywall, you need to know what’s behind it. This involves identifying the location of ceiling joists and any hidden utilities like electrical wiring or plumbing.
The Stud Finder’s Secret: Finding Joists and Framing
A stud finder is your best friend for locating ceiling joists. These structural members are usually spaced 16 or 24 inches apart and provide the support for the drywall. Knowing their location is crucial for safely detaching the drywall and avoiding damage to the framing. Mark the joist locations clearly on the ceiling.
Hidden Dangers: Electrical Wiring and Plumbing
Electrical wiring and plumbing are common behind drywall ceilings. Exercise extreme caution when working near these utilities. Look for telltale signs such as light fixtures, electrical boxes, or plumbing access panels.
Never assume you know where these utilities are located.
Planning for Utilities: Rerouting or Safe Handling
If you encounter electrical wiring or plumbing that needs to be moved or worked around, consult with a qualified electrician or plumber. Never attempt to reroute or handle electrical wiring or plumbing yourself unless you are a licensed professional. Improper handling can result in electrocution, water damage, or other serious hazards.
Gathering Essential Tools and Materials: Arming Yourself for Success
Having the right tools and safety gear is essential for a safe and efficient drywall removal project.
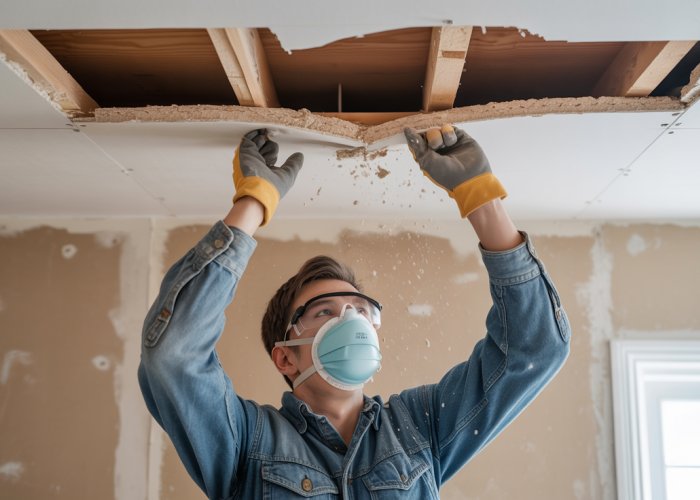
Prioritizing Safety: Personal Protective Equipment (PPE)
Safety is paramount. At a minimum, you will need safety glasses to protect your eyes from debris, a dust mask to filter out dust particles, and gloves to protect your hands from cuts and abrasions.
Choosing the Right Ladder: Reaching New Heights Safely
Select a sturdy ladder of appropriate height to comfortably reach the ceiling without overextending. Ensure the ladder is placed on a level surface and is in good working condition. Never stand on the top rung of the ladder.
The Demolition Trio: Utility Knife, Pry Bar, and Hammer
A sharp utility knife is used to score the drywall, creating clean lines for easier removal. A pry bar helps to gently detach the drywall from the ceiling joists. A hammer may be needed to remove stubborn fasteners or to tap the pry bar.
When to Upgrade: The Respirator Requirement
For extensive drywall removal projects, or when working in poorly ventilated areas, a respirator is highly recommended. A respirator provides a higher level of protection against dust and other airborne particles than a simple dust mask. Choose a respirator that is NIOSH-approved and fits properly.
Preparing the Work Area: Containment and Control
Proper preparation of the work area is crucial to minimize mess and protect your belongings.
Shielding Your Valuables: Protecting Floors and Furniture
Cover floors and furniture with drop cloths or plastic sheeting to protect them from dust and debris. Secure the drop cloths with tape to prevent them from shifting.
Breathing Easy: Ensuring Adequate Ventilation
Adequate ventilation is essential to minimize dust exposure. Open windows and doors to create airflow. Consider using a fan to exhaust dust to the outside. If possible, seal off the work area from the rest of the house with plastic sheeting to contain the dust.
Older homes, particularly those built before the 1980s, may contain asbestos in drywall joint compound or textured coatings, and lead-based paint. Disturbing these materials during demolition can release harmful fibers and particles into the air, posing serious health risks. The decision to test, and perhaps remediate, rests on the side of safety, but once any hazards are dealt with, the core work of removing the ceiling itself can begin.
Step-by-Step Guide: The Drywall Removal Process
The moment of truth has arrived. This section provides a detailed walkthrough of the drywall removal process, emphasizing safety and efficiency. We’ll cover everything from scoring the drywall to disposing of the debris, ensuring a smooth and manageable project.
Scoring the Drywall: Preparing for Detachment
The first step in drywall removal is not brute force. It’s precision. Scoring the drywall creates clean lines and weakens the material along seams and edges, making removal significantly easier and cleaner.
- Using a Utility Knife: Equip yourself with a sharp utility knife and a steady hand. Extend the blade enough to cut through the drywall paper and partially into the gypsum core.
-
Creating Clean Lines: Using a straight edge as a guide, score along all seams where the drywall sheets meet, both at the walls and where they join along the ceiling joists.
Also, score around any fixtures or openings (light fixtures, vents, etc.) that penetrate the ceiling. Multiple passes with the utility knife may be needed to ensure a clean, consistent score.
-
Cutting Along Seams and Edges: The goal is to create defined sections that can be removed independently. Focus on scoring the perimeter of the ceiling and any areas where you anticipate needing to break the drywall into smaller pieces.
Remember to use caution when handling the utility knife, always cutting away from yourself and keeping your fingers clear of the blade’s path.
Removing the Drywall Sheets: Section by Section
With the drywall scored, it’s time to begin detaching and removing the sheets. Patience and controlled movements are key to avoiding large, unwieldy pieces of falling debris.
-
Using a Pry Bar: Insert the flat end of a pry bar between the drywall and the ceiling joist. Gently apply pressure to detach the drywall. Start at a corner or along a scored seam.
Avoid excessive force, as this can damage the framing or cause large chunks of drywall to break off unexpectedly.
-
Working in Manageable Sections: Don’t try to remove entire sheets of drywall at once. Instead, focus on detaching smaller, more manageable sections. This reduces the risk of injury and makes debris removal easier.
For larger ceilings, you may need to score the drywall into smaller sections before detaching.
-
Safely Lowering Drywall Sections: As you detach sections of drywall, have a helper on hand to assist in safely lowering them to the ground. If working alone, carefully support the section with one hand while detaching it with the other, then gently lower it.
Never let go of a section of drywall without proper support, as this can lead to injury and damage to the floor or surrounding objects.
- Additional Tips:
- Use a ladder that is sturdy and tall enough to reach the ceiling comfortably without overreaching.
- Wear safety glasses and a dust mask to protect yourself from falling debris and dust.
Dealing with Fasteners: Removing Obstacles
Once the drywall is removed, you’ll likely find screws or nails remaining in the ceiling joists. These fasteners need to be removed or dealt with to create a smooth surface for future projects.
- Removing Screws and Nails: Use a screwdriver to remove any screws that are still embedded in the joists. For nails, use a claw hammer to carefully pull them out.
-
Driving in Remaining Fasteners: If some nails are difficult to remove, or if you prefer, use a hammer and nail punch to drive them further into the joist. This will create a flush surface and prevent them from interfering with future work.
Be careful not to damage the joists when hammering. Apply steady, controlled force.
Debris Removal: Proper Disposal
The final step in the drywall removal process is disposing of the debris. Proper disposal is essential for environmental reasons and to comply with local regulations.
-
Properly Disposing of Drywall and Other Construction Waste: Drywall cannot be simply thrown into regular trash.
Check with your local waste management authority for guidelines on disposing of construction and demolition (C&D) debris.
-
Following Local Regulations for Waste Disposal: Many municipalities require drywall to be taken to a designated landfill or recycling center. Some areas may also have specific regulations regarding the disposal of drywall that may contain asbestos or lead.
Ignoring these regulations can result in fines and penalties.
Consider renting a construction dumpster for larger projects, as this can simplify the debris removal process. Regardless of the method, always wear appropriate personal protective equipment (PPE), including gloves, a dust mask, and eye protection, when handling drywall debris.
The main work of demolition is complete; the old drywall is down. But before you rush into your next project, take a breath. The newly exposed framework above you holds valuable information, and how you treat it now will significantly impact the quality and longevity of your next steps.
Post-Removal Inspection and Preparation: Setting the Stage for What’s Next
With the drywall gone, the ceiling’s skeleton is laid bare. This is your chance to identify potential problems lurking beneath the surface, ensuring a solid foundation for whatever comes next – be it a fresh drywall installation, a drop ceiling, or even an exposed beam aesthetic. Diligence at this stage can save significant time, money, and headaches down the road.
Inspecting the Framing: Unveiling Hidden Issues
The framing, typically consisting of wooden joists, is the backbone of your ceiling. A thorough inspection is paramount to identify any structural weaknesses or issues that need addressing before proceeding.
Start with a visual assessment. Carefully examine each joist for signs of damage:
-
Damage from Water: Look for water stains, discoloration, or soft spots in the wood. These can indicate past or present leaks from the roof or plumbing above.
-
Rot: Rotting wood will often appear darker than the surrounding material and may crumble easily when probed with a screwdriver or awl.
-
Mold: Be on the lookout for mold growth, which can manifest as fuzzy patches of various colors (black, green, white). Mold indicates a moisture problem that must be resolved.
-
Insect Damage: Look for small holes or tunnels in the wood, which could signify insect infestation (termites, carpenter ants, etc.).
If you find any suspect areas, don’t hesitate to probe the wood with a tool to assess its integrity. Soft, spongy wood is a clear sign of rot or water damage.
Repairing or Replacing Damaged Framing Members
Depending on the extent of the damage, you may be able to repair the affected framing members. Minor rot or insect damage can sometimes be addressed with wood hardeners and fillers. However, severely damaged joists may require replacement.
Replacing a joist is a more involved process that may necessitate additional support while the old joist is removed and the new one is installed. If you’re not comfortable with structural repairs, consult with a qualified carpenter or contractor. Ignoring damaged framing can compromise the structural integrity of your ceiling and, potentially, the entire house.
Cleaning and Preparing the Surface: A Clean Slate
Once you’ve addressed any framing issues, it’s time to clean the area and prepare it for the next phase of your project.
-
Remove Debris: Use a shop vacuum to remove any remaining drywall debris, dust, or loose particles from the joists and surrounding areas. Pay close attention to corners and crevices where debris tends to accumulate.
-
Scrape Away Adhesive: Old adhesive from the previous drywall installation may still be clinging to the joists. Use a scraper or putty knife to remove any stubborn residue.
-
Address Fasteners: Remove any protruding nails, screws, or staples that were used to secure the old drywall. You can either pull them out with pliers or hammer them flush with the surface of the joists.
-
Consider a Primer: Depending on your next project, you might consider applying a primer to the exposed joists. A primer can help seal the wood, prevent staining, and improve adhesion for paint or other finishes.
By thoroughly cleaning and preparing the surface, you’ll create a clean, stable foundation for your new ceiling, ensuring a professional and long-lasting result.
The main work of demolition is complete; the old drywall is down. But before you rush into your next project, take a breath. The newly exposed framework above you holds valuable information, and how you treat it now will significantly impact the quality and longevity of your next steps.
Before You Re-Ceiling: Planning and Considerations
With the old ceiling gone, it’s tempting to immediately start putting up the new one. However, taking the time to plan and address underlying issues can significantly improve the final result. This stage is crucial for ensuring a safe, energy-efficient, and aesthetically pleasing ceiling.
Electrical Planning: Wiring and Lighting
Now is the ideal time to address any electrical needs before the new ceiling goes up. Consider the following:
- New Fixtures: Are you planning to install recessed lighting, a chandelier, or other new fixtures? Now is the time to run the necessary wiring.
- Outlet Placement: Do you need additional outlets in the room? Running wires within the ceiling cavity is much easier now than after the ceiling is installed.
- Code Compliance: Ensure all electrical work meets local building codes and is performed by a qualified electrician if you’re not comfortable or experienced.
Planning ahead for electrical needs ensures seamless integration and avoids costly and disruptive modifications later.
Insulation Assessment and Upgrade
A significant benefit of exposing the ceiling cavity is the opportunity to inspect and improve your home’s insulation.
Existing Insulation Check:
- Adequacy: Is the current insulation level sufficient for your climate? Consult with local building codes or energy efficiency guidelines for recommended R-values.
- Condition: Is the insulation damaged, compressed, or infested with pests? Damaged insulation loses its effectiveness.
- Gaps and Air Leaks: Seal any gaps or air leaks around wiring, plumbing, or framing members before adding or replacing insulation.
Insulation Options:
- Consider different types of insulation, such as fiberglass batts, blown-in cellulose, or spray foam, based on your budget, climate, and desired R-value.
- Proper insulation is crucial for energy efficiency, reducing heating and cooling costs, and improving overall comfort.
Drywall Finishing: Joint Compound, Tape, and Sanding
Once the new drywall is installed, the finishing process begins. This involves concealing seams and screw holes to create a smooth, paint-ready surface.
- Joint Compound Application: Apply joint compound in thin, even layers over the seams and screw holes. Several coats may be required, allowing each coat to dry completely before applying the next.
- Drywall Tape: Embed drywall tape into the wet joint compound to reinforce the seams and prevent cracking.
- Sanding: Once the joint compound is completely dry, sand the surface smooth using a sanding sponge or pole sander. Be careful not to oversand, which can damage the paper facing of the drywall.
- Priming: Apply a coat of primer to the entire ceiling surface before painting. This helps the paint adhere properly and provides a uniform finish.
When to Call in the Professionals
While DIY drywall removal and installation can be rewarding, certain situations warrant professional help.
- Structural Issues: If you discover significant structural damage to the framing, such as rot or insect infestation, consult with a qualified carpenter or structural engineer.
- Extensive Electrical Work: Complex electrical projects involving new circuits or modifications to the electrical panel should be handled by a licensed electrician.
- Asbestos or Lead Paint: If you suspect the presence of asbestos or lead paint, do not proceed with the project yourself. Contact a qualified professional for testing and remediation.
- Time Constraints or Physical Limitations: If you’re short on time or have physical limitations that make it difficult to perform the work safely, hiring a contractor can save you time, stress, and potential injury.
Ultimately, the decision to DIY or hire a contractor depends on your skill level, available time, budget, and the complexity of the project. Carefully assess your capabilities and don’t hesitate to seek professional help when needed.
FAQ: Removing a Drywall Ceiling
Got questions after tackling your drywall ceiling removal? Here are some common queries to help you navigate the process.
How can I tell if my drywall ceiling contains asbestos?
The only way to know for sure if your drywall ceiling contains asbestos is through professional testing. Do not disturb the material if you suspect asbestos. Contact a certified asbestos inspector and abatement company. Removing drywall ceilings containing asbestos is extremely dangerous and requires specialized equipment.
What safety precautions are most important when removing a drywall ceiling?
Eye protection (goggles), respiratory protection (a properly fitted N95 or P100 mask), and gloves are crucial. Falling debris is a major hazard. Cover furniture and flooring with plastic sheeting. Ensure proper ventilation. Safety is paramount when removing drywall ceilings.
How do I dispose of the old drywall ceiling material?
Check your local regulations for construction waste disposal. Many municipalities have specific guidelines for drywall disposal. Some areas may require drywall to be taken to a designated landfill or recycling center. Disposing of drywall from your removed drywall ceiling responsibly is important.
What’s the best way to find the ceiling joists under the drywall?
A stud finder is the easiest way to locate ceiling joists. You can also use a small nail or drill bit to probe for the joists. Mark the joist locations clearly on the drywall before you start removing the drywall ceiling. Knowing the joist locations is essential for repairs or future installations.
Alright, that’s the lowdown on removing drywall ceiling! Hopefully, you’re feeling more confident and ready to tackle (or maybe reconsider!) this project. Good luck, and remember to stay safe!