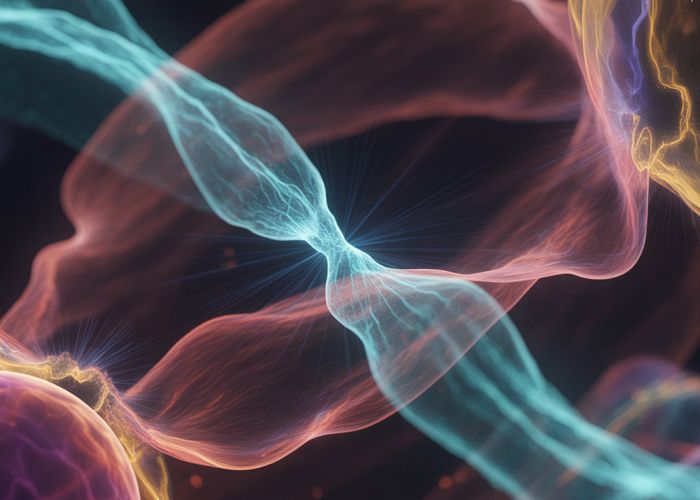
Ready to unleash your inner artist with plasma particle drawing? Imagine crafting mesmerizing visuals akin to the works of Beeple, but with your own unique flair! This guide illuminates the fascinating world where the tools from Adobe Photoshop meet the science-inspired techniques of creating artwork from glowing visuals similar to an electromagnetic field. You’ll discover how manipulating digital particles, inspired by the beautiful complexity of phenomena seen in plasma physics, can result in breathtaking digital masterpieces. Get ready to learn how to produce incredible art with plasma particle drawing!
Unleash Your Inner Artist: Designing the Perfect "Plasma Particle Drawing" Guide!
So, you’re ready to write the ultimate guide to plasma particle drawing! Awesome! Let’s break down the ideal article layout to captivate readers and turn them into plasma art pros. We’ll focus on keeping it engaging and super easy to follow.
Section 1: Introduction – What Is Plasma Particle Drawing, Anyway?
-
Purpose: This is your hook! Get readers excited and curious right from the start. Explain the magic of "plasma particle drawing" in a nutshell.
-
Content Ideas:
- Start with a visually stunning example of plasma particle art. Think bold, vibrant, and eye-catching.
- Clearly define "plasma particle drawing." Avoid technical jargon. Imagine explaining it to a friend who knows nothing about art or physics.
- Briefly touch on what makes it unique and appealing – the dynamic movement, the brilliant colors, the potential for abstract expression.
- Highlight the accessibility – anyone can create amazing art with the right tools and guidance.
- Tease what’s to come in the guide (step-by-step instructions, tool recommendations, inspiration, etc.).
Section 2: Essential Tools and Software for Plasma Particle Drawing
-
Purpose: Lay the groundwork by covering the tools needed to create "plasma particle drawing".
-
Content Ideas:
-
Overview: Explain the general types of tools available (software, tablets, etc.).
-
Software Options:
- List popular and beginner-friendly software like Processing, EmberGen, or even simpler apps depending on the intended audience.
- For each software option:
- Name of the software.
- A short description of its features and capabilities related to particle systems and rendering.
- Pricing (free, paid, subscription).
- Ease of use (beginner, intermediate, advanced).
-
Hardware Requirements:
- Minimum and recommended computer specifications (CPU, GPU, RAM).
- Tablet options (if applicable), focusing on pressure sensitivity and compatibility with the chosen software.
-
Table Example (Software Comparison):
Software Description Pricing Ease of Use Software A User-friendly interface, great for beginners. Free/Paid Beginner Software B Powerful, advanced features for complex animations. Paid Intermediate Software C Real-time rendering, excellent for visual effects. Subscription Advanced
-
Section 3: Step-by-Step Guide to Creating Your First Plasma Particle Drawing
-
Purpose: This is the core of your guide! Provide clear, concise instructions for creating basic "plasma particle drawing".
-
Content Ideas:
- Assumptions: Clearly state what the reader should already know (e.g., basic computer skills, software installation).
- Step-by-Step Instructions:
- Each step should be clearly numbered and accompanied by a screenshot or illustration.
- Break down complex tasks into smaller, manageable steps.
- Use action verbs to guide the reader (e.g., "Open the software," "Create a new project," "Adjust the particle settings").
- Explain why each step is important, not just how to do it.
- Provide troubleshooting tips and common mistakes to avoid.
- Example Steps:
- Setting up the Canvas: Choose the right resolution and background color.
- Creating Your First Emitter: Learn how to create and position your particle source.
- Subsection: Adjusting Emitter Properties: Particle size, speed, direction, and color.
- Adding Effects: Experiment with gravity, turbulence, and other forces.
- Rendering and Exporting: Save your masterpiece in a high-quality format.
- Visual Aids: Use plenty of screenshots, GIFs, or short video clips to demonstrate each step.
- Progressive Complexity: Start with a simple drawing and gradually introduce more advanced techniques.
Section 4: Mastering Advanced Techniques in Plasma Particle Drawing
-
Purpose: Take readers to the next level by introducing more complex concepts in "plasma particle drawing".
-
Content Ideas:
- Particle Collision: How to create interactions between particles.
- Custom Particle Shapes: Moving beyond basic circles.
- Importing custom shapes.
- Creating shapes within the software.
- Using Masks and Layers: Adding depth and complexity.
- Animating Particle Systems: Creating dynamic and evolving artwork.
- Scripting and Expressions: (If applicable and for more advanced users) How to use code to control particle behavior.
- Explain the basics of the scripting language used by the chosen software.
- Provide example scripts for common effects.
Section 5: Inspiration and Examples of Stunning Plasma Particle Art
-
Purpose: Fuel creativity by showcasing amazing "plasma particle drawing" examples.
-
Content Ideas:
- Gallery of Artwork: Feature a curated selection of inspiring pieces, with credit to the artists.
- Breakdown of Techniques: Briefly analyze how the artists achieved certain effects in their work.
- Categorization: Divide the examples into different styles or themes (abstract, realistic, futuristic, etc.).
- Call to Action: Encourage readers to share their own creations and join a community of plasma artists.
Plasma Particle Drawing: Frequently Asked Questions
Here are some common questions about creating stunning art using plasma particle drawing techniques.
What exactly is plasma particle drawing?
Plasma particle drawing is a digital art technique. It involves using software to simulate the behavior of plasma particles. Artists then manipulate these particles to create unique and visually appealing drawings, often with glowing and dynamic effects.
What kind of software do I need to do plasma particle drawing?
You’ll need specialized software. Options include Particle Illusion, EmberGen, and other visual effects or motion graphics programs that offer particle simulation capabilities. Search for "particle simulation software" to find suitable programs.
What are the advantages of using plasma particle drawing over other digital art forms?
Plasma particle drawing allows for highly dynamic and organic-looking visuals. It’s particularly effective for creating abstract art, glowing effects, and simulating natural phenomena. The realistic particle behavior can be difficult to achieve with other methods.
Can I use plasma particle drawing for animation as well as still images?
Yes, absolutely. Many software options let you animate the plasma particles over time. This allows you to create stunning motion graphics, visual effects, and animated sequences using plasma particle drawing techniques.
Alright, artists! Go forth and create some amazing plasma particle drawing art. We’re stoked to see what you come up with!