Designing a stunning outdoor space is within reach, and understanding picture framing deck construction is a key component. This technique, often favored by skilled carpenters, creates a polished, high-end look. The American Wood Council provides resources and guidelines for safe and effective deck building practices. Properly installed decking screws are essential for a secure and long-lasting frame. Many homeowners find inspiration from popular deck design blueprints to customize their outdoor living areas, showcasing how the picture framing deck elevates the overall aesthetic.
Frame Your Dream Deck: Picture Framing Deck Secrets!
Imagine stepping out onto a deck that’s more than just an outdoor platform.
Envision a space where the craftsmanship speaks volumes, where clean lines and sophisticated design elevate your entire backyard.
That’s the promise of a picture framing deck.
It’s about adding a touch of elegance and visual appeal to your outdoor living area.
This article is your guide to unlocking that potential.
We’ll explore the art of deck design and construction, focusing on a detail that makes a world of difference: the picture frame border.
The Allure of the Picture Frame Deck
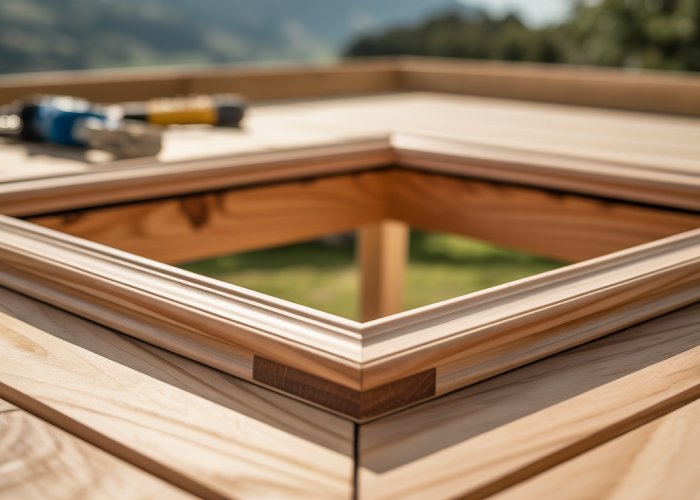
A picture frame deck is characterized by its distinct border, resembling a frame around a piece of art.
This border, typically made from decking boards laid perpendicular to the main deck boards, creates a visually striking outline.
The result is a polished, refined look that instantly enhances the deck’s aesthetic.
But the benefits extend beyond mere appearance.
A well-executed picture frame border can:
- Define the deck’s edges and create a sense of enclosure.
- Add structural rigidity to the deck surface.
- Provide an opportunity to use contrasting colors or materials for added visual interest.
- Increase your property’s value.
What We’ll Cover in This Guide
This isn’t just about slapping a border on your deck. It’s about understanding the why and how behind this design choice.
We’ll take you through the process, starting with foundational knowledge and moving towards practical application.
Here’s a glimpse of what you can expect to learn:
-
Deck Framing Fundamentals: Understanding the structural underpinnings of your deck is paramount. We’ll demystify joists, beams, posts, and ledger boards.
-
Planning Your Design: Careful planning is crucial. We’ll cover design principles and layout considerations to help you create a deck that meets your needs and vision.
-
Selecting the Perfect Materials: The choice of decking materials significantly impacts the final result. We’ll explore wood, composite, and PVC options.
-
Construction Techniques: We’ll provide a step-by-step guide to building the picture frame border.
-
Finishing Touches: Railing and lighting can dramatically enhance your deck’s appeal.
-
Permits and Safety: We’ll cover the essential aspects of permits, regulations, and safety guidelines.
By the end of this guide, you’ll have the knowledge and confidence to transform your ordinary deck into a stunning outdoor masterpiece.
Understanding Deck Framing Fundamentals
Before we dive into the aesthetics of a picture frame border, it’s crucial to understand the bones of your deck: the framing.
Think of the framing as the unseen hero of your outdoor oasis.
It’s the structural foundation that supports everything else, ensuring safety and longevity.
Without a solid frame, even the most beautiful decking materials and intricate designs will be for naught.
What is Deck Framing?
Deck framing refers to the interconnected network of structural members beneath the decking surface.
This framework provides the necessary support to withstand weight, resist weather, and maintain its integrity over time.
A strong and well-constructed frame is paramount for a safe and durable deck.
It’s not just about slapping some wood together; it’s about engineering a robust system.
Key Structural Components
Several key components work together to create a stable deck frame.
Understanding the role of each is essential for proper construction.
Let’s explore these elements in more detail:
Joists: The Horizontal Support
Joists are horizontal beams that run parallel to each other, spanning the distance between beams or a beam and a ledger board.
They provide direct support for the decking boards and distribute the weight evenly across the frame.
The spacing of joists is critical and depends on the type and thickness of the decking material used.
Closer spacing provides greater support, while wider spacing may lead to unwanted flexing or sagging of the deck boards.
Beams: The Weight Distributors
Beams are horizontal members that support the joists and transfer the load to the posts.
They run perpendicular to the joists and are typically larger in size to handle the accumulated weight.
The placement and size of beams are determined by the span they need to cover and the load they need to support.
Properly sized and positioned beams are essential for preventing deck collapse.
Posts: The Vertical Pillars
Posts are vertical supports that transfer the weight from the beams to the ground.
They are typically made of treated lumber or concrete and are anchored to footings below the frost line.
The spacing of posts depends on the size and span of the beams they support.
It’s crucial to ensure that the posts are plumb and securely fastened to the beams and footings.
Ledger Board: The House Connection
The ledger board is a crucial component that connects the deck to the house.
It’s a horizontal board attached to the house’s rim joist or foundation wall and provides support for one end of the deck joists.
Proper installation of the ledger board is critical for the stability and safety of the deck.
This includes using appropriate fasteners, flashing, and waterproofing to prevent water damage to the house.
Lumber Selection
Choosing the right lumber for your deck framing is an important decision.
Pressure-treated lumber is the most common choice due to its resistance to rot, insects, and decay.
However, not all pressure-treated lumber is created equal.
Be sure to select lumber that is specifically treated for ground contact if it will be used for posts or other components in direct contact with the soil.
Consider the grade of the lumber as well.
Higher grades have fewer knots and imperfections, resulting in stronger and more durable framing.
The Importance of Flashing
Flashing is a thin, impervious material installed to prevent water from penetrating vulnerable areas of the deck.
It’s typically made of metal or plastic and is used to protect the ledger board, posts, and other framing members from moisture damage.
Proper flashing is essential to prevent rot and decay, which can weaken the deck frame over time.
Pay close attention to flashing details during construction, especially around the ledger board and any areas where the deck frame comes into contact with the house.
Planning Your Picture Frame Deck Design
With a solid understanding of the underlying structure, we can now turn our attention to the exciting part: designing your picture frame deck. The key here is thoughtful planning. This ensures not only a visually appealing result but also a functional and enjoyable outdoor space for years to come.
Deck Design: Principles and Considerations
Designing a deck is more than just picking a size and shape. It’s about understanding how the deck will integrate with your home and lifestyle. Several key factors should influence your design choices:
-
Size: Consider how you intend to use the deck. Will it primarily be for dining, lounging, or entertaining? Size it accordingly. Too small, and it feels cramped; too large, and it might overwhelm your yard.
-
Shape: While rectangular decks are common, don’t be afraid to explore other shapes. L-shaped, curved, or multi-level designs can add visual interest and better suit your property’s unique features.
-
Layout Factors: Think about the deck’s orientation to the sun, prevailing winds, and views. Position the deck to maximize enjoyment and minimize exposure to harsh elements.
Integrating the Picture Frame Border
The picture frame border is the defining characteristic of this deck style, so its integration is crucial. It shouldn’t feel like an afterthought. Consider these points:
-
Contrast: Select a border material that complements, yet contrasts, with the main decking boards. This contrast is what makes the picture frame effect pop.
-
Width: The width of the border is a matter of personal preference. A wider border creates a bolder statement, while a narrower border offers a more subtle effect.
-
Mitered Corners: For a truly professional look, opt for mitered corners (45-degree cuts). They create a seamless and elegant transition between the border pieces.
Visualizing Your Design: The Power of Sketching
Before you start cutting lumber, take the time to visualize your design. Sketching is an invaluable tool for this purpose. It doesn’t have to be a professional rendering. A simple hand-drawn sketch can help you:
- Experiment with different sizes and shapes.
- Refine the placement of the picture frame border.
- Identify potential design flaws early on.
- Communicate your vision to contractors or helpers.
Deck Layout: Functionality and Flow
A beautiful deck is only as good as its functionality. Careful consideration of deck layout is essential for creating a space that is both aesthetically pleasing and practical.
-
Traffic Flow: Plan for smooth and unobstructed movement around the deck. Ensure that pathways are wide enough to accommodate multiple people.
-
Furniture Placement: Consider the size and arrangement of your outdoor furniture. Arrange furniture groupings to encourage conversation and relaxation.
-
Zoning: Divide the deck into different zones for various activities (e.g., dining area, lounging area, grilling area). This helps to create a more organized and functional space.
By investing time in careful planning, you can transform your deck vision into a reality. You’ll create an outdoor space that is not only beautiful but also perfectly tailored to your lifestyle.
Planning the layout and design sets the stage, but the true character of your picture frame deck emerges with the selection of decking materials. This choice isn’t just about aesthetics; it’s a decision that balances appearance, durability, maintenance, and budget. Let’s delve into the options and find the perfect fit for your outdoor oasis.
Selecting the Perfect Decking Materials
The material you choose for your deck is a critical decision, impacting both the look and longevity of your outdoor space. With options ranging from natural wood to high-tech composites and PVC, understanding the characteristics of each is essential. Each material brings a unique set of advantages and disadvantages, especially when considering the distinctive demands of a picture frame design.
Overview of Common Decking Materials
Let’s explore the most popular choices:
- Wood: A classic choice, wood offers natural beauty and warmth. Common options include pressure-treated lumber, cedar, redwood, and hardwoods like ipe.
- Composite: Made from a blend of wood fibers and recycled plastic, composites offer durability and low maintenance.
- PVC: A completely synthetic option, PVC decking is highly resistant to moisture, rot, and insects.
Wood Decking: Natural Beauty with a Commitment
Wood offers a timeless appeal with its natural grain and warm tones.
Pressure-treated lumber is an economical choice for the substructure, but for the decking surface, consider naturally durable woods like cedar or redwood.
For a truly luxurious look, hardwoods such as ipe are incredibly durable and resistant to wear.
Pros:
- Natural aesthetic.
- Relatively easy to work with.
- Can be stained or painted.
Cons:
- Requires regular maintenance (cleaning, staining, sealing).
- Susceptible to rot, insect damage, and splintering if not properly maintained.
- Can be more expensive than some composite options, especially hardwoods.
Composite Decking: Low Maintenance, Lasting Appeal
Composite decking offers a compelling blend of durability and low maintenance.
These materials resist rot, insects, and fading, making them a practical choice for busy homeowners.
The picture frame border will hold up for a long time because of the increased strength.
Pros:
- Low maintenance (no staining or sealing required).
- Resistant to rot, insects, and fading.
- Available in a wide range of colors and styles.
- Often made from recycled materials.
Cons:
- Can be more expensive than wood.
- May not have the same natural look as wood.
- Can get hot in direct sunlight.
PVC Decking: The Ultimate in Durability
PVC decking represents the cutting edge in synthetic decking materials.
Its 100% plastic composition provides unmatched resistance to moisture, insects, and fading, making it an ideal choice for demanding environments.
Pros:
- Extremely low maintenance.
- Highly resistant to moisture, insects, and fading.
- Lightweight and easy to install.
- Available in various colors and textures.
Cons:
- The most expensive decking option.
- Can look less natural than wood or composite.
- May expand and contract more than other materials.
Choosing Deck Boards for the Picture Frame Border
The picture frame border presents a unique opportunity to create visual interest and define the deck’s perimeter. Here are some considerations for selecting the right materials:
-
Contrast: Choose a material that contrasts with the main decking boards to create a distinct picture frame effect. A darker border around a lighter deck, or vice versa, can be very effective.
-
Material Consistency: While contrast is important, maintaining material consistency can also create a cohesive look. For example, using the same type of wood but in a different stain color.
-
Width Considerations: The width of the border will influence the amount of material needed. Wider borders create a bolder statement. This will need more precision to maintain the clean lines of the deck.
Ultimately, the best decking material for your picture frame deck depends on your individual needs, budget, and aesthetic preferences. By carefully considering the pros and cons of each option, you can create a beautiful and durable outdoor space that you’ll enjoy for years to come.
Planning the layout and design sets the stage, but the true character of your picture frame deck emerges with the selection of decking materials. This choice isn’t just about aesthetics; it’s a decision that balances appearance, durability, maintenance, and budget. Let’s turn our attention to the hands-on part, where precision and technique transform your vision into reality.
Construction Techniques: Building the Picture Frame Border
The picture frame border is more than just an aesthetic detail; it’s a testament to craftsmanship and attention to detail. Successfully constructing this border hinges on precise execution, turning ordinary decking into a showcase of clean lines and seamless transitions. Let’s break down the essential steps and techniques to ensure your border achieves a professional, eye-catching finish.
Step-by-Step Guide to a Flawless Border
Constructing the picture frame border requires a systematic approach.
Each step is crucial for achieving that seamless, professional look.
Follow this guide carefully, paying close attention to measurements and cuts.
-
Prepare the Deck Framing: Ensure the outer joists are perfectly flush and level. This is the foundation for your picture frame, and any imperfections here will be amplified in the final result. Add additional blocking between joists where the picture frame border will be installed for extra support and to provide a solid surface for fastening.
-
Measure with Precision: Accurate measurements are paramount. Measure the perimeter of your deck precisely, accounting for any angles or curves. Remember the mantra: measure twice, cut once.
-
Cut the Border Pieces: Using your measurements, cut the decking boards for the border. For straight runs, a miter saw will deliver the cleanest, most accurate cuts. For curved sections, use a jigsaw and a steady hand.
-
Install the Border: Begin by attaching the outer border pieces first. Use high-quality deck screws appropriate for your decking material. Pre-drilling is essential to prevent splitting, especially with hardwoods or composite decking.
-
Mitered Corners: For a classic picture frame look, miter the corners at a 45-degree angle. Precise cuts are crucial here. A slight imperfection can ruin the entire effect. Use construction adhesive along with screws for a strong, gap-free joint.
-
Concealing the Ends: An alternative to mitering is a butt joint with a cover board. This simplifies the cuts and can offer a unique aesthetic. The cover board is installed perpendicular to the border, concealing the ends of the picture frame boards.
-
Inner Border Installation: Now, install the inner border pieces, maintaining a consistent gap between the picture frame and the main deck boards. This gap allows for expansion and contraction and adds to the overall aesthetic.
Achieving a Seamless Appearance: Accurate Cuts are Key
The difference between an amateur and a professional-looking picture frame deck often comes down to the accuracy of the cuts. Here are some tips:
-
Invest in Quality Tools: A high-quality miter saw with a sharp blade is indispensable for achieving clean, precise cuts.
-
Practice Your Cuts: Before cutting your expensive decking material, practice on scrap pieces. This will help you get a feel for the saw and ensure your angles are accurate.
-
Use a Backing Board: When cutting thin or flexible decking, use a backing board to prevent splintering.
-
Check Your Angles: Use a protractor or angle finder to verify the accuracy of your miter cuts.
Decking Tools and Fasteners for a Pro Finish
Using the right tools and fasteners is essential for a professional and durable picture frame border.
Essential Decking Tools
-
Miter Saw: For precise angle cuts.
-
Jigsaw: For cutting curves.
-
Drill/Impact Driver: For pre-drilling and driving screws.
-
Measuring Tape: For accurate measurements.
-
Level: To ensure a level border.
-
Spacers: To maintain consistent gaps between boards.
Choosing the Right Fasteners
-
Deck Screws: Use screws specifically designed for decking. These are typically coated to resist corrosion and have a self-drilling tip to prevent splitting.
-
Hidden Fasteners: For a clean, screw-free look, consider using hidden fastener systems. These attach the decking boards from the underside, concealing the screw heads.
-
Construction Adhesive: Use a high-quality construction adhesive to bond the mitered corners and add extra strength.
Tips for Clean Lines and Concealed Screw Heads
The final touches make all the difference.
Here are some tips for achieving clean lines and concealing screw heads:
-
Countersinking: Countersink your screws slightly below the surface of the decking.
-
Wood Plugs: For a traditional look, use wood plugs to conceal the screw heads. Drill a hole slightly larger than the screw head, insert the screw, and then glue in a wood plug. Sand the plug flush with the surface of the decking.
-
Color-Matching Caulk: Use a color-matching caulk to fill any small gaps or imperfections.
-
Sanding: After installation, sand any rough edges or splinters for a smooth, professional finish.
-
Consistent Gaps: Maintain consistent spacing between the decking boards using spacers. This creates a uniform look and allows for expansion and contraction.
By following these steps and paying close attention to detail, you can create a stunning picture frame border that enhances the beauty and value of your deck. Remember, patience and precision are your greatest allies in this endeavor. With a little effort, you can achieve a professional-quality finish that will be the envy of your neighbors.
Construction is complete, the picture frame border gleams, and the deck’s potential is palpable. Now comes the exciting part: adding the finishing touches that truly bring your outdoor space to life. Railing and lighting aren’t just functional necessities; they’re opportunities to enhance the aesthetic and create an inviting atmosphere. Let’s explore how to make these final additions with style and purpose.
Finishing Touches: Railing and Lighting
Selecting the Right Deck Railing
Your choice of deck railing is a critical decision.
It impacts both the safety and the style of your deck.
The railing should complement your picture frame design, not compete with it.
Consider the material, style, and visibility.
Do you want to maintain unobstructed views?
Or are you looking for a more traditional, enclosed feel?
Material Considerations:
-
Wood: A classic choice, wood railings offer warmth and can be stained or painted to match your deck. Regular maintenance is key to prevent weathering and rot.
-
Composite: Low-maintenance and durable, composite railings come in various colors and styles. They resist fading, staining, and insect damage.
-
Metal: Sleek and modern, metal railings, often aluminum or steel, provide strength and minimal obstruction of views. Powder-coated finishes offer excellent weather resistance.
-
Glass: For unobstructed views, consider glass panels. They create a sophisticated look but require frequent cleaning.
Style Considerations:
-
Traditional: Spindles and posts create a classic, formal look.
-
Modern: Clean lines, minimalist designs, and cable railings offer a contemporary feel.
-
Craftsman: Incorporates natural elements and handcrafted details.
Deck Lighting: Ambiance and Safety
Lighting transforms your deck from a daytime space to an inviting nighttime retreat.
Carefully planned lighting enhances both the ambiance and safety of your outdoor living area.
Types of Deck Lighting:
-
Post Cap Lights: These provide subtle, downward-facing light, illuminating the deck surface and marking the perimeter.
-
Railing Lights: Integrated into the railing system, these lights offer both safety and style.
-
Stair Lights: Essential for safety, stair lights illuminate each step, preventing accidents.
-
Deck Surface Lights: Recessed into the deck boards, these lights create a soft, ambient glow.
-
Landscape Lighting: Strategically placed around the deck, landscape lighting highlights surrounding plants and features, extending the visual space.
Planning Your Lighting:
-
Layering: Combine different types of lighting to create depth and interest.
-
Brightness: Choose appropriate brightness levels to avoid glare and maintain a comfortable atmosphere.
-
Placement: Consider the placement of lights to maximize safety and highlight architectural features.
-
Energy Efficiency: Opt for LED lighting to save energy and reduce your carbon footprint.
Integrating Deck Stairs Seamlessly
If your deck is elevated, stairs are a necessity.
Stair design should integrate seamlessly with the overall deck aesthetic, especially the picture frame border.
Stair Design Considerations:
-
Placement: Position the stairs for convenient access to the yard or patio.
-
Width: Ensure the stairs are wide enough for comfortable and safe passage.
-
Materials: Use the same decking materials as the deck to create a cohesive look.
-
Lighting: Incorporate stair lighting for safety and visual appeal.
-
Railing: Extend the deck railing down the stairs to provide a continuous and secure handrail.
By thoughtfully selecting and installing railing, lighting, and stairs, you can elevate your picture frame deck from a simple structure to a stunning outdoor oasis. These finishing touches are the key to creating a space that is not only beautiful but also safe, functional, and inviting for years to come.
Construction is complete, the picture frame border gleams, and the deck’s potential is palpable. Now comes the exciting part: adding the finishing touches that truly bring your outdoor space to life. Railing and lighting aren’t just functional necessities; they’re opportunities to enhance the aesthetic and create an inviting atmosphere. Let’s explore how to make these final additions with style and purpose.
Permits, Regulations, and Safety Guidelines
Before you raise a single board or sink the first screw, it’s crucial to address the often-overlooked but absolutely essential aspects of deck building: permits, regulations, and safety. Ignoring these could lead to costly setbacks, legal issues, or, worst of all, injuries.
Think of this stage as your due diligence – ensuring your beautiful new deck is not only aesthetically pleasing but also structurally sound and legally compliant.
The Importance of Deck Permits
A deck permit is an official authorization from your local government to construct or modify a deck on your property. It might seem like an unnecessary hurdle, but obtaining the required permits is paramount for several reasons:
- Ensuring Safety: Permit offices review your plans to confirm they meet safety standards. This helps prevent structural failures and potential hazards.
- Code Compliance: Permits ensure your deck complies with local building codes, which are designed to protect residents and maintain property values.
- Avoiding Fines and Legal Issues: Building without a permit can result in hefty fines, legal action, and even the forced removal of your deck.
- Home Value: A permitted deck adds value to your home and provides assurance to potential buyers that the structure is safe and compliant.
Navigating Local Building Codes
Local building codes are a complex set of regulations that govern construction practices in your area. Navigating these codes can feel daunting, but understanding the basics is essential.
- Research: Start by contacting your local building department or visiting their website. Obtain a copy of the relevant building codes and familiarize yourself with the specific requirements for decks.
- Understand Key Requirements: Pay close attention to regulations regarding:
- Footing depth and size
- Joist spacing and span
- Railing height and strength
- Stair construction
- Setbacks from property lines
- Professional Help: If you find the codes confusing, consider consulting with a qualified architect, structural engineer, or experienced deck builder who is familiar with local regulations.
Essential Safety Guidelines
Building a deck involves inherent risks, and prioritizing safety is non-negotiable. Here are some essential safety guidelines to follow during the construction process:
- Personal Protective Equipment (PPE): Always wear appropriate PPE, including:
- Safety glasses to protect your eyes from flying debris
- Work gloves to protect your hands from splinters and abrasions
- Hearing protection when using power tools
- Steel-toed boots to protect your feet from dropped objects
- Tool Safety: Familiarize yourself with the proper operation and safety features of all power tools before using them. Keep tools in good working condition and never remove safety guards.
- Work Area Safety: Maintain a clean and organized work area to prevent trips and falls. Keep children and pets away from the construction zone.
- Lifting Techniques: Use proper lifting techniques to avoid back injuries. Lift with your legs, not your back, and get help when lifting heavy objects.
- Weather Conditions: Avoid working in adverse weather conditions, such as heavy rain, strong winds, or extreme temperatures.
- Electrical Safety: Be aware of underground utilities before digging. If you are working near electrical wires, take extra precautions to avoid electrocution.
- First Aid: Keep a well-stocked first-aid kit on hand and know how to use it.
By diligently addressing permits, understanding local building codes, and adhering to strict safety guidelines, you can ensure that your picture-frame deck project is not only beautiful and functional but also safe, compliant, and built to last.
FAQs About Picture Framing Your Dream Deck
Hopefully, this helps clear up any questions you have about picture framing your deck and creating that stunning, finished look.
What exactly is picture framing a deck?
Picture framing a deck involves adding a border of decking boards around the perimeter. This creates a clean, finished edge that resembles a picture frame. It enhances the aesthetic appeal and gives your deck a more polished and professional look.
Why should I consider picture framing my deck?
Picture framing provides a neat and defined edge. It hides the cut ends of the interior deck boards. Picture framing a deck can also increase its visual appeal and perceived value.
Can I picture frame a deck myself, or should I hire a professional?
While DIY picture framing is possible, it requires precise cuts and careful installation. Uneven cuts or improperly installed boards can detract from the overall look. If you lack experience, hiring a professional ensures a clean and well-executed picture framing deck project.
What materials do I need for picture framing my deck?
You’ll need decking boards (often the same as your deck surface, but sometimes a contrasting color), fasteners (screws or hidden fasteners), a saw (miter saw recommended), measuring tape, and potentially shims for leveling. The specific materials depend on the size and construction of your picture framing deck border.
So, are you ready to tackle your own picture framing deck project? We hope these secrets helped! Have fun building and enjoy the amazing deck you create!