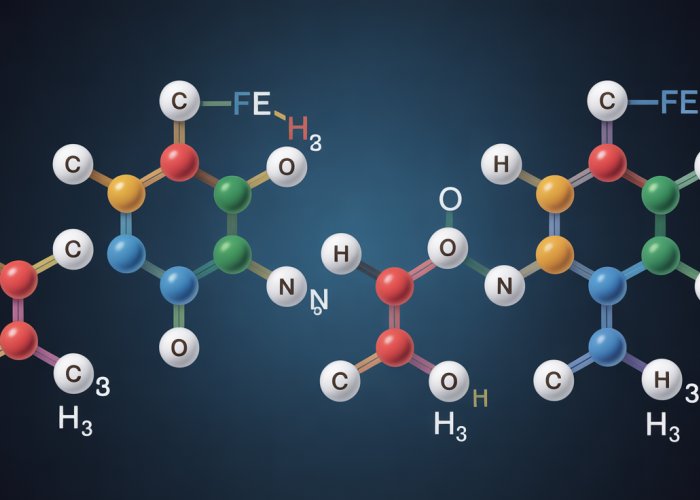
The stability of protein structures fundamentally depends on peptide bond resonance. This crucial characteristic, explored extensively in the research conducted at the Linus Pauling Institute, reveals that the peptide bond does not exist as a simple single bond. Rather, electron delocalization contributes to a partial double-bond nature influencing the bond’s rigidity. Spectroscopy techniques, such as Nuclear Magnetic Resonance (NMR), provide direct evidence of this resonance, enabling scientists to analyze its impact on protein folding. Understanding the implications of peptide bond resonance is vital for utilizing software tools such as PyMOL, which allows for the effective visualization and modeling of biomolecules, thus revealing the ‘shocking truth’ about its underestimated influence on protein dynamics and function.
Home brewing, once a niche hobby, has blossomed into a widespread passion, attracting individuals from all walks of life. The allure lies in the ability to craft personalized beers, offering a creative outlet and a deeper connection to the brewing process.
But what exactly is home brewing, and why has it captured the interest of so many?
The Essence of Home Brewing
At its core, home brewing is the process of brewing beer on a small scale for personal consumption. Unlike commercial brewing, which involves large-scale production and distribution, home brewing is a more intimate and experimental endeavor.
It’s about taking raw ingredients, applying brewing techniques, and transforming them into a unique and flavorful beverage.
People are drawn to home brewing for various reasons. For some, it’s the desire to control the ingredients and create beers that cater to their specific tastes. Others are captivated by the scientific and technical aspects of the brewing process. And for many, it’s simply the satisfaction of creating something delicious from scratch.
Uncorking the Benefits: Cost, Customization, and Craft
The appeal of home brewing extends beyond mere curiosity; it offers a tangible set of benefits that resonate with a growing number of enthusiasts.
Cost Savings
While there is an initial investment, home brewing can lead to significant cost savings in the long run. Brewing your own beer is far cheaper than buying craft beers at the store. Over time, the cost per bottle decreases dramatically as you reuse equipment and refine your brewing techniques.
Unleashing Creativity and Customization
Home brewing grants unparalleled control over the final product. You can experiment with different ingredients, hop varieties, and fermentation techniques to create beers that are truly unique. This level of customization is simply not possible with commercially produced beers. Want to brew a chocolate raspberry stout? With home brewing, you absolutely can.
The Allure of a Rewarding Hobby
Beyond the practical benefits, home brewing provides a rewarding and engaging hobby. The brewing process can be as challenging or as relaxed as you like. It encourages learning, experimentation, and problem-solving.
The sense of accomplishment that comes from brewing a great batch of beer is incredibly satisfying.
Navigating the Initial Landscape: Costs and Commitment
Before diving into the world of home brewing, it’s essential to acknowledge the initial investment and time commitment involved.
The startup costs can range from a few hundred to several thousand dollars, depending on the equipment you choose to purchase. While starter kits offer a more affordable entry point, upgrading equipment over time can increase the overall investment.
Time is another factor to consider. Brewing a batch of beer requires several hours of active work, followed by a period of fermentation that can last for several weeks. Bottling the beer also requires time and effort. Despite the time investment, many brewers find the process to be a relaxing and enjoyable way to spend their time.
Uncorking the Benefits: Cost, Customization, and Craft
The appeal of home brewing extends beyond mere curiosity; it offers a tangible set of benefits that resonate with a growing number of enthusiasts. But before you can start enjoying those benefits, you’ll need to assemble the right tools for the job.
Gathering Your Arsenal: Essential Home Brewing Equipment
Embarking on your home brewing journey requires more than just enthusiasm; you’ll need to equip yourself with the essential tools of the trade. These implements, while seemingly simple, are crucial for a successful and enjoyable brewing experience.
For beginners, extract brewing is an excellent entry point. This method simplifies the process by using pre-made malt extract, bypassing the complex steps of milling and mashing grains. Extract brewing allows you to focus on the fundamentals of fermentation, hopping, and sanitation, building a solid foundation for more advanced techniques later on.
The Extract Brewing Starter Kit: What You Need
Here’s a breakdown of the essential equipment you’ll need to get started with extract brewing:
-
Brew Kettle: The heart of your brewing setup.
A 5-gallon kettle is generally sufficient for brewing 1-3 gallon batches, while an 8-10 gallon kettle is recommended if you plan on brewing full 5-gallon batches to avoid boilovers.
Stainless steel is the preferred material due to its durability, ease of cleaning, and resistance to corrosion. -
Fermenter (Bucket or Carboy): Your beer’s temporary home during fermentation.
Food-grade plastic buckets are a cost-effective and durable option, while glass carboys offer the advantage of being transparent, allowing you to monitor the fermentation process visually.
A 6-7 gallon fermenter is a good size for a 5-gallon batch, providing enough headspace to prevent overflow. -
Airlock and Bung: A one-way valve that allows CO2 to escape while preventing air and contaminants from entering the fermenter.
This is crucial for preventing oxidation and spoilage during fermentation. -
Bottling Bucket and Spigot: Used to transfer the beer from the fermenter to the bottles for carbonation and aging.
The spigot allows for easy and controlled filling of bottles. -
Bottling Wand: A small, spring-loaded tube that attaches to the bottling bucket spigot and allows you to fill bottles from the bottom up, minimizing oxidation and foam.
-
Bottle Capper: A device used to securely seal crown caps onto your beer bottles.
There are two main types: lever cappers and bench cappers. Lever cappers are more affordable and portable, while bench cappers are more stable and require less effort. -
Bottles: The final resting place for your brew.
Use standard beer bottles (12oz or 500ml) that are not twist-off. Clear bottles should be avoided as they can lead to skunking. Brown or green bottles are preferable. -
Sanitizer (Food-Grade): Absolutely essential for preventing contamination and ensuring a clean fermentation.
Use a no-rinse sanitizer specifically designed for brewing. -
Hydrometer: A tool used to measure the specific gravity of your wort (unfermented beer) and beer.
This allows you to track the progress of fermentation and determine the alcohol content of your final product. -
Long Spoon or Paddle: Used for stirring the wort during the brewing process and ensuring proper mixing of ingredients.
Choose a stainless steel or food-grade plastic spoon or paddle that is long enough to reach the bottom of your brew kettle.
Functionality: Understanding the Role of Each Item
Each piece of equipment plays a specific role in the brewing process. The brew kettle is where you’ll boil your wort, extracting flavors from the malt extract and hops. The fermenter provides a controlled environment for the yeast to convert sugars into alcohol and CO2. The airlock prevents unwanted bacteria from entering the fermenter.
The bottling bucket and wand make bottling efficient and minimize oxygen exposure. The bottle capper ensures a tight seal, preventing carbonation from escaping. Sanitizer is your shield against contamination, and the hydrometer is your tool for monitoring fermentation. The long spoon or paddle is your trusty stirring companion.
Investing in quality equipment from the start will not only improve the quality of your beer but also make the brewing process more enjoyable and less prone to problems. With the right arsenal, you’ll be well-equipped to embark on your home brewing adventure and create delicious, personalized beers.
Brew kettles, fermenters, and bottling wands now in tow, it’s time to dive into what actually makes beer, well, beer. It’s a delicate dance between a few key components, each contributing uniquely to the final flavor profile.
Understanding Ingredients: The Four Pillars of Beer
The journey from raw materials to a refreshing pint hinges on four essential ingredients: water, malt extract, hops, and yeast. These aren’t just components; they’re active participants, each playing a crucial role in shaping the beer’s character, aroma, and overall quality.
Water: More Than Just a Filler
Water, often overlooked, makes up the vast majority of beer. It’s not merely a solvent; its mineral content significantly impacts the brewing process and the final taste. Different water profiles can accentuate certain flavors. For example, hard water (high in minerals) is often preferred for brewing darker beers like stouts, while softer water is better suited for lighter beers like pilsners. Understanding your water source is crucial, and you might even consider adjusting its mineral content to match the style of beer you’re brewing.
Malt Extract: The Soul of Your Brew
Malt extract is the concentrated sugars derived from malted barley. It serves as the primary source of fermentable sugars that the yeast will convert into alcohol and carbon dioxide. It comes in two primary forms: liquid malt extract (LME) and dry malt extract (DME).
LME vs. DME: Choosing Your Base
Liquid Malt Extract (LME) is a thick, syrup-like substance. It’s generally more affordable than DME but has a shorter shelf life.
Dry Malt Extract (DME) is a powdered form of malt extract. It offers better shelf stability and is often easier to work with, though typically more expensive.
A Spectrum of Flavors: Exploring Malt Extract Types
The type of malt extract you choose will significantly impact the beer’s color, body, and flavor.
-
Light malt extract is ideal for pale ales and lagers, contributing a subtle, clean malt flavor.
-
Amber malt extract adds a touch of caramel and toasty notes, perfect for amber ales and Irish reds.
-
Dark malt extract imparts rich, roasted flavors like coffee and chocolate, essential for stouts and porters.
Hops: Bittering Agents and Aromatic Delights
Hops are the flowers of the hop plant and are responsible for beer’s bitterness, aroma, and flavor. They also contribute to its preservative qualities. Hops contain alpha acids, which are isomerized during the boil to create bitterness, and essential oils, which contribute to aroma and flavor.
Bittering vs. Aroma Hops: A Matter of Timing
Hops are generally categorized as either bittering hops or aroma hops, depending on when they are added during the boil.
-
Bittering hops are added early in the boil (typically 60 minutes or longer) to maximize the isomerization of alpha acids and impart bitterness.
-
Aroma hops are added late in the boil (15 minutes or less) or even after the boil (dry hopping) to preserve their delicate essential oils and contribute aroma and flavor.
Hop Variety Showcase: A World of Flavors
The world of hops is vast and diverse, with countless varieties each offering unique characteristics.
-
Cascade is a classic American hop known for its citrusy and floral aroma.
-
Centennial offers a balanced profile of citrus, floral, and pine notes.
-
Citra is a popular hop with intense citrus and tropical fruit aromas.
-
Hallertau Mittelfrüh is a traditional German hop known for its noble, floral aroma.
Yeast: The Alchemist Transforming Sugars
Yeast are single-celled microorganisms responsible for fermentation. They consume the sugars in the wort and produce alcohol, carbon dioxide, and a wide range of flavor compounds. The choice of yeast strain is critical as it significantly influences the beer’s final flavor profile.
Ale vs. Lager Yeasts: Two Distinct Families
The two main categories of brewing yeast are ale yeasts and lager yeasts.
-
Ale yeasts ferment at warmer temperatures (60-75°F) and produce a wide range of flavors, including fruity esters and spicy phenols. They are typically used for brewing ales, IPAs, and stouts.
-
Lager yeasts ferment at cooler temperatures (45-55°F) and produce a cleaner, crisper flavor profile. They are typically used for brewing lagers and pilsners.
The Golden Rule: Sanitation is Paramount
Yeast health and purity are crucial. Sanitation is non-negotiable to prevent contamination from unwanted bacteria or wild yeasts that can lead to off-flavors. Thoroughly sanitize all equipment that comes into contact with the wort after it has been boiled.
Brew kettles, fermenters, and bottling wands now in tow, it’s time to dive into what actually makes beer, well, beer. It’s a delicate dance between a few key components, each contributing uniquely to the final flavor profile.
Brew Day: A Step-by-Step Guide to Your First Batch
The alchemy of brewing truly unfolds on brew day. This is where preparation meets execution, and your vision of a perfect pint begins to take shape. While recipes vary, the core steps remain consistent. Adhering to these steps diligently, especially the crucial emphasis on sanitation, will pave the way for a successful and satisfying home brewing experience.
Step 1: Sanitize, Sanitize, Sanitize
Sanitation is paramount. Before you even think about heating water or handling ingredients, meticulously sanitize every piece of equipment that will come into contact with your wort (the sugary liquid extracted from malt). This includes the brew kettle, fermenter, airlock, tubing, spoons – everything.
Use a food-grade sanitizer like Star San or Iodophor, following the manufacturer’s instructions carefully. Remember, beer is susceptible to contamination from wild yeasts and bacteria, which can lead to off-flavors or even spoil your entire batch.
A quick rinse is not enough; ensure adequate contact time with the sanitizer for effective sterilization.
Step 2: Heating the Water – The Foundation of Your Wort
With your equipment sanitized, it’s time to heat your brewing water. The amount of water will depend on your recipe, but generally, you’ll need more than the final volume of beer you intend to produce, accounting for evaporation during the boil.
Use filtered water if possible, as tap water can contain chlorine or other chemicals that can negatively impact the flavor of your beer. Heat the water in your brew kettle to the temperature specified in your recipe.
Step 3: Adding the Malt Extract – Unlocking the Sugars
Once the water reaches the desired temperature, turn off the heat and slowly add your malt extract (LME or DME), stirring constantly to prevent clumping and scorching.
This step is crucial for creating a homogenous mixture. Ensure the extract is fully dissolved before proceeding. Scorched extract can impart unwanted flavors to your beer.
Step 4: Bringing the Wort to a Boil – The Hot Break
After the malt extract is fully dissolved, bring the wort to a rolling boil. This is important for several reasons: it sterilizes the wort, isomerizes the hop acids (releasing their bitterness), and helps to drive off unwanted volatile compounds.
Be mindful of boil-overs, especially when using LME. Keep a spray bottle of water handy to knock down the foam if it threatens to spill over the top of the kettle.
Step 5: Hop Additions – Bittering, Flavor, and Aroma
Hops are typically added at different times during the boil to achieve different effects. Bittering hops are added early in the boil (60 minutes or longer) to extract their alpha acids, which contribute to the beer’s bitterness. Flavor hops are added in the middle of the boil (around 15-30 minutes) to contribute more flavor. Aroma hops are added late in the boil (5-10 minutes) or even after the boil (a process called "whirlpooling" or "hop standing") to preserve their delicate aromas.
Follow your recipe carefully for hop additions, as the timing and amount of hops will significantly impact the final flavor of your beer.
Step 6: Cooling the Wort – A Race Against Infection
Once the boil is complete, you need to cool the wort down to yeast-pitching temperature as quickly as possible. This is crucial to prevent the growth of unwanted bacteria and wild yeasts that can thrive in warm wort.
The faster you cool the wort, the lower the risk of contamination.
Common methods for cooling include using an ice bath (placing the kettle in a sink or tub filled with ice water) or using a wort chiller (a copper or stainless steel coil that circulates cold water through the wort).
Step 7: Transferring to the Fermenter – Preparing for Transformation
Carefully transfer the cooled wort to your sanitized fermenter, leaving behind as much of the sediment (trub) in the kettle as possible. The trub is composed of hop debris and coagulated proteins.
While some trub is acceptable, excessive amounts can contribute to off-flavors. Use a sanitized strainer or filter if necessary.
Step 8: Topping Up – Achieving the Target Volume
Add cooled, pre-boiled water to the fermenter to reach your desired batch volume. This water should be free of chlorine and other contaminants.
Step 9: Oxygenating the Wort – A Breath of Life for Yeast
Yeast needs oxygen to reproduce and ferment properly. Oxygenate the wort by shaking the fermenter vigorously for several minutes (if using a bucket) or by using an aeration stone and oxygen tank (for carboys).
Proper oxygenation is essential for a healthy fermentation.
Step 10: Pitching the Yeast – The Spark of Fermentation
Once the wort is cooled and oxygenated, it’s time to pitch the yeast. Ensure your yeast is properly hydrated according to the manufacturer’s instructions. Sprinkle the yeast evenly over the surface of the wort.
Step 11: Sealing the Fermenter – Committing to the Process
Seal the fermenter with the sanitized airlock and bung. Fill the airlock with sanitized water or vodka to prevent air from entering the fermenter while allowing CO2 to escape.
Place the fermenter in a dark, temperature-controlled environment, and let the fermentation begin.
With the airlock bubbling, you’ve officially embarked on the fermentation journey, and you’re one step closer to enjoying your home-brewed beer.
Brew kettles, fermenters, and bottling wands now in tow, it’s time to dive into what actually makes beer, well, beer. It’s a delicate dance between a few key components, each contributing uniquely to the final flavor profile.
Fermentation and Bottling: Patience is Key
With the brew day complete and your wort safely nestled in its fermenter, the next phase, fermentation, requires a different kind of attention. It’s a period of watchful waiting where the yeast diligently converts sugars into alcohol and carbon dioxide, the very essence of beer. Bottling is the final act before the grand reveal, but it’s a stage where precision and care are crucial to achieving a satisfying final product.
Understanding Fermentation: The Yeast’s Vital Role
Fermentation is the heart of brewing, where yeast transforms the sugary wort into beer. Yeast consumes sugars, producing alcohol, carbon dioxide, and a range of flavor compounds.
The duration of fermentation varies depending on the yeast strain, the specific gravity of the wort, and the fermentation temperature, usually ranging from one to three weeks.
Monitoring Fermentation
During active fermentation, you’ll observe vigorous bubbling in the airlock, a sign that carbon dioxide is being released. This activity will gradually slow down as the yeast consumes the available sugars.
Temperature Control: A Crucial Factor
Temperature plays a critical role in fermentation. Different yeast strains have optimal temperature ranges. Ale yeasts typically ferment at warmer temperatures (60-72°F), while lager yeasts prefer cooler conditions (48-58°F).
Maintaining a consistent temperature within the yeast’s ideal range is essential for a clean and predictable fermentation. Fluctuations can lead to off-flavors or stalled fermentation.
Confirming Completion: The Hydrometer’s Tale
The hydrometer is an invaluable tool for determining when fermentation is complete. It measures the specific gravity of the beer, which indicates the amount of sugar present.
As fermentation progresses, the specific gravity decreases as sugars are converted into alcohol.
By taking hydrometer readings over several days, you can confirm that the gravity has stabilized, indicating that fermentation is complete. Compare the final gravity to the expected final gravity in your recipe. This is a crucial step before bottling.
The Bottling Process: Preparing for the Grand Finale
Once fermentation is complete, it’s time to bottle your beer. This stage requires meticulous attention to detail to ensure proper carbonation and prevent contamination.
Bottle Preparation: The First Line of Defense
Sanitizing your bottles is crucial to prevent contamination. Use a food-grade sanitizer, ensuring adequate contact time. A bottle rinser can be helpful for this step.
Priming Sugar: Creating the Fizz
Priming sugar is added to the beer before bottling to provide the yeast with a small amount of sugar to consume, creating carbon dioxide within the sealed bottles. This is what gives beer its fizz.
The amount of priming sugar depends on the style of beer and the desired level of carbonation. Use a priming sugar calculator to determine the correct amount. Dissolve the priming sugar in a small amount of boiling water, then carefully add it to the bottling bucket.
Racking and Bottling: Minimizing Sediment
Carefully rack, or siphon, the beer from the fermenter into the bottling bucket, avoiding disturbing the sediment (trub) at the bottom. The goal is to transfer the clear beer without introducing excessive oxygen.
Attach the bottling wand to the spigot of the bottling bucket and fill each bottle, leaving a small amount of headspace at the top. The bottling wand prevents oxidation and controls fill levels.
Capping: Sealing the Deal
Immediately after filling, cap each bottle using a bottle capper. Ensure a tight seal to prevent carbon dioxide from escaping.
Aging and Conditioning: Patience Rewarded
Bottled beer requires time to age and condition. During this period, the yeast consumes the priming sugar, carbonating the beer. Flavors also mellow and blend together.
Store the bottles at room temperature (around 70°F) for at least two weeks. Then, refrigerate them before drinking. Aging can improve the flavor of your beer and can reduce any harsh flavors that may be present after fermentation. Be patient!
Brew kettles, fermenters, and bottling wands now in tow, it’s time to dive into what actually makes beer, well, beer. It’s a delicate dance between a few key components, each contributing uniquely to the final flavor profile. With the brew day complete and your wort safely nestled in its fermenter, the next phase, fermentation, requires a different kind of attention. It’s a period of watchful waiting where the yeast diligently converts sugars into alcohol and carbon dioxide, the very essence of beer. Bottling is the final act before the grand reveal, but it’s a stage where precision and care are crucial to achieving a satisfying final product.
Troubleshooting and Tips: Avoiding Common Brewing Pitfalls
Even with the best intentions and meticulous preparation, home brewing can present challenges. Recognizing potential pitfalls and equipping yourself with troubleshooting strategies is vital for a rewarding brewing experience. Let’s explore some common issues and how to navigate them.
The Imperative of Sanitation
Sanitation is paramount in brewing. It’s the single most crucial factor in preventing off-flavors and batch spoilage. Wild bacteria and unwanted microorganisms can wreak havoc on your beer, leading to sour, medicinal, or otherwise undesirable tastes.
Thoroughly clean and sanitize every piece of equipment that comes into contact with the wort after the boil. Use a food-grade sanitizer like Star San or Iodophor, following the manufacturer’s instructions carefully. Remember, cleanliness is next to godliness in the brewing world.
Identifying and Avoiding Off-Flavors
Off-flavors are unwelcome guests that can appear in your beer, often indicating a problem somewhere in the brewing process. Learning to recognize common off-flavors is essential for diagnosing and correcting issues.
Some frequent culprits include:
-
Diacetyl (buttery or butterscotch flavor): Often caused by stressed yeast or premature racking. Ensure proper fermentation temperatures and allow sufficient time for the yeast to clean up byproducts.
-
Acetaldehyde (green apple flavor): Usually a sign of incomplete fermentation. Give the beer more time to ferment.
-
Chlorophenols (medicinal or plastic-like flavor): Typically results from using chlorinated water or improperly sanitized equipment. Use filtered water and ensure thorough sanitation.
-
Infection (sour or funky flavors): Indicates the presence of unwanted bacteria or wild yeast. Strict sanitation practices are key to prevention.
Preventing off-flavors involves meticulous attention to detail at every stage, from water quality to temperature control and sanitation.
Navigating a Stuck Fermentation
A stuck fermentation occurs when the yeast prematurely ceases activity, leaving behind unfermented sugars. This can result in a beer that is overly sweet and lacking the desired alcohol content.
Several factors can contribute to a stuck fermentation:
-
Insufficient Yeast: Ensure you’re pitching an adequate amount of healthy, viable yeast for your wort’s gravity.
-
Temperature Issues: Yeast can become sluggish or dormant if the fermentation temperature is too low or fluctuates excessively.
-
Nutrient Deficiencies: Yeast requires nutrients to thrive. Adding yeast nutrient can help kickstart a stalled fermentation.
-
High Gravity: Very high-gravity worts can stress the yeast. Consider using a yeast starter or a more alcohol-tolerant yeast strain.
If you encounter a stuck fermentation, gently rouse the yeast by swirling the fermenter (if using a carboy, be careful not to splash). Warm the fermentation temperature slightly (within the yeast’s tolerance). If these measures don’t work, consider pitching a fresh batch of yeast.
Common Brewing Problems and Solutions
Beyond off-flavors and stuck fermentations, other challenges may arise during your brewing journey.
Here’s a quick guide to some common problems and their solutions:
-
Cloudy Beer: Can be caused by chill haze (proteins that precipitate when cold), yeast suspension, or starch haze (incomplete starch conversion during mashing, more common in all-grain brewing). Cold crashing (reducing the temperature of the beer before bottling) can help clear chill haze and yeast suspension.
-
Oxidation: Exposure to oxygen after fermentation can lead to stale or cardboard-like flavors. Minimize splashing during transfers and purging headspace with CO2.
-
Gushing Bottles: Over-carbonation due to excessive priming sugar or residual fermentation. Use accurate measuring tools when adding priming sugar, and ensure fermentation is complete before bottling.
Resources for Continuous Learning
Home brewing is a journey of continuous learning. Fortunately, a wealth of resources are available to support you.
- Books: John Palmer’s "How to Brew" is a classic and comprehensive guide.
- Websites and Forums: Websites like HomebrewTalk offer a vast community of brewers sharing tips and troubleshooting advice.
- Local Homebrew Shops: Your local homebrew shop is an invaluable resource for equipment, ingredients, and expert advice.
- Brewing Clubs: Joining a homebrew club connects you with experienced brewers and provides opportunities for learning and collaboration.
By embracing a spirit of experimentation and continuous learning, you’ll overcome challenges and refine your brewing skills, consistently producing delicious and satisfying homebrews.
Peptide Bond Resonance: FAQs
Here are some frequently asked questions to clarify the surprising details of peptide bond resonance.
What exactly is peptide bond resonance?
Peptide bond resonance describes the partial double bond character between the carbonyl carbon and the nitrogen atom in a peptide bond. This resonance arises from the delocalization of electrons, making the peptide bond shorter and more rigid than a typical single bond.
Why is peptide bond resonance considered "shocking"?
The "shocking" aspect refers to how the partial double bond nature affects the geometry and properties of proteins. This resonance restricts rotation around the peptide bond, influencing protein folding and overall structure. The rigidity it imparts is crucial for protein function.
How does peptide bond resonance affect protein structure?
Peptide bond resonance enforces a planar geometry around the peptide bond. This planarity significantly limits the possible conformations of the polypeptide chain, guiding how proteins fold into their functional three-dimensional shapes.
What are the implications of peptide bond resonance for peptide synthesis?
Understanding peptide bond resonance is crucial in peptide synthesis because it influences the reactivity of the amide linkage. Chemists must account for the resonance stabilization when designing and optimizing synthetic routes to create specific peptide sequences.
Alright, that wraps up our deep dive into peptide bond resonance! Hopefully, you now have a better understanding of how this seemingly small detail plays a huge role in the world of proteins. Keep those bonds resonating!