Understanding privacy fences is crucial, and fence installation companies often recommend an overlapping wood fence for its unique benefits. Specifically, an overlapping wood fence design features pickets arranged to completely block visibility, a significant advantage for homeowners desiring seclusion. This fence construction, differing from standard picket fences, relies on interwoven wood panels, providing enhanced strength and wind resistance; cedar material choices further improves fence durability and resists pests. With our guide, you’ll learn all the essential details about choosing and maintaining your overlapping wood fence.
Overlapping Wood Fence: Everything You Need to Know!
An overlapping wood fence, also known as a shadow box fence or board-on-board fence, is a popular choice for homeowners seeking privacy and an aesthetically pleasing design. Unlike a standard fence with boards butted directly against each other, an overlapping fence has alternating boards that create a layered effect. This guide covers all aspects of overlapping wood fences, from understanding their benefits and design variations to installation considerations and maintenance tips.
Understanding Overlapping Wood Fences
What is an Overlapping Wood Fence?
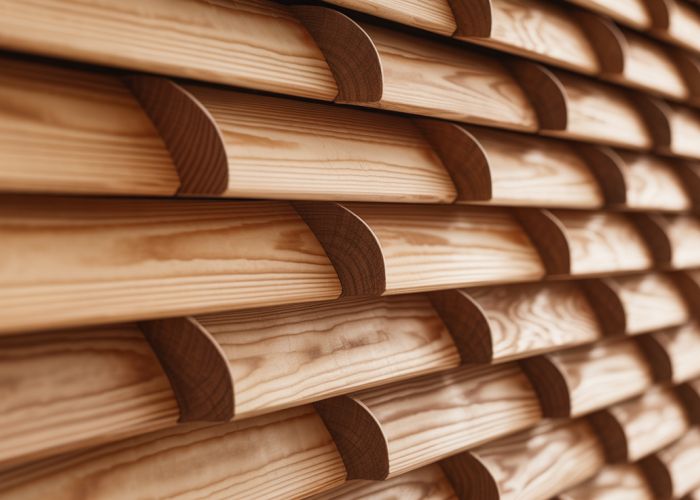
An overlapping wood fence consists of vertical boards attached to horizontal rails. The unique characteristic is that the boards are placed on alternating sides of the rails, creating an overlapping effect. Imagine one board on the front, then the next board partially covering the edge of the first board but on the back, and so on. This staggered pattern provides significantly enhanced privacy compared to traditional fences.
Benefits of an Overlapping Wood Fence
Overlapping wood fences offer several key advantages:
- Enhanced Privacy: The overlapping design eliminates gaps between boards, providing a higher level of privacy.
- Aesthetic Appeal: The staggered boards create an attractive shadow effect, enhancing the visual appeal of your property. The fence looks essentially identical from both sides.
- Increased Strength: The layered construction typically adds to the fence’s overall strength and stability.
- Wind Resistance (to a degree): While not completely windproof, the overlapping boards allow some wind to pass through, reducing the pressure on the fence during strong winds, compared to a solid barrier.
Disadvantages of an Overlapping Wood Fence
While there are many benefits, consider these potential drawbacks:
- Higher Material Cost: Due to the additional lumber required for the overlapping design, the overall material cost is higher compared to standard fences.
- More Labor Intensive Installation: The installation process takes more time and effort than installing a simple fence because there is more cutting, measuring, and securing of boards.
- Potential for Moisture Retention: The overlapping boards can create areas where moisture can accumulate, potentially leading to rot or decay if the wood isn’t properly treated and maintained. Proper spacing during installation is critical to reduce this issue.
Design Considerations for Your Overlapping Wood Fence
Wood Types
The type of wood you choose significantly impacts the fence’s longevity and appearance. Common choices include:
- Cedar: Naturally resistant to rot and insects, cedar is a popular and durable option.
- Redwood: Similar to cedar in its natural resistance, redwood offers a rich color.
- Pressure-Treated Pine: More affordable than cedar or redwood, pressure-treated pine is chemically treated to resist rot and insects. Requires more regular maintenance.
- Cypress: Another naturally rot-resistant wood, cypress is less commonly available than cedar or redwood in some regions.
Fence Height and Board Spacing
- Height: Local regulations often dictate the maximum allowable fence height. Common heights range from 6 to 8 feet. Check your local building codes before you purchase material or begin construction.
- Board Width: The width of the boards also impacts privacy and aesthetics. Wider boards offer more coverage.
- Overlap Amount: The degree of overlap between boards affects privacy and the overall appearance. More overlap equals more privacy but also requires more lumber. The most common overlap amount is between 1 and 2 inches.
- Spacing Between Boards: A small amount of space between each set of boards allows for air circulation and helps prevent moisture buildup. This space should be small enough to maintain privacy and block vision. A typical spacing is 1/2 to 1 inch.
Style Variations
While the core concept remains the same, there are design variations that can influence the fence’s appearance:
- Board Width Combinations: Use different width boards in alternating patterns.
- Topper Styles: Add decorative toppers to the fence posts to enhance the fence’s visual appeal. Consider caps, post tops, or decorative finials.
- Staining and Painting: Choose a stain or paint color that complements your home and landscape.
Installing an Overlapping Wood Fence
Planning and Preparation
- Check Local Regulations: As mentioned, always verify local zoning laws, height restrictions, and any necessary permits before starting construction.
- Mark the Fence Line: Use stakes and string to accurately mark the perimeter of your fence.
- Locate Underground Utilities: Contact your local utility companies to locate and mark any underground lines. This is critical to avoid damaging underground lines during post hole digging.
Step-by-Step Installation
-
Set the Posts: Dig post holes deep enough to provide stability (typically 1/3 of the post height). Set the posts in concrete, ensuring they are plumb and properly spaced. Post spacing is typically between 6 and 8 feet.
- Use a level to check the posts’ vertical alignment.
- Brace the posts until the concrete has fully cured.
-
Attach the Rails: Once the concrete is cured, attach the horizontal rails to the posts. Typically, there are three rails (top, middle, and bottom). Use galvanized screws or nails to secure the rails to the posts.
- Ensure the rails are level.
- Install the Boards: Begin attaching the vertical boards, alternating sides of the rails to create the overlapping effect.
- Maintain consistent spacing between boards. Use spacers to ensure uniform gaps.
- Use galvanized nails or screws to secure the boards to the rails.
- Finishing Touches: Trim any excess board length, add post caps, and apply a stain or sealant to protect the wood.
Tools and Materials Checklist
| Tool/Material | Description |
|---|---|
| Wood (posts, rails, boards) | Choose the appropriate type and amount of wood based on your fence design. |
| Concrete | For setting the posts. |
| Galvanized Screws/Nails | For attaching the rails and boards. |
| Post Hole Digger | For digging the post holes. |
| Level | For ensuring posts and rails are level. |
| Measuring Tape | For accurate measurements. |
| Circular Saw | For cutting the wood. |
| Drill/Driver | For driving screws. |
| Hammer | For driving nails. |
| Stakes & String | For marking the fence line. |
| Spacers | For maintaining consistent spacing between boards. |
| Stain/Sealant | To protect the wood from the elements. |
Maintaining Your Overlapping Wood Fence
Regular Cleaning
Clean your fence regularly to remove dirt, debris, and mildew. Use a brush and a mild soap solution. A pressure washer can be used, but use caution to avoid damaging the wood.
Inspecting for Damage
Periodically inspect your fence for signs of damage, such as rot, insect infestations, or loose boards. Address any issues promptly to prevent further damage.
Staining and Sealing
Reapply stain or sealant every few years to protect the wood from the elements and maintain its appearance. The frequency depends on the type of wood, the climate, and the type of stain/sealant used.
Repairing Damage
Replace damaged boards or posts as needed. If rot is present, remove the affected wood and treat the surrounding area with a wood preservative. Repair loose boards with screws or nails.
FAQs: Overlapping Wood Fences
This FAQ addresses common questions about overlapping wood fences, covering design, construction, and benefits.
What is the main advantage of an overlapping wood fence compared to a standard fence?
The primary benefit lies in enhanced privacy. The overlapping design minimizes gaps between boards, creating a tighter barrier. This increases visual screening and also offers slightly better wind resistance.
How does the overlapping construction affect the cost of an overlapping wood fence?
Overlapping fences generally require more lumber than standard fences due to the additional material needed for the overlap. This increased material usage directly impacts the overall cost of the fence. Expect to pay a premium for this style.
Is an overlapping wood fence more difficult to install than a regular fence?
While the fundamental principles of fence installation remain the same, overlapping fences involve more precise board placement. Each board needs to be carefully aligned to maintain consistent overlap. This attention to detail may increase installation time slightly.
Does an overlapping wood fence provide more security?
An overlapping wood fence offers marginally better security due to the tighter board arrangement. It is harder to see through, and less easy to push through. However, it is not a significant security upgrade over a standard wood fence. Physical strength of the wood and proper post installation remain key.
Alright, so you’re basically an overlapping wood fence expert now, right? We hope this helped you figure out what you need to know! Good luck with your project!