Creating stunning ombre frosted nails doesn’t have to be intimidating! Nail art brushes, essential tools for achieving that flawless gradient, allows for precise application. A good quality frosted top coat offers that signature delicate sparkle. Even the iconic French manicure, with its elegant simplicity, provides a foundation on which to build your ombre frosted nails design. Practice, of course, is the key to mastering this technique, but soon you will create masterpieces.
Mastering Ombre Frosted Nails: Your DIY Guide to Stunning Fingers!
Ready to transform your nails into miniature works of art? Ombre frosted nails are a gorgeous trend that looks complex but is surprisingly easy to achieve at home. This guide will walk you through everything you need to know, from gathering supplies to creating a flawless, frosted ombre effect. Let’s get started!
1. Understanding Ombre Frosted Nails
What exactly are Ombre Frosted Nails?
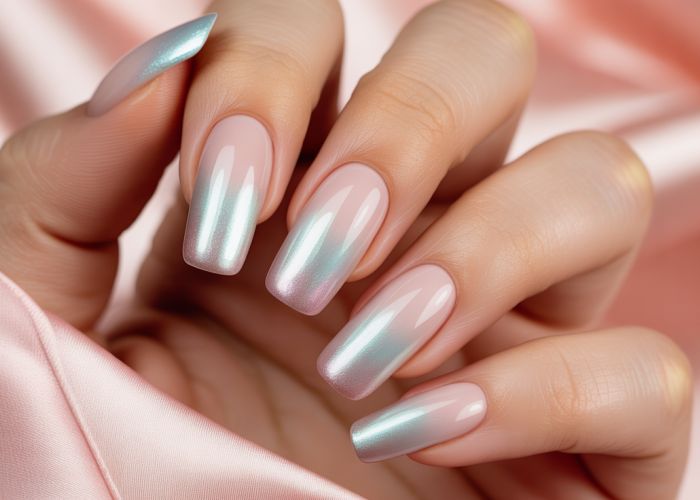
Ombre, in nail terms, refers to a gradient effect where one color seamlessly blends into another. Frosted refers to a finish that gives the nails a subtle, shimmering, almost icy look. Combine the two, and you have ombre frosted nails: a captivating design that’s both elegant and modern. Think of snow-kissed mountains or a shimmering sunset – that’s the vibe we’re aiming for!
Why Choose Ombre Frosted Nails?
- Versatile Style: Ombre frosted nails complement a wide range of outfits and occasions, from casual everyday wear to more formal events.
- Customizable Colors: The ombre effect allows you to play with different color combinations to match your personal style.
- Easy to DIY: You don’t need to be a professional nail artist to achieve this look. With the right techniques and a little patience, you can create stunning ombre frosted nails at home.
2. Gathering Your Supplies
A successful manicure relies heavily on having the right tools at hand. Here’s what you’ll need to create your ombre frosted nails:
- Base Coat: Protects your natural nails and helps your polish adhere better.
- Two Shades of Nail Polish: Choose two colors that complement each other. Lighter and darker shades of the same color family work exceptionally well (e.g., light blue and dark blue).
- Frosted Top Coat: This is key to achieving the frosted effect. Choose a top coat specifically labeled "frosted" or "shimmering."
- Cosmetic Sponge (wedge-shaped): This is used to create the ombre effect. Makeup sponges with a fine texture work best.
- Liquid Latex or Petroleum Jelly (optional): To protect your cuticles from getting polish on them.
- Top Coat: To seal in the design and add shine.
- Nail Polish Remover: For cleaning up any mistakes.
- Cotton Swabs: For precise cleanup.
- Orange Wood Stick or Cuticle Pusher: To gently push back your cuticles.
- Nail File & Buffer: To shape and smooth your nails.
3. Preparing Your Nails
A smooth canvas is essential for a flawless manicure. Follow these steps to prep your nails:
- Remove old polish: Make sure your nails are clean and free of any previous polish.
- Shape your nails: File your nails into your desired shape (round, square, oval, etc.).
- Buff your nails: Use a buffer to smooth out any ridges and create a smooth surface.
- Push back cuticles: Gently push back your cuticles with an orange wood stick or cuticle pusher.
- Clean your nails: Wipe your nails with nail polish remover to remove any oils or debris.
- Apply base coat: Apply a thin layer of base coat to protect your nails. Let it dry completely.
4. Creating the Ombre Effect
This is where the magic happens! Here’s a step-by-step guide to creating the ombre effect:
- Apply the base color: Apply 1-2 coats of your lighter shade of nail polish to all your nails. Let each coat dry completely.
- Prepare the sponge: Apply a strip of your lighter polish and a strip of your darker polish side-by-side on the cosmetic sponge, making sure they touch. The point where they touch is where the ombre effect will happen.
- Dab the sponge onto your nail: Gently dab the sponge onto your nail, starting from the cuticle area and working your way towards the tip. Use a light hand and build up the color gradually.
- Repeat the process: Reapply polish to the sponge as needed and continue dabbing until you achieve the desired ombre effect.
- Clean up the edges: Use a cotton swab dipped in nail polish remover to clean up any polish that got onto your skin. If you used liquid latex or petroleum jelly, peel it off carefully.
- Let it dry completely: Allow the ombre design to dry thoroughly.
5. Adding the Frosted Touch
The frosted top coat is the finishing touch that transforms your ombre design into a truly stunning manicure.
- Apply the frosted top coat: Apply a thin layer of your frosted top coat to each nail.
- Let it dry completely: Allow the frosted top coat to dry thoroughly.
6. Sealing and Protecting Your Design
A final layer of top coat will seal in your design and protect it from chipping.
- Apply the top coat: Apply a thin layer of your regular top coat to each nail.
- Let it dry completely: Allow the top coat to dry thoroughly.
7. Tips and Tricks for Ombre Frosted Nail Perfection
Here are some extra tips to help you achieve the best results:
- Practice makes perfect: Don’t be discouraged if your first attempt isn’t perfect. Keep practicing, and you’ll get better with each try.
- Use high-quality polishes: Invest in good-quality nail polishes for better color payoff and longer wear.
- Work in thin layers: Applying thin layers of polish will prevent smudging and allow the colors to blend more seamlessly.
- Clean your sponge: After each use, clean your sponge with nail polish remover to prevent the colors from mixing and to keep it in good condition.
- Experiment with different colors: Don’t be afraid to experiment with different color combinations to find your perfect ombre frosted look.
- Consider using a matte top coat: For a different take on the frosted look, try using a matte top coat instead of a glossy one. This will give your nails a more subtle, textured finish.
8. Troubleshooting Common Issues
Encountering problems? Here’s how to handle some common ombre frosted nail issues:
| Issue | Solution |
|---|---|
| Uneven Ombre Gradient | Use a fresh sponge and apply more even pressure when dabbing. |
| Streaky Finish | Make sure the base coat and polish layers are completely dry before applying the frosted top coat. |
| Polish on Cuticles | Apply liquid latex or petroleum jelly before starting. Use a thin brush dipped in remover for precise cleanup. |
| Chipping | Ensure each layer is dry before applying the next. Use a high-quality top coat and reapply every other day. |
| Not enough "Frost" | Apply a second coat of the frosted top coat. |
Ombre Frosted Nails: Your Questions Answered
Here are some common questions about creating beautiful ombre frosted nails at home.
What’s the difference between regular ombre nails and ombre frosted nails?
Regular ombre nails blend two or more colors seamlessly. Ombre frosted nails add a subtle, shimmering finish on top of the ombre effect, giving them a delicate, "frosted" appearance, often achieved with a shimmer or pearlescent top coat.
Can I achieve the ombre effect without an airbrush?
Absolutely! Sponges, particularly makeup sponges, are excellent for creating an ombre effect. Just dab the different polish colors onto the sponge and gently press it onto your nails. This is the easiest technique for DIY ombre frosted nails.
What kind of top coat gives the "frosted" look?
Look for top coats labeled as "shimmer," "pearl," "frost," or "iridescent." These contain fine particles that create the subtle, frosted effect on your ombre frosted nails. Alternatively, you can use a matte top coat for a different, but equally beautiful, finish.
How do I make my ombre frosted nails last longer?
Always apply a base coat before your polish to protect your nails. Seal the edges of your ombre frosted nails with each coat of polish, including the top coat. Reapply top coat every few days to prevent chipping and maintain the frosted effect.
So, give these ombre frosted nails tips a try and get ready to show off your amazing mani! Can’t wait to see what you create!