Achieving a luxurious, touchable texture is now easier than ever with matte velvet nails! This comprehensive guide offers a step-by-step journey into creating this coveted nail art effect. Nail polish manufacturers constantly innovate, and the introduction of special velvet powders has revolutionized the creation of matte velvet nails. DIY nail enthusiasts, like the celebrated ManiMe team, are constantly sharing their tips and tricks for the best application techniques. The beauty community at large is buzzing about the unique look that matte velvet nails offer, and you can get in on the trend with just a few simple steps!
Unleash the Velvet: Your DIY Guide to Stunning Matte Velvet Nails
Ready to transform your nails into miniature works of art that feel as luxurious as they look? Creating matte velvet nails at home is easier than you might think! This guide breaks down the process, ensuring you achieve a professional-looking, velvety smooth finish. Let’s dive in!
What Exactly Are Matte Velvet Nails?
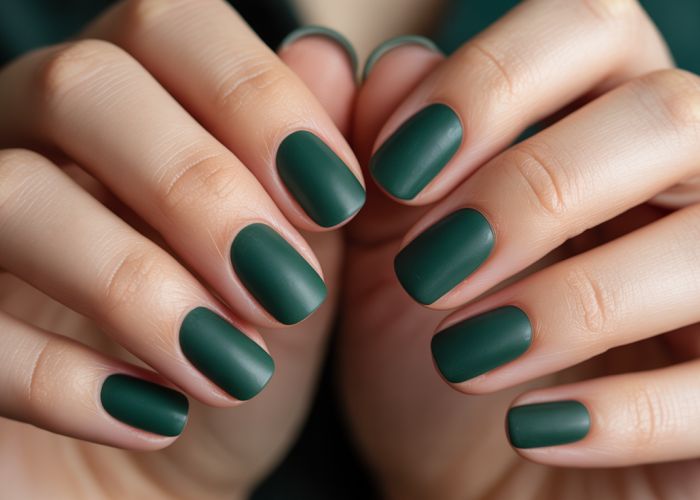
Before we start painting, let’s understand what makes matte velvet nails so captivating. They are characterized by their soft, velvety texture and a completely shine-free (matte) finish. This effect is achieved either through special velvet powders applied over wet polish or, more commonly, with specially formulated matte velvet nail polish that contains micro-particles to create that plush look.
Gathering Your Arsenal: Essential Supplies
Success with matte velvet nails hinges on having the right tools and materials. Here’s a checklist:
- Base Coat: Protects your natural nails and helps the polish adhere better.
- Matte Velvet Nail Polish: The star of the show! Choose your favorite color and ensure it’s a genuine matte velvet formula.
- Top Coat (optional): While it seems counterintuitive, some prefer a thin layer of regular top coat to protect the velvet texture. Be careful, though, as too much can ruin the matte effect. Look for top coats specifically designed for matte polishes.
- Nail Polish Remover: For inevitable mistakes!
- Cotton Pads: For cleaning up spills and removing excess polish.
- Cuticle Pusher: To gently push back your cuticles for a neater manicure.
- Nail File: To shape your nails to your desired length and form.
- Orange Wood Stick: Useful for cleaning up edges around the cuticle.
Prep is Key: Preparing Your Nails
Just like painting a masterpiece, prepping your canvas (in this case, your nails!) is crucial for a flawless matte velvet nail look.
- Remove Any Existing Polish: Ensure your nails are completely clean and free of any old polish.
- Shape and File: Use a nail file to achieve your preferred nail shape – round, square, oval, or almond.
- Buff the Nail Surface: Gently buff the surface of your nails to create a smooth base for the polish to adhere to.
- Push Back Cuticles: Use a cuticle pusher to gently push back your cuticles. Avoid cutting them unless you’re trained to do so.
- Cleanse Your Nails: Wipe your nails with nail polish remover to remove any oils or residue. This ensures better polish adhesion.
The Velvet Application: Step-by-Step Instructions
Now for the exciting part! Follow these steps to achieve matte velvet nails that will turn heads:
-
Apply a Base Coat: Apply a thin, even layer of base coat to protect your nails and promote polish adhesion. Let it dry completely.
-
First Coat of Matte Velvet Polish: Apply a thin, even coat of your matte velvet nail polish. Be sure to cover the entire nail surface, but don’t apply it too thick. Thinner coats are better to avoid streaks.
-
Second Coat of Matte Velvet Polish: Allow the first coat to dry almost completely (usually a few minutes). Then, apply a second thin, even coat. This will deepen the color and enhance the matte velvet effect.
-
(Optional) Apply a Special Top Coat: If desired, apply a thin layer of a matte top coat or a top coat specifically formulated for matte polishes. This will help protect the finish and extend the life of your manicure. Skip this step if you prefer the pure, unadulterated velvety texture. Wait for each coat to fully dry.
-
Clean Up Any Mistakes: Use a cotton swab dipped in nail polish remover to carefully clean up any polish that has gotten on your skin. An orange wood stick can be helpful for cleaning around the cuticle area.
Caring for Your Matte Velvet Nails
Matte velvet nails require slightly different care than traditional manicures. Here are a few tips to keep them looking their best:
- Avoid Excessive Water Exposure: Prolonged exposure to water can soften the matte finish. Wear gloves when washing dishes or doing other household chores.
- Gentle Cleansing: Use a gentle soap and water to clean your hands. Avoid harsh chemicals or abrasive cleaners.
- Reapply Top Coat (Occasionally): If you choose to use a top coat, you may need to reapply it every few days to maintain the protective layer. Again, use sparingly.
- Avoid Rubbing: Excessive rubbing can damage the velvet texture. Be mindful of this when handling rough surfaces.
Troubleshooting: Common Issues and Solutions
Even with careful application, you might encounter a few challenges. Here’s how to tackle them:
| Issue | Solution |
|---|---|
| Streaky Application | Apply thinner coats and allow each coat to dry completely before applying the next. |
| Lack of Matte Finish | Ensure you’re using a genuine matte velvet polish. Some polishes advertise a matte finish but don’t deliver. |
| Polish Chips Easily | Use a good quality base coat and, if desired, a thin layer of top coat specifically designed for matte finishes. |
| Uneven Texture | Apply even coats and avoid applying too much pressure with the brush. |
Matte Velvet Nails FAQ
Here are some frequently asked questions about achieving stunning matte velvet nails at home.
What exactly are matte velvet nails?
Matte velvet nails are a nail finish that mimics the soft, plush texture of velvet. They achieve this look by using a matte top coat, flocking powder, or a specialized velvet nail polish. The result is a sophisticated and luxurious look that’s both eye-catching and subtle.
Can I achieve the matte velvet nail look with regular nail polish?
Yes, you can. While specialty velvet nail polishes exist, you can create matte velvet nails by applying your favorite nail polish color and then finishing with a matte top coat. For an added velvet texture, consider using flocking powder before the top coat.
How long do matte velvet nails typically last?
The longevity of matte velvet nails depends on the products used and how well you maintain them. Generally, you can expect them to last about 5-7 days with minimal chipping, especially if you apply thin layers of polish and seal the edges well.
What is flocking powder and how do I use it for velvet nails?
Flocking powder is a fine, fiber-like material that creates a textured effect. To use it for velvet nails, apply a coat of your chosen nail polish, then immediately sprinkle the flocking powder over the wet polish. Gently press it in and allow it to dry completely before brushing away the excess. Seal with a matte top coat, if desired, for a longer-lasting finish.
So, there you have it! Go ahead and give these matte velvet nails a try – we know you’ll absolutely love the luxurious result!