Mastering the herringbone tile pattern is within your reach, and this guide is your roadmap. Understanding tile substrate preparation ensures longevity and a flawless finish. Explore how to use tools from companies like Rubi for precise cuts and spacing. Consider the impact of grout color on the overall aesthetic. This comprehensive guide will give you confidence to tackle your own herringbone tile pattern project, ensuring a professional and beautiful result.
Herringbone Tile Pattern: The Ultimate Design & Install Guide – Article Layout
This outlines the ideal article structure for a comprehensive guide to the herringbone tile pattern, keeping in mind the primary keyword "herringbone tile pattern" and aiming for maximum reader engagement and clarity.
Introduction: What is Herringbone?
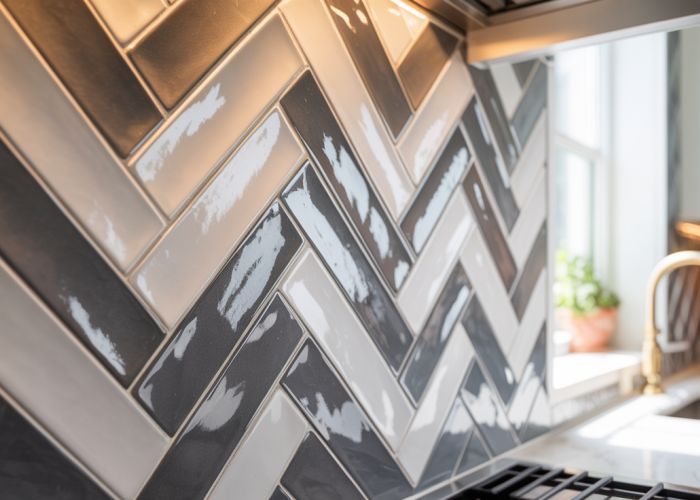
- Start with a captivating hook. Perhaps a stunning visual example of a herringbone tile installation.
- Clearly define "herringbone tile pattern" for readers unfamiliar with the term.
- Briefly explain its origins and history. A few sentences about its association with classic design will add depth.
- Highlight the pattern’s enduring popularity and why it’s still a relevant and desirable design choice today. Mention its versatility in various interior design styles (modern, traditional, rustic, etc.).
- Briefly touch on the range of materials and colours available for herringbone tile.
- Tease the content to come: Briefly mention the topics covered in the guide (design considerations, tile selection, installation process, etc.).
Design Considerations: Planning Your Herringbone
-
Room Size & Layout: How does the herringbone pattern interact with different room sizes? Explain how it can make a small room feel larger or a large room feel even more grand.
- Direction: Discuss how the direction of the herringbone pattern (horizontal, vertical, diagonal) can influence the perceived dimensions of the room. Use visuals to demonstrate this.
-
Tile Size & Proportion: Provide guidance on selecting the right tile size for the space.
- Relationship to Room Size: Explain how smaller tiles are suitable for smaller rooms, while larger tiles can work well in larger spaces.
- Aesthetic Considerations: Touch on the visual impact of different tile sizes on the overall herringbone pattern.
-
Colour Palette: Discuss how colour choice impacts the overall look and feel of the herringbone pattern.
- Monochrome vs. Contrasting Colours: Explain the different effects achieved with monochromatic (similar shades) and contrasting colour schemes.
- Impact on Room Atmosphere: Show how different colours can create different moods (e.g., bright colours for a vibrant space, muted colours for a calming effect).
-
Grout Colour: Explain how grout colour affects the visual impact of the herringbone pattern.
- Matching Grout: Discuss the benefits of using a grout colour that closely matches the tiles for a seamless look.
- Contrasting Grout: Discuss the impact of using a contrasting grout colour to highlight the herringbone pattern.
- Overall Style: Connect the herringbone pattern to different interior design styles.
- Classic/Traditional: How to use herringbone in a classic or traditional setting.
- Modern/Contemporary: How to incorporate herringbone into a modern or contemporary space.
- Rustic/Farmhouse: How to achieve a rustic or farmhouse feel with herringbone.
Choosing the Right Tiles: Material & Size
- Material Options: List the common tile materials suitable for herringbone patterns, along with their pros and cons.
- Ceramic: Durability, affordability, wide range of colours and styles.
- Porcelain: Higher durability and water resistance than ceramic.
- Natural Stone (Marble, Slate, Travertine): Adds a luxurious and unique look.
- Glass: Adds a sleek and modern touch.
- Wood-Look Tile: Offers the aesthetic of wood with the durability of tile.
- Tile Shape and Dimensions: Emphasize the importance of rectangular tiles for the standard herringbone pattern. Mention alternative variations that use different shapes.
- Standard Rectangular Tile Sizes: List common rectangular tile sizes (e.g., 2×8, 3×12, 4×16 inches) and their suitability for different room sizes and styles.
- Consistency is Key: Stress the importance of using tiles that are perfectly uniform in size and shape for a clean and precise herringbone pattern.
Tools & Materials: Getting Ready for Installation
-
Provide a comprehensive list of all necessary tools and materials. Consider breaking this down into sections for clarity.
- Tools:
- Tile cutter (wet saw recommended)
- Notched trowel
- Rubber mallet
- Spacers
- Level
- Measuring tape
- Pencil
- Safety glasses
- Gloves
- Materials:
- Tiles
- Thin-set mortar
- Grout
- Grout sealer
- Backer board (if needed)
- Mortar mixer (optional)
- Tools:
Installation Guide: Step-by-Step Instructions
-
Provide a detailed, step-by-step guide on how to install a herringbone tile pattern. Use clear and concise language, and include plenty of visuals (photos or diagrams).
- Surface Preparation: Explain the importance of a clean, level, and properly prepared subfloor. Detail the steps for preparing the surface (cleaning, leveling, applying backer board if needed).
- Planning the Layout: Explain how to find the centre of the room and establish a starting point for the herringbone pattern. This is crucial for achieving a symmetrical and visually appealing result.
- Applying Thin-Set Mortar: Describe the correct technique for applying thin-set mortar using a notched trowel. Emphasize the importance of applying an even layer and creating proper ridges for tile adhesion.
- Laying the Tiles: Provide detailed instructions on how to lay the tiles in a herringbone pattern, paying close attention to the angle and spacing between tiles. Stress the importance of using spacers to maintain consistent grout lines.
- Cutting Tiles: Explain how to accurately cut tiles to fit along the edges of the room using a tile cutter.
- Curing Time: Emphasize how long to let the mortar cure.
- Grouting: Describe the process of applying and cleaning grout. Explain how to achieve a smooth and even grout finish. Mention different grout application methods.
- Sealing: Explain the importance of sealing the grout to protect it from stains and moisture.
Common Mistakes & How to Avoid Them
-
Identify common mistakes that people make when installing herringbone tile patterns and provide solutions.
- Uneven Subfloor: Explain how to identify and correct an uneven subfloor to prevent tiling problems.
- Inconsistent Spacing: Provide tips for maintaining consistent spacing between tiles to achieve a uniform pattern.
- Improper Mortar Application: Explain the importance of using the correct amount of mortar and applying it evenly to ensure proper tile adhesion.
- Incorrect Cutting: Provide tips for accurate tile cutting to avoid gaps and uneven edges.
- Not Planning The Layout: Explain the importance of planning the layout and finding the starting point to avoid headaches down the line.
Maintenance & Care: Keeping Your Herringbone Looking Its Best
-
Provide tips on how to clean and maintain a herringbone tile floor or wall to keep it looking its best for years to come.
- Regular Cleaning: Explain how to regularly clean the tiles using a mild detergent and water.
- Stain Removal: Provide tips for removing common stains.
- Grout Cleaning: Explain how to clean and maintain grout lines to prevent them from becoming discoloured or stained.
- Sealing (Re-application): Explain when and how often to re-seal the grout.
Herringbone Variations: Exploring Different Styles
-
While focusing on the classic herringbone, briefly touch on variations like:
- Double Herringbone: Two tiles placed side-by-side to create a wider pattern.
- Stacked Herringbone: A more modern take with straight lines.
- Different Tile Shapes: Show how other shapes can be used to create herringbone-esque patterns.
Inspiration Gallery: Showcase Beautiful Herringbone Installations
- Include a gallery of high-quality images showcasing different herringbone tile installations in various settings (kitchens, bathrooms, hallways, etc.). This provides visual inspiration for readers and reinforces the pattern’s versatility.
This layout provides a comprehensive and informative guide to herringbone tile patterns, covering everything from design considerations to installation and maintenance.
FAQs About Herringbone Tile Patterns
Here are some frequently asked questions to help you better understand herringbone tile patterns and how to install them successfully.
What makes the herringbone tile pattern unique?
The herringbone tile pattern is unique due to its distinctive V-shaped arrangement of rectangular tiles. This creates a visually dynamic and classic look that adds character to floors and walls. Unlike simpler patterns, herringbone offers a sophisticated aesthetic.
Is the herringbone tile pattern difficult to install?
Compared to straight-lay patterns, the herringbone tile pattern is more challenging to install. It requires precise cuts and careful alignment to ensure a consistent and aesthetically pleasing design. Proper planning and patience are key.
What size tiles work best for a herringbone pattern?
Smaller, rectangular tiles generally work best for the herringbone tile pattern. Common sizes include 2×8 inches, 3×12 inches, or similar dimensions. The smaller size makes it easier to manage the pattern’s complexity.
Can I use different materials for a herringbone tile pattern?
Yes, various materials can be used for a herringbone tile pattern, including ceramic, porcelain, natural stone, and even wood-look tiles. Choose a material that suits the intended location and desired aesthetic, keeping in mind the potential challenges presented by each material.
So there you have it! Hopefully, you’re feeling ready to tackle your own herringbone tile pattern project. Go get those tiles and start creating something amazing. Let me know how it goes!