Embarking on the journey of growing your own plants can be incredibly rewarding, and the uniquely beautiful cat eye seed is no exception! This comprehensive guide simplifies the process, even if you’re unfamiliar with hydroponics, a technique that can accelerate growth. Successfully cultivating these seeds often relies on understanding the advice shared by gardening communities, especially regarding optimal light exposure, which, unlike direct sunlight, LED grow lights will provide consistent and controlled illumination for your cat eye seedlings. Following these easy steps will empower even beginner enthusiasts to nurture these captivating plants successfully.
Discover the Magic of Cat Eye Seeds: A Gardener’s Delight
Cat Eye Seeds. The name itself conjures images of mystery and natural beauty. But what are they, and why are so many gardeners captivated by their allure?
These seeds are more than just a starting point for a plant; they’re tiny vessels of potential, holding the promise of unique beauty and ornamental value that can transform any garden space. This guide will unveil the secrets to successfully growing Cat Eye Seeds, making the process accessible and enjoyable for everyone, regardless of prior gardening experience.
The Allure of Cat Eye Seeds: A Visual Masterpiece
The first encounter with Cat Eye Seeds is often through their striking appearance. Their unique markings and captivating shapes immediately draw the eye, sparking curiosity and wonder.
It’s this visual appeal that makes them a favorite among gardeners looking to add a touch of the extraordinary to their landscapes. Imagine a garden adorned with plants grown from these intriguing seeds, each one a testament to the beauty of nature’s artistry.
Why Grow Cat Eye Seeds? Unveiling the Motivation
Beyond their undeniable visual appeal, there are several reasons why Cat Eye Seeds have garnered so much interest.
For many, it’s the ornamental value they bring to gardens. The plants that grow from these seeds often boast unique foliage, vibrant flowers, or other distinctive features that make them stand out.
Others are drawn to the challenge and satisfaction of nurturing these seeds from tiny beginnings to thriving plants. The process is a rewarding experience that connects us with the natural world and allows us to witness the miracle of life unfold.
The unique appearance of the plants is also a major draw. Whether it’s the unusual shape of the leaves, the captivating colors of the blooms, or some other distinctive trait, Cat Eye plants offer something different from the ordinary, adding a touch of intrigue and personality to any garden.
Your Guide to Success: Growing Cat Eye Seeds Made Easy
This guide is designed to empower you with the knowledge and confidence to successfully grow Cat Eye Seeds. We’ll break down the process into easy-to-follow steps, covering everything from sourcing seeds to nurturing seedlings and eventually harvesting the fruits (or seeds!) of your labor.
Whether you’re a seasoned gardener or a complete beginner, you’ll find the information and guidance you need to transform your garden with the magic of Cat Eye Seeds. Get ready to embark on a rewarding journey that will connect you with nature and unlock the beauty and potential hidden within these extraordinary seeds.
The plants that sprout from Cat Eye Seeds undoubtedly possess a captivating visual charm, and are also relatively easy to grow; but their allure extends far beyond mere aesthetics. To truly harness their potential, it’s essential to delve into a deeper understanding of their characteristics, origins, and ideal growing conditions.
Understanding Cat Eye Seeds: More Than Just a Pretty Seed
Gaining a comprehensive understanding of Cat Eye Seeds lays the groundwork for successful cultivation. This knowledge empowers gardeners to create the optimal environment for these unique plants to thrive, transforming a simple growing process into a fulfilling horticultural journey.
Decoding the Cat Eye: A Detailed Look
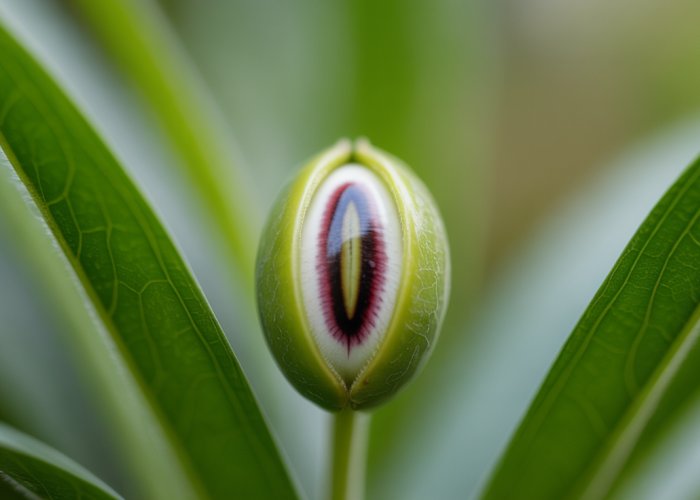
The most striking feature of Cat Eye Seeds is, of course, their appearance. These seeds aren’t uniform in shape or size; rather they often display a captivating array of patterns and colors that mimic the mesmerizing gaze of a feline.
But what exactly contributes to this unique visual appeal?
Typically, Cat Eye Seeds exhibit a smooth, hard outer shell, ranging in size from that of a small pebble to a larger bean. The color palette can vary widely, from deep browns and blacks to lighter tans and creams.
It’s the intricate patterns, however, that truly set them apart. These markings may appear as stripes, spots, or swirling patterns, often with a contrasting "eye" or focal point that resembles the pupil of a cat. This distinctive feature is what gives them their intriguing name and captivating charm.
The Sweet Spot: Ideal Climate and Conditions
Cat Eye Seeds generally prefer temperate climates with moderate temperature fluctuations. However, specific requirements can vary depending on the variety of Cat Eye Seeds you’re growing.
Generally, they thrive in temperatures between 60°F and 80°F (15°C and 27°C). Excessive heat or prolonged exposure to freezing temperatures can hinder their growth and development.
Humidity levels also play a crucial role. Cat Eye Seeds prefer moderate humidity, as overly dry conditions can lead to stunted growth, while excessive moisture can increase the risk of fungal diseases.
Maintaining proper air circulation around the plants is also important to prevent moisture buildup and promote healthy growth.
Location, Location, Location: Choosing the Perfect Spot
Selecting the right garden location or growing environment is essential for successful Cat Eye Seed cultivation. Sunlight exposure is a critical factor, as these plants generally require at least six hours of direct sunlight per day.
However, in regions with intense sunlight, providing some afternoon shade can help prevent scorching of the foliage.
Soil type is another important consideration. Cat Eye Seeds prefer well-draining soil that is rich in organic matter. Amending the soil with compost or other organic materials can improve its drainage, nutrient content, and overall suitability for growing these plants.
The ideal soil pH range for Cat Eye Seeds is slightly acidic to neutral (between 6.0 and 7.0). Conducting a soil test can help determine the pH level and nutrient content of your garden soil, allowing you to make necessary adjustments before planting.
The plants that sprout from Cat Eye Seeds undoubtedly possess a captivating visual charm, and are also relatively easy to grow; but their allure extends far beyond mere aesthetics. To truly harness their potential, it’s essential to delve into a deeper understanding of their characteristics, origins, and ideal growing conditions.
Getting Started: From Seed to Sprout
Now that you’re familiar with the unique qualities of Cat Eye Seeds and the conditions they prefer, it’s time to embark on the practical journey of bringing them to life. This section provides a comprehensive guide to the initial stages of growth, from sourcing your seeds to nurturing the first delicate sprouts. Whether you’re a seasoned gardener or a complete novice, these steps will set you on the path to success.
Sourcing Your Cat Eye Seeds: Quality Matters
The first step, and perhaps one of the most important, is acquiring your Cat Eye Seeds. Not all seeds are created equal, and selecting a reliable source will significantly impact your success rate.
Consider these recommendations:
-
Online Retailers: Numerous online seed retailers specialize in unique and rare varieties. Look for retailers with positive reviews and clear descriptions of their seeds.
-
Local Nurseries: Supporting local nurseries is always a great option. Check if they carry Cat Eye Seeds or can special order them for you.
-
Seed Viability: Ensure the seeds you purchase are relatively fresh. Check the packaging for a "packed on" or "sell by" date.
-
Reputable Suppliers: Prioritize suppliers known for their quality seeds and customer service.
Unlocking Germination: Awakening the Seed
Germination is the crucial process where the seed awakens and begins to sprout. Here’s a step-by-step guide to maximizing your germination success:
The Pre-Soak: A Gentle Awakening (If Required)
Some Cat Eye Seeds benefit from a pre-soak to soften their outer shell and encourage germination. Check the seed packet instructions to determine if soaking is recommended.
- If soaking is advised, submerge the seeds in lukewarm water for the recommended time, typically 12-24 hours.
Choosing Your Germination Method
Several methods can be used to germinate Cat Eye Seeds. Here are two popular options:
- Paper Towel Method: Place the seeds between two moist (not soaking wet) paper towels. Put the paper towels in a plastic bag or container to maintain moisture. Check daily and ensure the paper towels remain damp.
- Direct Sowing: Plant the seeds directly into your chosen growing medium. This method is convenient but requires careful monitoring of moisture levels.
Maintaining the Ideal Environment
Regardless of the method you choose, maintaining proper moisture and temperature is key.
- Keep the seeds in a warm location, ideally between 70-75°F (21-24°C).
- Ensure the paper towels or growing medium remain consistently moist, but not waterlogged.
Seed Starting Trays and Pots: Giving Your Seedlings a Head Start
Using seed starting trays or individual pots offers several advantages:
- Control: They allow for greater control over the growing environment.
- Easy Transplanting: Seedlings can be easily transplanted without disturbing their roots.
- Organization: Trays and pots help keep your seedlings organized and prevent overcrowding.
When choosing trays or pots, select a size appropriate for the anticipated growth of the seedlings before transplanting.
Growing Medium: The Foundation for Growth
The growing medium provides essential nutrients and support for your Cat Eye Seedlings. Choosing the right medium is crucial for healthy development.
Here are two excellent options:
- Soil Mixes: Use a well-draining seed starting mix specifically formulated for seedlings. Avoid using garden soil, as it can be too heavy and may contain pathogens.
- Coco Coir: Coco coir is a sustainable alternative to peat moss. It provides excellent drainage and aeration.
Regardless of your choice, ensure the medium is well-draining and provides adequate nutrients.
Planting Depth: Finding the Sweet Spot
Planting depth is another critical factor for successful emergence. Planting too shallow can cause the seeds to dry out, while planting too deep can prevent them from reaching the surface.
- As a general rule, plant Cat Eye Seeds at a depth equal to two to three times their width. Refer to the seed packet for specific recommendations.
Indoor vs. Outdoor: Choosing Your Starting Point
You can start Cat Eye Seeds either indoors or outdoors, depending on your climate and preferences.
Indoor Growing: A Controlled Environment
Starting seeds indoors allows you to control the growing environment and get a head start on the growing season.
- Lighting: Provide adequate light using grow lights or a sunny windowsill. Seedlings need at least 12-16 hours of light per day.
- Transplanting: Once the seedlings have developed a few sets of true leaves, they can be transplanted outdoors, gradually acclimatizing them to the outdoor conditions.
Outdoor Growing: Embracing Nature
Directly sowing seeds outdoors is a simpler approach, but it requires careful consideration of weather conditions and soil preparation.
- Soil Preparation: Ensure the soil is well-draining and amended with compost or other organic matter.
- Weather Conditions: Wait until the risk of frost has passed and the soil has warmed up before sowing seeds directly outdoors.
By following these steps, you’ll be well on your way to successfully germinating and growing beautiful Cat Eye Seeds. Remember to be patient, observant, and adaptable, and enjoy the journey!
The seedlings have emerged, tiny green promises of the beauty to come. But the journey isn’t over; in fact, it’s only just begun. Nurturing these fragile sprouts requires a delicate balance of attention, patience, and the right techniques.
Nurturing Your Seedlings: The Key to Thriving Plants
The initial stages of germination are undoubtedly critical, but the continued care of your Cat Eye seedlings is equally important for ensuring their long-term health and vibrancy. The success of your Cat Eye Seeds hinges on providing the right environment for them to thrive, especially during their vulnerable early stages. Proper watering, adequate sunlight, timely fertilization, and appropriate spacing are fundamental aspects of this nurturing process.
Watering: Finding the Right Balance
Water is life, but too much or too little can be detrimental to your seedlings. The goal is to maintain consistently moist soil without waterlogging it.
- How Much? Water deeply enough to moisten the entire root zone, but avoid creating puddles on the surface.
- How Often? Check the soil moisture daily. If the top inch feels dry to the touch, it’s time to water. Frequency will vary depending on environmental factors like temperature and humidity.
- Technique: Water gently at the base of the seedlings to avoid damaging their delicate stems and leaves. A watering can with a rose head or a gentle spray bottle works well.
- Avoiding Problems: Overwatering can lead to root rot, while underwatering can cause stunted growth and wilting. Observe your seedlings closely for signs of stress.
Sunlight: Fueling Growth and Vitality
Sunlight is the engine that drives photosynthesis, the process by which plants convert light energy into the sugars they need to grow. Cat Eye seedlings need plenty of light to develop strong stems and vibrant foliage.
- Ideal Conditions: Aim for at least six hours of direct sunlight per day. A south-facing window is often ideal.
- Supplementing Light: If you don’t have enough natural light, consider using grow lights. Fluorescent or LED grow lights can provide the necessary spectrum and intensity.
- Light Distance: Position grow lights a few inches above the seedlings, adjusting the height as they grow.
- Recognizing Deficiency: Leggy growth (long, spindly stems) is a common sign of insufficient light.
Fertilizer: Providing Essential Nutrients
Seedlings need a steady supply of nutrients to fuel their rapid growth. Fertilizing provides these essential elements.
- Choosing a Fertilizer: Opt for a balanced, water-soluble fertilizer specifically formulated for seedlings. Look for a fertilizer with an N-P-K ratio (Nitrogen, Phosphorus, Potassium) of around 10-10-10 or 5-5-5.
- Application Method: Dilute the fertilizer according to the manufacturer’s instructions and apply it gently to the soil around the base of the seedlings.
- Timing: Fertilize every 2-3 weeks, or as needed.
- Avoiding Over-Fertilization: Too much fertilizer can burn the roots and damage the seedlings. Always err on the side of caution and use a diluted solution.
Spacing: Giving Seedlings Room to Grow
Proper spacing is essential for preventing overcrowding and promoting healthy air circulation, reducing the risk of disease.
- Thinning Seedlings: Once your seedlings have developed their first set of true leaves (the leaves that appear after the initial seed leaves), thin them out, removing the weakest seedlings to provide adequate space for the strongest ones.
- Spacing Recommendations: The ideal spacing will depend on the specific variety of Cat Eye Seeds you are growing. As a general rule, aim for at least a few inches between seedlings.
- Transplanting: When the seedlings are large enough to handle, carefully transplant them into individual pots or into the garden, following the recommended spacing guidelines.
- Benefits of Proper Spacing: Adequate spacing promotes strong root development, healthy foliage, and increased resistance to pests and diseases.
The delicate attention you’ve provided thus far sets the stage for strong, healthy plants. However, even with the best care, challenges can arise. Recognizing and addressing these issues promptly is essential for ensuring your Cat Eye plants thrive and reach their full potential.
Troubleshooting: Common Challenges and Solutions
Every gardener, regardless of experience, encounters occasional setbacks. When nurturing Cat Eye plants, vigilance is key. Early detection of problems, whether pests or diseases, allows for swift intervention, minimizing potential damage and safeguarding your precious plants. Let’s delve into some common challenges and how to overcome them.
Identifying Pests and Diseases
The first step in troubleshooting is accurate identification. Knowing what you’re dealing with is crucial for selecting the most effective treatment.
Common Pests
Aphids are small, soft-bodied insects that cluster on stems and leaves, sucking plant sap. Look for distorted growth, sticky residue (honeydew), and the presence of ants, which are attracted to the honeydew.
Spider mites are tiny arachnids that create fine webs on plants. Infested leaves may appear stippled, yellowed, or bronzed.
Common Diseases
Fungal infections can manifest in various ways, including powdery mildew (a white, powdery coating on leaves), leaf spot (dark, circular spots on leaves), and root rot (soft, brown, decaying roots).
Preventive measures such as proper air circulation and avoiding overhead watering can help reduce the risk of fungal diseases.
Organic Control Methods
Whenever possible, opt for organic control methods to minimize harm to beneficial insects and the environment.
Aphids
A strong blast of water from a hose can dislodge aphids. Insecticidal soap or neem oil are also effective organic treatments. Introducing natural predators like ladybugs can provide long-term control.
Spider Mites
Similar to aphids, a strong water spray can help control spider mites. Neem oil is another effective organic option. Increase humidity around the plants, as spider mites prefer dry conditions.
Fungal Infections
Improve air circulation around plants by spacing them adequately and pruning away dense foliage. Remove and destroy infected leaves promptly. Apply organic fungicides containing copper or sulfur as needed.
Chemical Control Methods (If Necessary)
In severe cases, chemical control methods may be necessary, but should be used as a last resort, following all label instructions carefully.
Choosing the Right Product
Select a product specifically labeled for the pest or disease you are targeting. Avoid broad-spectrum pesticides, which can harm beneficial insects.
Application Guidelines
Always wear protective clothing, including gloves and eye protection, when applying chemical pesticides. Apply the product in the evening to minimize harm to pollinators.
Responsible Usage
Use chemical pesticides sparingly and only when necessary. Overuse can lead to pest resistance and environmental damage.
Preventative Measures
Prevention is always better than cure. Implementing preventative measures can significantly reduce the risk of pest and disease problems.
- Inspect plants regularly: Catching problems early is key.
- Maintain good air circulation: Proper spacing and pruning promote healthy growth.
- Water properly: Avoid overwatering and overhead watering.
- Provide adequate sunlight: Strong plants are less susceptible to pests and diseases.
- Use disease-resistant varieties: If available, choose varieties known for their resistance to common problems.
- Maintain healthy soil: Healthy soil supports healthy plants.
By staying vigilant and implementing these strategies, you can confidently address any challenges that arise and ensure your Cat Eye plants thrive, bringing beauty and joy to your garden.
The delicate attention you’ve provided thus far ensures your plants are thriving. Now, the satisfying culmination of your efforts arrives: harvesting and preserving the very essence of your Cat Eye plants – their seeds. Understanding the nuances of harvesting and seed saving will allow you to propagate these unique plants for years to come, while also finding creative ways to appreciate the fruits (or rather, seeds) of your labor.
Harvesting and Enjoying Your Cat Eye Seeds
The timing and method of harvesting Cat Eye seeds depend largely on your intended use for the plants. Are you primarily growing them for their ornamental value, the unique patterns of their seed pods, or specifically for seed saving? Each objective dictates a slightly different approach.
Timing is Everything: Knowing When to Harvest
If you’re after the seeds themselves, patience is key. Allow the seed pods to fully mature and dry on the plant. The pods will typically turn brown and become brittle. You should be able to hear the seeds rattling inside when you shake the pod gently.
For ornamental purposes, you might choose to harvest the pods earlier, when they still retain some color but are firm enough to hold their shape. Keep in mind that seeds harvested at this stage may not be viable.
The Harvesting Process: A Step-by-Step Guide
-
Gather your supplies: You’ll need pruning shears or scissors, a clean container or bag, and potentially gloves if the plants have prickly or irritating foliage.
-
Carefully cut the seed pods: Cut the pods from the plant, being mindful not to damage the surrounding foliage.
-
Dry the pods further (if needed): If the pods aren’t completely dry, spread them out on a tray in a well-ventilated area for a few days until they are brittle.
-
Extract the seeds: Once the pods are dry, gently break them open and remove the seeds. Discard any damaged or discolored seeds.
The Art of Seed Saving: Preserving Future Generations
Saving seeds allows you to perpetuate the unique characteristics of your Cat Eye plants. This process ensures your garden is brimming with these special plants for years to come.
Drying Seeds Properly
Proper drying is essential for seed longevity. Spread the seeds out in a single layer on a clean surface, such as a paper towel or screen. Place them in a cool, dry, and well-ventilated area away from direct sunlight. Allow the seeds to dry for at least two weeks.
Storage is Key
Once the seeds are thoroughly dry, store them in an airtight container. Glass jars or resealable plastic bags work well. Label the container with the plant name and the date of harvest. Store the container in a cool, dark, and dry place. A refrigerator or freezer can extend seed viability even further, but ensure the seeds are completely dry before freezing.
Beyond the Garden: Creative Ways to Enjoy Cat Eye Seeds
While seed saving is a practical application, there are many creative ways to enjoy your Cat Eye seeds:
- Ornamental Displays: Use the dried seed pods in floral arrangements, wreaths, or other decorative crafts.
- Educational Purposes: Use them in science lessons to teach children about plant life cycles.
- Gifts for Fellow Gardeners: Share your saved seeds with friends and family, spreading the joy of growing Cat Eye plants.
By mastering the art of harvesting and seed saving, you not only ensure a continuous supply of these unique plants but also unlock a world of creative possibilities beyond the garden. Embrace the opportunity to connect with nature on a deeper level and celebrate the enduring beauty of Cat Eye seeds.
FAQs About Growing Cat Eye Seeds
Here are some frequently asked questions to help you successfully grow your own cat eye seeds. This section should clarify any points missed in the ultimate guide!
How long does it take for cat eye seeds to germinate?
Generally, cat eye seeds will germinate within 7-14 days under optimal conditions. Make sure the soil is consistently moist and the temperature is warm for best results.
What’s the best soil for planting cat eye seeds?
A well-draining potting mix is ideal. You want something that retains moisture but doesn’t become waterlogged, preventing the cat eye seed from rotting. A mix of peat moss, perlite, and vermiculite works well.
Do cat eye seeds need direct sunlight?
While they appreciate sunlight, cat eye seeds don’t necessarily require direct sunlight, especially when they’re young seedlings. Indirect, bright light is sufficient during the early stages of growth. Too much direct sun can scorch the leaves.
How often should I water my cat eye seedlings?
Water regularly to keep the soil consistently moist, but not soggy. Check the soil surface and water when the top inch feels dry. Overwatering can lead to root rot, damaging the cat eye seed’s growth.
So, there you have it! You’re now equipped to give growing cat eye seed a shot. Remember to be patient and enjoy the process. Happy planting!