Understanding gravitational phenomena relies heavily on visual representations, and gravitational force arrows serve as a crucial tool in this process. Newtonian physics, a foundational concept, provides the theoretical framework for understanding how gravity manifests as a force. Furthermore, successful problem-solving with gravitational forces frequently utilizes free-body diagrams to represent all forces acting on an object. Finally, institutions like the Physics Education Technology (PhET) project offer interactive simulations to better visualize and manipulate gravitational force arrows, enabling a deeper comprehension of their application in varying scenarios.
Visualizing Gravity: Mastering Gravitational Force Arrows
This guide provides a structured approach to understanding and effectively using "gravitational force arrows" to represent the force of gravity in diagrams. We will break down the key elements of creating these arrows, interpreting their meaning, and applying them in various scenarios.
Understanding Gravitational Force
First, it’s important to establish what gravitational force represents.
- Definition: Gravitational force is the attractive force between any two objects with mass. The more massive the objects, and the closer they are, the stronger the force.
- Direction: Gravity always pulls objects towards each other. This directionality is crucial for understanding how to represent it with arrows.
- Newton’s Law of Universal Gravitation: This law mathematically describes the gravitational force: F = G (m1 m2) / r^2, where:
- F is the gravitational force
- G is the gravitational constant
- m1 and m2 are the masses of the two objects
- r is the distance between the centers of the two objects
Understanding this foundational knowledge is crucial before visualizing it.
The Anatomy of a Gravitational Force Arrow
A gravitational force arrow isn’t just any arrow; its components have specific meanings.
- Origin (Tail): The tail of the arrow originates on the object experiencing the gravitational force. This indicates where the force is acting.
- Direction: The arrow points in the direction of the gravitational force. Remember, gravity is always attractive.
- Length: The length of the arrow represents the magnitude or strength of the gravitational force. A longer arrow signifies a stronger force.
- Label (Optional): While not strictly necessary, labeling the arrow (e.g., "Fg" or "Fgravity") can improve clarity, especially in complex diagrams.
Drawing Gravitational Force Arrows: A Step-by-Step Guide
Let’s illustrate how to draw gravitational force arrows for common situations.
-
Identify the Objects: Determine which objects are interacting gravitationally. Usually, one will be a massive body like a planet, and the other a smaller object.
-
Locate the Center of Mass: For simplicity, we often treat objects as if all their mass is concentrated at their center of mass.
-
Draw the Arrow:
- Tail Placement: Place the tail of the arrow on the object experiencing the force.
- Direction: Point the arrow towards the center of mass of the object exerting the gravitational force.
- Length: Estimate the relative magnitude of the force. A heavier object, or a closer object, means a longer arrow.
- Label (Optional): Add a label for further clarity.
-
Multiple Objects: If multiple objects are exerting gravitational forces, draw a separate arrow for each force acting on the object in question. These forces can then be vectorially added to determine the net gravitational force.
Example: An Apple Falling from a Tree
- Objects: The Earth and the Apple.
- Center of Mass: Approximate the center of the Earth, and the center of the apple.
- Draw the Arrow:
- Tail: Place the tail of the arrow on the apple.
- Direction: Point the arrow downwards towards the Earth’s center.
- Length: The length should represent the gravitational force on the apple (its weight).
- Label: You could label this arrow "Fg (Earth)" or simply "Fg".
Common Scenarios and Applications
Here’s how to apply gravitational force arrows in different contexts.
-
Objects on a Flat Surface: The gravitational force arrow points directly downwards, towards the Earth’s center. A normal force arrow, equal in magnitude but opposite in direction, will also be present.
-
Objects on an Inclined Plane: The gravitational force arrow still points downwards, but it can be resolved into components parallel and perpendicular to the plane for analysis.
-
Orbital Motion: The gravitational force arrow points from the orbiting object towards the center of the object it is orbiting. This is the centripetal force that keeps the object in orbit.
Understanding Relative Force Magnitudes: A Comparative Table
| Scenario | Object 1 Mass | Object 2 Mass | Distance | Relative Force Strength | Arrow Length (Relative) |
|---|---|---|---|---|---|
| Person on Earth | ~70 kg | Earth’s mass | 6371 km | High | Long |
| Satellite Orbiting Earth | ~500 kg | Earth’s mass | 400 km | High | Long |
| Person on the Moon | ~70 kg | Moon’s mass | 1737 km | Lower | Short |
| Spacecraft near a Small Asteroid | ~1000 kg | Asteroid’s Mass | 100 m | Very Low | Very Short |
This table illustrates the relative lengths of gravitational force arrows based on mass and distance. Remember, it is all about relative comparisons in diagrams.
Frequently Asked Questions: Gravitational Force Arrows
This section answers common questions about visualizing gravity using gravitational force arrows. We hope it clarifies any confusion and helps you understand how to represent gravitational force accurately.
What exactly are gravitational force arrows, and what do they represent?
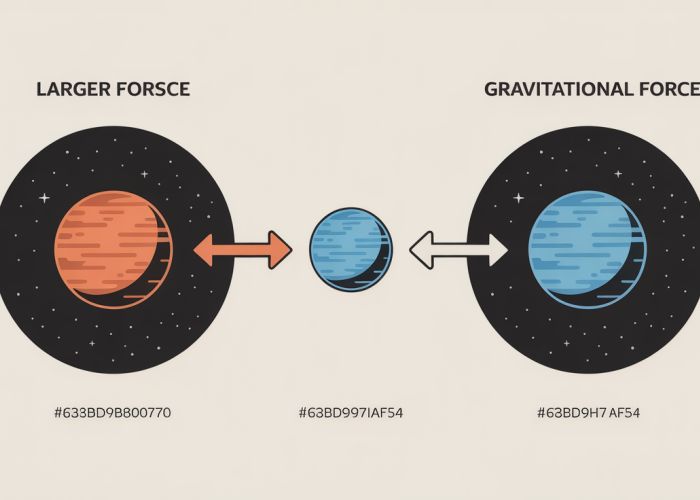
Gravitational force arrows are visual tools that represent the direction and strength of the gravitational force acting on an object. The arrow’s direction indicates the direction of the force (towards the object causing the gravity), and the length of the arrow represents the magnitude (strength) of the force. Longer arrows signify a stronger gravitational pull.
How do I determine the length of the gravitational force arrows?
The length of the gravitational force arrows is proportional to the strength of the gravitational force. This strength depends on the masses of the objects involved and the distance between them. The greater the masses or the smaller the distance, the stronger the force, and consequently, the longer the gravitational force arrow.
Can I use gravitational force arrows to represent gravity between multiple objects?
Yes, you can. For each object, draw a gravitational force arrow representing the force exerted on it by each of the other objects. The net gravitational force is then the vector sum of all these individual arrows. Consider direction and magnitude to accurately visualize the combined pull.
What does it mean if a gravitational force arrow is absent or very small?
The absence or a very small gravitational force arrow indicates that the gravitational force acting on that object is negligible. This often happens when the object’s mass is insignificant, the distance between objects is large, or the gravitational forces from other objects are significantly stronger, effectively cancelling out the force you’re considering.
Alright, that wraps it up for visualizing gravity using gravitational force arrows! Hopefully, you now have a better grasp of how to illustrate and understand this fundamental force. Go forth and conquer those physics problems!