Understanding quadratic functions is crucial, as the vertex of the parabola reveals key information, making it an essential concept for mastering graphing quadratic inequalities. The strategic use of a graphing calculator can greatly aid in visualizing solutions, which is pivotal. Correctly interpreting the solution sets requires a solid comprehension of interval notation, helping to accurately represent the regions satisfying the inequality. Identifying common errors in graphing quadratic inequalities will ensure accurate and confident problem-solving.
At the heart of algebra lies the power to describe relationships that aren’t always equal. Enter quadratic inequalities: mathematical statements that compare a quadratic expression to a value, unveiling a world of solutions beyond simple equations.
But why should you care about graphing these inequalities?
Because visualizing them unlocks their meaning, turning abstract algebra into concrete understanding. Being able to clearly show a quadratic inequality is a fundamental skill, but is often fraught with errors.
Quadratic Inequalities: Beyond Equality
A quadratic inequality is, at its core, an extension of a quadratic equation.
Instead of seeking the exact points where a parabola intersects the x-axis (as in ax² + bx + c = 0), we’re now interested in the regions where the parabola is either above or below a certain line.
This "certain line" is most often the x-axis, but can be any value we compare our quadratic to.
These regions represent a range of x-values that satisfy the inequality. For example, ax² + bx + c > 0 asks: "For what x-values is this parabola above the x-axis?"
This seemingly small shift from equality to inequality dramatically expands the landscape of possible solutions, moving us from discrete points to continuous intervals.
The Importance of Visualizing Solutions
Graphing quadratic inequalities isn’t just about following a set of rules. It’s about developing a visual intuition for what the solution represents.
A graph provides an immediate and clear representation of all x-values that satisfy the inequality.
Without a graph, you’re essentially navigating in the dark, relying solely on algebraic manipulations that can easily lead to errors. The graph serves as a visual check, ensuring your algebraic solution aligns with the actual behavior of the quadratic function.
Common Graphing Challenges
Graphing quadratic inequalities presents several common challenges. These challenges range from misinterpreting inequality symbols to inaccurately shading the solution region. Students often struggle with:
- Accurately plotting the parabola: Finding the vertex, intercepts, and overall shape can be tricky.
- Determining the correct boundary line: Knowing when to use a solid vs. dashed line is crucial.
- Shading the appropriate region: Identifying whether to shade above or below the parabola can be confusing.
These errors can lead to incorrect solutions and a misunderstanding of the inequality’s true meaning.
Avoiding the Pitfalls: A Practical Guide
The goal of this guide is to help you navigate these potential pitfalls and develop a confident approach to graphing quadratic inequalities.
We will explore the most common mistakes students make and provide clear, step-by-step instructions on how to avoid them.
By understanding these errors and mastering the correct techniques, you can unlock the power of visual representation and gain a deeper understanding of quadratic inequalities.
At the heart of algebra lies the power to describe relationships that aren’t always equal. Enter quadratic inequalities: mathematical statements that compare a quadratic expression to a value, unveiling a world of solutions beyond simple equations.
But why should you care about graphing these inequalities?
Because visualizing them unlocks their meaning, turning abstract algebra into concrete understanding. Being able to clearly show a quadratic inequality is a fundamental skill, but is often fraught with errors.
Without a graph, you’re essentially navigating in the dark. You’re missing a crucial tool for understanding the complete solution set. So, where do many students stumble on this journey? Often, the problem stems from a shaky foundation.
Mistake #1: Neglecting Foundational Concepts
One of the most common pitfalls in graphing quadratic inequalities is a lack of solid understanding of the underlying concepts. It’s like trying to build a house on sand; without a strong base, everything else crumbles.
Quadratic Inequalities and Equations: A Close Relationship
To truly grasp quadratic inequalities, it’s essential to understand their relationship to quadratic equations. Remember that a quadratic equation (ax² + bx + c = 0) seeks the specific x-values where the parabola intersects the x-axis. These points are the roots or solutions of the equation.
A quadratic inequality, on the other hand, asks a broader question. It asks: "For what range of x-values is the parabola above or below the x-axis (or some other reference line)?"
Think of it this way: the quadratic equation gives you the exact points of intersection.
The inequality describes the regions where the parabola satisfies a certain condition. The equation defines the boundaries; the inequality explores the space within and beyond those boundaries.
Understanding the Direction of Inequalities
The direction of the inequality symbol (>, <, ≥, ≤) is crucial in determining the solution set. It dictates which region of the graph should be shaded.
- > (greater than): Indicates the region above the parabola.
- < (less than): Indicates the region below the parabola.
- ≥ (greater than or equal to): Indicates the region above the parabola, including the parabola itself. This will be represented by a solid line.
- ≤ (less than or equal to): Indicates the region below the parabola, including the parabola itself. This, too, will be represented by a solid line.
Misinterpreting these symbols leads to shading the wrong area. It is one of the most common and easily avoidable errors.
Pay close attention to whether the inequality is strict (>, <) or non-strict (≥, ≤). This determines whether the boundary line is dashed or solid. This seemingly small detail significantly impacts the accuracy of your solution.
- Strict inequalities use a dashed line to indicate that points on the parabola are not included in the solution.
- Non-strict inequalities use a solid line to show that points on the parabola are part of the solution.
Think of it this way: the quadratic equation gives you the exact points where the parabola kisses the x-axis, while the inequality broadens the scope, asking about entire regions above or below. This seemingly simple difference is often overlooked, leading to confusion and errors when students start graphing. Now, let’s move on to another area where mistakes often arise: the process of actually plotting the parabola.
Mistake #2: Parabola Plotting Pitfalls
Graphing quadratic inequalities hinges on accurately representing the parabola that defines the boundary. While the underlying concept may seem straightforward, the execution is often riddled with errors.
Let’s dissect the common pitfalls that plague students when they attempt to sketch these curves.
Understanding the Parabola Shape
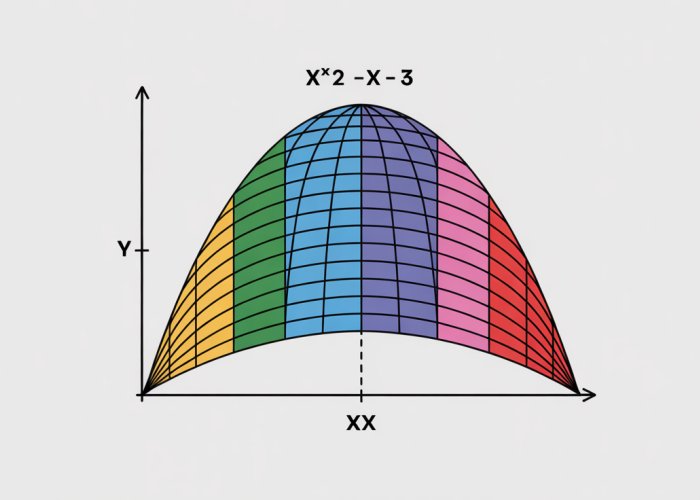
First and foremost, it’s crucial to understand that a parabola is a symmetrical, U-shaped curve. This shape is defined by the quadratic term (ax²) in the equation. The sign of ‘a’ determines whether the parabola opens upwards (a > 0) or downwards (a < 0). This simple distinction is paramount for getting the basic orientation of the graph correct.
The Significance of the Vertex
The vertex is the turning point of the parabola – its minimum or maximum point. Accurately locating the vertex is absolutely critical. The vertex not only defines the lowest (or highest) point on the graph, but also acts as the axis of symmetry.
The x-coordinate of the vertex can be found using the formula:
x = -b / 2a
where ‘a’ and ‘b’ are the coefficients in the quadratic equation (ax² + bx + c = 0). Once you have the x-coordinate, plug it back into the original equation to find the corresponding y-coordinate. Together, these coordinates give you the precise location of the vertex.
Determining the Parabola’s Direction
As mentioned earlier, the sign of the ‘a’ coefficient dictates the direction of the parabola. If a > 0, the parabola opens upwards, resembling a smile. If a < 0, the parabola opens downwards, resembling a frown. This is a fundamental concept that should be ingrained.
Forgetting to consider the sign of ‘a’ can lead to a completely inverted graph, rendering your solution meaningless.
Utilizing Intercepts
Intercepts are the points where the parabola intersects the x-axis (x-intercepts) and the y-axis (y-intercept).
X-Intercepts
The x-intercepts, also known as the roots or zeros of the quadratic equation, are found by setting y = 0 and solving for x.
These points are crucial because they define where the parabola crosses the x-axis, giving you key reference points for the graph. Factoring the quadratic equation or using the quadratic formula are the common methods to finding the x-intercepts.
Y-Intercept
The y-intercept is found by setting x = 0 in the quadratic equation. This gives you the point where the parabola intersects the y-axis.
The y-intercept is particularly straightforward to calculate, as it’s simply the constant term ‘c’ in the equation (ax² + bx + c = 0).
The Importance of Accurate Plotting
Ultimately, even with a solid understanding of the parabola’s shape, vertex, direction, and intercepts, careless plotting can still lead to errors.
Ensure that you accurately transfer these key points onto your graph. A sloppy or rushed graph can obscure the true solution set of the inequality. Take your time, double-check your points, and use a ruler or straightedge to draw smooth curves.
Think of plotting the parabola as setting the stage for the real action. Now comes the crucial decision that dictates what actually gets included in the solution set: the boundary line. It’s more than just aesthetics; it’s a fundamental part of accurately representing the inequality on the graph.
Mistake #3: Boundary Line Blunders
The boundary line in a quadratic inequality graph serves as a visual separator. It distinguishes between regions that satisfy the inequality and those that don’t. The type of line used – dashed or solid – carries significant meaning. A failure to use the correct type of line is a common yet critical error that impacts the accuracy of the solution.
Dashed vs. Solid: Decoding the Line Types
The choice between a dashed line and a solid line directly corresponds to the inequality symbol used in the problem. This seemingly small detail is fundamental to accurately portraying the solution set.
A dashed line signifies that the parabola itself is not included in the solution. This occurs when the inequality uses strict symbols: greater than (>) or less than (<). The dashed line acts as a boundary, indicating values infinitesimally close to the parabola satisfy the inequality, but not the parabola itself.
Conversely, a solid line indicates that the parabola is included in the solution set. This occurs when the inequality uses non-strict symbols: greater than or equal to (≥) or less than or equal to (≤). The solid line means that all points on the parabola, in addition to the region that satisfies the inequality, are part of the solution.
Inequality Symbols: Strict vs. Non-Strict
Understanding the difference between strict and non-strict inequalities is paramount.
Strict inequalities (> and <) exclude the boundary line.
Non-strict inequalities (≥ and ≤) include the boundary line.
This distinction directly dictates whether the boundary line is represented as dashed or solid. The line type accurately represents whether the parabola is incorporated into the solution.
Paying Attention to Detail: Avoiding Costly Errors
The difference between a dashed and a solid line may seem minor. However, it fundamentally alters the solution set. Inaccurate representation of the boundary line renders the entire graph incorrect. Always double-check the inequality symbol before drawing the boundary line.
Failing to differentiate between strict and non-strict inequalities can lead to misinterpreting the solution. This error often leads to identifying incorrect regions as solutions. This can especially impact the selection of test points later in the solving process. This can be avoided through careful assessment of the inequality symbol.
Think of plotting the parabola as setting the stage for the real action. Now comes the crucial decision that dictates what actually gets included in the solution set: the boundary line. It’s more than just aesthetics; it’s a fundamental part of accurately representing the inequality on the graph.
Mistake #4: Shading Shenanigans
After accurately graphing the parabola and establishing the correct boundary line, many students stumble when it comes to shading. Shading is far more than just filling in an area; it’s a visual representation of the solution set to the inequality. Incorrect shading leads to a misinterpretation of which values satisfy the original inequality, rendering the entire graphical representation inaccurate.
Understanding the Solution Set Through Shading
The solution set encompasses all the points on the coordinate plane that, when plugged into the original inequality, make the statement true. Shading is the mechanism used to visually highlight this solution set. The area that is shaded represents the infinite number of (x, y) coordinate pairs that satisfy the given inequality.
It’s a visual declaration, stating: “All points within this shaded region are solutions." Conversely, the unshaded region represents the values that do not satisfy the inequality.
The Test Point Method: Your Shading Compass
The Test Point method is a straightforward and reliable technique for determining which region to shade.
It involves selecting an arbitrary point on the coordinate plane that is not on the parabola itself. This point acts as a proxy, representing all the points in the same region as it.
If the test point satisfies the inequality, then the entire region containing that point is part of the solution set and should be shaded. If the test point does not satisfy the inequality, then that region should remain unshaded.
Step-by-Step Guide to Using a Test Point
-
Select a Test Point: Choose a point that is easy to work with and not located on the parabola. The point (0, 0) is often a convenient choice, provided the parabola does not pass through the origin.
-
Substitute the Test Point into the Inequality: Plug the x and y coordinates of your chosen point into the original quadratic inequality.
-
Evaluate the Inequality: Simplify the inequality and determine whether the resulting statement is true or false.
-
Shade Accordingly:
-
If the test point makes the inequality true, shade the region of the graph containing the test point. This indicates that all points in that region are solutions to the inequality.
-
If the test point makes the inequality false, shade the opposite region. This indicates that the test point’s region does not contain solutions to the inequality.
-
Visual Example of Correct Shading
Consider the inequality: y > x² – 2x – 3
-
Parabola: The corresponding parabola is graphed (y = x² – 2x – 3).
-
Boundary Line: The boundary line is dashed because the inequality is "greater than" and doesn’t include equality.
-
Test Point: Let’s use (0, 0) as our test point.
-
Substitution: Substitute x = 0 and y = 0 into the inequality:
0 > (0)² – 2(0) – 3
0 > -3
-
Evaluation: The statement "0 is greater than -3" is true.
-
Shading: Since (0, 0) made the inequality true, we shade the region containing (0, 0), which is the area above the parabola. This shaded region visually represents all the (x, y) values that satisfy the inequality y > x² – 2x – 3.
Think of shading as the grand finale after a performance. But even if every step leading up to it was executed perfectly, the performance falls flat if the audience doesn’t understand the meaning behind it. So too with quadratic inequalities; accurately graphing and shading is not enough, it’s critical to understand what the solution set represents in the broader context of the problem.
Mistake #5: Overlooking the Complete Picture
The final, and perhaps most nuanced, mistake lies in failing to fully internalize the significance of the solution set. It’s not just about following steps to arrive at a shaded region; it’s about understanding what that shaded region means. This involves considering the inequality within real-world scenarios, thinking critically about the solutions, and ensuring they make logical sense.
Decoding the Solution Set
The solution set is more than just a collection of points on a graph. It’s a comprehensive representation of all the values that satisfy the original inequality.
Each point within the shaded region, when its x and y coordinates are substituted into the original inequality, will result in a true statement.
Conversely, any point outside the shaded region will make the inequality false.
Understanding this fundamental concept is key to truly mastering quadratic inequalities.
Real-World Context and Logical Sense
Many mathematical problems, particularly those involving inequalities, are derived from real-world situations. These contexts provide constraints and conditions that the solution set must adhere to.
For instance, consider a scenario where the inequality represents the possible dimensions of a rectangular garden with a limited area.
The solution set must only include positive values for length and width because a garden cannot have negative dimensions.
Similarly, if the inequality models the height of a projectile over time, the solution must consider that time cannot be negative.
It is crucial to consider the practical limitations of the problem and discard any solutions that do not make sense in the real world.
Solution Signification
Understanding the solution set also involves interpreting what the solution actually signifies within the inequality.
What does the shaded region tell us about the relationship between the variables in the inequality?
For example, if the inequality represents the profit margin of a business, the solution set might indicate the range of prices that will yield a profit.
If it represents the speed of a vehicle, it shows all possible speeds the vehicle can go.
By analyzing the solution set in this way, you can gain a deeper understanding of the problem and its implications.
Therefore, always ask yourself:
What does the solution tell me about the situation that the inequality represents?
Graphing Quadratic Inequalities: Frequently Asked Questions
Here are some common questions about graphing quadratic inequalities to help you avoid mistakes.
How does the inequality symbol affect the graph?
The inequality symbol determines whether the parabola’s boundary line is solid or dashed. A solid line means points on the parabola are included in the solution (≤ or ≥). A dashed line indicates they are not included (< or >). When graphing quadratic inequalities, this distinction is crucial.
What does "shading" the graph actually represent?
Shading represents all the points (x, y) that satisfy the quadratic inequality. All points within the shaded area, when plugged into the original inequality, will make the statement true. The shading helps visually represent the solution set when graphing quadratic inequalities.
How do I choose a test point to determine which region to shade?
Pick any point not on the parabola itself. A simple choice is (0, 0) if the parabola doesn’t pass through the origin. Substitute the coordinates of the test point into the original quadratic inequality. If the inequality holds true, shade the region containing the test point; otherwise, shade the opposite region. This confirms the correct region when graphing quadratic inequalities.
What if the quadratic inequality is not in standard form?
Before you can accurately graph the quadratic inequality, you must first rewrite it in standard form (e.g., y > ax² + bx + c). This allows you to correctly identify the vertex, axis of symmetry, and direction of the parabola, which are essential for graphing quadratic inequalities.
Alright, now you know the common pitfalls in graphing quadratic inequalities! Go forth and conquer those parabolas. Hopefully this saves you some headaches.