The world of embedded systems relies heavily on effective communication, and GPIO in microcontroller is a cornerstone of that communication. A microcontroller like the Arduino Uno, often programmed using the C programming language, utilizes General Purpose Input/Output (GPIO) pins to interact with the physical world. These GPIO pins, managed by the microcontroller’s internal architecture, allow developers to control and sense signals from external devices, making them vital for projects ranging from simple LED control to complex robotic systems. STM32 microcontrollers also offers advanced GPIO functionalities.
Microcontrollers (MCUs) are the brains behind countless embedded systems, controlling everything from your washing machine to sophisticated industrial machinery. Understanding how these tiny computers interact with the real world is fundamental to unlocking their potential. This is where the concept of General Purpose Input/Output (GPIO) pins becomes essential.
Defining Microcontrollers and Their Role
A microcontroller is essentially a self-contained computer on a single integrated circuit. Unlike general-purpose computers, MCUs are designed for specific tasks, often involving real-time control and interaction with sensors and actuators.
They typically integrate a processor core, memory (both RAM and ROM or Flash), and various peripherals like timers, analog-to-digital converters (ADCs), and communication interfaces, all on a single chip.
Embedded systems, powered by microcontrollers, are ubiquitous. They are in our cars, appliances, medical devices, and even our clothing. Their compact size, low power consumption, and dedicated functionality make them ideal for these applications.
What are GPIO Pins and Why are They Essential?
GPIO pins are the microcontroller’s interface to the outside world. They are physical pins on the chip that can be configured as either inputs or outputs. This versatility allows the microcontroller to:
-
Sense external conditions through sensors (e.g., temperature, light, pressure).
-
Control external devices such as LEDs, motors, relays, and displays.
-
Communicate with other devices using various communication protocols.
GPIO pins act as the fundamental bridge between the digital world inside the microcontroller and the analog world outside. Without them, the microcontroller would be isolated and unable to interact with its environment. They are the essential gateway to creating intelligent and responsive embedded systems.
Popular Microcontroller Platforms
Several popular platforms make working with microcontrollers and GPIO pins accessible to beginners.
-
Arduino: Known for its ease of use and extensive community support, Arduino is an excellent platform for learning the basics of microcontroller programming and GPIO control.
-
ESP32 and ESP8266: These chips are popular for IoT (Internet of Things) applications due to their built-in Wi-Fi capabilities. They offer a rich set of GPIO pins that can be used to connect to sensors, actuators, and other devices, enabling connected and interactive projects.
-
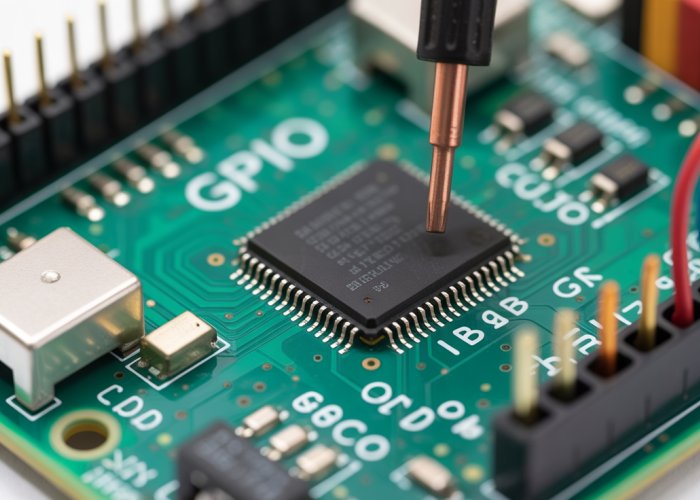
Raspberry Pi: While technically a single-board computer (SBC) and not a microcontroller, the Raspberry Pi also offers GPIO pins for interfacing with external hardware. Its powerful processor and Linux-based operating system make it suitable for more complex embedded applications.
Target Audience and Learning Objectives
This guide is specifically designed for beginners with little to no prior experience in embedded systems or microcontroller programming. We aim to provide a clear and concise introduction to GPIO concepts, focusing on practical examples and hands-on exercises.
By the end of this guide, you will be able to:
-
Understand the fundamental concepts of GPIO pins.
-
Configure GPIO pins as inputs and outputs.
-
Read data from sensors and control external devices using GPIO pins.
-
Implement basic embedded systems projects using popular microcontroller platforms.
-
Grasp the importance of GPIO in creating interactive and intelligent devices.
Get ready to embark on an exciting journey into the world of microcontrollers and GPIO! This is the first step towards building your own innovative embedded systems projects.
Microcontrollers, with their ability to control an array of devices, rely heavily on their connection to the external environment. These connections are made through General Purpose Input/Output (GPIO) pins.
Now, let’s delve deeper into how GPIO pins function specifically as digital inputs, enabling the microcontroller to perceive and interpret signals from the world around it.
GPIO Fundamentals: Digital Input – Sensing the World
The microcontroller’s power comes from its ability to react to changing conditions. Digital input functionality allows the microcontroller to "sense" the state of an external signal: is a button pressed, is a switch on, is a sensor detecting light? Understanding this fundamental operation is critical for building any interactive embedded system.
Understanding Digital Input
Digital input refers to the ability of a GPIO pin to detect whether a signal is in a high or low state. Instead of measuring a continuous range of values, as with analog input, a digital input reads a binary value: 1 or 0, true or false, on or off. This makes digital input ideal for scenarios where a simple yes/no or on/off determination is needed.
Essentially, the GPIO pin acts as a sensor, translating an external condition into a digital signal the microcontroller can process. The microcontroller then uses this information to make decisions and control other parts of the system.
Decoding Logic Levels: High and Low
The high and low states correspond to voltage levels. These levels are defined by the microcontroller’s specifications.
Generally, a voltage near the microcontroller’s supply voltage (e.g., 3.3V or 5V) is considered a high state, representing a logic 1. Conversely, a voltage near 0V (ground) is considered a low state, representing a logic 0.
These voltage thresholds are crucial to understand because applying a voltage outside of these ranges could lead to unpredictable behavior or even damage the microcontroller. You need to understand the datasheet of your microcontroller.
Voltage Considerations and Safe Operating Ranges
The microcontroller’s datasheet is the ultimate authority on voltage limits. Always consult the datasheet to determine the absolute maximum and minimum voltage ratings for each GPIO pin.
Exceeding these limits can cause permanent damage to the chip. Equally important, applying voltages outside the recommended operating range may result in unreliable readings.
It’s also important to consider the voltage levels of the external components you are connecting to the GPIO pins. Level shifting circuits might be necessary to adapt different voltage levels.
Practical Example: Reading a Button Press
One of the most common uses of digital input is to read the state of a button. Let’s consider how this works.
-
The Circuit: Connect one side of the button to a GPIO pin configured as an input. Connect the other side of the button to ground. A pull-up resistor is usually used (more on this later) to define the pin’s state when the button is not pressed.
-
Idle State: When the button is not pressed, the pull-up resistor ensures the GPIO pin reads a high signal (logic 1).
-
Button Press: When the button is pressed, it connects the GPIO pin directly to ground, forcing the pin to read a low signal (logic 0).
-
Microcontroller Code: The microcontroller continuously monitors the state of the GPIO pin. When it detects a change from high to low, it knows the button has been pressed.
This simple example illustrates how a GPIO pin can be used to detect a real-world event and trigger a corresponding action within the microcontroller’s program.
The ability to perceive external signals, as we’ve explored with digital inputs, is only half the story. A microcontroller’s true potential unlocks when it can influence the world around it. This influence comes from its ability to send signals, not just receive them, allowing it to actively control external devices and components.
GPIO Fundamentals: Digital Output – Controlling External Devices
Digital output is the cornerstone of microcontroller control. It enables the microcontroller to act as a conductor, orchestrating the behavior of other electronic components and creating dynamic interactions. Understanding how to wield this power is critical to designing effective embedded systems.
Understanding Digital Output
Digital output is the ability of a GPIO pin to output a digital signal, either HIGH or LOW. Unlike digital input, where the pin reads a state, here the pin sets a state. This allows the microcontroller to energize or de-energize a connected component.
The digital output is essentially a switch. When set HIGH, it connects the pin to the microcontroller’s voltage supply. When set LOW, it connects the pin to ground. This allows the microcontroller to turn things on and off.
Supplying Voltage and Current
Microcontrollers don’t just signal; they also provide power. When a GPIO pin is configured as an output and set to HIGH, it supplies voltage and, crucially, current to the connected component. The amount of current a GPIO pin can safely source (supply) or sink (draw) is limited.
Exceeding these limits can damage the microcontroller permanently. The datasheet for your specific microcontroller is your bible here – it specifies the maximum current for each pin.
Controlling an LED: A Practical Example
The most common "Hello, World!" equivalent in the embedded world is blinking an LED. Let’s walk through how to control an LED using a GPIO pin as a digital output.
- Connection: Connect the positive (anode) leg of the LED to a GPIO pin through a resistor. The negative (cathode) leg of the LED should be connected to ground.
- Code: The code configures the GPIO pin as an output. When the code sets the pin HIGH, the LED lights up. When it sets it LOW, the LED turns off. By alternating HIGH and LOW states with a delay, we make the LED blink.
- Explanation: The microcontroller’s output voltage (e.g., 3.3V or 5V) flows through the resistor, then through the LED, completing the circuit to ground. The resistor limits the current to a safe value for both the LED and the microcontroller.
Current Limiting Resistors: Protecting Your Microcontroller
Current limiting resistors are not optional; they are essential for protecting your GPIO pins. LEDs, for instance, require a specific current to operate without burning out. Without a resistor, an LED will draw too much current, potentially damaging both the LED and the microcontroller.
The resistor limits the current flow, preventing damage. To calculate the correct resistor value, you need to know:
- The microcontroller’s output voltage (Vsupply)
- The LED’s forward voltage (Vf) – typically around 2V for a red LED.
- The LED’s desired forward current (If) – typically around 20mA (0.02A).
Ohm’s Law (V = IR) is used to calculate the resistor value (R = (Vsupply – Vf) / If).
For example, if Vsupply is 5V, Vf is 2V, and If is 0.02A, then R = (5V – 2V) / 0.02A = 150 ohms. A standard 150-ohm resistor or the next readily available higher value (e.g., 220 ohms) would be suitable. Always err on the side of a higher resistor value to ensure safety, even if it slightly dims the LED.
The ability to perceive external signals, as we’ve explored with digital inputs, is only half the story. A microcontroller’s true potential unlocks when it can influence the world around it. This influence comes from its ability to send signals, not just receive them, allowing it to actively control external devices and components. Now that we’ve seen how microcontrollers can assert their will on the outside world, it’s equally crucial to explore how to ensure the integrity of the signals they receive from that world.
Pull-up and Pull-down Resistors: Ensuring Reliable Input Signals
In the realm of digital electronics, a floating input pin can be a source of unpredictable behavior. These undefined states are susceptible to noise and can lead to erratic operation of your microcontroller-based system. This is where pull-up and pull-down resistors come into play, providing a crucial function by establishing a default state for input pins.
The Purpose of Pull-up Resistors
A pull-up resistor, as the name suggests, connects a GPIO pin to a positive voltage supply (typically VCC). Its primary purpose is to "pull" the voltage of the pin high when no other signal is present.
This ensures that the pin doesn’t float randomly, but instead has a defined, known state.
When and Why to Use Pull-up Resistors
Pull-up resistors are particularly useful in situations where an external switch or sensor connects the GPIO pin to ground when activated.
Consider a simple push-button connected to a microcontroller. When the button is not pressed, the pull-up resistor ensures the pin reads HIGH.
When the button is pressed, it connects the pin directly to ground, forcing the voltage LOW. Without the pull-up resistor, the pin would be floating when the button isn’t pressed, leading to unreliable readings.
In essence, pull-up resistors provide a deterministic HIGH signal when the input is inactive.
The Purpose of Pull-down Resistors
Conversely, a pull-down resistor connects a GPIO pin to ground. Its purpose is to "pull" the voltage of the pin low when no other signal is present.
This establishes a default LOW state, preventing the pin from floating.
When and Why to Use Pull-down Resistors
Pull-down resistors are used in similar scenarios as pull-up resistors but with the logic inverted. They are most appropriate when an external signal will actively pull the pin high.
For example, if a sensor outputs a HIGH signal when activated, a pull-down resistor would ensure the pin is LOW when the sensor is inactive.
The key difference is that pull-down resistors provide a deterministic LOW signal when the input is inactive. The choice between pull-up and pull-down often depends on the specific requirements of the circuit and the desired default state.
Internal Pull-up Resistors
Many microcontrollers have built-in, configurable pull-up resistors. These internal resistors can be enabled or disabled through software, eliminating the need for an external component.
Using internal pull-ups simplifies the circuit design and reduces the component count.
To use an internal pull-up resistor, you’ll typically need to configure the GPIO pin in your code. The specific commands vary depending on the microcontroller platform (Arduino, ESP32, etc.), but generally involve setting the pin mode to INPUT_PULLUP or a similar designation.
While convenient, internal pull-up resistors might have higher resistance values than external resistors. This can make them more susceptible to noise in certain environments.
Therefore, you should carefully consider your application’s requirements when deciding between internal and external pull-up/pull-down resistors.
The use of pull-up and pull-down resistors provides a practical solution for ensuring reliable input signals. But to truly harness the power of GPIO, we must delve deeper into the microcontroller’s architecture and understand how these pins are controlled at the register level. This unlocks a level of fine-grained control that is essential for advanced embedded systems development.
Register Deep Dive: How GPIOs are Controlled Internally
At the heart of every microcontroller lies a complex system of registers. These registers act as the control panel for all its peripherals, including the crucial GPIO pins. Understanding how to manipulate these registers directly is key to unlocking the full potential of your microcontroller.
Understanding Registers
Think of registers as special memory locations within the microcontroller. Each register is assigned a specific address and is responsible for controlling a particular aspect of the microcontroller’s functionality.
For GPIO, registers dictate whether a pin acts as an input or an output, and they manage the reading and writing of digital data. By directly manipulating these registers, you gain precise control over each GPIO pin.
Data Direction Registers (DDR): Configuring Pin Direction
One of the most important types of registers for GPIO control are the Data Direction Registers (DDRs). These registers determine whether a specific GPIO pin is configured as an input or an output.
Each bit in a DDR corresponds to a single GPIO pin. Setting a bit to 1 typically configures the corresponding pin as an output, while setting it to 0 configures it as an input.
The specific naming convention for DDRs can vary depending on the microcontroller architecture. But the underlying principle remains the same: these registers dictate the direction of data flow for each GPIO pin.
For instance, on many AVR microcontrollers (like those used in Arduino), you might find DDR registers named DDRA, DDRB, DDRC, and so on, each controlling a specific port of GPIO pins. By writing the appropriate binary value to the register (e.g., 0b11110000 to set the upper four pins as outputs and the lower four as inputs), you can configure the direction of each pin.
Port Input/Output Registers (PIN/PORT): Reading and Writing Data
Once you’ve configured the direction of your GPIO pins, you need a way to actually read data from input pins and write data to output pins. This is where Port Input/Output Registers (PIN/PORT) come into play.
These registers are used to either read the current state of the input pins or set the output state of the output pins. Like DDRs, each bit in a PIN or PORT register typically corresponds to a specific GPIO pin.
-
PIN Registers: These registers are used for reading the digital value present on a particular GPIO pin. If a pin is configured as an input, reading the corresponding bit in the PIN register will give you the current logic level (high or low) detected on that pin.
-
PORT Registers: These registers are used for writing digital values to GPIO pins that are configured as outputs. Setting a particular bit in the PORT register to
1will drive the corresponding output pin high, while setting it to0will drive it low.
Again, the naming conventions can differ across microcontroller architectures. But the function remains consistent: PIN registers allow you to sample the state of inputs, and PORT registers allow you to control the state of outputs.
By understanding and manipulating these registers directly, you bypass the need for higher-level library functions. This grants more granular control and often leads to more efficient code execution.
The use of pull-up and pull-down resistors provides a practical solution for ensuring reliable input signals. But to truly harness the power of GPIO, we must delve deeper into the microcontroller’s architecture and understand how these pins are controlled at the register level. This unlocks a level of fine-grained control that is essential for advanced embedded systems development.
Advanced GPIO: Pulse Width Modulation (PWM) for Analog Control
While GPIO pins are inherently digital, offering only two states (high or low), there are clever techniques to simulate analog behavior. Pulse Width Modulation (PWM) is one such technique. PWM allows us to control the average power delivered to a device by rapidly switching a digital signal on and off.
This creates the illusion of an analog signal, enabling us to perform tasks like dimming LEDs or controlling motor speeds with a level of precision that standard digital outputs can’t achieve.
Understanding Pulse Width Modulation (PWM)
PWM works by varying the width of the pulse of a digital signal. Imagine a square wave that alternates between on (high) and off (low) states.
The proportion of time the signal is in the "on" state within a given period determines the effective voltage seen by the controlled device. This proportion is known as the duty cycle.
Duty Cycle and Frequency Explained
The duty cycle is the percentage of one period in which the signal is active (high). A 0% duty cycle means the signal is always off, while a 100% duty cycle means the signal is always on. A 50% duty cycle means the signal is on for half the period and off for the other half.
Changing the duty cycle allows us to control the amount of power delivered to a load. A higher duty cycle delivers more power, while a lower duty cycle delivers less.
The frequency of the PWM signal refers to how many times the signal completes a full cycle (on and off) per second, measured in Hertz (Hz). The choice of frequency is crucial and depends on the application.
For example, driving an LED usually requires a frequency high enough to prevent flickering, while controlling a motor may require a lower frequency to optimize torque.
Fading an LED with PWM: A Practical Example
One of the most common applications of PWM is controlling the brightness of an LED. By varying the duty cycle of the PWM signal sent to the LED, we can smoothly adjust its brightness, creating a fading effect.
Here’s how it works:
- A microcontroller generates a PWM signal on a GPIO pin connected to the LED.
- The duty cycle of the PWM signal is gradually increased or decreased.
- As the duty cycle increases, the LED appears brighter because it’s receiving more power.
- As the duty cycle decreases, the LED appears dimmer.
This simple example demonstrates the power of PWM to create analog-like effects using purely digital signals. The perception of brightness is an analog phenomenon controlled by a digital signal.
Motor Speed Control Using PWM
Another significant application of PWM is motor speed control. By varying the duty cycle of the PWM signal applied to a motor driver, we can precisely control the voltage supplied to the motor.
A higher duty cycle results in a higher average voltage, causing the motor to spin faster. A lower duty cycle results in a lower average voltage, causing the motor to spin slower.
PWM offers a highly efficient method for controlling motor speed, allowing for smooth and responsive adjustments. Sophisticated motor control algorithms can use PWM to regulate speed, torque, and position with great accuracy.
PWM allows for advanced control capabilities, offering precision and flexibility beyond simple on/off control.
The ability to simulate analog behavior with PWM opens up a world of control possibilities. However, some applications demand an even more responsive approach. This is where interrupts come into play, providing a mechanism for microcontrollers to react immediately to external stimuli.
Advanced GPIO: Interrupts – Responding to External Events in Real-Time
Interrupts are a crucial feature in embedded systems, enabling microcontrollers to respond to external events without constantly polling input pins. They provide a more efficient and responsive way to handle asynchronous events. This section will delve into the world of interrupts, exploring their purpose, types, and application.
What are Interrupts?
Imagine a microcontroller diligently executing its primary task. Now, picture an external event occurring – a button press, a sensor reading exceeding a threshold, or data arriving on a communication interface. Without interrupts, the microcontroller would have to constantly check the status of these external signals, consuming valuable processing time.
Interrupts offer a more elegant solution. An interrupt is a signal that temporarily suspends the microcontroller’s current operation and transfers control to a specific piece of code called an Interrupt Service Routine (ISR) or interrupt handler.
This ISR handles the external event and, once completed, returns control to the main program, which resumes execution from where it left off.
The key advantage of interrupts is that the microcontroller can focus on its primary task and only respond to external events when they actually occur, significantly improving system efficiency and responsiveness.
Why Use Interrupts?
Interrupts are indispensable in many embedded systems applications due to their ability to:
-
Improve Responsiveness: React to events in real-time, crucial for time-critical applications.
-
Enhance Efficiency: Avoid constant polling, freeing up the processor for other tasks.
-
Handle Asynchronous Events: Respond to events that occur at unpredictable times.
Consider a security system. An interrupt can be triggered by a door sensor being opened, allowing the system to immediately initiate an alarm sequence, even if the microcontroller was busy performing other tasks.
This responsiveness is essential for ensuring the security system functions effectively.
Types of Interrupts: Edge-Triggered vs. Level-Triggered
Interrupts can be triggered in different ways, broadly categorized as edge-triggered and level-triggered.
Edge-Triggered Interrupts
Edge-triggered interrupts are activated by a change in the signal level on the interrupt pin. This change can be a rising edge (low to high transition) or a falling edge (high to low transition).
Once the edge is detected, the interrupt is triggered, and the ISR is executed. The interrupt will not trigger again until another edge of the specified type is detected, regardless of how long the signal remains at the new level.
Edge-triggered interrupts are useful for detecting momentary events like a button press or a pulse signal.
Level-Triggered Interrupts
Level-triggered interrupts, on the other hand, are activated by the signal level on the interrupt pin. The interrupt is triggered as long as the signal remains at the specified level (either high or low).
The ISR will continue to be executed repeatedly as long as the signal level remains active. To prevent continuous triggering, the ISR must typically clear the interrupt condition by changing the signal level or disabling the interrupt.
Level-triggered interrupts are suitable for detecting sustained conditions like a sensor exceeding a threshold or a communication line being active.
The choice between edge-triggered and level-triggered interrupts depends on the specific application and the nature of the external event being monitored.
Example: Responding to a Button Press Using an Interrupt
Let’s illustrate the use of interrupts with a common example: responding to a button press.
-
Configuration: Configure a GPIO pin as an interrupt input and set the trigger to a falling edge (assuming the button connects the pin to ground when pressed).
-
Interrupt Service Routine (ISR): Create an ISR that will be executed when the button is pressed. This ISR might perform actions like toggling an LED, sending a message, or incrementing a counter.
-
Enable Interrupt: Enable the interrupt for the configured GPIO pin.
Now, when the button is pressed, the falling edge on the GPIO pin will trigger the interrupt. The microcontroller will immediately suspend its current operation and execute the ISR.
Once the ISR is complete, the microcontroller will return to its main program and continue executing from where it left off.
This example demonstrates how interrupts provide a responsive and efficient way to handle button presses in embedded systems.
GPIO in Action: Exploring Popular Microcontroller Platforms
Having explored the theoretical underpinnings of GPIO, it’s time to ground our understanding with practical examples on popular microcontroller platforms. The beauty of GPIO lies in its versatility, but the specific implementation can vary slightly from platform to platform. Let’s examine how to harness the power of GPIO on Arduino, ESP32/ESP8266, and Raspberry Pi.
Arduino: Simplicity and Ease of Use
Arduino is renowned for its user-friendly environment, making it an excellent choice for beginners. The Arduino IDE provides a simplified interface to GPIO control, abstracting away much of the low-level complexity.
Arduino Libraries for GPIO Control
The Arduino environment provides readily available libraries that simplify GPIO interaction. Functions like pinMode(), digitalWrite(), and digitalRead() provide easy-to-use interfaces for configuring pin direction, setting output values, and reading input values. These functions streamline the coding process, enabling users to quickly prototype and implement their projects.
Controlling an LED with Arduino Code: A Simple Example
Let’s illustrate GPIO control on Arduino with a classic example: controlling an LED.
First, declare the LED’s pin:
const int ledPin = 13; // Arduino Uno's built-in LED
Next, set the pin as an output in the setup() function:
void setup() {

  pinMode(ledPin, OUTPUT);

}
Finally, toggle the LED in the loop() function:
void loop() {

  digitalWrite(ledPin, HIGH); // Turn the LED on

  delay(1000);              // Wait for one second

  digitalWrite(ledPin, LOW);  // Turn the LED off

  delay(1000);              // Wait for one second

}
This simple code snippet demonstrates the basic principles of GPIO control on Arduino, providing a foundation for more complex applications.
ESP32 and ESP8266: Connectivity and Versatility
The ESP32 and ESP8266 are popular choices for IoT (Internet of Things) projects due to their built-in Wi-Fi capabilities and versatile GPIO pins.
GPIO for Connecting Sensors and Actuators
These chips offer a wide array of GPIO pins that can be configured to interface with various sensors and actuators. Connecting sensors like temperature sensors, humidity sensors, or motion detectors is straightforward using the digital input capabilities.
Similarly, controlling actuators such as relays, motors, or servo motors can be achieved using the digital output and PWM functionalities.
Controlling Wi-Fi and Bluetooth Modules Using GPIO
A unique feature of the ESP32 and ESP8266 is the ability to control their integrated Wi-Fi and Bluetooth modules using GPIO pins. This can be useful for power management, enabling or disabling wireless communication based on specific conditions. For example, you might use a GPIO pin to activate Wi-Fi only when a sensor detects a particular event, conserving power in battery-operated applications.
Raspberry Pi: General-Purpose Computing with GPIO Capabilities
The Raspberry Pi is a single-board computer that runs a full-fledged operating system. While it’s more than just a microcontroller, it also provides GPIO pins that can be used to interact with external hardware.
Using GPIO with Python Libraries on Raspberry Pi
Python is the most popular language for programming the Raspberry Pi, and several libraries are available for controlling GPIO pins. The RPi.GPIO library is a common choice, offering a simple and intuitive interface for configuring pin direction and reading/writing data.
Here’s a basic example of controlling an LED using RPi.GPIO:
import RPi.GPIO as GPIO

import time
led_pin = 18 # GPIO pin number
GPIO.setmode(GPIO.BCM) # Use Broadcom SOC channel numbering
GPIO.setup(led_pin, GPIO.OUT)
try:
while True:
GPIO.output(ledpin, GPIO.HIGH) # Turn on
time.sleep(1)
GPIO.output(ledpin, GPIO.LOW) # Turn off
time.sleep(1)
except KeyboardInterrupt:
GPIO.cleanup() # Clean up GPIO on exit
This example demonstrates how to use Python and the RPi.GPIO library to control an LED connected to a GPIO pin on the Raspberry Pi.
Understanding these differences and nuances of GPIO implementation on different platforms empowers you to adapt your knowledge and apply it effectively across various projects. Experimentation and exploration are key to mastering GPIO control on your platform of choice.
Practical Considerations: Safety and Best Practices
Having explored the theoretical underpinnings of GPIO, it’s time to ground our understanding with practical examples on popular microcontroller platforms. The beauty of GPIO lies in its versatility, but the specific implementation can vary slightly from platform to platform. Let’s examine how to harness the power of GPIO on Arduino, ESP32/ESP8266, and Raspberry Pi.
Beyond the technical specifics of controlling GPIO pins lies a crucial aspect: safety and best practices. Working with electronics, even at low voltages, requires careful consideration to prevent damage to both your equipment and yourself. This section outlines essential guidelines for safe and reliable GPIO operation.
Electrical Safety: A Foundation for Success
Electrical safety is paramount when working with any electronic circuit. Microcontrollers are sensitive devices, and improper handling can lead to irreversible damage.
Always work in a clean, dry environment to minimize the risk of short circuits.
Before making any connections, double-check your wiring diagram and ensure that all components are correctly oriented.
It’s also wise to disconnect the power supply before making changes to the circuit. This prevents accidental shorts that could fry your microcontroller.
Never exceed the voltage or current ratings specified in the microcontroller’s datasheet. Doing so can cause permanent damage and even pose a fire hazard.
Current Limiting: Protecting Your Investment
One of the most common mistakes beginners make is failing to limit the current flowing through GPIO pins.
Microcontrollers can only source or sink a limited amount of current, typically in the range of milliamps (mA). Connecting a load that draws more current than the pin can handle will likely damage the pin, potentially rendering the entire microcontroller useless.
This is where current limiting resistors come into play.
The Role of Resistors
A resistor placed in series with the load limits the current to a safe level.
The appropriate resistor value can be calculated using Ohm’s Law (V = IR), where V is the voltage, I is the desired current, and R is the resistance.
For example, if you want to drive an LED from a 5V GPIO pin and the LED requires 20mA with a forward voltage of 2V, the resistor value would be:
R = (5V – 2V) / 0.02A = 150 Ohms
A standard 150-ohm resistor, or the next closest available value, should be used.
Avoiding Common Pitfalls
It’s generally better to err on the side of caution and choose a slightly higher resistor value. This will reduce the current and dim the LED slightly, but it will also provide a greater margin of safety.
Always consult the datasheet for both the microcontroller and the external components to determine the maximum current ratings.
Best Practices for GPIO Operation
Beyond safety precautions, adhering to best practices will significantly improve the reliability and longevity of your GPIO-based projects.
Static Electricity Prevention
Electrostatic discharge (ESD) can easily damage sensitive electronic components, including microcontrollers. Ground yourself before handling any electronic components.
Using an anti-static wrist strap connected to a grounded surface is the best approach.
Organized Wiring and Documentation
Maintain a clean and organized wiring setup. Messy wiring can lead to errors and make troubleshooting difficult.
Use different colored wires to easily identify connections.
Keep a detailed wiring diagram and documentation of your project. This will save you time and frustration when debugging or making modifications.
Testing and Debugging
Thoroughly test your code and hardware before deploying your project. Use a multimeter to check voltages and continuity.
Start with simple test cases and gradually increase complexity.
Use debugging tools, such as a serial monitor or an oscilloscope, to monitor the behavior of your circuit.
Datasheet Awareness
Always refer to the datasheet for your microcontroller and any external components you are using.
The datasheet contains critical information about voltage and current ratings, pin assignments, and other specifications.
Ignoring the datasheet can lead to damage or unexpected behavior.
Software Considerations
When writing code to control GPIO pins, use clear and descriptive variable names. Comment your code thoroughly to explain the purpose of each section.
Avoid writing code that toggles GPIO pins rapidly, as this can generate noise and interfere with other circuits.
Be mindful of timing considerations, especially when working with interrupts or PWM.
By following these safety precautions and best practices, you can ensure safe, reliable, and successful GPIO-based projects. The time invested in planning and careful execution will pay off in the long run, preventing costly mistakes and ensuring the longevity of your creations.
FAQs: GPIO in Microcontrollers
This FAQ addresses common questions about using General Purpose Input/Output (GPIO) pins in microcontrollers, complementing our beginner’s guide.
What exactly is a GPIO pin on a microcontroller?
A GPIO pin is a versatile pin on a microcontroller that can be configured as either an input or an output. This allows the microcontroller to interact with the outside world, sensing signals or controlling external devices. These pins are fundamental for any microcontroller project.
Why are GPIO pins important for microcontrollers?
GPIO pins provide the interface between the microcontroller’s internal logic and external hardware. Without them, a microcontroller would be isolated and unable to control or respond to its environment. The flexibility of GPIO is critical for a vast range of applications.
What’s the difference between input and output modes for a GPIO pin?
In input mode, the GPIO pin reads the voltage level applied to it. This allows the microcontroller to sense signals from sensors or other devices. In output mode, the GPIO pin outputs a voltage level, enabling the microcontroller to control LEDs, motors, or other actuators.
Can I damage a microcontroller by misusing GPIO pins?
Yes, improper use of GPIO pins can potentially damage the microcontroller. For example, connecting a GPIO configured as an output directly to ground (short circuit) can draw excessive current and damage the pin or the entire microcontroller. Always use current-limiting resistors when driving LEDs or other components via a gpio in microcontroller.
And there you have it! Hopefully, this beginner’s guide demystified the world of GPIO in microcontroller for you. Now go out there and start experimenting with those pins!