The flow chart, a visual representation of processes, relies heavily on the flow chart diamond, its quintessential decision symbol. Lucidchart, a popular diagramming tool, enables creators to easily incorporate this essential element into their workflows. The logic embodied in the flow chart diamond directly informs the project management outcome. Indeed, the ANSI standards provides specification for the flow chart diamond, highlighting its importance in standardization and interoperability.
Unveiling the Power of the Diamond in Flowcharts
In today’s fast-paced world, clear communication and efficient processes are more vital than ever. Flowcharts, a visual language for mapping out processes, have become indispensable tools for businesses, programmers, and anyone seeking to understand and optimize complex systems.
At the heart of many effective flowcharts lies a seemingly simple shape: the diamond.
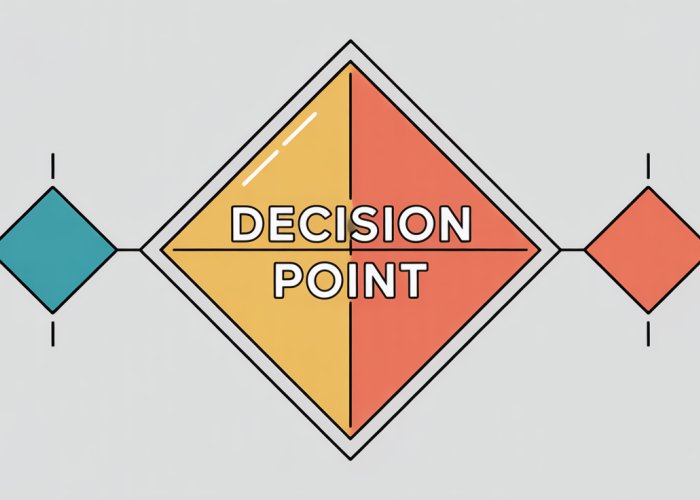
This unassuming symbol represents the decision point, the juncture where a process can branch off in different directions based on specific conditions.
Its significance cannot be overstated.
This article aims to be your ultimate guide to understanding and effectively utilizing the diamond symbol in flowcharts. We will delve into its mechanics, explore its applications, and provide practical tips for leveraging its power to create clear, concise, and effective process visualizations.
Flowcharts: A Visual Language for Processes
Flowcharts offer a powerful alternative to textual descriptions of processes. By using standardized symbols and connecting arrows, they provide a clear and intuitive representation of how a process unfolds.
They allow us to see the sequence of steps, identify potential bottlenecks, and understand the flow of information at a glance.
Flowcharts are used in diverse industries and domains, from software development and manufacturing to customer service and project management. Their versatility stems from their ability to distill complex information into easily digestible visual format.
The Diamond: The Cornerstone of Conditional Logic
Within the flowchart lexicon, the diamond symbol holds a unique and critical position. It embodies the concept of conditional logic, allowing processes to adapt and respond to different inputs or situations.
Unlike other symbols that represent sequential steps, the diamond introduces the element of choice.
It poses a question or condition that must be evaluated, and based on the answer, the process follows a different path. This branching capability is what allows flowcharts to model complex, real-world scenarios where decisions must be made along the way.
Mastering the Diamond: Your Guide to Effective Flowcharting
The purpose of this guide is to equip you with the knowledge and skills necessary to harness the full potential of the diamond symbol. We will explore its anatomy, examine its role in decision-making processes, and provide practical examples of its use in various scenarios.
By mastering the diamond, you will be able to create flowcharts that are not only visually appealing but also highly effective in communicating complex information and driving process improvement.
Flowcharts, as we’ve established, are visual stories that narrate the progression of a process. But stories are rarely linear; they twist, turn, and branch off based on decisions characters make. The diamond symbol is the enabler of these crucial narrative divergences in the flowchart world.
Decoding the Diamond: The Decision Point Defined
At its core, the diamond symbol within a flowchart serves as the decision point. This is the single, crucial location within the process flow where the path diverges based on the evaluation of a specific condition.
It’s the "choose your own adventure" moment for the process, directing it down one route or another. Without the diamond, flowcharts would be limited to depicting only the most straightforward, unwavering processes, incapable of adapting to changing circumstances or variable inputs.
The Diamond as the Gateway to Conditional Logic
The significance of the diamond stems from its ability to facilitate conditional logic. This is the cornerstone of any dynamic process, allowing the flowchart to represent scenarios where different actions are taken based on whether a particular condition is met.
Think of it like this: the condition posed within the diamond is a question, and the answers (typically "Yes" or "No," "True" or "False") dictate which path the process will follow next. This branching capability is what empowers flowcharts to model complex, real-world scenarios with multiple potential outcomes.
The diamond allows you to illustrate flexibility. It provides the ability to model how a system responds to different inputs, errors, or user choices. Without this, processes would be rigid, predictable, and ultimately, less useful for analyzing or optimizing real-world operations.
The Role of Logic: Questioning Reality
A decision point is not simply a random fork in the road. It demands a condition, typically formulated as a question, rooted in logical reasoning.
This question acts as a gatekeeper, meticulously evaluating incoming information and directing the process accordingly. The quality of this question directly impacts the efficacy of the entire flowchart. A vague or ambiguous question leads to unpredictable results, while a clear and concise question ensures a well-defined process flow.
The question must be objectively answerable. This prevents subjective interpretations from derailing the process.
Common Questions and Conditions Represented
The questions posed within a diamond can take various forms, depending on the process being modeled. Some common examples include:
-
"Is the value greater than X?" This is often used in numerical computations or data validation processes.
-
"Is the file found?" Essential in file management systems and software applications that rely on specific files.
-
"Is the user authenticated?" Crucial for security protocols and access control systems.
-
"Is the order quantity sufficient?" Found in inventory management and order processing workflows.
The key is that the question must be phrased in a way that elicits a definitive "Yes" or "No" answer. The possibilities are vast and depend on the situation being mapped. These questions, when embedded in flowcharts using the diamond symbol, create powerful tools for visualizing algorithms, troubleshooting problems, and streamlining operations.
Flowcharts, as we’ve established, are visual stories that narrate the progression of a process. But stories are rarely linear; they twist, turn, and branch off based on decisions characters make. The diamond symbol is the enabler of these crucial narrative divergences in the flowchart world.
But what exactly constitutes a decision within the diamond? Let’s dissect the anatomy of this pivotal symbol, exploring the information that feeds it, the logic it employs, and the impact of its resulting outputs.
Anatomy of a Decision: Inputs, Internal Logic, and Outputs
The diamond symbol, while seemingly simple, is a sophisticated component. It functions as a self-contained unit, receiving input, processing it according to a defined logic, and then producing an output that dictates the next step in the process. Understanding each of these aspects is vital to harnessing the full power of the diamond.
Feeding the Decision: Inputs to the Diamond
The input to a diamond represents the information necessary for the decision-making process to occur. This can take various forms, depending on the nature of the flowchart and the specific decision being made.
It’s the raw material upon which the diamond operates.
These inputs can include:
-
Data: Numerical values, text strings, dates, or any other data relevant to the process.
-
Control Signals: Signals from external devices or other parts of the system that indicate the status of a particular condition.
-
User Input: Information provided by the user, such as selections from a menu or answers to a question.
The type of input will directly influence the condition being evaluated inside the diamond. Without the correct input, the decision cannot be accurately made.
The Heart of the Matter: Internal Logic
At the core of the diamond lies the internal logic: the question or condition that will be evaluated. The clarity and precision of this internal logic are paramount to ensure the flowchart functions as intended.
Ambiguity or vagueness at this stage can lead to unpredictable or incorrect outcomes.
The question within the diamond should be:
-
Concise: Expressed in as few words as possible while maintaining clarity.
-
Unambiguous: Leaving no room for interpretation or misinterpretation.
-
Testable: Formulated in a way that can be evaluated as either true or false.
For example, instead of writing "Value is high," a better question might be "Is the value greater than 100?". The latter is specific, measurable, and directly testable. The strength of your internal logic determines the usefulness of the decision point.
Branching Paths: Outputs and Their Impact
The outputs of the diamond symbol represent the possible outcomes of the decision-making process.
These outputs typically take the form of binary responses such as "Yes" or "No," "True" or "False". These responses will direct the flow chart down separate pathways.
Each output corresponds to a different branch in the flowchart. The destination of each branch must be clearly defined, ensuring a smooth and logical progression.
Analyzing Branch Effects
The impact of each branch should be carefully considered. Does one branch lead to the termination of the process? Does another trigger a loop back to a previous step? Understanding the consequences of each path is crucial for designing an effective flowchart.
-
Process Termination: One output may lead to the end of the process, indicating a successful completion or an error condition.
-
Looping: Another output may direct the flow back to a previous step, allowing for repeated execution of a certain section of the process.
-
Subroutines: Outputs can direct to specific subroutines that perform dedicated tasks, keeping the primary flowchart uncluttered.
By meticulously analyzing the inputs, internal logic, and outputs of the diamond symbol, and their potential consequences, you can create flowcharts that accurately model complex decision-making processes and guide users towards desired outcomes.
Flowcharts, as we’ve established, are visual stories that narrate the progression of a process. But stories are rarely linear; they twist, turn, and branch off based on decisions characters make. The diamond symbol is the enabler of these crucial narrative divergences in the flowchart world.
But what exactly constitutes a decision within the diamond? Let’s dissect the anatomy of this pivotal symbol, exploring the information that feeds it, the logic it employs, and the impact of its resulting outputs.
Decision Making and the Diamond: A Powerful Partnership
The diamond symbol isn’t merely a shape in a flowchart; it’s the visual embodiment of a decision-making process. It represents a critical juncture where the flow of operations diverges based on the evaluation of a specific condition. Understanding this relationship is paramount to crafting effective and insightful flowcharts.
Visualizing the Decision: From Abstract Thought to Concrete Diagram
The power of the diamond lies in its ability to transform abstract decision-making into a tangible visual representation. Instead of simply stating a decision point, the diamond forces us to define the specific condition being evaluated.
Consider a simple example: a process for handling customer inquiries.
Without a flowchart, the decision "Is the customer satisfied?" remains an intangible question.
However, within a flowchart, this question is placed inside a diamond. This forces us to consider the inputs that determine customer satisfaction (e.g., survey scores, complaint frequency) and the possible outcomes (satisfied or unsatisfied).
The diamond then channels the process down different paths depending on the result. This visual mapping of cause and effect is what makes the diamond so effective at clarifying complex processes.
Navigating Complexity: Branching Scenarios and the Diamond
Real-world scenarios often involve multiple layers of decision-making. The diamond symbol excels at representing these complex branching scenarios.
By chaining multiple diamonds together, we can create decision trees that model intricate logical pathways. Each diamond represents a specific decision point, and the outputs from that diamond lead to further decisions, creating a network of possibilities.
For instance, in a medical diagnosis flowchart, the initial diamond might ask, "Does the patient have a fever?".
Depending on the answer, the flow could branch to further diamonds asking about other symptoms, eventually leading to a diagnosis.
This ability to model intricate decision paths is invaluable in fields such as software development, engineering, and business process management.
Clarity Through Diamonds: Eliminating Ambiguity
Ultimately, the diamond symbol’s most significant contribution is to clarity and understanding.
By explicitly defining decision points and their potential outcomes, the diamond eliminates ambiguity and ensures that the logic of the process is transparent.
This clarity is particularly important in complex processes where multiple stakeholders are involved.
A well-designed flowchart using the diamond symbol provides a common visual language that everyone can understand.
For example, in a software development project, a flowchart outlining the bug-fixing process, with diamonds representing decision points like "Is the bug reproducible?" or "Is the bug critical?", ensures that all team members are on the same page.
The diamond’s contribution goes beyond mere visualization; it promotes structured thinking and clear communication, which are essential for effective decision-making and process management.
Visualizing the Decision: From Abstract Thought to Concrete Diagram
The power of the diamond lies in its ability to transform abstract decision-making into a tangible visual representation. Instead of simply stating a decision point, the diamond forces us to define the specific condition being evaluated.
Consider a simple example: a process for handling customer inquiries.
Without a flowchart, the decision "Is the customer satisfied?" remains an intangible question.
However, within a flowchart, this question is placed inside a diamond.
This forces us to consider the inputs that determine customer satisfaction (e.g., survey scores, complaint frequency) and the possible outcomes (satisfied or unsatisfied).
The diamond then channels the process down different paths depending on the result.
Diamond in Action: Real-World Examples and Scenarios
The true value of the diamond symbol emerges when we observe it in action, transforming theoretical concepts into practical process flows. From the simplest "If/Then/Else" scenarios to complex decision trees mirroring real-world dilemmas, the diamond proves its versatility as a cornerstone of effective flowcharting. Let’s explore some concrete examples.
The Simplicity of "If/Then/Else": A Basic Conditional Statement
At its most fundamental, the diamond embodies the "If/Then/Else" construct.
Imagine a program validating user input.
The flowchart begins; the first step is to input data.
A diamond then poses the question: "Is the input valid?"
If the answer is "Yes" (the ‘Then’ path), the process proceeds, perhaps saving the data.
If "No" (the ‘Else’ path), an error message is displayed, prompting the user to re-enter the information.
This simple example illustrates the core function of the diamond: directing the flow based on a binary condition. This branching is the essence of conditional logic and is invaluable in programming, system design, and general problem-solving.
Navigating Complexity: Constructing Decision Trees
Real-world scenarios are rarely as simple as a single "If/Then/Else" statement. More often, they involve a cascade of decisions, each branching into multiple possibilities. This is where decision trees come into play.
Consider a medical diagnosis flowchart.
The process might begin with a patient presenting symptoms.
The first diamond could ask, "Is there a fever present?"
Depending on the answer, the flowchart branches to explore different potential illnesses.
Each branch leads to further diamonds, asking increasingly specific questions. "Is there a cough?"
"Is there chest pain?"
This creates a hierarchical structure of decisions, guiding a user (in this case, a medical professional) towards a conclusion based on a logical progression of questions and answers. The power of decision trees lies in their ability to break down complex problems into manageable steps.
Real-World Applications: Order Processing and Troubleshooting
The application of the diamond symbol extends far beyond academic examples.
Order Processing
In an e-commerce order processing flowchart, a diamond might appear after a customer submits their order.
The question posed could be, "Is the item in stock?"
If "Yes," the process proceeds to payment processing and shipping.
If "No," the system could trigger a notification to the customer, offering alternatives or estimating a restock date.
A later diamond could assess, "Was the payment successful?"
If "Yes," the order is confirmed.
If "No," the customer is prompted to retry their payment method. This ensures a robust and user-friendly order fulfillment process.
Troubleshooting Guides
Troubleshooting guides are another prime example of the diamond in action.
Imagine a guide for resolving a computer network connection issue.
The flowchart might begin with the question, "Is the network cable connected?"
If "No," the user is instructed to connect the cable and try again.
If "Yes," the next diamond might ask, "Is the router powered on?"
Each diamond guides the user towards isolating the root cause of the problem and implementing a solution.
The power of a well-designed troubleshooting flowchart lies in its ability to empower users to resolve issues independently, reducing reliance on technical support. The diamond, therefore, becomes an indispensable tool for streamlining processes and enhancing efficiency across a multitude of applications.
Diamond Design: Best Practices for Effective Flowcharts
As we’ve seen, the diamond symbol is more than just a shape; it’s the engine of decision-making within a flowchart. Its proper implementation is critical to creating flowcharts that are both easily understood and truly useful. Let’s delve into the best practices that will elevate your flowchart design from functional to exceptional.
Strategic Placement: Where and When to Deploy the Diamond
The placement of the diamond within your flowchart directly impacts its readability and effectiveness. Consider these guidelines:
-
Natural Flow: Position the diamond at points where a clear choice or evaluation naturally occurs within the process. Avoid forcing decisions where they don’t logically belong.
-
Avoid Diamond Overload: Too many diamonds in close proximity can create a confusing, spaghetti-like diagram. If you find yourself using many diamonds in a row, consider if the process can be simplified, or broken down into multiple flowcharts.
-
Consider Hierarchy: Complex processes may benefit from a hierarchical flowchart structure. Sub-processes with multiple decision points can be isolated into separate, more detailed flowcharts, linked from the main flowchart.
Clarity and Consistency: The Language of Decision
The text within the diamond is the single most important factor in ensuring clarity. Ambiguous or poorly worded questions can render the entire flowchart useless.
-
Use Concise, Direct Questions: Frame the condition as a clear, unambiguous question. Avoid jargon or overly technical language that the intended audience might not understand.
-
Binary Logic Preferred: Ideally, the question should have a binary (yes/no, true/false) answer. This simplifies the branching logic and makes the flowchart easier to follow.
-
Consistent Wording: Maintain consistency in the wording of similar decision points throughout the flowchart. If you use "Is Valid?" in one diamond, don’t switch to "Valid Input?" in another.
-
Actionable Outcomes: The question within the diamond should directly relate to the actions that will be taken based on the outcome. This ensures a clear link between the decision and the subsequent steps.
Avoiding Common Pitfalls: Steering Clear of Disaster
Even with careful planning, it’s easy to fall into common traps when using the diamond symbol. Recognizing and avoiding these pitfalls is key to effective flowcharting.
The Ambiguity Trap
The most common mistake is using ambiguous language within the diamond.
For example, a diamond asking "Problem Solved?" is vague. What constitutes "solved?" Instead, use a more specific question like, "Issue Resolution Confirmed by Customer?".
The Unclear Path
Every output path from the diamond (typically "Yes" and "No") must lead to a clearly defined next step. Avoid dangling paths that lead nowhere or paths that loop back on themselves without a clear purpose.
The Missing "Else"
Always consider the "Else" (or "No") path. It’s tempting to focus only on the positive outcome, but neglecting the alternative can lead to incomplete and ineffective flowcharts. Make sure there’s a defined course of action for every possible outcome.
The Overly Complex Question
Avoid cramming multiple conditions into a single diamond. If the decision involves several factors, break it down into a series of simpler diamonds. This makes the logic easier to follow and troubleshoot.
The Hidden Assumption
Be aware of hidden assumptions embedded within the diamond’s question. What seems obvious to the flowchart creator may not be clear to someone else. Explicitly state any underlying assumptions to ensure everyone interprets the decision point in the same way.
By following these best practices, you can harness the full potential of the diamond symbol, creating flowcharts that are not only visually appealing but also powerful tools for communication, problem-solving, and process improvement.
Flowcharting Tools: Leveraging Software for Diamond Symbol Integration
Mastering the art of flowchart creation often requires the assistance of specialized software. These tools not only provide a user-friendly interface for diagramming but also offer robust features specifically designed to enhance the functionality of the diamond symbol.
This section delves into the capabilities of two popular flowcharting platforms, Microsoft Visio and Lucidchart, with a keen focus on their diamond symbol integration and their broader application in visualizing algorithms.
Microsoft Visio: Diamond Symbol Functionality in Detail
Microsoft Visio remains a stalwart in the flowcharting world, known for its comprehensive feature set and deep integration with the Microsoft Office suite. When it comes to the diamond symbol, Visio provides a versatile environment for its manipulation and utilization.
Extensive Shape Libraries and Customization
Visio boasts an extensive library of flowchart shapes, including a dedicated diamond symbol readily available for insertion. Users can easily customize the appearance of the diamond, altering its size, color, and line style to suit their specific needs.
Beyond basic aesthetics, Visio allows for advanced customization of the diamond’s properties. You can add custom data fields to the diamond, such as decision IDs or related documentation links, enhancing the overall information density of the flowchart.
Logic and Validation Features
Visio offers built-in features that support the logical consistency of flowcharts. The "Check Diagram" function can identify potential errors in the flowchart’s structure, such as disconnected shapes or missing decision points.
Furthermore, Visio’s data validation capabilities allow users to define rules for the data associated with each diamond symbol. This ensures that the decisions being made are based on valid and consistent information.
Automating Flowchart Creation
Visio can be used to automatically generate flowcharts from data sources, such as Excel spreadsheets or databases. This feature is particularly useful for visualizing complex processes with numerous decision points, as it eliminates the need for manual diagram creation.
By mapping data fields to specific diamond symbols and their corresponding decision logic, users can create dynamic flowcharts that reflect real-time changes in the underlying data.
Lucidchart: Collaborative Diamond-Centric Diagramming
Lucidchart distinguishes itself with its collaborative features and cloud-based accessibility. This makes it an ideal choice for teams working remotely or those who require real-time co-editing capabilities.
Intuitive Interface and Drag-and-Drop Functionality
Lucidchart’s user interface is designed to be intuitive and user-friendly, even for those with limited flowcharting experience. The drag-and-drop functionality simplifies the process of adding and connecting diamond symbols to the flowchart.
The platform’s real-time collaboration features allow multiple users to work on the same flowchart simultaneously, with changes instantly visible to all collaborators. This fosters teamwork and ensures that everyone is on the same page.
Version Control and Revision History
Lucidchart’s version control system provides a complete history of all changes made to a flowchart, allowing users to revert to previous versions if necessary. This is particularly useful for complex flowcharts with numerous decision points, as it provides a safety net against accidental errors or unwanted modifications.
Template Library and Pre-built Diamond Structures
Lucidchart offers a wide range of flowchart templates, many of which incorporate pre-built diamond symbol structures for common decision-making scenarios. These templates can serve as a starting point for users, saving time and effort in the diagram creation process.
Users can also create their own custom templates and share them with their team, ensuring consistency in flowchart design across the organization.
Visualizing Algorithms with Flowcharting Tools
Both Visio and Lucidchart are powerful tools for visualizing algorithms. By representing the steps of an algorithm as flowchart shapes, including the crucial diamond symbol for conditional logic, developers and analysts can gain a clearer understanding of the algorithm’s behavior.
Flowcharts provide a visual representation of the algorithm’s control flow, making it easier to identify potential bottlenecks or areas for optimization. The diamond symbol, in particular, highlights the decision points within the algorithm, allowing for a more thorough analysis of its conditional logic.
Furthermore, flowcharts can serve as a form of documentation for algorithms, making them easier to understand and maintain over time. The visual nature of flowcharts makes them accessible to a wider audience, including those who may not be familiar with the underlying code. By using these tools effectively, algorithms can be better understood, communicated, and ultimately, improved.
From Diamond to Algorithm: The Connection Explained
The flowchart, in its essence, is more than just a visual aid; it’s a blueprint for action, a tangible representation of a process. But its significance deepens when we consider its intimate connection with algorithms – the bedrock of computational problem-solving. Flowcharts and algorithms are inextricably linked, each informing and enhancing the other.
This synergy is nowhere more apparent than in the role of the diamond symbol. It’s not merely a shape on a diagram; it’s the embodiment of choice, the visual representation of conditional logic that drives the very heart of an algorithm.
Flowcharts as Visual Algorithms
An algorithm is a set of well-defined instructions to solve a problem. It dictates the sequence of steps a computer must take to achieve a specific outcome. Flowcharts provide a visual framework to design and represent algorithms before they are translated into code.
They allow developers to map out the logical flow, identify potential bottlenecks, and refine the process. Each shape in a flowchart represents a specific operation or action, and the arrows connecting them define the order of execution.
The diamond symbol stands out as the point where the algorithm’s path diverges based on specific conditions.
The Diamond: Algorithmic Decision-Making Visualized
The diamond symbol is the visual representation of a conditional statement. It captures the essence of "if-then-else" logic, the fundamental building block of most algorithms.
Consider a simple example: an algorithm to determine if a number is even or odd. The diamond symbol would represent the question, "Is the number divisible by 2?". The "yes" branch would lead to the output "Even," while the "no" branch would lead to "Odd."
This simple example highlights the power of the diamond. It enables algorithms to respond dynamically to different inputs, adapting their behavior based on predefined rules. Without this capability, algorithms would be rigid and inflexible, unable to handle the complexities of real-world problems.
Diamonds Pave the Path to Efficient Algorithms
The strategic use of diamond symbols is crucial for crafting efficient algorithms. A well-designed flowchart, incorporating diamonds thoughtfully, can significantly improve an algorithm’s performance.
Consider these key aspects:
-
Clarity: Diamonds force you to explicitly define the conditions under which different paths are taken, reducing ambiguity and making the algorithm easier to understand.
-
Optimization: By visualizing decision points, you can identify opportunities to streamline the algorithm. Perhaps a complex series of nested "if" statements can be simplified by restructuring the flowchart and consolidating decision points.
-
Debugging: A flowchart acts as a powerful debugging tool. When an algorithm isn’t working as expected, the flowchart allows you to trace the execution path and pinpoint the source of the error. The diamond symbol becomes a key focus, as it represents the points where the logic branches.
In conclusion, the diamond symbol is far more than just a shape in a flowchart. It is the linchpin connecting visual representation with the core decision-making processes that define algorithms. Mastering its use is essential for anyone seeking to design efficient, robust, and easily understandable solutions to computational problems.
Flow Chart Diamond: Frequently Asked Questions
Here are some common questions about the flow chart diamond symbol and its usage, to help you get the most out of your diagrams.
What does the diamond shape mean in a flow chart?
The diamond shape in a flow chart represents a decision or question that needs to be answered. It typically has two or more paths leading out of it, depending on the possible answers or outcomes of the decision.
Why is the flow chart diamond important?
It is crucial because it represents branching logic in a process. Without the diamond, you can’t illustrate alternative paths based on different conditions. The flow chart diamond is how you show choices and conditional statements.
What are some common alternatives to using a diamond shape?
While the diamond is the standard for decisions, some people might use a rectangle with clearly labelled "yes/no" or "true/false" exits, especially in simpler charts. However, the flow chart diamond remains the most universally understood symbol.
What labels should I use inside the flow chart diamond?
Inside the flow chart diamond, you should place a clear and concise question or condition. This should be worded in a way that allows for easy "yes/no," "true/false," or other binary type responses that clearly indicate which path to follow.
And that’s your ultimate guide to the flow chart diamond! We hope you found it helpful, and remember, clear decision points make for clear flow charts. Now go forth and chart those processes!