Understanding roofing systems is paramount for ensuring the longevity of any structure, and the flashing diverter roof plays a vital role in directing water away from vulnerable areas. Proper installation of a flashing diverter often necessitates the skills of a trained roofing contractor, especially when working with complex roof designs. For those tackling the installation themselves, the International Building Code (IBC) offers crucial guidelines regarding materials and best practices to achieve optimum drainage control using a flashing diverter roof. Water damage prevention is the primary attribute of a properly installed flashing diverter roof, safeguarding the underlying structure from potential leaks and deterioration.
Flashing Diverter Roof: A Complete Install Guide!
Installing a flashing diverter on your roof might seem intimidating, but with the right preparation and instructions, it’s a manageable DIY project. This guide provides a detailed, step-by-step approach to help you install a flashing diverter roof correctly and effectively. The primary goal of a flashing diverter roof system is to redirect water away from areas prone to leaks, like chimneys, dormers, or skylights, preventing water damage and prolonging the life of your roof.
Understanding Flashing Diverters
Before diving into the installation process, it’s crucial to understand what a flashing diverter is and why it’s necessary.
What is a Flashing Diverter?
A flashing diverter is a piece of metal (usually aluminum, copper, or galvanized steel) shaped to channel water. Think of it as a miniature gutter strategically placed on your roof. They come in various shapes and sizes depending on the specific application and the roof’s architecture.
Why Use a Flashing Diverter Roof System?
- Prevent Leaks: Redirects water away from vulnerable areas, minimizing the risk of leaks.
- Protect Structures: Protects chimneys, dormers, and skylights from water damage.
- Extend Roof Life: By minimizing water accumulation, helps prevent rot and decay, extending the lifespan of your roof.
- Improve Water Management: Contributes to overall better water drainage on your roof.
Preparing for Installation
Proper preparation is key to a successful flashing diverter roof installation. This involves gathering the necessary tools and materials and carefully assessing the area where the diverter will be installed.
Tools and Materials Needed
- Flashing Diverter: Choose the correct size and material for your specific needs. Measure the area where it will be installed accurately.
- Metal Shears or Snips: For cutting the flashing if needed.
- Drill with Screwdriver Bits: For securing the flashing to the roof.
- Caulking Gun and Sealant: Use a high-quality, waterproof roofing sealant.
- Measuring Tape: For accurate measurements.
- Pencil or Marker: For marking cut lines and placement.
- Safety Glasses: Protect your eyes from debris.
- Work Gloves: Protect your hands.
- Ladder: Ensure it is stable and properly positioned.
- Roofing Nails (if needed): Sometimes nails are required in addition to screws.
Assessing the Installation Area
- Identify the Problem Area: Pinpoint the exact location where water is pooling or causing leaks.
- Measure the Runoff: Determine the amount of water flowing towards the problem area during heavy rain. This will help you choose the correct size of flashing diverter.
- Inspect the Existing Flashing: Check the condition of the existing flashing around the chimney, dormer, or skylight. Damaged or deteriorated flashing needs to be repaired or replaced before installing the diverter.
- Clean the Area: Remove any debris, moss, or algae from the roof surface where the flashing diverter will be installed. A clean surface ensures proper adhesion of the sealant.
Step-by-Step Installation Guide
Now, let’s move on to the actual installation of the flashing diverter. Remember to prioritize safety and work carefully, especially when working at heights.
Step 1: Cutting the Flashing (If Necessary)
If the flashing diverter needs to be custom-sized, use metal shears to cut it to the required dimensions. Mark the cutting lines clearly with a pencil before cutting.
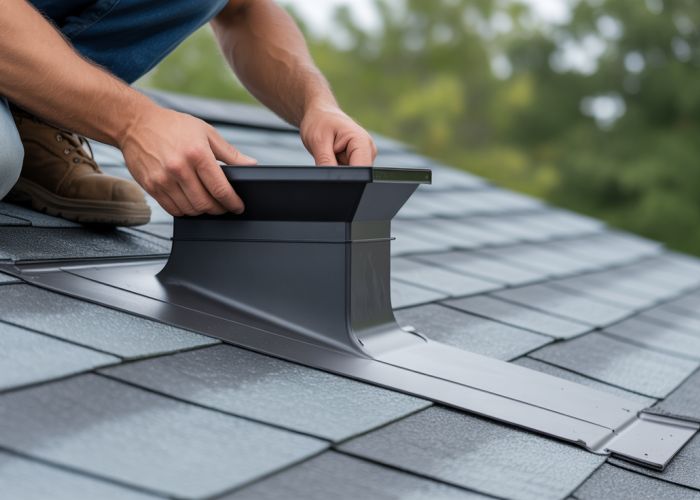
Step 2: Positioning the Flashing Diverter
Place the flashing diverter upstream from the area you’re protecting. Its purpose is to intercept water flow before it reaches the vulnerable spot. Ensure the diverter is properly aligned to direct the water away from the target area.
Step 3: Securing the Flashing
- Pre-Drilling (Optional): If working with hard materials, pre-drilling small pilot holes can help prevent the screws from stripping or damaging the flashing.
- Applying Sealant: Apply a generous bead of roofing sealant along the edges of the flashing that will be in contact with the roof. This creates a watertight seal.
- Attaching the Flashing: Using the drill and appropriate screws, carefully secure the flashing to the roof. Space the screws evenly along the flashing, typically every 6-8 inches. Avoid overtightening the screws, as this can damage the flashing or the roof shingles. If using roofing nails, hammer them in carefully, ensuring they penetrate the roof surface securely.
Step 4: Sealing the Edges
After securing the flashing, apply another bead of sealant along all edges where the flashing meets the roof. This reinforces the watertight seal and prevents water from seeping underneath the flashing. Smooth the sealant with your finger for a clean finish.
Step 5: Testing the Diverter
Once the sealant has dried (refer to the sealant manufacturer’s instructions for drying time), test the flashing diverter by pouring water onto the roof above it. Observe how the water is redirected. Make any necessary adjustments to ensure the water flows away from the protected area effectively.
Maintenance and Inspection
Regular maintenance and inspection are crucial to ensuring the longevity and effectiveness of your flashing diverter roof system.
Routine Checks
- Inspect Annually: Conduct a thorough inspection of the flashing diverter at least once a year, preferably in the spring and fall.
- Check for Damage: Look for any signs of damage, such as dents, cracks, or corrosion.
- Clean Debris: Remove any debris, leaves, or branches that may accumulate around the flashing diverter, obstructing water flow.
- Reapply Sealant: If the sealant shows signs of cracking or deterioration, reapply a fresh bead to maintain a watertight seal.
Addressing Issues
| Issue | Solution |
|---|---|
| Leaks | Identify the source of the leak and reapply sealant or replace damaged flashing. |
| Loose Flashing | Tighten screws or replace them if stripped. Consider using roofing nails for added security. |
| Corrosion | Clean the corrosion and apply a protective coating. If severe, replace the flashing. |
| Obstructions | Remove any debris or obstructions blocking the water flow. |
FAQs: Flashing Diverter Roof Installation
Here are some frequently asked questions about installing a flashing diverter roof to help clarify the process.
What exactly is a flashing diverter roof and what does it do?
A flashing diverter roof, often called a cricket or saddle, is a small, peaked structure built on a roof behind a chimney or other vertical obstruction. Its purpose is to divert water and debris around the obstruction, preventing accumulation and potential leaks. This protects your roof and helps ensure proper drainage.
When is a flashing diverter roof necessary?
A flashing diverter roof is generally needed when a chimney or other vertical structure is wider than 30 inches. Without one, water can pool behind the obstruction, increasing the risk of water damage and premature roof deterioration.
What materials are typically used to build a flashing diverter roof?
Common materials for constructing a flashing diverter roof include roofing shingles, metal flashing (like aluminum or copper), plywood sheathing, and roofing nails. The specific materials will depend on your existing roof and the desired aesthetic. Ensure all materials are compatible.
Can I install a flashing diverter roof myself, or should I hire a professional?
Installing a flashing diverter roof requires a solid understanding of roofing principles and techniques. Incorrect installation can lead to leaks and further damage. If you’re not confident in your abilities, it’s best to hire a qualified roofing professional to ensure the flashing diverter roof is properly installed.
Alright, you’ve got the lowdown on flashing diverter roofs! Go forth and tackle that project, and remember – a little patience goes a long way in getting it right. Happy roofing!