The flame test, a fundamental technique in qualitative analysis, offers a visually compelling method for identifying the presence of certain metals. Sodium (Na), a highly reactive alkali metal, exhibits a characteristic, intense yellow-orange hue when subjected to this procedure. This observation, widely utilized in chemistry labs and even forensic science, stems from the excitation of sodium’s electrons by the heat of the flame. Consequently, a simple flame test sodium experiment can unlock secrets about the composition of unknown substances, revealing the presence of even trace amounts of this ubiquitous element.
The flame test stands as a cornerstone technique in the world of chemistry.
It provides a relatively simple yet powerful method for identifying the elemental composition of a sample based on the characteristic color it imparts to a flame.
Among the many elements detectable through this method, sodium (Na) holds a special place.
Its distinct, vibrant color makes it easily recognizable and serves as a valuable tool in qualitative analysis.
This exploration focuses specifically on sodium, delving into the nuances of its flame test and the science that underlies its brilliant display.
Flame Tests: A Colorful Gateway to Elemental Identification
Flame tests are a type of qualitative analysis, which means they help identify what elements are present in a sample, rather than how much of each element is present (which is quantitative analysis).
The method relies on the principle that when certain elements are heated, their atoms become excited and emit light of specific wavelengths.
These wavelengths correspond to different colors, creating a unique "fingerprint" for each element.
This makes the flame test a rapid and convenient method for preliminary elemental identification.
The Sodium Flame Test: A Focus on Distinctiveness
The unique characteristic of Sodium (Na) in a flame test stems from its electronic structure.
When Sodium compounds are introduced into a flame, the heat energy excites the outermost electron to a higher energy level.
As the electron falls back to its original energy level, it emits energy in the form of light at a specific wavelength.
For Sodium, this emitted light falls within the orange-yellow portion of the visible spectrum, producing a bright and easily identifiable color.
Qualitative Analysis: Unlocking Chemical Composition
The Sodium flame test serves as an invaluable tool in qualitative analysis, particularly in situations where rapid identification of elements is required.
By carefully observing the color produced when a sample is introduced into a flame, chemists can quickly determine whether Sodium is present.
It’s important to note that while the flame test is a relatively simple technique, its accuracy depends on careful execution and interpretation.
Contamination with other elements, particularly sodium itself (which is ubiquitous), can lead to inaccurate results, making proper technique and controls essential.
This article will serve as your guide to perform a Sodium Flame Test effectively.
It explains the underlying science, necessary precautions, and interpreting the results accurately.
We aim to provide a comprehensive understanding of this fundamental technique in chemistry.
The flame test stands as a cornerstone technique in the world of chemistry.
It provides a relatively simple yet powerful method for identifying the elemental composition of a sample based on the characteristic color it imparts to a flame.
Among the many elements detectable through this method, sodium (Na) holds a special place.
Its distinct, vibrant color makes it easily recognizable and serves as a valuable tool in qualitative analysis.
This exploration focuses specifically on sodium, delving into the nuances of its flame test and the science that underlies its brilliant display.
The Science Behind the Glowing Flame: Energy Levels and Emission
But what is it that causes these elements to glow with such vibrant and distinctive colors?
The secret lies within the very structure of the atom, in the intricate dance of electrons and energy levels that govern the behavior of matter at its most fundamental level.
Heat and Energy: An Intimate Relationship
At the heart of the flame test lies a fundamental principle: the relationship between heat and energy.
Heat, in essence, is a form of energy.
When a substance is heated, its atoms absorb that energy.
This added energy has profound effects on the behavior of the electrons that orbit the nucleus of each atom.
Excitation: Jumping to a Higher Energy Level
Consider a sodium atom introduced into the intense heat of a Bunsen burner flame.
The heat energy excites the outermost electron of the sodium atom.
This means that the electron absorbs some of the heat energy and jumps from its normal, stable ground state to a higher energy level, also known as an excited state.
This jump requires a precise amount of energy, corresponding to the difference between the two energy levels.
The electron doesn’t stay in this excited state for long, as it is inherently unstable.
Emission: Returning to Ground State and Releasing Light
Almost instantly, the excited electron falls back down to its original, lower energy level (the ground state).
As it does so, it must release the energy it previously absorbed.
This energy is emitted in the form of a photon, a particle of light.
The energy of the emitted photon is precisely equal to the energy difference between the excited state and the ground state.
This energy corresponds to a specific wavelength of light, which determines the color we observe in the flame test.
For sodium, this specific energy difference corresponds to light in the orange-yellow region of the visible spectrum.
That’s why a sodium compound in a flame produces that characteristic bright orange-yellow glow.
Electron Configuration: The Atomic Fingerprint
The specific energy levels available to an electron within an atom are dictated by its electron configuration.
Each element has a unique electron configuration, a unique arrangement of electrons in its various energy levels.
This is why different elements emit different colors when subjected to a flame test.
The electron configuration acts as an atomic "fingerprint," defining the possible energy transitions that an electron can make, and therefore, the colors of light that it can emit.
Alkali Metals: A Family of Colors
The alkali metals (Lithium, Sodium, Potassium, Rubidium, Cesium, and Francium) are a group of elements in the periodic table that share similar properties due to their similar electron configurations.
All alkali metals have only one electron in their outermost shell, which is loosely held.
Because of this they are easily excited in a flame, producing vibrant colors:
- Lithium (Li): Crimson red
- Sodium (Na): Orange-yellow
- Potassium (K): Lilac
- Rubidium (Rb): Red-violet
- Cesium (Cs): Blue-violet
The observed differences in color reflect the subtle variations in energy levels within their respective electron configurations.
This consistent pattern within the alkali metal family further highlights the direct relationship between atomic structure and the colors observed in the flame test.
But to bring this vibrant spectacle to life, careful preparation is key. The success of a flame test hinges not only on technique but also on the quality of the materials at hand.
Gather Your Tools: Materials for the Sodium Flame Test
The sodium flame test is a relatively simple experiment, yet it demands specific tools and reagents to ensure accurate and reliable results.
Each component plays a crucial role in isolating the sodium’s unique emission and minimizing potential interference.
Here’s a comprehensive breakdown of the necessary equipment and materials:
Essential Materials for Success
-
Sodium Salt (e.g., Sodium Chloride): The source of sodium ions for the flame test. Sodium Chloride (NaCl), common table salt, is often used as a readily available and safe option.
Other sodium salts like Sodium Carbonate can also be employed.
-
Bunsen Burner: The heat source that excites the sodium atoms, causing them to emit light. A Bunsen burner provides a consistent and controllable flame, essential for observing the characteristic color.
Ensure the burner is connected to a gas source and functioning correctly.
-
Platinum or Nichrome Wire Loop: The tool used to introduce the sodium salt into the flame. Platinum wire is preferred due to its high melting point and resistance to corrosion.
Nichrome wire is a more affordable alternative, although it may produce its own faint color in the flame, potentially interfering with the results if the wire is not cleaned correctly. Always make sure the wire is securely attached to a handle.
-
Hydrochloric Acid (HCl): Used to clean the platinum or nichrome wire. HCl effectively removes any contaminants that might interfere with the flame test.
A dilute solution (e.g., 1-2M) is sufficient for cleaning purposes. Always handle hydrochloric acid with care, wearing appropriate personal protective equipment.
-
Distilled Water: Used for rinsing the wire after cleaning with HCl and for moistening the sodium salt. Distilled water is free from impurities that could affect the flame color.
Avoid using tap water, as it may contain minerals that can introduce unwanted colors into the flame.
The Imperative of Purity
The purity of the chemicals used is paramount to obtaining reliable results in any chemical experiment, especially the flame test.
Impurities can introduce extraneous colors into the flame, obscuring the characteristic emission of sodium and leading to misidentification.
Using reagent-grade chemicals ensures that contaminants are minimized, allowing for a clear and accurate observation of the sodium flame. Always check the labels of your chemicals to verify their purity before use.
Ensuring a Clean Start
Before beginning the experiment, meticulous cleaning of the platinum or nichrome wire is essential. Dip the wire loop into the hydrochloric acid, then rinse thoroughly with distilled water.
Repeat this process until the wire produces no color when inserted into the flame.
This step removes any residual contaminants that could interfere with the test. Contamination is one of the biggest factors impacting accuracy.
But to bring this vibrant spectacle to life, careful preparation is key. The success of a flame test hinges not only on technique but also on the quality of the materials at hand. Now, let’s delve into the practical steps needed to conduct the sodium flame test, ensuring accuracy and safety every step of the way.
Step-by-Step Guide: Performing the Sodium Flame Test
Executing the sodium flame test correctly is paramount for obtaining reliable results. This process demands meticulous attention to detail, strict adherence to safety protocols, and a systematic approach. The following instructions will guide you through each step.
Prioritizing Safety in the Laboratory
Before commencing any experiment, safety must be your top priority. A laboratory environment can pose risks if proper precautions are not observed.
Essential Safety Measures
- Eye Protection: Always wear safety goggles or glasses to shield your eyes from chemical splashes or accidental exposure to the flame.
- Hand Protection: Use chemical-resistant gloves to protect your skin from corrosive substances like hydrochloric acid and other potential irritants.
- Ventilation: Perform the experiment in a well-ventilated area. This minimizes the inhalation of potentially harmful fumes or gases produced during the experiment. A fume hood is ideal.
- Attire: Wear appropriate clothing, such as a lab coat, to protect your skin and clothing from chemical spills. Avoid wearing loose clothing or jewelry that could pose a hazard near the open flame.
- Awareness: Be fully aware of the location of safety equipment, such as the fire extinguisher, eyewash station, and first aid kit, and know how to use them in case of an emergency.
- Behavior: Maintain a focused and orderly workspace. Avoid distractions and unnecessary movements that could lead to accidents.
Preparing the Platinum or Nichrome Wire Loop
The cleanliness of the wire loop is critical in preventing contamination and ensuring accurate results.
Thorough Cleaning with Hydrochloric Acid
- Acid Bath: Dip the platinum or nichrome wire loop into a small beaker of concentrated hydrochloric acid (HCl). HCl effectively removes any residual contaminants from previous tests.
- Flame Cleaning: Carefully hold the wire loop in the hottest part of the Bunsen burner flame. Observe the flame’s color. If the flame displays any color other than the faint glow of the wire itself, repeat the HCl cleaning process.
- Repetition: Repeat the dipping and heating process until the wire loop no longer imparts any color to the flame. This indicates that the wire is free from contaminants.
- Caution: Handle hydrochloric acid with extreme care, as it is corrosive and can cause severe burns. Always wear gloves and eye protection during this step.
Collecting the Sodium Salt Sample
After cleaning, the wire must be used to collect the sodium salt for testing.
Distilled Water Rinse and Sample Collection
- Rinsing: After cleaning the wire loop, rinse it thoroughly with distilled water to remove any remaining traces of hydrochloric acid. The water must be distilled to avoid introducing impurities.
- Moistening: Dip the cleaned and rinsed wire loop back into a small amount of distilled water. The water will help the sodium salt adhere to the wire.
- Sample Acquisition: Carefully touch the moistened wire loop to the sodium salt (e.g., sodium chloride) you are testing. A small amount of the salt should stick to the loop due to the water’s surface tension. Avoid collecting excessive amounts of the salt, as it can distort the flame color and make observation difficult.
Introducing the Sample to the Flame
With the sample collected, you’re ready to introduce it to the Bunsen burner’s flame.
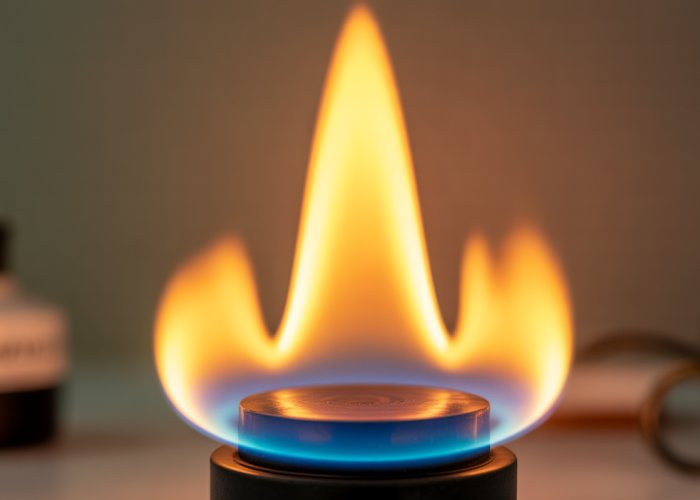
- Flame Adjustment: Ensure that the Bunsen burner is producing a stable, non-luminous flame. Adjust the air vents to achieve a blue flame with a distinct inner cone.
- Loop Placement: Hold the wire loop containing the sodium salt at the edge or just inside the hottest part of the flame (usually near the tip of the inner blue cone).
- Observation: Observe the color of the flame produced as the sodium salt is heated. Sodium produces a distinctive, intense orange-yellow color.
- Color Note: Note the color’s intensity and duration. Impurities can affect the color, so a clear observation is crucial.
- Duration: Observe the flame color for a few seconds. Note that the color may fade quickly as the sodium salt is consumed.
Documenting Your Observations
Careful observation is critical, but recording your observations is equally important.
Accurate Record-Keeping
- Immediate Recording: Immediately record the observed flame color and any variations in intensity or hue. Note the time you are doing this and other surrounding factors.
- Comparison: If possible, compare the observed color to a reference chart or a known sample of sodium salt. This helps confirm your identification.
- Multiple Trials: Repeat the test multiple times with fresh samples to ensure consistency and accuracy in your observations.
- Detailed Notes: Document any deviations from the expected results, such as faint colors, unusual intensities, or the presence of other colors. These observations can indicate impurities or the presence of other elements.
- Photographic Evidence: If available, take photographs or videos of the flame test to provide visual documentation of your results.
After the scrupulous execution of the sodium flame test, the moment arrives to interpret the visual evidence. The color that dances within the Bunsen burner’s flame is not mere aesthetic appeal; it’s a coded message, a spectral fingerprint revealing the presence of sodium.
Decoding the Flame: Interpreting Your Results
The culmination of your meticulous preparation and careful execution lies in the interpretation of the flame’s color. This isn’t simply about seeing a color; it’s about understanding what that color signifies, what information it encodes about the element you’re testing for. In the case of sodium, the message is clear, but decoding it requires a trained eye and a grasp of the underlying principles.
The Tell-Tale Orange-Yellow Hue
When sodium ions are introduced into the flame, anticipate a vibrant and distinctive color. The characteristic color of sodium in a flame test is a bright, almost intense, orange-yellow. This color is so prominent that it can often mask the presence of other elements in a mixture, a phenomenon we will address later.
The intensity of the color depends on the concentration of sodium present. A higher concentration generally results in a more vivid and persistent flame color. However, even trace amounts of sodium can produce a noticeable hue, emphasizing the need for meticulous cleaning procedures.
Unlocking the Spectral Secret: Emission Spectra
The specific orange-yellow color observed isn’t arbitrary; it’s directly linked to the emission spectrum of sodium. This concept is fundamental to understanding why flame tests work.
Each element, when excited, emits light at specific wavelengths. These wavelengths are unique to that element, like a fingerprint. When the excited electrons in sodium atoms return to their ground state, they release energy in the form of light.
The energy released corresponds to a specific wavelength, which our eyes perceive as a particular color. The specific wavelength emitted by sodium falls within the orange-yellow region of the visible spectrum. This relationship between an element’s electron configuration and its emitted light is the cornerstone of flame test analysis.
Navigating the Murk: Potential Interferences
While the sodium flame test is relatively straightforward, potential interferences from other elements can complicate the interpretation. Sodium’s intense color, in particular, can mask the presence of other elements.
The Sodium Glare
Even small amounts of sodium present as impurities can overpower the colors of other elements. This is why thorough cleaning of the platinum or nichrome wire is essential before each test.
Contamination from previous experiments or even from the environment can lead to false positives or obscure the true results.
Potassium’s Subtle Violet
Potassium, for instance, emits a violet color in the flame test. However, the intense yellow of sodium can easily overwhelm this delicate hue.
Minimizing Interference
Several techniques can minimize these interferences.
-
Using a Cobalt Blue Glass: Viewing the flame through a cobalt blue glass filter can help to block the yellow light emitted by sodium, making it easier to observe the colors of other elements like potassium.
-
Dilution: Diluting the sample can reduce the concentration of sodium, making it less likely to mask the colors of other elements. However, this must be done carefully, as it can also reduce the visibility of the target element.
-
Spectroscopic Analysis: For more complex mixtures, spectroscopic techniques offer a more precise method of analysis. Spectroscopy can separate the emitted light into its constituent wavelengths, allowing for the identification of multiple elements even when their flame colors overlap.
By understanding the principles behind the sodium flame test and being aware of potential interferences, you can accurately interpret your results. The color of the flame is a key that unlocks information about the elemental composition of your sample.
Beyond Identification: Applications of the Sodium Flame Test
While the bright orange-yellow hue of sodium provides a clear indication of its presence, the utility of the flame test extends far beyond simple identification. This seemingly simple technique serves as a gateway to understanding broader analytical methodologies and appreciating the fundamental principles that govern elemental behavior.
Unveiling Unknowns: Identifying Metal Cations
Flame tests are most powerfully applied when seeking to identify unknown metal cations within a sample. By systematically observing the flame’s color, a chemist can deduce the presence (or absence) of specific metallic elements.
It’s important to note that this application is most effective when dealing with relatively pure samples. Complex mixtures can produce overlapping spectral signatures, complicating accurate identification. Even if sodium ions are present, its distinct flame color may be easily visible and recognizable, even in a mixture.
Qualitative Analysis and its Limitations
The sodium flame test serves as an invaluable tool for qualitative analysis. Unlike quantitative methods that determine the amount of a substance, qualitative analysis focuses on identifying its components.
However, the flame test possesses inherent limitations. The subjective nature of color interpretation, coupled with the potential for signal masking by dominant elements like sodium, makes it difficult to pinpoint trace amounts of other metals. For example, the intense yellow of sodium can easily obscure the fainter colors of potassium or lithium.
This necessitates the employment of more sophisticated analytical techniques when higher accuracy and sensitivity are required.
Spectroscopy: A Deeper Dive into the Emission Spectrum
To overcome the limitations of the naked eye, chemists often turn to spectroscopy. This technique analyzes the light emitted during a flame test by passing it through a prism or diffraction grating. The resulting emission spectrum is a unique fingerprint for each element, displaying a series of distinct lines at specific wavelengths.
Spectroscopy offers several advantages over simple visual observation.
- Enhanced Sensitivity: It can detect trace amounts of elements that would otherwise be masked.
- Quantitative Capabilities: By measuring the intensity of the spectral lines, the concentration of each element can be determined.
- Precise Identification: The unique spectral signature of each element ensures unambiguous identification, even in complex mixtures.
While the flame test offers a quick and accessible method for identifying sodium and other metals, spectroscopy provides the necessary precision and depth for more rigorous analysis.
Flame atomic absorption spectroscopy is a relevant, powerful, technique to conduct quantitative elemental analysis. This method improves the identification of even very small quantities of sodium ions.
Safety First: Precautions and Responsible Experimentation
The allure of chemistry lies in its transformative power, but this power demands respect and responsibility. Throughout the sodium flame test, a commitment to safety is paramount, not just as a procedural requirement, but as an integral aspect of sound scientific practice. This section will emphasize the importance of adhering to safety guidelines, proper chemical handling, and the critical need for adult supervision, ensuring a secure and enriching learning experience for everyone involved.
Prioritizing Laboratory Safety
Laboratory safety is not merely a checklist of rules; it is a mindset that must permeate every stage of the experiment. Before commencing any work, ensure that appropriate personal protective equipment (PPE) is readily available and correctly worn. This includes safety goggles to shield the eyes from potential splashes, gloves to protect the skin from chemical contact, and a lab coat to safeguard clothing.
Working in a well-ventilated area is equally important. The experiment should be conducted in a space with adequate airflow to prevent the build-up of potentially harmful fumes. Never conduct experiments in confined or poorly ventilated spaces.
Chemical Handling and Disposal
The safe handling and disposal of chemicals are crucial aspects of responsible experimentation. Hydrochloric acid (HCl), used for cleaning the platinum or nichrome wire, is a corrosive substance and requires careful attention. Always add acid to water, never the other way around, to prevent dangerous splattering.
Use appropriate containers and equipment when handling chemicals, and avoid direct contact with skin or eyes. In case of accidental exposure, immediately rinse the affected area with copious amounts of water and seek medical attention if necessary.
Proper disposal of chemical waste is equally important. Consult your local regulations or laboratory guidelines for appropriate disposal procedures. Never pour chemicals down the drain unless explicitly permitted. Instead, use designated waste containers and follow the established protocols for hazardous waste disposal.
The Essential Role of Adult Supervision
When young students are involved in the sodium flame test or any chemistry experiment, adult supervision is not just recommended; it is absolutely essential. Adults can provide guidance, ensure that safety protocols are followed, and address any questions or concerns that may arise.
Supervisors should have a thorough understanding of the experiment and its potential hazards, and they should be prepared to intervene if necessary. It is crucial to explain the risks involved to the students in an age-appropriate manner and to emphasize the importance of following instructions carefully.
Furthermore, supervisors should encourage a culture of safety and responsibility in the laboratory. Students should be empowered to speak up if they notice any potential hazards or have any concerns about the experiment. By fostering a safe and supportive learning environment, we can ensure that young scientists develop a lifelong appreciation for the importance of safety in chemistry.
Flame Test Sodium: Frequently Asked Questions
[This section answers common questions about performing and understanding the flame test using sodium.]
Why does sodium produce a yellow flame in a flame test?
When heated in a flame, electrons in the sodium atom become excited. As these excited electrons return to their ground state, they release energy in the form of light. This light has a specific wavelength that corresponds to a bright yellow color, which is why the flame test sodium results in a yellow flame.
What precautions should I take when performing a flame test with sodium compounds?
Always wear safety goggles to protect your eyes from potential splatters. Perform the flame test in a well-ventilated area. Be careful handling chemicals and avoid inhaling any fumes. Dispose of chemicals properly following your local guidelines.
How can I be sure the yellow color I see is solely from the sodium in my sample?
Sodium is a very common contaminant, so even trace amounts can produce a yellow flame. To minimize interference, use a clean platinum or nichrome wire that has been cleaned in hydrochloric acid. Also, try viewing the flame through a blue cobalt glass filter, which will block out the yellow light from flame test sodium but allow you to see other colors.
What if I don’t have sodium chloride (table salt)? Can I use other sodium compounds for the flame test?
Yes, you can use other water-soluble sodium compounds like sodium carbonate or sodium hydroxide to perform the flame test. The key is that the compound contains sodium. The yellow flame produced is characteristic of the sodium ion, regardless of the specific compound used.
So, you’ve mastered the flame test for sodium! Pretty cool, right? Now you can impress your friends (or your chemistry professor!) with your newfound knowledge of flame test sodium. Go give it a try and see what colorful secrets you can uncover!