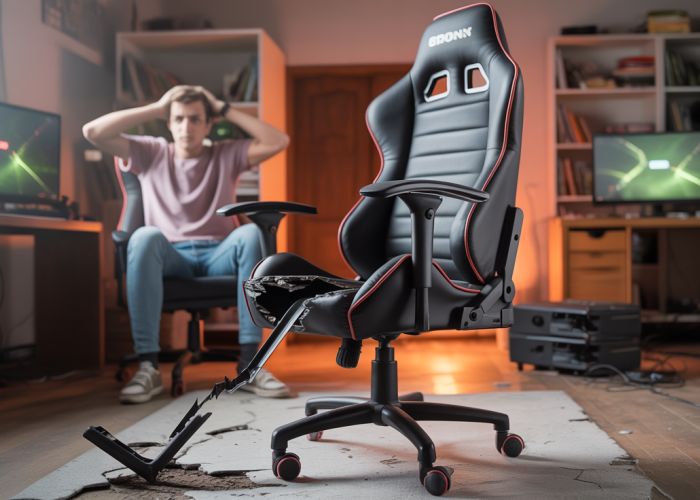
A broken gaming chair often leads to discomfort and frustration, especially during intense gaming sessions. Consider the ergonomics of your chair; proper support is crucial for preventing back pain and maintaining good posture. When tackling repairs, having the right tools, like a reliable screwdriver set, makes the job significantly easier. Many online communities, such as the Reddit gaming forums, offer troubleshooting tips and advice from fellow gamers who’ve faced similar issues. Addressing a broken gaming chair promptly ensures you can continue enjoying your favorite games with comfort and support. If the issues are bigger than you can handle, remember that professional furniture repair services are also an option.
Optimizing Your "Broken Gaming Chair? Fix It Now! [DIY Guide]" Article Layout
Here’s how to structure your article about fixing a broken gaming chair for maximum helpfulness and readability, keeping "broken gaming chair" as your primary keyword.
1. Introduction: Acknowledge the Problem and Offer Hope
- Hook: Start with a relatable scenario. "Is your favorite gaming chair starting to sag, creak, or even fall apart? Don’t despair!" This immediately grabs the reader experiencing a broken gaming chair problem.
- Briefly Describe Common Issues: Mention a few common reasons why a gaming chair might break. Examples include: worn-out gas lift cylinders, broken armrests, ripped fabric, or a failing base. This reinforces the "broken gaming chair" theme.
- Emphasize the DIY Aspect: Reassure readers that many issues are fixable at home with basic tools and a little patience. Highlight the potential cost savings compared to buying a new chair.
- Outline What the Article Covers: Briefly list the types of repairs the article will guide the reader through. "This guide will cover common issues and provide step-by-step instructions to get your broken gaming chair back in action."
2. Gathering Your Tools and Materials
- Importance of Preparation: Stress the need to have everything ready before starting.
- List of Essential Tools:
- Screwdrivers (various sizes and types, including Phillips and flathead)
- Wrench set (metric and/or imperial depending on the chair)
- Pliers
- Hammer
- Safety glasses
- Gloves
- List of Common Replacement Parts:
- Gas lift cylinder (mention different heights and diameter options)
- Armrests (specify left/right and attachment methods)
- Replacement wheels/casters
- Fabric repair kit or replacement fabric
- Foam padding
- Screws, bolts, and washers (consider a small assortment)
3. Diagnosing the Problem: Identifying the Culprit
- Why Diagnosis is Important: Explain that identifying the specific issue with the broken gaming chair prevents wasted time and money on unnecessary repairs.
-
Common Issues and How to Identify Them:
- Gas Lift Cylinder Failure:
- Symptom: Chair sinks or doesn’t stay at the set height.
- Diagnosis: Observe the chair’s behavior. If it slowly lowers even after being raised, the cylinder is likely failing.
- Broken Armrests:
- Symptom: Armrests are loose, wobbly, cracked, or completely detached.
- Diagnosis: Visually inspect the armrests and their attachment points for damage.
- Worn-Out Wheels/Casters:
- Symptom: Difficulty rolling, squeaking noises, or wheels falling off.
- Diagnosis: Check the wheels for damage, debris, and secure attachment.
- Damaged Fabric or Foam:
- Symptom: Rips, tears, flattening of the padding.
- Diagnosis: Visually inspect the fabric and padding for signs of wear and tear.
- Base Issues (Cracked or Broken):
- Symptom: Instability, creaking noises, visible cracks in the base.
- Diagnosis: Carefully inspect the base for any signs of damage.
- Gas Lift Cylinder Failure:
4. Step-by-Step Repair Guides for Common Issues
This section will have the bulk of the content. Each repair should have its own subsection with very clear, actionable steps.
4.1 Replacing a Gas Lift Cylinder
- Safety First: Warn readers to depressurize the cylinder before attempting removal.
- Removing the Old Cylinder: Describe the process, which often involves a rubber mallet and tapping upwards on the base of the chair.
- Installing the New Cylinder: Guide readers on how to properly align and secure the new cylinder in the chair’s mechanism.
4.2 Repairing or Replacing Armrests
- Removing the Old Armrest: Explain how to detach the armrest, typically involving screws or bolts.
- Repair Options (if applicable): If the damage is minor, provide instructions on using epoxy or other adhesives to repair cracks.
- Installing the New Armrest: Guide readers on attaching the new armrest using the correct screws and ensuring a secure fit.
4.3 Replacing Wheels/Casters
- Removing the Old Wheels: Explain how to pull out the old wheels, which usually just pop out.
- Installing the New Wheels: Guide readers on how to firmly push the new wheels into the base.
4.4 Repairing Fabric Tears
- Cleaning the Area: Stress the importance of cleaning the damaged fabric before attempting repair.
- Repair Options:
- Fabric Repair Kit: Explain how to use a fabric repair kit for small tears.
- Patching with New Fabric: Guide readers on cutting a patch and applying it to larger tears, either using fabric glue or sewing.
4.5 Dealing with a Broken Base
- Assessing the Damage: Emphasize that some base damage is irreparable and requires full replacement.
- Finding a Replacement Base: Provide guidance on where to find a compatible replacement base (online retailers, manufacturer websites).
- Transferring the Mechanism: Explain how to safely remove the chair mechanism from the old base and attach it to the new base.
5. Maintenance Tips to Prevent Future Problems
- Regular Cleaning: Advise readers to regularly clean their gaming chair to prevent dirt and grime buildup.
- Proper Usage: Explain the importance of not exceeding the chair’s weight limit.
- Tightening Screws: Suggest periodically checking and tightening all screws and bolts.
- Lubricating Moving Parts: Recommend lubricating the gas lift cylinder and wheels occasionally to prevent squeaking and ensure smooth operation. These tips will help prolong the life of the repaired gaming chair.
This structure will provide a comprehensive and helpful guide for readers looking to fix their broken gaming chair. Remember to use clear, concise language and include plenty of visuals (photos or illustrations) to demonstrate each step.
FAQs: Fixing Your Broken Gaming Chair
Here are some common questions about repairing a broken gaming chair at home. This should help you understand the process and troubleshoot any issues you encounter.
What are the most common reasons a gaming chair breaks?
Common issues include worn-out casters (wheels), damaged or broken armrests, a failing gas lift cylinder that controls height adjustment, and tears or rips in the upholstery. Depending on the age and usage, even the frame of a broken gaming chair can weaken over time.
My gas lift cylinder won’t hold its height. Can I fix it?
Yes, you can! The guide explains how to replace the gas lift cylinder. You’ll need a new cylinder that’s compatible with your chair model. Replacing this is the usual solution for a gaming chair that sinks.
What tools will I absolutely need to fix my broken gaming chair?
While the specific tools can vary depending on the issue, a basic set should include screwdrivers (Phillips and flathead), pliers, a rubber mallet, and possibly an adjustable wrench. More complex repairs might require a power drill. Check the guide for a tool list specific to your repair.
Is it worth fixing my broken gaming chair, or should I just buy a new one?
That depends on the extent of the damage and the cost of the replacement parts. If the damage is minor and the parts are relatively inexpensive, fixing your gaming chair is usually more economical. However, for extensive damage or if the cost of parts nears the price of a new chair, a replacement might be the better option.
So, there you have it! Hopefully, you’ve got your broken gaming chair back in action. Get back to gaming, and remember to take breaks! Good luck, and happy fixing!