Exterior wall sheathing, a critical component in building construction, provides a substrate for cladding and contributes significantly to structural integrity. A proper understanding of its installation, considering factors like stud spacing – a key element for load distribution – is crucial for long-term performance. The American Plywood Association (APA) offers extensive resources and guidelines on selecting and installing appropriate sheathing materials, ensuring adherence to best practices. Furthermore, utilizing the right nail gun with properly sized fasteners plays a crucial role in securely attaching the sheathing to the framing. Ignoring these factors could compromise energy efficiency, a field where building science has contributed important findings, and ultimately affect the durability of the entire building envelope.
The Vital Role of Exterior Wall Sheathing
Exterior wall sheathing is a foundational element in modern construction, often hidden from view but absolutely critical to a building’s overall performance. It serves as the linchpin of structural integrity, moisture management, and energy efficiency. Understanding its purpose and proper installation is paramount for any construction project, from small residential renovations to large-scale commercial developments.
Defining Exterior Wall Sheathing
Exterior wall sheathing refers to the panel product that is fastened to the exterior wall framing (studs, top and bottom plates) of a building.
It forms the substrate for the exterior cladding or siding.
Common materials include oriented strand board (OSB), plywood, and, in some cases, specialized products like gypsum board or cement board.
Placement Within the Wall Assembly
The sheathing is typically installed directly over the wall framing, creating a continuous surface. This surface provides a solid base for attaching exterior finishes like siding, brick veneer, or stucco.
It sits between the framing and the weather-resistive barrier (house wrap), working in tandem to protect the building from the elements.
Multifaceted Benefits of Sheathing
The benefits of properly installed sheathing extend far beyond simply providing a surface to nail siding to.
It offers a range of crucial functions:
-
Structural Support: Sheathing significantly increases the racking strength of the wall assembly, preventing it from collapsing or deforming under lateral loads such as wind or seismic forces. It acts as a shear plane, distributing loads across the entire wall.
-
Air Barrier: When properly sealed at the seams and penetrations, sheathing acts as a key component of the building’s air barrier, reducing air leakage and improving energy efficiency. This minimizes drafts and helps maintain a consistent indoor temperature.
-
Moisture Resistance: While not a waterproof barrier on its own, sheathing provides a degree of moisture resistance, protecting the wall cavity from rain and snow infiltration. It works in conjunction with the weather-resistive barrier to manage moisture.
-
Insulation Backing: Sheathing provides a solid backing for insulation materials, preventing them from sagging or compressing. This ensures that the insulation performs optimally, maximizing energy savings.
Purpose of This Guide
This guide is designed to empower homeowners, contractors, and building professionals with the knowledge necessary to select and install exterior wall sheathing correctly.
By understanding the materials, techniques, and best practices outlined in this guide, readers will be well-equipped to ensure a durable, energy-efficient, and weather-resistant building envelope.
Air barrier: When properly sealed at the seams, sheathing can significantly reduce air leakage through the wall assembly, improving energy efficiency and occupant comfort. It minimizes drafts and helps maintain a consistent indoor temperature.
Choosing the Right Sheathing Material: OSB vs. Plywood
With a firm understanding of what exterior wall sheathing is and what it accomplishes, the next crucial step lies in selecting the appropriate material. Two materials dominate the sheathing market: oriented strand board (OSB) and plywood. Each has distinct characteristics that make it suitable for different applications and budgets.
OSB (Oriented Strand Board)
OSB has become an increasingly popular choice for sheathing due to its cost-effectiveness and availability. Understanding its composition and properties is key to making an informed decision.
Composition and Manufacturing
OSB is an engineered wood panel manufactured from rectangular-shaped wood strands (also known as flakes or wafers) that are oriented in layers, with the strands in each layer oriented perpendicular to the adjacent layers. These strands are then bonded together with resins under high pressure and temperature.
The result is a solid panel with good shear strength and dimensional stability. This layered construction gives OSB a characteristic appearance, easily distinguished from plywood.
Advantages of OSB
Cost-Effectiveness: One of the most significant advantages of OSB is its lower cost compared to plywood. This can translate into substantial savings on large construction projects.
Availability: OSB is widely available at most lumberyards and home improvement stores, making it a readily accessible option for builders and homeowners.
Consistent Quality: Due to its engineered manufacturing process, OSB tends to have a more consistent quality than plywood, with fewer voids or defects.
Disadvantages of OSB
Moisture Sensitivity: OSB is more susceptible to moisture absorption and swelling than plywood. Prolonged exposure to moisture can lead to delamination and reduced structural performance.
Lower Permeability: OSB has a lower permeability than plywood, meaning it does not breathe as well, which can trap moisture within the wall cavity if not properly detailed with a vapor control layer.
Selecting the Right OSB Grade and Thickness
The grade and thickness of OSB are crucial factors to consider when selecting sheathing for exterior walls. Look for OSB sheathing that is Exposure 1 rated. This means it can withstand moisture exposure during construction delays but is not intended for permanent exposure.
Common thicknesses for wall sheathing range from 7/16 inch to 3/4 inch, depending on the stud spacing and design loads. Consult local building codes and engineering specifications to determine the appropriate thickness for your specific project.
Plywood
Plywood, a traditional sheathing material, continues to be a reliable choice for its strength and durability.
Composition and Manufacturing
Plywood is composed of multiple thin layers of wood veneer, called plies, that are glued together with the grain of each ply running perpendicular to the adjacent layers. This cross-graining provides exceptional strength and resistance to splitting.
The type of wood used in the plies, as well as the type of adhesive, affects the plywood’s performance and durability.
Advantages of Plywood
Strength and Durability: Plywood offers excellent strength and resistance to impact, making it a durable choice for exterior wall sheathing.
Moisture Resistance: While not waterproof, plywood generally exhibits better moisture resistance than OSB, reducing the risk of swelling and delamination.
Nail-Holding Ability: Plywood tends to hold nails and screws better than OSB, providing a more secure attachment for siding and other exterior finishes.
Disadvantages of Plywood
Higher Cost: Plywood typically costs more than OSB, which can impact the overall budget of a construction project.
Potential for Voids and Defects: Depending on the grade, plywood may contain voids or defects that can compromise its structural integrity.
Selecting the Right Plywood Grade and Thickness
Plywood grades are typically designated by letters, such as A, B, C, and D, with A being the highest quality and D the lowest. For exterior wall sheathing, CDX grade plywood is a common choice. The "C" and "D" refer to the veneer quality on the front and back of the panel, respectively, while the "X" indicates that the panel is suitable for exterior exposure.
As with OSB, plywood thickness should be selected based on stud spacing and design loads. Consult local building codes and engineering specifications for guidance.
Comparative Analysis: OSB vs. Plywood
To summarize the key differences between OSB and plywood for sheathing applications, consider the following points:
| Feature | OSB | Plywood |
|---|---|---|
| Cost | Lower | Higher |
| Moisture Resistance | Lower | Higher |
| Strength | Good | Excellent |
| Availability | Readily Available | Readily Available |
| Consistency | More Consistent | Can Vary |
| Uses | Wall and Roof Sheathing, Subflooring | Wall and Roof Sheathing, Subflooring, Furniture |
Ultimately, the choice between OSB and plywood for exterior wall sheathing depends on a variety of factors, including budget, climate, design requirements, and personal preferences. Carefully weigh the pros and cons of each material to make an informed decision that meets the specific needs of your project.
Gathering Your Tools and Materials: A Pre-Installation Checklist
With a firm understanding of what exterior wall sheathing is and what it accomplishes, the next crucial step lies in selecting the appropriate material. Successfully installing that sheathing, however, hinges on having the right tools and materials readily available. Preparation is paramount; a well-stocked and organized workspace not only streamlines the installation process but also ensures accuracy, safety, and a professional finish. This section details the essential items required for a successful sheathing project, acting as a pre-installation checklist to guarantee you’re fully equipped before you begin.
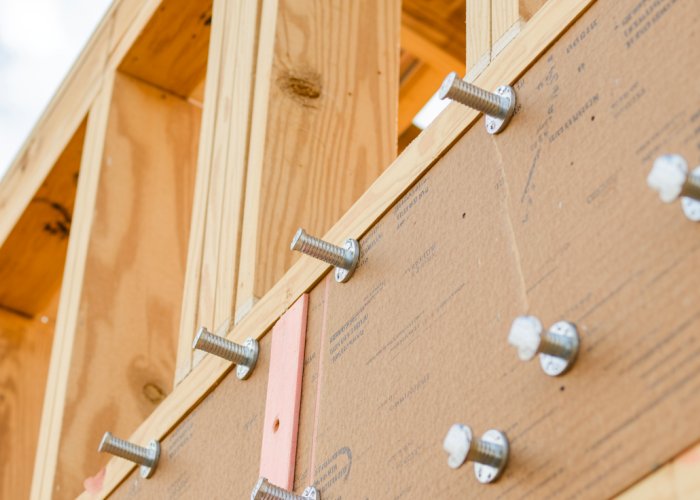
Fasteners: The Glue That Holds It All Together
The choice of fasteners is not merely a matter of convenience; it’s a critical decision that directly impacts the structural integrity and longevity of your sheathing.
Using the incorrect fasteners can lead to premature failure, moisture intrusion, and even compromise the entire wall assembly.
Selecting the Right Type and Size
Galvanized or coated nails and screws are essential for exterior applications.
These coatings provide crucial protection against corrosion, preventing rust and ensuring a secure, lasting connection, especially in environments exposed to moisture.
The size of the fastener is equally important; it must be long enough to penetrate sufficiently into the framing member to provide adequate holding power.
Guidelines for Length, Shank, Head, and Spacing
The length of the nail or screw should be at least twice the thickness of the sheathing material, ensuring it penetrates deeply into the stud or framing member.
The shank type (smooth, ring-shank, or screw-shank) affects the fastener’s holding power; ring-shank and screw-shank nails offer superior resistance to withdrawal.
The head type should be wide enough to prevent the fastener from pulling through the sheathing, but not so large that it interferes with the application of subsequent layers, such as siding or house wrap.
Proper spacing is also critical; follow the manufacturer’s recommendations and local building codes for edge and field nailing patterns.
Nails vs. Screws: A Comparative Look
The age-old debate: nails or screws for sheathing?
Nails are generally faster to install, especially when using a nail gun, making them a popular choice for large projects.
They also offer a degree of flexibility that can accommodate minor movement in the structure.
However, screws provide superior holding power and are less likely to loosen over time.
They also allow for easy removal and re-installation if adjustments are needed. Ultimately, the best choice depends on the specific requirements of your project and your personal preferences.
Cutting and Fastening Tools: Precision and Safety
Having the right tools for cutting and fastening sheathing panels is just as vital as selecting the correct fasteners. Proper tools ensure accuracy, minimize waste, and enhance overall safety.
The Essentials: Hammer, Nail Gun, and Circular Saw
A hammer is a fundamental tool for driving nails, but for larger projects, a nail gun can significantly speed up the installation process.
A circular saw is essential for cutting sheathing panels to the desired size and shape.
Invest in a high-quality saw blade designed for cutting wood or engineered wood products to ensure clean, accurate cuts.
Tips for Clean Cuts and Secure Fastening
When cutting sheathing, always use a straightedge or guide to ensure clean, straight cuts.
Avoid forcing the saw through the material, as this can cause splintering or tear-out.
When fastening sheathing, drive nails or screws straight and flush with the surface, avoiding overdriving, which can damage the sheathing.
The Complete Toolkit: Beyond the Basics
Beyond the hammer, nail gun, and circular saw, a complete toolkit should include:
- Measuring tape: For accurate measurements and layout.
- Utility knife: For scoring and cutting sheathing or house wrap.
- Level: To ensure panels are installed plumb and level.
- Safety glasses: To protect your eyes from flying debris.
- Gloves: To protect your hands from splinters and abrasions.
Having all these tools readily available will contribute to a smoother, safer, and more efficient sheathing installation.
Fasteners, meticulously selected and properly installed, are the unsung heroes of a robust wall assembly. With the proper tools now assembled, the focus shifts to the practical application of these materials, transforming a bare frame into a solid, sheathed wall ready to face the elements. The following section provides a step-by-step guide to achieving just that.
Step-by-Step Installation: Achieving a Solid Sheathed Wall
This section serves as a comprehensive roadmap for installing exterior wall sheathing, carefully detailing each phase of the process, from initial preparations to final sealing measures. The aim is to equip you with the knowledge and techniques to create a structurally sound and weather-resistant wall assembly.
Preparation: Ensuring a Solid Foundation
Before even thinking about attaching a single sheathing panel, a thorough assessment of the wall framing is essential. This foundational step ensures that the sheathing is installed on a solid and reliable base, guaranteeing the overall stability and longevity of the wall.
Wall Framing Inspection
The integrity of the wall begins with its frame. Each stud must be verified for proper alignment, ensuring they are plumb (perfectly vertical), level (perfectly horizontal where applicable), and free from any defects. This includes checking for bowing, twisting, or any signs of damage that could compromise the structural integrity of the wall.
Any deviations from plumb or level need to be corrected before proceeding. Similarly, damaged or weakened studs must be repaired or replaced to provide adequate support for the sheathing.
Addressing Water Damage, Rot, and Mold
Existing water damage, rot, or mold growth is a critical concern that needs to be addressed before installing new sheathing. These issues not only compromise the structural integrity of the framing but can also lead to further deterioration and health hazards if left unchecked.
Affected areas should be thoroughly cleaned, treated with appropriate fungicides or preservatives, and, if necessary, repaired or replaced. Ignoring these problems will only lead to more significant and costly repairs down the line.
Verifying Structural Soundness
Ultimately, the wall framing must be structurally sound enough to provide adequate support for the sheathing. This means ensuring that the studs are properly spaced, securely fastened to the top and bottom plates, and capable of withstanding the anticipated loads.
Any weaknesses or deficiencies in the framing should be addressed before proceeding with the sheathing installation. Failure to do so can result in a compromised wall assembly that is susceptible to structural failure.
Sheathing Installation: Techniques for Strength and Stability
With a solid foundation in place, the next step is to install the sheathing panels, employing techniques that maximize wall strength, minimize air infiltration, and accommodate thermal movement.
Staggering Vertical Joints
Staggering vertical joints is a crucial technique for maximizing wall strength and minimizing air infiltration. This involves offsetting the vertical seams between sheathing panels so that they do not align on adjacent rows.
By staggering the joints, you create a continuous, interlocking surface that distributes loads more evenly across the wall and reduces the potential for air leakage. This simple technique significantly enhances the overall performance of the wall assembly.
Maintaining Proper Spacing (Expansion Gap)
Sheathing materials, like all building materials, expand and contract with changes in temperature and humidity. To accommodate this thermal movement, it’s essential to maintain proper spacing between sheathing panels, creating an expansion gap.
A small gap, typically around 1/8 inch, should be left between each panel to allow for expansion without causing buckling or stress on the fasteners. This seemingly minor detail can prevent significant problems over time.
Nailing Pattern and Fastener Spacing
The correct nailing pattern and fastener spacing are critical for ensuring secure attachment of the sheathing panels. Both edge nailing (fastening along the edges of the panel) and field nailing (fastening in the middle of the panel) are necessary.
The specific nailing pattern and fastener spacing will depend on the sheathing thickness, the type of fastener used, and local building codes. However, as a general guideline, fasteners should be spaced closer together along the edges of the panel and further apart in the field. Consulting the sheathing manufacturer’s recommendations and local building codes is essential.
Sealing and Weather Protection: Preventing Moisture Intrusion
The final, and arguably most important, step in the sheathing installation process is sealing and weather protection. This involves creating a robust barrier against moisture intrusion, preventing water damage, mold growth, and other problems that can compromise the wall assembly.
Installing House Wrap
Installing house wrap is a fundamental step in creating an effective air and water barrier. House wrap is a synthetic material that is applied over the sheathing to protect it from the elements.
It allows moisture vapor to escape from the wall cavity while preventing liquid water from penetrating from the outside. This breathability is essential for preventing moisture accumulation and mold growth within the wall.
Overlapping and Sealing Seams
Proper overlapping and sealing of house wrap seams is critical for maintaining the integrity of the air and water barrier. Seams should be overlapped by at least 6 inches, and the overlap should be sealed with weather-resistant tape.
This prevents water from seeping through the seams and compromising the sheathing. Pay particular attention to corners, edges, and penetrations, ensuring that all seams are thoroughly sealed.
Integrating Flashing
Integrating flashing around windows, doors, and other penetrations is another crucial step in preventing water leakage. Flashing is a thin, impervious material, typically metal or plastic, that is installed to direct water away from vulnerable areas.
Properly installed flashing prevents water from seeping into the wall cavity around windows, doors, and other openings. This helps to protect the sheathing and framing from water damage, ensuring the long-term performance of the wall assembly.
Fasteners, meticulously selected and properly installed, are the unsung heroes of a robust wall assembly. With the proper tools now assembled, the focus shifts to the practical application of these materials, transforming a bare frame into a solid, sheathed wall ready to face the elements. The following section addresses the common challenges and preventative measures to ensure the longevity of your sheathed wall.
Troubleshooting and Best Practices: Avoiding Common Pitfalls
Even with meticulous planning and execution, sheathing installation can present unforeseen challenges. Understanding these potential pitfalls and implementing best practices is crucial for ensuring the long-term performance and durability of your wall assembly. This section will address two critical areas: moisture management and building code compliance, providing solutions and guidance to avoid costly mistakes.
Moisture Management: Preventing Damage and Mold
Moisture is the enemy of any building structure, and improperly installed or inadequately protected sheathing is particularly vulnerable. Water accumulation within the wall cavity can lead to a host of problems, including wood rot, mold growth, reduced insulation effectiveness, and structural damage. Preventing these issues requires a multi-faceted approach that addresses potential sources of moisture and promotes effective drying.
Strategies for Preventing Moisture Accumulation
Several key strategies can minimize the risk of moisture problems.
These include controlling interior humidity through proper ventilation (kitchen and bathroom fans are essential) and sealing air leaks to prevent warm, moist air from entering the wall cavity and condensing.
Exterior measures are equally important. Ensure proper roof overhangs and gutters to deflect rainwater away from the walls. Pay close attention to detailing around windows, doors, and other penetrations, using flashing and sealants to create a watertight barrier.
The Importance of Ventilation and Drainage
Proper ventilation is crucial for allowing moisture to escape the wall cavity. This can be achieved through a variety of methods, including installing vented cladding systems that create an airspace behind the siding, allowing air to circulate and dry out any moisture that may have penetrated the sheathing.
Drainage is equally important. A properly installed drainage plane, such as house wrap with drainage channels, allows water that penetrates the siding to flow down and out of the wall assembly, preventing it from accumulating and causing damage.
Selecting Moisture-Resistant Sheathing and Applying Protective Coatings
When selecting sheathing materials, consider options with enhanced moisture resistance. Some OSB and plywood products are treated with preservatives or coatings that make them less susceptible to water damage and mold growth.
Applying a protective coating or sealant to the sheathing can further enhance its resistance to moisture. However, it is important to choose products that are compatible with the sheathing material and that will not trap moisture within the wall cavity. Breathable coatings that allow water vapor to escape are generally preferred.
Building Code Compliance: Ensuring Safety and Standards
Sheathing installation is subject to strict building codes designed to ensure safety, structural integrity, and energy efficiency. Ignoring these codes can result in costly rework, legal penalties, and, most importantly, compromise the safety of the building and its occupants.
Overview of Relevant IBC and IRC Sections
The International Building Code (IBC) and the International Residential Code (IRC) contain specific requirements related to sheathing installation. These codes address issues such as sheathing thickness, fastener spacing, fire-resistance ratings, and requirements for weather protection.
Familiarize yourself with the relevant sections of these codes before beginning any sheathing installation project. Your local building department can provide guidance on specific code requirements in your area.
Adhering to Local Building Codes and Obtaining Necessary Permits
Building codes vary from one jurisdiction to another, so it is crucial to adhere to local requirements. Contact your local building department to determine which codes apply to your project and to obtain any necessary permits.
Failing to obtain the required permits can result in fines and delays. Additionally, a building inspector may require you to remove and reinstall the sheathing if it does not meet code requirements.
Fire-Resistance Ratings and Other Building Code Considerations
In addition to structural and weather protection requirements, building codes also address fire safety. Sheathing materials must meet certain fire-resistance ratings, depending on the building’s occupancy and location.
Consider the fire-resistance requirements when selecting sheathing materials and ensure that the installation meets all applicable code requirements. Other building code considerations may include requirements for air barriers, insulation, and ventilation. Consulting with a qualified building professional can help you navigate these complex requirements and ensure that your sheathing installation is safe, code-compliant, and durable.
Fasteners, meticulously selected and properly installed, are the unsung heroes of a robust wall assembly. With the proper tools now assembled, the focus shifts to the practical application of these materials, transforming a bare frame into a solid, sheathed wall ready to face the elements. The following section addresses the increasing demand for installation efficiency and superior performance, focusing on advanced sheathing systems that offer innovative solutions for modern construction.
Exploring Advanced Sheathing Systems: Streamlining Installation and Enhancing Performance
The construction industry is constantly evolving, driven by the need for greater efficiency, enhanced performance, and reduced labor costs. Traditional sheathing methods, while effective, can be time-consuming and require multiple steps.
Advanced sheathing systems offer a modern approach by integrating multiple functions into a single product, streamlining the installation process and enhancing overall wall performance.
Integrated Sheathing Systems: A Modern Approach
Integrated sheathing systems represent a significant departure from traditional methods.
These systems typically combine the structural sheathing panel with a weather-resistive barrier (WRB), creating a single product that simplifies installation and reduces the potential for errors.
The ZIP System: A Case Study
One prominent example of an integrated sheathing system is the Huber Engineered Woods ZIP System. This system utilizes engineered wood panels (OSB or plywood) with a pre-applied, water-resistant overlay.
The panels are installed with specially designed acrylic tape to seal the seams, creating a continuous air and water barrier. The system’s color coded process helps ensure correct installation.
This approach eliminates the need for separate house wrap, saving time and labor on the job site.
Advantages of Integrated Systems
The advantages of integrated sheathing systems are numerous.
Simplified Installation: By combining sheathing and weather protection into a single product, these systems significantly reduce the number of steps required for wall assembly.
Reduced Labor Costs: The streamlined installation process translates directly into reduced labor costs, making these systems attractive for builders looking to improve their bottom line.
Improved Performance: Integrated systems are designed to provide a consistent and reliable air and water barrier, enhancing the building’s energy efficiency and protecting against moisture damage.
The precise engineering of the panel and integrated tape ensures optimal performance and mitigates risks associated with improper installation of separate components.
Other Integrated Sheathing Products
While the ZIP System is perhaps the best-known example, other manufacturers offer similar integrated sheathing solutions. These products often feature variations in materials, application methods, and performance characteristics.
It’s essential to research and compare different systems to determine the best fit for a specific project and climate. Factors to consider include cost, ease of installation, water resistance, and warranty coverage.
FAQ: Exterior Wall Sheathing Installation
Here are some frequently asked questions about exterior wall sheathing installation to help clarify the guide.
What is the primary purpose of exterior wall sheathing?
Exterior wall sheathing serves multiple purposes, including providing a nailing base for siding, contributing to the structural integrity of the wall, and offering some level of insulation. It also helps create a consistent surface for weather-resistant barriers.
What type of sheathing should I use for my climate?
The best type of sheathing depends on your local climate and building codes. OSB and plywood are common choices, but moisture-resistant options are recommended in areas with high humidity or frequent rain. Always consult local building codes and guidelines.
How important is it to properly space sheathing panels?
Proper spacing between exterior wall sheathing panels is crucial. This spacing allows for expansion and contraction of the sheathing due to temperature and moisture changes, preventing buckling or warping of the finished wall.
Can I install siding directly onto the exterior wall sheathing?
No, siding should never be installed directly onto the exterior wall sheathing. A weather-resistant barrier, like house wrap, is essential to protect the sheathing from moisture intrusion and prevent potential mold growth or structural damage.
So, there you have it – your comprehensive guide to exterior wall sheathing! Hopefully, you’re feeling confident and ready to tackle your next project. Remember to consult local building codes and regulations before you start, and happy sheathing!