Understanding electric motor overload is critical for maintaining operational efficiency and preventing costly downtime in industrial settings. NEMA standards define acceptable motor performance parameters, but unforeseen circumstances can still cause issues. Properly sized overload relays provide essential protection, continuously monitoring motor current. This guide will empower you to diagnose and resolve electric motor overload situations, helping you avoid equipment failures and ensure your system runs smoothly.
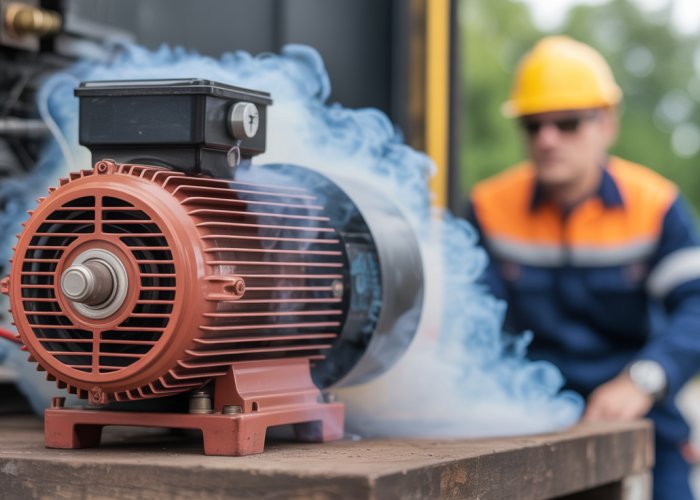
Electric motors are the workhorses of modern industry, silently powering everything from conveyor belts and pumps to HVAC systems and sophisticated machinery. Yet, these essential components are vulnerable to a condition known as overload, a silent threat that can lead to catastrophic failures, costly downtime, and even safety hazards.
Understanding Electric Motor Overload
Electric motor overload occurs when a motor is forced to draw more current than it is designed to handle continuously. This increased current generates excessive heat within the motor windings, which, if left unchecked, can degrade the insulation, damage the rotor, and ultimately lead to motor failure.
Unlike a short circuit, which causes a sudden and massive surge of current, an overload is a more gradual process. It may not immediately trip a circuit breaker or blow a fuse, allowing the motor to continue operating in a stressed condition. This makes overload particularly insidious, as it can slowly but surely erode the motor’s lifespan and reliability.
The significance of understanding and addressing motor overload cannot be overstated. Overloaded motors consume more energy, leading to increased operating costs. They are also more prone to breakdowns, resulting in unplanned downtime and production losses. In extreme cases, a motor overload can even create a fire hazard, endangering personnel and property.
Consequences of Unchecked Overloads
The ramifications of ignoring motor overload are far-reaching, impacting not only the bottom line but also the safety and operational efficiency of an organization.
-
Equipment Damage: The excessive heat generated by overload degrades motor windings, bearings, and other critical components, leading to premature failure and the need for costly repairs or replacements.
-
Production Delays: When a motor fails due to overload, the equipment it powers comes to a standstill. This can disrupt production schedules, delay shipments, and damage customer relationships.
-
Safety Risks: Overheated motors can create a fire hazard, particularly in environments with flammable materials. Additionally, sudden motor failures can pose a risk to personnel operating or working near the affected equipment.
Purpose of This Guide
This guide serves as a comprehensive resource for understanding, diagnosing, and resolving electric motor overload issues. It provides a step-by-step methodology for identifying the root cause of overload conditions and implementing effective solutions to prevent future occurrences.
By following the guidance provided in this guide, maintenance personnel, engineers, and facility managers can:
- Accurately diagnose motor overload problems.
- Implement effective solutions to prevent motor failures.
- Extend motor lifespan and improve overall equipment reliability.
- Enhance workplace safety by reducing the risk of motor-related accidents.
- Minimize downtime and maximize production efficiency.
Electric motors are the workhorses of modern industry, silently powering everything from conveyor belts and pumps to HVAC systems and sophisticated machinery. Yet, these essential components are vulnerable to a condition known as overload, a silent threat that can lead to catastrophic failures, costly downtime, and even safety hazards.
Understanding Electric Motor Overload
Electric motor overload occurs when a motor is forced to draw more current than it is designed to handle continuously. This increased current generates excessive heat within the motor windings, which, if left unchecked, can degrade the insulation, damage the rotor, and ultimately lead to motor failure.
Unlike a short circuit, which causes a sudden and massive surge of current, an overload is a more gradual process. It may not immediately trip a circuit breaker or blow a fuse, allowing the motor to continue operating in a stressed condition. This makes overload particularly insidious, as it can slowly but surely erode the motor’s lifespan and reliability.
The significance of understanding and addressing motor overload cannot be overstated. Overloaded motors consume more energy, leading to increased operating costs. They are also more prone to breakdowns, resulting in unplanned downtime and production losses. In extreme cases, a motor overload can even create a fire hazard, endangering personnel and property.
Consequences of Unchecked Overloads
The ramifications of ignoring motor overload are far-reaching, impacting not only the bottom line but also the safety and operational efficiency of an organization.
To truly combat motor overload, we need to move beyond recognizing the symptoms and delve into the underlying causes and characteristics of this potentially devastating condition. This section aims to provide a deeper understanding of motor overload, differentiating it from other electrical faults and exploring the various factors that contribute to its occurrence.
Understanding Motor Overload: Beyond the Basics
Effective troubleshooting begins with a solid understanding of the problem. When it comes to electric motors, overload is a common culprit behind premature failures and unexpected downtime. But what exactly is motor overload, and what factors contribute to its occurrence? Let’s delve into the technical aspects.
Defining Overload
Motor overload is often confused with other electrical faults, such as short circuits and ground faults. While all these conditions involve excessive current flow, their causes and effects are distinctly different.
Overload vs. Short Circuit
A short circuit is an unintended low-resistance path between two points of different potential in a circuit. This results in a sudden and massive surge of current, typically tripping a circuit breaker or blowing a fuse almost instantaneously. The current magnitude in a short circuit is often many times higher than the motor’s rated current.
In contrast, an overload is a more gradual condition where the motor draws more current than its rated full-load amperage (FLA) for a sustained period. The current increase is typically less dramatic than in a short circuit, but the prolonged heat buildup can be just as damaging, if not more so, over time.
Overload vs. Ground Fault
A ground fault occurs when current flows from a live conductor to ground, often through a person or conductive object. This can create a significant safety hazard and can also damage equipment.
While a ground fault can sometimes lead to an overload condition, the primary concern is the risk of electric shock. Ground fault protection devices are designed to quickly interrupt the circuit in the event of a ground fault, minimizing the risk of injury.
The key difference lies in the path of the excessive current. Overload is excessive current within the motor’s normal circuit, while a ground fault is current flowing outside that intended circuit to ground.
Common Causes of Motor Overload
Many factors can contribute to motor overload, ranging from mechanical issues to electrical problems and environmental conditions. Identifying the root cause is essential for implementing effective solutions.
Excessive Mechanical Load
The most common cause of motor overload is simply exceeding the motor’s rated mechanical load. This can happen if the driven equipment requires more torque than the motor can provide. For example, if a pump is trying to move a fluid that is too viscous, or if a conveyor belt is carrying too much weight, the motor will be forced to work harder and draw more current.
Ensure the motor is appropriately sized for the application’s demands.
Voltage Imbalance
Uneven phase voltages can also lead to motor overload. In a three-phase system, ideally, the voltage on each phase should be equal. However, if one or more phases have a significantly lower voltage than the others, the motor will attempt to compensate by drawing more current on the phases with higher voltage, leading to overheating and potential failure.
Voltage imbalance can stem from utility supply issues, unbalanced loads on the distribution system, or faulty wiring.
Phase Loss (Single-Phasing)
One of the most severe conditions for a three-phase motor is phase loss, also known as single-phasing. This occurs when one of the three phases is lost due to a blown fuse, a broken wire, or a utility problem.
When a three-phase motor operates on only two phases, it experiences a significant current increase in the remaining phases. This can quickly lead to overheating and motor damage. Single-phasing is a leading cause of motor burnout.
Locked Rotor Condition
A locked rotor condition occurs when the motor’s rotor is unable to turn, usually due to a mechanical obstruction or a failed starting mechanism. When the rotor is locked, the motor draws a very high current, often several times its FLA. This high current generates intense heat, which can quickly damage the motor windings.
A locked rotor condition is a critical event that requires immediate attention to prevent catastrophic failure.
Environmental Factors
Environmental factors, such as high ambient temperature and inadequate cooling, can also contribute to motor overload. Motors are designed to operate within a specific temperature range. If the ambient temperature is too high, the motor’s cooling system may not be able to dissipate heat effectively, leading to overheating.
Similarly, if the motor’s ventilation is blocked or if the cooling fan is not functioning properly, the motor can overheat even under normal load conditions.
Proper ventilation and ambient temperature control are crucial for maintaining motor reliability.
Decoding Nameplate Data
The motor nameplate is a treasure trove of information about the motor’s operating characteristics. Understanding the key parameters listed on the nameplate is crucial for identifying potential overload conditions and ensuring proper motor protection.
Key parameters to understand include:
- Horsepower (HP) or Kilowatts (kW): Represents the motor’s mechanical output power.
- Voltage (V): Specifies the rated voltage at which the motor is designed to operate.
- Full-Load Amperage (FLA): Indicates the amount of current the motor will draw when operating at its rated horsepower and voltage. This is a crucial value for setting overload relays.
- Service Factor (SF): Represents the amount of overload the motor can handle for short periods without damage, typically expressed as a multiplier (e.g., 1.15).
- RPM (Revolutions per Minute): Indicates the motor’s rotational speed at full load.
- Insulation Class: Specifies the maximum allowable operating temperature for the motor’s winding insulation.
By comparing measured values (voltage, amperage) to the nameplate data, you can quickly identify potential overload conditions. For example, if the measured amperage is consistently higher than the FLA, it suggests that the motor is overloaded. The service factor can also be used to determine the motor’s short-term overload capacity. However, continuous operation above the FLA, even within the service factor, can reduce the motor’s lifespan.
Understanding and utilizing nameplate data is essential for proactive motor management.
To truly combat motor overload, we need to move beyond recognizing the theoretical causes and delve into the practical methods of identifying its symptoms. Early detection is paramount; it’s the difference between a minor adjustment and a complete system shutdown. By honing your ability to recognize the warning signs, you can proactively address overload conditions before they escalate into costly and dangerous failures.
Recognizing the Warning Signs: Identifying Overload Symptoms
Detecting motor overload isn’t about waiting for catastrophic failure; it’s about vigilance and understanding the subtle cues that a motor provides. This section will equip you with the knowledge to identify overload symptoms through visual inspections, auditory cues, and crucial electrical measurements. Mastering these techniques is vital for preserving your equipment and ensuring operational safety.
The Power of Visual Inspection
The first line of defense in detecting motor overload is a thorough visual inspection. Often, the motor itself will display physical signs of stress long before a complete breakdown occurs. Look closely for anything that deviates from the motor’s normal appearance.
Housing Damage
Carefully examine the motor housing for any signs of physical damage. Cracks, dents, or warping can indicate that the motor has been subjected to excessive heat or mechanical stress. Discoloration, particularly a brownish or blackish tint, is a telltale sign of overheating, suggesting that the motor has been operating beyond its thermal limits.
Insulation Degradation
The winding insulation is the motor’s protective shield against short circuits. Inspect the insulation for any signs of burning, cracking, or melting. A strong, acrid odor emanating from the motor is another clear indicator of insulation breakdown. Addressing insulation issues promptly is crucial, as compromised insulation can lead to catastrophic failures and safety hazards.
Tuning into Audible Cues
Beyond visual cues, a motor under stress often broadcasts its distress through unusual sounds. Learning to recognize these audible cues can provide early warnings of overload conditions.
Unusual Noises
Listen attentively for any unusual noises coming from the motor. A pronounced humming sound, particularly if it’s louder than normal, can indicate an electrical imbalance or excessive load. Grinding or squealing sounds often suggest bearing issues, which can contribute to increased friction and, consequently, motor overload. Regular monitoring of motor sounds can reveal developing problems before they escalate.
Electrical Measurements: Quantifying the Problem
While visual and auditory cues are valuable, electrical measurements provide the most definitive indication of motor overload. By carefully measuring amperage and voltage under load, you can gain a precise understanding of the motor’s operating condition.
Amperage and Voltage Monitoring
Use a multimeter to measure the amperage drawn by the motor on each phase, ensuring that the motor is operating under typical load conditions. Compare the measured amperage values to the motor’s nameplate data, specifically the full-load amperage (FLA). If the measured amperage consistently exceeds the FLA, the motor is likely overloaded.
Similarly, measure the voltage on each phase to check for voltage imbalances. Significant voltage imbalances can cause one or more phases to draw excessive current, leading to overheating and overload.
Interpreting Nameplate Data
Understanding the motor’s nameplate data is crucial for accurate assessment. The nameplate provides critical information about the motor’s rated voltage, amperage, horsepower, and service factor. The service factor indicates the amount of overload the motor can safely handle for short periods. Exceeding the service factor for extended durations can significantly reduce the motor’s lifespan.
By comparing your measurements against the nameplate data, you can determine whether the motor is operating within its design parameters and identify potential overload conditions before they lead to significant problems.
Troubleshooting Overload: A Step-by-Step Guide
Having sharpened your senses to recognize the symptoms of motor overload, the next crucial step is pinpointing the root cause. This requires a systematic and methodical approach, prioritizing safety at every turn. Remember, electrical troubleshooting can be dangerous, and shortcuts can have severe consequences.
This section provides a structured troubleshooting guide to help you navigate the complexities of motor overload, ensuring you identify and resolve the issue effectively and safely.
Safety First: Your Unwavering Priority
Before you even think about touching any electrical component, establish a safe working environment. This begins and ends with Lockout/Tagout (LOTO) procedures. LOTO ensures that the motor circuit is completely de-energized and cannot be accidentally re-energized while you’re working on it.
Never bypass LOTO, no matter how tempting it might be to save time.
Equally crucial is the use of appropriate Personal Protective Equipment (PPE). At a minimum, wear safety glasses to protect your eyes from debris and insulated gloves to safeguard against electrical shock. Depending on the specific environment and potential hazards, additional PPE may be necessary.
Checking the Mechanical Load: Is the Motor Overworked?
One of the most frequent culprits behind motor overload is an excessive or improperly applied mechanical load.
Verifying Mechanical Load Alignment
A misaligned load can place undue stress on the motor, causing it to draw excessive current. Carefully inspect the alignment between the motor shaft and the driven equipment.
Use precision alignment tools, such as laser alignment kits, to ensure that the shafts are perfectly aligned both horizontally and vertically. Even a slight misalignment can significantly increase the load on the motor.
Inspecting Lubrication Levels and Quality
Friction is the enemy of efficiency. Insufficient or contaminated lubrication in bearings, gears, or other mechanical components can dramatically increase the load on the motor.
Check lubrication levels regularly and ensure that the lubricant is clean and of the correct type for the application. Consider a lubrication analysis program to proactively identify potential issues before they lead to motor overload.
Inspecting the Electrical Supply: The Foundation of Performance
A stable and balanced electrical supply is essential for proper motor operation. Issues with the incoming power can quickly lead to overload conditions.
Measuring Phase Voltage
Use a multimeter to measure the voltage on each phase of the motor supply. Significant voltage imbalances (typically more than 2-3%) can cause excessive current draw in one or more phases, leading to overheating and potential overload.
Also, check for phase loss, where one phase of the supply is completely missing. Operating a three-phase motor on only two phases (single-phasing) results in a dramatic increase in current draw and rapid motor damage.
Measuring Phase Amperage
Measure the current on each phase using a clamp meter. Compare these measurements to the motor’s nameplate full-load amperage (FLA). If the measured current on any phase exceeds the FLA, the motor is likely overloaded.
Significant current imbalances between phases can also indicate a problem with the motor windings or the connected load.
Examining Overcurrent Protection Devices: Ensuring Proper Safeguards
Overcurrent protection devices, such as circuit breakers, fuses, and overload relays, are the last line of defense against motor overload. Their proper sizing and functionality are critical.
Ensuring Proper Sizing and Functionality
Verify that the circuit breakers and fuses are correctly sized for the motor’s FLA and starting current. Undersized protection devices will trip prematurely, while oversized devices will fail to protect the motor from overload damage.
Test the functionality of circuit breakers by manually tripping them and ensuring they respond correctly. Inspect fuses for signs of damage or deterioration.
Checking Overload Relay Settings
Overload relays are specifically designed to protect motors from overload conditions. Ensure that the overload relay is correctly calibrated for the motor’s FLA. The relay’s trip current should be set slightly above the FLA to allow for normal variations in load.
Improperly set overload relays are a common cause of both nuisance tripping and inadequate motor protection.
Testing the Motor Itself: Unveiling Internal Issues
If external factors have been ruled out, the problem may lie within the motor itself.
Assessing Winding Insulation Resistance
Use a megohmmeter (also known as a megger) to measure the insulation resistance of the motor windings. Low insulation resistance indicates insulation breakdown, which can lead to short circuits and motor failure.
A significant drop in insulation resistance suggests that the motor needs to be rewound or replaced.
Thermal Overload Protection: Your Motor’s Guardian Angel
Having established a foundational understanding of troubleshooting methodologies, it’s time to turn our attention to the crucial safeguard against motor overload: thermal overload protection. Without it, your motor is vulnerable.
This protection typically takes the form of overload relays. These relays are the unsung heroes that constantly monitor the motor’s operating conditions, ready to intervene at a moment’s notice. A properly configured thermal overload protection system is essential for preventing catastrophic motor failures and minimizing costly downtime.
How Overload Relays Work: A Deep Dive
Overload relays are designed to mimic the heating characteristics of a motor. They are connected in series with the motor’s power supply and are sensitive to the current flowing through them. When the motor draws excessive current for an extended period, the overload relay trips, interrupting the power supply and shutting down the motor.
There are two primary types of overload relays commonly used:
-
Bimetallic Strip Relays: These relays utilize a bimetallic strip, composed of two different metals with varying coefficients of thermal expansion.
When the current flowing through the strip exceeds the setpoint, the strip heats up and bends due to the differential expansion of the metals. This bending action triggers a mechanical trip mechanism, opening the circuit and disconnecting the motor from the power supply.
-
Electronic Overload Relays: These relays employ electronic sensors to monitor the motor’s current. The sensors then feed information to an electronic circuit that analyzes the data and determines when an overload condition exists.
If an overload is detected, the electronic circuit activates a relay. That relay, in turn, opens the motor’s circuit, shutting down the motor and preventing damage. Electronic overload relays often offer advanced features, such as adjustable trip curves, remote monitoring capabilities, and diagnostic information.
The electronic type is often superior in features and capabilities.
Proper Sizing and Setting: The Key to Effective Protection
The effectiveness of thermal overload protection hinges on selecting the correct overload relay and configuring it appropriately for the specific motor it is protecting. An improperly sized or set overload relay can lead to nuisance tripping (unnecessary shutdowns) or, even worse, failure to protect the motor from damage during an actual overload condition.
Selecting the Right Overload Relay
The most important factor in selecting an overload relay is its current range.
The relay’s current range must be appropriate for the motor’s full-load amperage (FLA), as indicated on the motor’s nameplate. The overload relay should have an adjustable trip current that can be set to match the motor’s FLA.
Setting the Trip Current
Once the overload relay is selected, the trip current must be set correctly. The trip current is the level of current that will cause the relay to trip and shut down the motor.
The general rule is to set the trip current slightly above the motor’s FLA. This allows for normal variations in load and prevents nuisance tripping. However, it’s crucial to consult the motor manufacturer’s recommendations and relevant electrical codes for specific guidance on setting the trip current.
Typically, the overload relay is set at 115-125% of FLA for standard motors. Service Factor is factored in at this stage.
Avoiding Nuisance Tripping
Nuisance tripping can be a significant issue, causing unnecessary downtime and frustration. To avoid nuisance tripping, consider the following factors:
- Ensure that the motor is not subjected to excessive starting loads or frequent starts and stops, as these can cause temporary overcurrent conditions.
- Verify that the motor is properly ventilated and that the ambient temperature is within the motor’s specified operating range.
- Check the power supply for voltage imbalances or other irregularities that could contribute to overcurrent.
Common Causes of Overload Relay Failure
Even with proper sizing and setting, overload relays can fail, rendering the motor vulnerable to damage. Some common causes of overload relay failure include:
- Improper Wiring: Incorrect wiring can prevent the overload relay from functioning properly, leading to false trips or a failure to trip during an actual overload. Always follow the manufacturer’s wiring diagrams carefully.
- Corrosion: Corrosion can damage the internal components of the overload relay, affecting its accuracy and reliability. Protect the relay from exposure to moisture and corrosive substances.
- Mechanical Damage: Physical damage to the overload relay can compromise its functionality. Handle the relay with care and avoid subjecting it to excessive shock or vibration.
- Environmental Factors: Extreme temperatures, humidity, and dust can all negatively impact the performance of overload relays. Use suitable enclosures to protect relays from harsh environmental conditions.
- Age: Like all electrical components, overload relays have a lifespan. Over time, the internal components can degrade, leading to inaccurate tripping or outright failure. Replace overload relays periodically as part of a preventative maintenance program.
By understanding how overload relays work, properly sizing and setting them, and addressing the common causes of failure, you can ensure that your motors are adequately protected from the damaging effects of overload conditions. This proactive approach can save you time, money, and headaches in the long run.
Having explored the intricacies of thermal overload protection and its role as a safety net, the next logical step is to shift our focus towards proactive strategies. Preventing motor overload in the first place is far more efficient and cost-effective than reacting to its consequences.
Prevention is Power: Avoiding Motor Overload in the First Place
Reactive troubleshooting, while essential, addresses problems after they’ve already manifested. A truly effective strategy involves preventing motor overload from occurring altogether. This requires a shift in mindset, from simply fixing problems to actively cultivating motor health and longevity.
The key elements of this proactive approach are regular maintenance, proper motor sizing, and data-driven monitoring. By implementing these strategies, you can significantly reduce the risk of motor overload, minimize downtime, and optimize overall system performance.
Regular Maintenance: The Foundation of Motor Health
Regular maintenance is the cornerstone of any effective motor overload prevention program. Neglecting routine checks and preventative measures can lead to a gradual decline in motor performance. This ultimately increases the risk of overload and premature failure.
Scheduled Inspections and Preventative Maintenance
Establish a schedule for routine inspections. This helps to identify potential issues early on, before they escalate into major problems. These inspections should be tailored to the specific motor and its operating environment. Consider factors such as duty cycle, load type, and ambient temperature.
Regular maintenance tasks should include:
- Cleaning motor windings to remove dust and debris, which can impede heat dissipation.
- Checking bearing lubrication levels and quality to reduce friction and wear.
- Verifying proper ventilation to ensure adequate cooling.
- Inspecting electrical connections for tightness and corrosion.
The Importance of Clean Windings
Dirty motor windings act as insulators, trapping heat and increasing the motor’s operating temperature. This elevated temperature reduces the lifespan of the insulation. It also makes the motor more susceptible to overload.
Regular cleaning, using appropriate methods and cleaning agents, is crucial for maintaining efficient heat dissipation and preventing premature failure.
Proper Motor Sizing: Matching the Motor to the Task
One of the most common causes of motor overload is simply using a motor that is too small for the application. An undersized motor will constantly operate at or near its maximum capacity. This significantly increases the risk of overheating and overload.
Assessing Load Requirements
Carefully assess the application’s expected load requirements before selecting a motor. Consider factors such as:
- Starting torque: The amount of torque required to initiate movement.
- Duty cycle: The percentage of time the motor is operating under load.
- Environmental conditions: Ambient temperature and humidity can affect motor performance.
- Peak load demands: Unexpected surges in load should be factored into motor selection.
Service Factor: A Safety Buffer
The motor’s service factor, as indicated on the nameplate, provides a safety buffer. This allows the motor to operate safely above its rated horsepower for short periods. However, continuous operation above the rated horsepower, even within the service factor, can still lead to premature failure.
Choosing a motor with an adequate service factor provides an additional layer of protection against unexpected load increases.
Monitoring and Data Analysis: Gaining Insights into Motor Performance
Implementing systems to track motor performance parameters. This provides valuable insights into its operating condition. Analyzing this data can help identify trends and predict potential failures before they occur.
Key Performance Indicators (KPIs)
Monitor key performance indicators (KPIs) such as:
- Amperage: Indicates the motor’s current draw and load.
- Voltage: Reveals potential voltage imbalances or low voltage conditions.
- Temperature: Provides direct indication of motor heating.
- Vibration: Can indicate bearing wear or mechanical misalignment.
Predictive Maintenance
By analyzing historical data, you can identify patterns. This enables you to predict potential failures and schedule maintenance proactively.
For example, a gradual increase in motor amperage over time may indicate a developing mechanical problem. This allows you to address the issue before it leads to a motor overload or failure. This proactive approach minimizes downtime and extends motor lifespan.
Electric Motor Overload: FAQs
Here are some frequently asked questions regarding electric motor overload issues and troubleshooting.
What exactly is an electric motor overload?
An electric motor overload happens when a motor draws excessive current beyond its rated capacity for an extended period. This generates excessive heat, which can damage the motor’s windings and shorten its lifespan. Essentially, the motor is working harder than it was designed to.
What are some common causes of an electric motor overload?
Several factors can lead to an electric motor overload. These include: excessive load on the motor, low voltage supply, locked rotor condition, incorrect motor sizing for the application, and environmental factors such as high ambient temperature or poor ventilation.
How does an overload relay protect an electric motor?
An overload relay monitors the current flowing to the electric motor. If it detects an excessive current for a sustained period, it trips, disconnecting the power supply to the motor. This prevents the electric motor from overheating and suffering permanent damage.
What is the first step in troubleshooting an electric motor overload?
The first step is always to identify the cause of the overload. Disconnect the motor from the load and test the motor independently. Check the motor’s nameplate to verify voltage and current ratings. Also, carefully inspect the wiring and connections for any signs of damage or looseness.
Alright, you made it to the end of the guide! Hopefully, you’ve got a better handle on diagnosing and fixing electric motor overload. Now go put that knowledge to good use and keep those motors humming!