A malfunctioning dryer plug connection can be a real headache, and understanding the common issues is key to a quick fix. You might encounter problems with the NEMA standards that define the configuration of your electrical receptacle. These standards ensure the electrical safety of your home. Incorrect wiring can also lead to a faulty connection, so always double-check the wiring diagram typically provided by manufacturers like Whirlpool. Furthermore, consider the tools you’ll need, such as a multimeter, to properly diagnose voltage and continuity issues when assessing your dryer plug connection.
The unsung hero of laundry day is the dryer plug connection.
It’s easy to take for granted, but a properly functioning connection is absolutely critical for both the safe and efficient operation of your electric dryer.
Think of it as the lifeline that delivers the necessary power to transform damp clothes into warm, fluffy comfort.
However, when this connection falters, the consequences can range from inconvenient to downright dangerous.
The Silent Threats: Arcing and Fire Hazards
A faulty dryer plug connection isn’t just about your dryer not working.
It’s a significant safety risk.
Loose or damaged connections create resistance, leading to a buildup of heat.
This excessive heat can cause arcing, a phenomenon where electricity jumps across a gap in the connection.
Arcing generates intense temperatures that can ignite nearby flammable materials, such as lint, dust, or even the dryer itself, leading to a fire hazard.
Beyond the immediate danger of fire, electrical arcing can also damage the dryer’s internal components, shortening its lifespan and leading to costly repairs.
Therefore, addressing dryer plug connection issues promptly is not just a matter of convenience, but a matter of safety and financial prudence.
Your Guide to Dryer Plug Connection Solutions
This article serves as a comprehensive guide for homeowners seeking to understand and resolve common dryer plug connection problems.
We aim to empower you with the knowledge and practical solutions needed to ensure a safe and reliable connection for your dryer.
Whether you’re dealing with a loose connection, a damaged plug, or a frequently tripping circuit breaker, this guide will provide you with actionable steps to diagnose and address the issue.
Our goal is to help you identify potential problems early, implement simple fixes when appropriate, and recognize when it’s time to call in a qualified electrician.
By understanding the potential risks and taking proactive measures, you can ensure that your dryer operates safely and efficiently for years to come.
The ability to promptly resolve dryer connection issues is paramount, but before you troubleshoot or attempt any repairs, it’s crucial to understand the electrical demands of your appliance.
Knowing the voltage, amperage, and plug configurations will not only help you diagnose problems effectively but also ensure that any solutions you implement are safe and compliant with electrical standards.
Understanding Your Dryer’s Electrical Requirements
An electric dryer isn’t just another appliance; it’s a significant electrical load in your home.
To ensure its safe and efficient operation, it’s essential to understand its specific electrical requirements.
Voltage: Why 240V Matters
Unlike most household appliances that run on a standard 120V circuit, electric dryers require 240V for optimal performance.
This higher voltage is necessary to generate the heat needed to efficiently dry your clothes.
Attempting to run a 240V dryer on a 120V circuit will not only result in poor performance but can also damage the appliance.
Amperage: Matching the Circuit
The amperage rating of your dryer indicates the amount of electrical current it draws during operation.
Most electric dryers require a 30-amp circuit, although some larger models may need a 40- or even 50-amp circuit.
It’s crucial to ensure that the circuit breaker and wiring connected to your dryer outlet are properly rated to handle the dryer’s amperage draw.
Using an undersized circuit can lead to overloaded circuits, frequent tripping of the breaker, and potentially dangerous overheating.
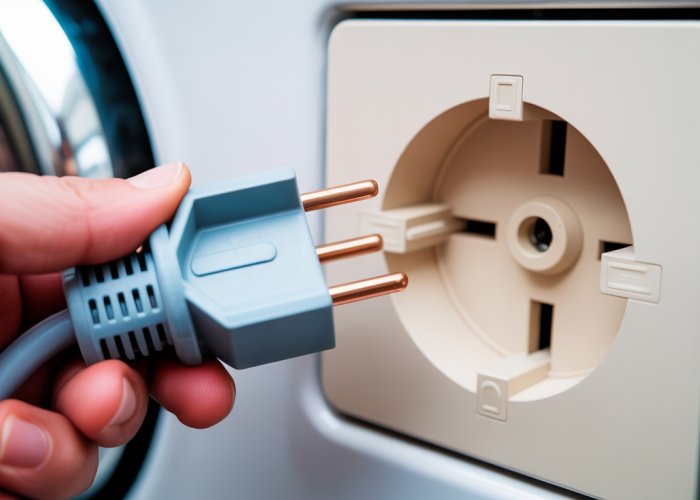
3-Prong vs. 4-Prong: Understanding the Difference
One of the most confusing aspects of dryer connections is the difference between 3-prong and 4-prong plugs and outlets.
Older homes typically used 3-prong connections, while newer homes are equipped with 4-prong connections.
The Evolution of Dryer Plug Configurations
The difference lies in how the dryer is grounded.
-
3-Prong Connections: In a 3-prong system, the neutral wire is also used as the grounding wire.
-
4-Prong Connections: The 4-prong system separates the neutral and grounding wires, providing a dedicated path for stray electrical current to return to the ground, reducing the risk of electrical shock.
Safety Implications
The 4-prong system is considered safer and is now required by most electrical codes for new installations.
If you have an older home with a 3-prong outlet and are replacing your dryer with a newer model that has a 4-prong plug, you may need to convert the outlet to a 4-prong configuration or replace the dryer cord with a 3-prong cord (following the manufacturer’s instructions and local electrical codes).
Adhering to the National Electrical Code (NEC)
The National Electrical Code (NEC) sets the standards for safe electrical installations in the United States.
It’s essential to adhere to the NEC guidelines when dealing with dryer connections to ensure the safety of your home and family.
Why the NEC Matters
The NEC covers various aspects of dryer connections, including:
-
Wiring size and type.
-
Proper grounding techniques.
-
Outlet and plug configurations.
-
Circuit breaker ratings.
Consulting a Professional
Familiarizing yourself with the NEC guidelines can help you understand the principles behind safe electrical practices.
However, it’s always best to consult with a qualified electrician to ensure that your dryer connection complies with all applicable codes and regulations.
One of the most confusing aspects of dryer connections is the transition from 3-prong to 4-prong systems, but equally important is being able to discern the signs of a problematic dryer connection before it escalates into a dangerous situation. Beyond simply ensuring the correct plug type, recognizing the subtle indicators of common connection issues is key to preventing appliance damage and potential electrical hazards.
Identifying Common Dryer Plug Connection Issues
A seemingly minor issue with your dryer plug connection can quickly turn into a significant problem, posing risks to your appliance and even your home. Understanding the common issues, their causes, and the symptoms they present is the first step toward ensuring a safe and efficient laundry experience.
Loose Connections: The Silent Threat
Loose connections are a prevalent and often overlooked issue with dryer plugs. Over time, the screws holding the wires in place can loosen due to vibrations, repeated plugging and unplugging, or simply age.
This loosening creates resistance in the electrical circuit. Resistance generates heat, and excessive heat is a recipe for disaster.
Signs of a Loose Connection
Identifying a loose connection early can prevent more serious problems. Be alert for the following signs:
-
Burning Smell: This is often the first and most alarming sign. A burning smell near the dryer plug or outlet indicates that the wires are overheating and the insulation may be melting. Immediately disconnect the dryer and investigate.
-
Discoloration: Look for discoloration or scorching on the plug itself, the outlet, or the surrounding wall. This is a clear indication of excessive heat buildup.
-
Flickering Lights: Although less direct, flickering lights in the same circuit as the dryer can suggest voltage fluctuations caused by a loose connection.
Damaged Dryer Plug or Dryer Outlet: Obvious and Insidious
Physical damage to the dryer plug or outlet is often easy to spot, but sometimes the damage is more subtle and requires a closer inspection.
Types of Damage
-
Physical Damage: Check for cracks, chips, or broken prongs on the plug or outlet. Any visible damage compromises the connection and should be addressed immediately.
-
Corrosion: Moisture and dust can lead to corrosion on the metal contacts of the plug and outlet. Corrosion increases resistance and can cause the same overheating issues as loose connections. Look for a greenish or whitish buildup on the metal parts.
Overloaded Circuit Breaker: A Symptom of a Larger Problem
An overloaded circuit breaker, while not directly a problem with the plug connection itself, can be a sign of issues related to the dryer’s electrical demands and how they interact with your home’s wiring.
When the dryer draws more current than the circuit is designed to handle, the circuit breaker trips, cutting off power to prevent overheating and potential fire.
How Overloading Affects the Dryer Plug Connection
Repeatedly overloading the circuit can put stress on the entire electrical system, including the dryer plug connection. This repeated stress can degrade the wiring and connections over time, leading to loose connections or other problems.
Symptoms of an Overloaded Circuit
- Frequent Tripping of the Circuit Breaker: If the circuit breaker for your dryer trips frequently, especially when the dryer is running, it’s a strong indication of an overloaded circuit. Don’t simply reset the breaker repeatedly without investigating the cause.
Improper Grounding: A Critical Safety Issue
Grounding provides a safe path for stray electrical current to return to the electrical panel, preventing electric shock. Proper grounding is paramount for safety.
Problems Associated with Poor Grounding
-
Increased Risk of Electric Shock: Without proper grounding, a fault in the dryer could cause the metal chassis to become energized, posing a serious shock hazard.
-
Appliance Damage: Improper grounding can also damage the dryer’s internal components.
It’s vital to understand these common dryer plug connection issues. By recognizing the signs and symptoms, you can take proactive steps to address the problem before it escalates into a dangerous situation.
Discerning the difference between a simple fix and a situation best left to a professional is paramount when dealing with electrical issues. Armed with the knowledge of potential problems, you can now explore some troubleshooting steps and safe DIY fixes for minor dryer plug connection issues, always remembering that safety is the top priority.
Troubleshooting and Safe DIY Fixes
When your dryer is acting up, the problem might stem from a simple connection issue.
Before diving into any fixes, it’s crucial to take the necessary precautions to protect yourself from electrical shock.
Remember, when in doubt, always consult a qualified electrician.
Safety First: The Golden Rule of Electrical Work
Safety should always be your primary concern when dealing with electrical components.
Before you even think about touching anything, adhere to these critical safety measures:
-
Cut the Power: Locate the circuit breaker that controls the dryer’s electrical circuit within your electrical panel. Flip the breaker to the "off" position. This will de-energize the circuit, minimizing the risk of electrical shock.
-
Verify Power is Off: Never assume the power is off simply because you flipped the breaker. Use a voltage tester to confirm that there is no electricity flowing to the dryer plug or outlet. Place one probe of the tester on a known ground (like a metal pipe) and the other on each terminal of the outlet. If the tester indicates voltage, double-check that you’ve turned off the correct breaker.
Addressing Loose Connections: A Common Culprit
Loose connections are a frequent cause of dryer plug problems.
Luckily, they are often easy to resolve with some careful attention.
-
Visual Inspection is Key: Carefully examine both the dryer plug and the dryer outlet for any signs of damage, such as cracks, burns, or corrosion. If you spot any significant damage, do not attempt to repair it yourself. Proceed to the section about replacement or call a qualified electrician.
-
Tightening the Screws: If the plug and outlet appear to be in good condition, use a screwdriver to carefully tighten the screws that secure the wires to the terminals. Make sure the wires are making solid contact with the terminals, but avoid over-tightening the screws, as this could strip the threads or damage the components.
Replacing a Damaged Dryer Plug or Outlet: A Step-by-Step Guide
If visual inspection reveals damage to either the plug or outlet, replacement becomes necessary. Here’s how to do it safely:
-
Power Down: As always, start by turning off the circuit breaker and verifying the power is off with a voltage tester. Never skip this step.
-
Remove the Old Component: Carefully unscrew the old dryer plug or dryer outlet from the wall or cord. Note how the wires are connected to the terminals. Taking a photo can be helpful for re-wiring.
-
Connect the Wires: Connect the wires to the new dryer plug or dryer outlet, matching the wiring configuration of the old component. Typically, black and red wires are for power, the white wire is neutral, and the bare copper or green wire is for ground. Ensure that each wire is securely fastened to its terminal.
-
Mount the New Component: Secure the new dryer plug or dryer outlet to the wall or cord.
-
Restore Power: Turn the circuit breaker back on and test the dryer to ensure it is working properly.
- Matching the Type: When replacing a dryer plug or dryer outlet, it is absolutely critical to match the replacement with the correct type (3-prong or 4-prong). Using the wrong type can create a dangerous electrical hazard.
Dealing with a Tripped Circuit Breaker: Understanding the Cause
A circuit breaker that trips frequently when the dryer is in use suggests an overloaded circuit or a fault within the dryer itself.
-
Identifying a Tripped Breaker: A tripped circuit breaker will usually be in the "off" position or in a middle position between "on" and "off."
-
Resetting the Breaker: To reset a tripped circuit breaker, first, push the breaker handle completely to the "off" position. Then, flip it to the "on" position.
-
Frequent Tripping: If the circuit breaker trips repeatedly, even after resetting it, do not continue to reset it. This is a sign of a more serious problem, such as an overloaded circuit or a faulty dryer component. In this case, you should consult a qualified electrician to diagnose and repair the issue.
Using a Multimeter for Diagnosis: Unveiling Hidden Issues
A multimeter is a valuable tool for diagnosing electrical problems, allowing you to check voltage and continuity.
-
Checking Voltage: To check the voltage at the dryer outlet, set the multimeter to the appropriate AC voltage range (typically 250V or higher). Place the probes of the multimeter into the slots of the outlet. You should read approximately 240 volts. If you read significantly lower voltage, it indicates a problem with the electrical supply.
-
Testing Continuity: Continuity testing verifies that an electrical path is complete. To check continuity, disconnect the dryer and set the multimeter to the continuity setting (often indicated by a diode symbol or a speaker icon). Then, test the continuity of the wiring and connections.
Discerning the difference between a simple fix and a situation best left to a professional is paramount when dealing with electrical issues. Armed with the knowledge of potential problems, you can now explore some troubleshooting steps and safe DIY fixes for minor dryer plug connection issues, always remembering that safety is the top priority.
Knowing When to Call a Qualified Electrician
While some dryer plug connection issues can be safely addressed with DIY solutions, it’s crucial to recognize when a problem exceeds your comfort level or expertise. Electricity is a powerful force, and mishandling it can lead to serious injury, fire, or even death. Knowing when to call a qualified electrician isn’t about admitting defeat; it’s about prioritizing safety and ensuring the job is done correctly.
The Limits of DIY: Recognizing Your Comfort Zone
Before undertaking any electrical repair, honestly assess your skill level and knowledge. Are you truly comfortable working with electricity, even after taking all the necessary safety precautions? If the thought of touching wires makes you uneasy, or if you’re unsure about any step in the repair process, it’s best to err on the side of caution.
Sometimes, recognizing what you don’t know is the most valuable skill of all. An electrician has years of training and experience, enabling them to diagnose and repair electrical issues safely and effectively.
Situations Demanding Professional Intervention
Several specific scenarios warrant an immediate call to a qualified electrician. Ignoring these warning signs can have dire consequences.
Damaged Wiring: A Red Flag
If you discover damaged, frayed, or exposed wiring anywhere near the dryer plug or outlet, do not attempt any repairs yourself. Damaged wiring poses a significant risk of electrical shock and fire. A professional electrician has the tools and expertise to safely replace or repair the damaged wires, ensuring a secure and code-compliant connection.
Signs of Arcing: A Critical Hazard
Arcing is a dangerous electrical phenomenon that occurs when electricity jumps between two conductors. It often manifests as:
- A buzzing or crackling sound.
- A burning smell.
- Visible sparks around the dryer plug or outlet.
If you suspect arcing, immediately turn off the circuit breaker and call an electrician. Arcing can quickly escalate into a fire hazard and requires immediate professional attention.
Recurring Circuit Breaker Trips: A Symptom of a Larger Problem
While an occasional tripped circuit breaker might indicate a simple overload, frequent tripping suggests a more serious underlying problem. This could be caused by:
- A short circuit.
- Faulty wiring.
- An improperly sized circuit breaker.
Repeatedly resetting a circuit breaker without addressing the root cause is dangerous. An electrician can diagnose the problem and implement a safe and lasting solution.
Unfamiliar Territory: When in Doubt, Call a Pro
Ultimately, if you encounter any electrical issue that you don’t fully understand or feel comfortable handling, call a qualified electrician. It’s always better to be safe than sorry.
A professional electrician can provide peace of mind, knowing that your dryer plug connection is safe, reliable, and up to code. The cost of a professional repair is a small price to pay for the safety and well-being of your home and family.
Knowing When to Call a Qualified Electrician
Discerning the difference between a simple fix and a situation best left to a professional is paramount when dealing with electrical issues. Armed with the knowledge of potential problems, you can now explore some troubleshooting steps and safe DIY fixes for minor dryer plug connection issues, always remembering that safety is the top priority.
Preventative Measures and Ongoing Maintenance
The best way to address dryer plug connection problems is to prevent them from happening in the first place. A little proactive care goes a long way in ensuring the safety and longevity of your dryer and electrical system. Simple habits of inspection and maintenance can significantly reduce the risk of electrical issues and the need for costly repairs down the road.
The Power of Regular Inspections
Regular inspection of your dryer plug and outlet is arguably the most effective preventative measure. Make it a habit to visually examine these components at least every few months, or even monthly if your dryer sees heavy use. Look for the following warning signs:
- Cracks or chips in the plug or outlet housing.
- Discoloration or burn marks, indicating overheating.
- Loose or wobbly prongs on the plug.
- Dust and lint accumulation inside the outlet.
Any of these issues, however minor they may seem, should be addressed promptly. Even a small crack can worsen over time, creating a pathway for moisture and increasing the risk of electrical shock. A loose prong can lead to arcing and overheating, potentially causing a fire.
If you spot any of these warning signs, turn off the circuit breaker immediately and assess the situation carefully. Depending on the severity of the damage, you may be able to tighten a loose connection or clean the outlet. However, if you’re unsure about the repair or if the damage is significant, it’s always best to call a qualified electrician.
Avoiding Circuit Overload
Dryers, with their high power demands, can easily overload a circuit if not used carefully. An overloaded circuit is not only a safety hazard but can also damage your dryer and other appliances connected to the same circuit. Here are a few key things to keep in mind:
- Dedicated Circuit: Ensure your dryer is on a dedicated circuit, meaning it’s the only appliance drawing power from that circuit.
- Avoid Simultaneous Use: Avoid running other high-power appliances (like a microwave or vacuum cleaner) on the same circuit while the dryer is operating.
- Heed Warning Signs: Pay attention to signs of an overloaded circuit, such as flickering lights or the circuit breaker tripping frequently.
If you notice these signs, immediately reduce the load on the circuit by unplugging unnecessary appliances. If the problem persists, consult with an electrician to determine if you need to upgrade your electrical panel or wiring.
Combating Lint Buildup
Lint is a silent but deadly enemy of dryer safety. It’s highly flammable, and when it accumulates around the dryer plug and outlet, it creates a significant fire hazard.
- Regular Cleaning: Make it a habit to clean the area around your dryer regularly, using a vacuum cleaner or a damp cloth to remove any accumulated lint.
- Behind the Dryer: Don’t forget to clean behind the dryer, where lint tends to collect unnoticed.
- Lint Trap: Clean the dryer’s lint trap after every load. A clogged lint trap not only reduces drying efficiency but also increases the risk of lint buildup around the electrical connections.
By diligently following these preventative measures, you can significantly reduce the risk of dryer plug connection problems and ensure the safety and efficiency of your appliance.
Dryer Plug Connection Problems: Your Questions Answered
Having dryer plug connection issues? Here are some common questions and their solutions to help you troubleshoot.
Why is my dryer not getting power even though it’s plugged in?
A loose or damaged dryer plug connection is a frequent culprit. Check if the plug is fully inserted into the outlet and if the prongs are clean and undamaged. Also, inspect the outlet itself for any signs of burning or damage.
What are the signs of a bad dryer plug connection?
Look for visual cues like scorching or melting around the dryer plug or outlet. You might also notice a burning smell, flickering lights when the dryer is running, or the dryer stopping mid-cycle. These indicate a dangerous and potentially fire-hazardous dryer plug connection.
Can I replace the dryer plug myself?
While it’s technically possible to replace a dryer plug yourself, it involves working with electricity and requires knowledge of wiring. If you’re not comfortable or experienced, it’s always best to hire a qualified electrician to ensure a safe and proper dryer plug connection.
What if the dryer outlet is the problem, not the plug?
If you suspect the outlet is the problem, carefully inspect it for any signs of damage, like cracks or discoloration. Try plugging another appliance into the outlet to see if it works. If not, or if you see any damage, consult an electrician to replace the faulty outlet for a safe dryer plug connection.
Alright, that’s the lowdown on dealing with dryer plug connection headaches! Hopefully, these tips helped you troubleshoot like a pro. Stay safe, and happy drying!