Understanding the crucial role of a replacement window flange in weatherproofing is paramount for any homeowner undertaking a DIY project. Improperly installed flanges can lead to significant water damage, necessitating costly repairs later on. The National Fenestration Rating Council (NFRC) sets standards for window performance, and understanding their guidelines will help ensure your replacement window flange installation meets building codes. Tools like a high-quality caulk gun are essential for creating a watertight seal. Consider consulting with local hardware stores which often offer workshops that explain the best practices when choosing the right replacement window flange.
DIY Window Flange Replacement: A Step-by-Step Guide
Replacing a damaged window flange yourself can save you significant money and time compared to hiring a professional. This guide provides a clear, structured approach to help you successfully complete your own replacement window flange project.
Understanding Window Flanges and Their Importance
A window flange is the outer perimeter of a window frame, designed to integrate seamlessly with the exterior wall sheathing of your house. Think of it as a "picture frame" around the window that extends outward. Its primary purpose is to create a watertight seal, preventing water from seeping into your walls and causing rot, mold, or structural damage. A properly installed flange directs water away from the window opening and down the exterior of your home.
Why Replacement Window Flange is Necessary
Over time, window flanges can become damaged due to weather exposure, physical impact, or poor initial installation. Cracks, warping, or separation from the window frame compromises the weather seal and allows water infiltration. Symptoms of a failing flange include:
- Water stains or discoloration around the window frame (interior or exterior).
- Drafts near the window.
- Visible damage to the flange material.
- Soft or spongy wood around the window opening (a sign of rot).
If you observe any of these, it’s crucial to consider a replacement window flange.
Preparing for Your DIY Project
Before you begin, thorough preparation is key to a successful outcome.
Gathering Your Tools and Materials
You’ll need the following:
- New Window Flange (Exact Match): The most important item! Order a replacement flange that matches the original window’s make, model, and dimensions. Contact the window manufacturer if needed.
- Safety Glasses & Gloves: Protection is paramount.
- Utility Knife: For cutting caulk and sealant.
- Pry Bar & Putty Knife: For carefully removing the old flange.
- Measuring Tape: Essential for accurate measurements.
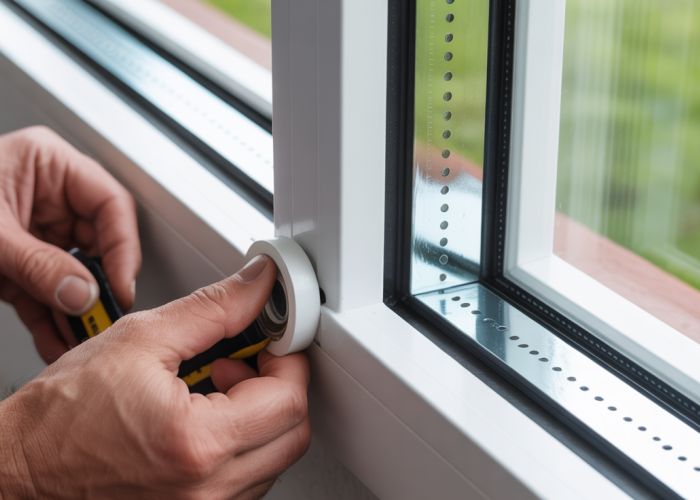
- Caulk Gun & Exterior-Grade Caulk: Select a high-quality, paintable caulk.
- Drill & Screwdriver: For removing and installing screws.
- Exterior Wood Screws (if needed): To secure the new flange.
- Painter’s Tape: To protect surrounding surfaces and ensure clean caulk lines.
- Clean Rags or Sponges: For cleaning surfaces.
- Optional: Waterproof Flashing Tape: For additional weather protection.
Assessing the Window and Surrounding Area
Carefully inspect the window and surrounding wall for any existing damage. Check for:
- Rot: Especially in the wall sheathing or framing around the window. If significant rot is present, you might need to replace more than just the flange.
- Existing Sealant: Note how the old flange was sealed to the window and wall. This helps you replicate the process correctly.
- Structural Integrity: Ensure the window is securely installed in the opening. A loose window will make flange replacement difficult and ineffective.
Safety Precautions
- Wear safety glasses and gloves at all times.
- Work in good weather conditions. Avoid working in rain or high winds.
- If working at heights, use a sturdy ladder and follow ladder safety guidelines.
- If you are uncomfortable with any part of the process, consult a professional.
Step-by-Step Flange Replacement
Now, let’s get into the replacement process.
1. Removing the Old Flange
This step requires patience and care to avoid damaging the window or surrounding wall.
- Score the Caulk: Use a utility knife to carefully score along the edges of the flange where it meets the window frame and the wall. This helps to break the seal without pulling off paint.
- Pry Carefully: Gently insert a putty knife or pry bar between the flange and the window/wall. Work slowly and carefully, applying pressure gradually to avoid splintering the wood or damaging the window.
- Remove Fasteners: If the flange is secured with screws or nails, remove them.
- Clean the Area: Once the old flange is removed, thoroughly clean the window frame and the surrounding wall area. Remove any debris, old caulk, or sealant. A clean surface is crucial for proper adhesion of the new flange.
2. Installing the New Replacement Window Flange
This is where precision matters.
- Dry Fit: Before applying any sealant, test fit the new flange to ensure it aligns properly with the window frame. Make any necessary adjustments.
- Apply Caulk: Apply a generous bead of exterior-grade caulk to the back of the flange where it will contact the window frame. Also, apply caulk to the area where the flange will contact the exterior wall.
- Position and Secure: Carefully position the new flange onto the window frame, aligning it with the original markings (if any). Press firmly to ensure good contact with the caulk. Secure the flange with screws (if applicable) according to the manufacturer’s instructions.
- Apply Flashing Tape (Optional): For enhanced weather protection, apply waterproof flashing tape around the perimeter of the flange where it meets the wall. Overlap the tape to create a watertight seal.
- Caulk the Perimeter: Apply a bead of caulk around the entire perimeter of the flange, where it meets both the window frame and the wall. Smooth the caulk with your finger or a caulk smoothing tool for a professional finish.
- Remove Excess Caulk and Tape: Wipe away any excess caulk or flashing tape residue with a clean rag.
- Allow Time to Cure: Allow the caulk and any adhesives used to fully cure as directed by the manufacturer.
3. Finishing Touches
These details elevate the project from merely functional to aesthetically pleasing.
- Paint the Flange (if desired): If you want to paint the new flange to match your exterior trim, use an exterior-grade paint and follow the paint manufacturer’s instructions. Make sure the caulk is fully cured before painting.
- Inspect the Seal: After the caulk has cured, inspect the seal to ensure there are no gaps or cracks. Repair any imperfections with additional caulk.
Troubleshooting Common Issues
Even with careful preparation, some challenges may arise.
| Issue | Possible Cause | Solution |
|---|---|---|
| Flange doesn’t fit properly | Incorrect flange size; warped or damaged window frame | Double-check the flange dimensions; address any window frame damage before installing. |
| Caulk not adhering | Dirty surface; incorrect caulk type | Thoroughly clean the surface; use exterior-grade caulk designed for the materials involved. |
| Leaks after installation | Inadequate caulking; damaged flashing | Re-caulk any suspect areas; inspect and repair or replace flashing tape. |
| Screws stripping | Over-tightening; soft wood | Use screws designed for wood; pre-drill pilot holes; use larger diameter screws if necessary |
FAQs About DIY Window Flange Replacement
Here are some frequently asked questions about replacing your window flange yourself. Hopefully these answers will help guide you through the process and save you money!
What exactly is a window flange and why does it need replacing?
The window flange is the outer lip or fin around a window frame. It’s designed to create a watertight seal between the window and the wall sheathing. Over time, exposure to the elements can cause the flange to crack, warp, or corrode, leading to leaks and potential water damage. Replacing a damaged window flange helps prevent further issues.
Can I really save money doing this myself versus hiring a professional?
Absolutely! Labor costs are a significant part of professional window repairs. By tackling the window flange replacement as a DIY project, you only pay for the cost of the replacement window flange and necessary tools/materials, saving you potentially hundreds of dollars.
What tools and materials will I actually need for a window flange replacement?
You’ll generally need a utility knife, pry bar or scraper, sealant or flashing tape compatible with your siding, a caulk gun (if using caulk), a replacement window flange, measuring tape, and safety glasses. Depending on the specific installation, you may also need a drill, screws, and shims.
How do I know if my window flange needs replacing, or if the leak is from somewhere else?
Signs of a failing window flange include visible cracks, warping, or corrosion around the window perimeter, water stains inside the wall near the window, or drafts coming from around the window frame. Before replacing the window flange, check the surrounding siding, roofing, and caulking for potential issues as the leak source.
Alright, you’ve got the knowledge to tackle that replacement window flange project! Go get ’em and remember, a little prep goes a long way. Happy DIY-ing!