A well-crafted mailbox post significantly enhances curb appeal; furthermore, simple carpentry techniques empower homeowners to personalize their entrance. Mailbox post diy projects offer substantial cost savings compared to purchasing pre-made options from stores like Home Depot. Many online tutorials demonstrate how to use readily available pressure-treated lumber to construct a durable and attractive support, showcasing the creativity possible with even basic tools.
Designing the Perfect "DIY Mailbox Post" Article Layout
Let’s plan the best way to present information about building a stylish and affordable mailbox post, focusing on the keyword "mailbox post diy." The goal is to provide readers with clear, easy-to-follow instructions and inspire them to tackle this project themselves.
1. Introduction: Hooking the Reader & Setting Expectations
-
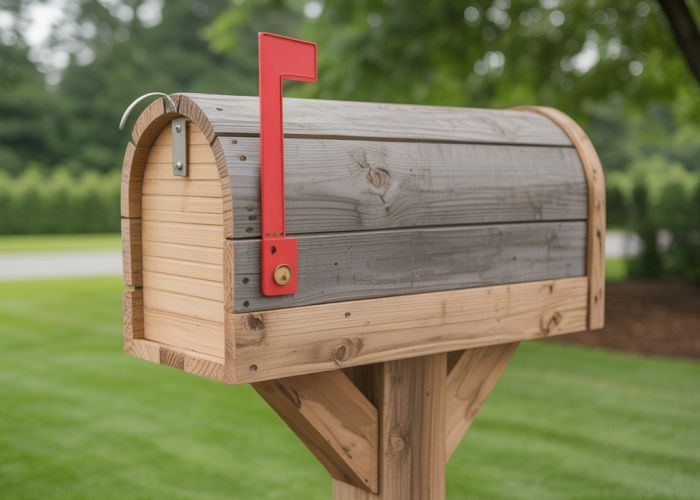
Start with an engaging image: A visually appealing photo of a beautifully finished DIY mailbox post will immediately grab attention.
-
Intriguing Opening Paragraph(s): Paint a picture. Briefly describe the impact a well-crafted mailbox post can have on curb appeal and overall home aesthetics. Highlight the advantages of DIY: customization, cost savings, and the satisfaction of creating something with your own hands.
-
Clearly State the Article’s Purpose: Tell the reader exactly what they’ll learn in the article. For example: "In this guide, we’ll walk you through the steps to build a stunning and sturdy mailbox post that won’t break the bank." Explicitly mention "mailbox post diy" in the introduction.
-
Brief Overview of the Process: Briefly outline the steps involved in the project to give readers a roadmap.
2. Planning & Preparation: Setting the Stage for Success
2.1 Choosing the Right Design: Inspiration & Considerations
- Gallery of Inspiration: Include several photos of different mailbox post styles (e.g., classic, modern, rustic).
- Design Factors: Discuss factors like:
- Your Home’s Style: How to choose a design that complements the existing architecture.
- Material Options: Wood, metal, composite – pros and cons of each. Consider budget, durability, and aesthetic preferences.
- Size & Dimensions: Complying with postal regulations and ensuring stability. A simple graphic or diagram showing typical dimensions can be helpful.
- Skill Level: Matching the project’s complexity to the reader’s experience.
2.2 Materials & Tools: Gathering Your Supplies
-
Comprehensive List: Provide a detailed, itemized list of all necessary materials. Include estimated costs to emphasize the "cheap" aspect. For example:
Material Quantity Estimated Cost 4×4 Pressure-Treated Post 8 ft $20 2×4 Lumber 6 ft $8 Concrete Mix 1 bag $6 Gravel 1/2 bag $4 Wood Screws 1 box $5 Exterior Paint/Stain 1 quart $15 -
Tool List: Detail every tool required. Include:
- Measuring tape
- Saw (circular saw, hand saw, or miter saw)
- Drill/Driver
- Level
- Shovel
- Post Hole Digger (optional, but highly recommended)
- Safety Glasses
- Gloves
2.3 Safety First: Important Precautions
- General Safety Advice: Emphasize the importance of wearing safety glasses and gloves throughout the project.
- Tool-Specific Safety: Briefly mention safe usage practices for each tool (e.g., unplugging the saw before changing blades).
- Working with Concrete: Handling concrete safely.
3. Step-by-Step Instructions: Building Your Mailbox Post
3.1 Digging the Hole: Laying the Foundation
- Accurate Measurements: Explain how to determine the correct depth and width of the hole based on local frost lines and the post’s dimensions.
- Clear Instructions: Step-by-step guide to digging the hole, ensuring it’s plumb and level. Include visual aids (diagrams or photos).
- Gravel Base: Importance of a gravel base for drainage.
3.2 Setting the Post: Ensuring Stability
- Centering the Post: Techniques for accurately centering the post in the hole.
- Mixing Concrete: Clear instructions on how to mix the concrete to the correct consistency.
- Pouring Concrete: How to properly pour the concrete around the post.
- Plumbing the Post: Using a level to ensure the post is perfectly vertical.
- Bracing: How to brace the post while the concrete cures.
- Curing Time: Emphasize the importance of allowing the concrete to fully cure before proceeding.
3.3 Building the Mailbox Support: Adding the Details
- Cutting the Lumber: Provide specific measurements and instructions for cutting the 2×4 lumber to the required lengths.
- Assembling the Support: Step-by-step guide to assembling the mailbox support, using wood screws or nails.
- Attaching the Support to the Post: How to securely attach the support to the main post, ensuring it’s level and stable.
- Reinforcing the Structure: Optional steps for adding extra support or decorative elements.
3.4 Finishing Touches: Adding Style & Protection
- Sanding: Preparing the wood surface for painting or staining.
- Painting or Staining: Choosing the right paint or stain and applying it correctly.
- Sealing: Adding a sealant for extra protection against the elements.
- Attaching the Mailbox: Instructions on how to securely attach the mailbox to the support.
- Adding Decorative Elements: Ideas for adding personal touches, such as address numbers, decorative trim, or plants.
4. Troubleshooting: Addressing Common Issues
- Post is not Level: Solutions for correcting a leaning post.
- Concrete Cracking: Tips for preventing concrete cracking.
- Mailbox Support is Wobbly: Troubleshooting a wobbly support.
- Wood Warping: How to prevent wood warping.
DIY Mailbox Post FAQs
Here are some frequently asked questions about building your own stylish and affordable mailbox post.
What tools will I absolutely need for this mailbox post DIY project?
You’ll need a post hole digger, a level, a saw (circular or hand saw), a drill or screwdriver, and measuring tape. These are essential for creating a stable and aesthetically pleasing mailbox post diy.
What type of wood is recommended for a long-lasting mailbox post?
Pressure-treated lumber is highly recommended because it resists rot and insect damage. This ensures your mailbox post diy stands up to the elements for years to come. Cedar is a good alternative, though it’s often more expensive.
How deep should I dig the hole for the mailbox post?
Ideally, the hole should be at least 24 inches deep, and even deeper in colder climates where the ground freezes. This helps to anchor the mailbox post securely and prevent it from leaning or shifting. Ensure proper drainage to protect your mailbox post diy project.
Can I customize the design of the mailbox post?
Absolutely! This tutorial provides a basic framework, but you can easily customize it with different paint colors, decorative trim, or even add a planter box. The sky is the limit when it comes to creating a unique mailbox post diy that reflects your style.
So there you have it! Building your own mailbox post diy project isn’t as daunting as it looks, right? Now go get your hands dirty and create something awesome!