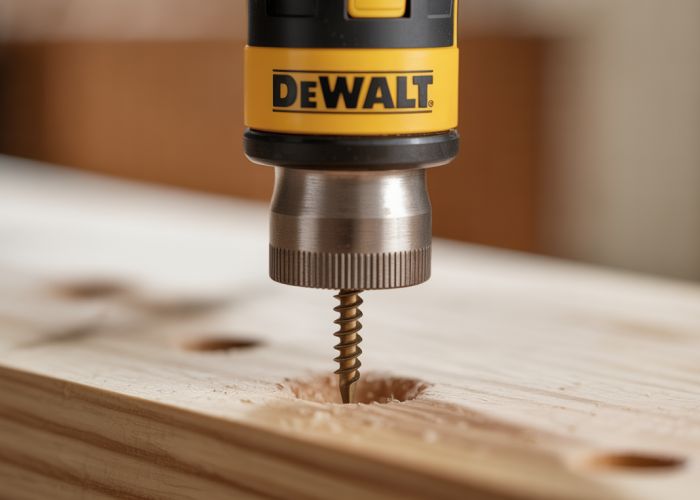
Effectively removing damaged fasteners frequently necessitates employing a specialized tool, and the dewalt screw extractor provides a robust solution. Mechanics widely acknowledge its utility across diverse applications. Selecting the appropriate size of dewalt screw extractor is critical for optimal performance, directly influencing the success of the extraction process. DeWalt, a reputable manufacturer, offers these extractors, known for their durability and precision. DIY enthusiasts also find them to be indispensable for home repair projects, contributing to efficient and professional results.
DeWalt Screw Extractor: Mastering Its Use
This guide will provide a detailed breakdown of how to effectively use a DeWalt screw extractor to remove damaged screws. We will cover the necessary preparation, the steps involved, and important safety precautions. The focus will be on achieving successful removal without further damaging the workpiece or the tool.
Understanding the DeWalt Screw Extractor
Before attempting to use a DeWalt screw extractor, it’s crucial to understand its purpose and components. These tools are designed to remove screws with stripped heads, broken shafts, or otherwise compromised integrity that prevents standard removal methods.
Components of a DeWalt Screw Extractor Set
A typical DeWalt screw extractor set usually includes:
- Drill Bits: Used to create a pilot hole in the damaged screw. These are often standard drill bits, but some sets might include specialized bits with a centering tip.
- Extractors: These are hardened steel tools with a reverse thread or fluted design. They grip the inside of the pilot hole and, when turned counter-clockwise, extract the screw. DeWalt screw extractors come in various sizes to accommodate different screw diameters.
- Drill Chuck Adapter (Optional): May be included to ensure compatibility with different drill chuck sizes.
- Case: A container for storage and organization.
How DeWalt Screw Extractors Work
The fundamental principle behind DeWalt screw extractors involves creating a secure grip inside the damaged screw. The process typically involves:
- Drilling a pilot hole into the center of the screw head.
- Inserting the appropriately sized extractor into the pilot hole.
- Applying pressure and turning the extractor counter-clockwise. The reverse thread or flutes will "bite" into the screw, and continued turning will gradually extract the screw.
Preparation is Key
Proper preparation is essential for successful screw extraction and to prevent further damage or injury.
Gather Your Tools and Materials
Before you begin, ensure you have the following:
- DeWalt screw extractor set (with appropriate size for the screw you’re removing)
- Drill with adjustable speed and torque settings
- Safety glasses
- Gloves (optional but recommended)
- Center punch (optional but helpful for centering the drill bit)
- Hammer (if using a center punch)
- Lubricant (e.g., penetrating oil)
- Clean rag
Assess the Damage
Carefully examine the damaged screw. Consider:
- Size: Select the appropriately sized drill bit and extractor.
- Material: The material of the screw and the surrounding workpiece can impact the extraction process. Harder materials may require more pressure and slower speeds.
- Corrosion: Heavily corroded screws may require more effort and lubricant.
Setting Up Your Work Area
- Ensure adequate lighting.
- Secure the workpiece to prevent movement during drilling and extraction. A vise or clamps may be necessary.
- Clear the area of any obstructions.
Step-by-Step Guide to Using a DeWalt Screw Extractor
This section provides a detailed, step-by-step guide to using a DeWalt screw extractor.
-
Center the Drill Bit: If the screw head is uneven or broken, use a center punch and hammer to create a small indentation in the center. This will prevent the drill bit from wandering.
-
Drill a Pilot Hole: Insert the appropriate-sized drill bit into your drill. Start slowly and apply consistent pressure. Drill straight and deep enough for the screw extractor to grip effectively. A good rule of thumb is to drill at least half the depth of the extractor. Avoid drilling all the way through the screw.
- Tip: Use a lower drill speed to prevent overheating and damaging the drill bit.
-
Insert the Screw Extractor: Place the correct-sized DeWalt screw extractor into the pilot hole. You may need to tap it gently with a hammer to ensure it is seated securely. Some extractors are designed to self-tap as they are turned.
-
Extract the Screw: Using the drill in reverse (counter-clockwise) at a very slow speed, apply firm and consistent pressure. The extractor’s reverse threads should bite into the screw. Continue turning slowly and applying pressure until the screw begins to rotate and back out of the hole.
- Important: Excessive speed can cause the extractor to break or strip the pilot hole.
-
Clean Up: Once the screw is removed, clean the area and inspect the threads in the workpiece. If the threads are damaged, you may need to tap them to restore them.
Troubleshooting Common Problems
Even with proper technique, you might encounter problems during screw extraction.
| Problem | Possible Cause | Solution |
|---|---|---|
| Extractor not gripping | Pilot hole too shallow or extractor too small | Drill deeper pilot hole or use a larger extractor. |
| Extractor breaking | Excessive pressure or speed | Reduce pressure and speed. Ensure the pilot hole is centered and straight. |
| Screw not budging | Corrosion or thread lock | Apply penetrating oil and let it soak. Gently tap the screw head before attempting extraction again. |
| Extractor stripping the pilot hole | Excessive pressure or speed; soft screw | Reduce pressure and speed. Consider using a different type of extractor (e.g., a fluted extractor). |
Safety Precautions
- Always wear safety glasses to protect your eyes from flying debris.
- Use gloves to improve grip and protect your hands.
- Do not force the extractor. If it doesn’t grip, reassess the situation and consider a different approach.
- Be aware of the surrounding area and ensure it’s clear of obstructions.
- Use a drill with adjustable speed and torque settings to maintain control and prevent damage.
- If the screw is deeply embedded or heavily corroded, consider seeking professional help. A machinist or experienced repair technician may have specialized tools or techniques.
DeWalt Screw Extractor: Frequently Asked Questions
Here are some common questions and answers about using a DeWalt screw extractor to remove stripped screws.
What sizes of DeWalt screw extractors do I need?
The size of the DeWalt screw extractor you need depends on the screw size. DeWalt offers sets that include various sizes to handle most common screws. Refer to the screw extractor packaging for size guidelines.
Can I use a DeWalt screw extractor on hardened screws?
Yes, but with caution. Hardened screws can be more difficult. Apply consistent, even pressure and go slowly. Using a lubricant can also help the DeWalt screw extractor grip the screw better.
What drill speed should I use with a DeWalt screw extractor?
Always use a low speed. High speeds can damage both the screw extractor and the screw. Slow and steady wins the race when using a DeWalt screw extractor to remove stubborn screws.
How do I prevent damaging the surrounding material?
Center your drill bit accurately before using the DeWalt screw extractor. Avoid applying excessive force. If the screw refuses to budge, try applying penetrating oil and allowing it to soak before trying again. This will help protect the material around the screw.
So, you’re now armed with the knowledge to confidently tackle those stripped screws with your trusty dewalt screw extractor! Go forth and conquer those frustrating fasteners, and remember to always work safely. Happy extracting!