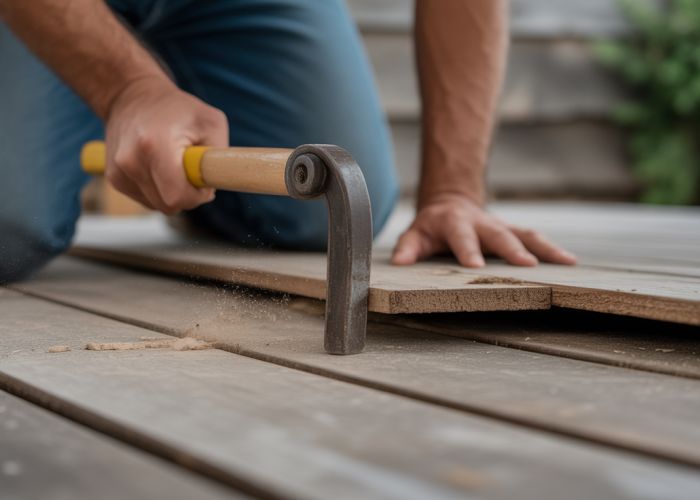
Effective deck board removal often starts with understanding the right techniques. Proper leverage, often achieved with a tool like the Deck Demon, significantly eases the process. The National Association of Home Builders offers resources related to deck construction and maintenance, including aspects of deck board removal. Understanding wood rot is also key, as this can greatly impact how easily boards detach. Therefore, knowledge of these elements ensures a safer and more efficient deck board removal process.
Deck Board Removal: Optimizing Your Article Layout
When creating an article focused on "deck board removal," a well-structured layout is key to providing clear and actionable information to the reader. This breakdown provides a blueprint for an engaging and effective article.
Introduction: Hook, Problem, and Promise
The introduction should immediately grab the reader’s attention, highlight the common challenges associated with deck board removal, and then promise a solution.
-
Hook: Start with a relatable scenario. For example, "Is your deck looking tired and in need of repair? Replacing those old boards is a great way to give it a new lease on life." Or, "Replacing damaged deck boards can seem daunting, but with the right approach, it’s a manageable DIY project."
-
Problem: Briefly explain the potential difficulties of deck board removal. Examples:
- Boards that are tightly secured or warped.
- Risk of damage to the underlying deck structure.
- Use of incorrect tools leading to frustration.
-
Promise: Clearly state what the article will provide: "This guide will walk you through the easiest steps for deck board removal and help you avoid common mistakes, ensuring a smooth and successful project." Emphasize the ease and accessibility of the process.
Preparing for Deck Board Removal: Tools and Safety
This section focuses on setting the stage for the actual removal process.
Essential Tools
A bulleted list outlining the necessary tools is ideal here. Include links to purchase these items if feasible.
- Pry Bar (specifically designed for deck boards if available)
- Hammer
- Drill/Impact Driver
- Screwdriver (both flathead and Phillips head)
- Safety Glasses
- Work Gloves
- Circular Saw (optional, for cutting damaged sections)
Prioritizing Safety
This subsection should emphasize safety precautions.
- Wear protective gear: Always wear safety glasses and work gloves to prevent injuries from splinters, flying debris, and sharp tools.
- Inspect the work area: Check for loose boards, protruding nails, and any potential hazards before starting.
- Be mindful of leverage: When using a pry bar, position yourself safely and maintain a stable stance.
- Disconnect power: If you’re using power tools, ensure they are properly grounded and disconnected when not in use.
Step-by-Step Guide: Removing Deck Boards
This is the core of the article, providing a detailed, instructional guide. Numbered lists work best for this.
-
Locate Fasteners: Identify all screws or nails securing the deck board to the joists.
- If fasteners are heavily corroded, consider using a penetrating oil to loosen them before attempting removal.
-
Remove Screws: Use a drill or impact driver with the appropriate bit to remove the screws.
- If screw heads are stripped, use a screw extractor tool to remove them.
-
Remove Nails: Use a nail puller or the claw of a hammer to remove nails.
- Place a piece of wood between the hammer and the deck joist to prevent damage.
-
Pry the Board (Carefully!): Position the pry bar between the deck board and the joist. Gently pry the board upwards. Work your way along the board, lifting it gradually.
- Use shims or small pieces of wood to maintain the gap as you pry, preventing the board from settling back down.
-
Cutting the Board (if necessary): If the board is severely damaged or stuck, you may need to cut it into smaller, more manageable sections using a circular saw.
- Set the saw depth to slightly less than the board’s thickness to avoid cutting into the joists.
- Make multiple cuts along the length of the board to divide it into smaller pieces.
-
Final Removal: Once the board is loose, carefully lift it away from the deck frame.
- Check for any remaining nails or screws in the joists and remove them.
Common Mistakes to Avoid
This section is crucial for preventing errors and ensuring a professional-looking result.
Mistake 1: Using the Wrong Tools
- Explanation: Using a regular crowbar instead of a deck-specific pry bar can damage the joists and make removal more difficult.
- Solution: Invest in a deck pry bar designed for the task. It provides better leverage and minimizes damage.
Mistake 2: Applying Too Much Force
- Explanation: Forcing the board off can splinter the wood and damage the underlying structure.
- Solution: Apply steady, controlled pressure with the pry bar. Work gradually along the board’s length.
Mistake 3: Neglecting Safety Precautions
- Explanation: Skipping safety glasses or gloves can lead to eye injuries or splinters.
- Solution: Always wear appropriate protective gear before starting any work.
Mistake 4: Damaging the Deck Joists
- Explanation: Careless prying or cutting can damage the deck joists, compromising the structural integrity of the deck.
- Solution: Use a protective barrier between the pry bar and the joists. Avoid cutting into the joists when using a circular saw.
Mistake 5: Not Removing All Fasteners
- Explanation: Leaving nails or screws in place can make removal difficult and potentially damage tools.
- Solution: Thoroughly inspect the board and joists for fasteners before attempting to pry the board loose.
After Removal: Preparing for Replacement
This section briefly addresses what comes after the deck board removal.
- Inspect the Joists: Check the joists for rot, damage, or decay. Replace any damaged joists before installing new deck boards.
- Clean the Area: Remove any debris, old nails, or screws from the work area.
- Consider Treatment: Apply a wood preservative or sealant to the joists to protect them from moisture and decay.
This layout provides a comprehensive framework for an article about "deck board removal," addressing key steps, potential pitfalls, and follow-up procedures in a clear and informative manner. Remember to incorporate visuals, such as photographs or diagrams, to further enhance the reader’s understanding.
Deck Board Removal FAQs
Here are some frequently asked questions about deck board removal, helping you do it right and avoid common pitfalls.
What’s the best tool for removing deck boards without damaging the frame?
A specialized deck board removal tool is highly recommended. These tools provide leverage and grip specifically designed for lifting boards without splintering them or harming the joists underneath. Using the right tool makes deck board removal much easier.
Can I reuse deck boards after removal?
Potentially, yes. However, the condition of the deck boards will determine their reusability. Inspect for rot, splitting, or warping. If the boards are still sound and you removed them carefully, they can be reused, provided they meet current building codes if used in structural application.
What if I can’t get the screws or nails out of a deck board?
If fasteners are stubborn, try using a screw extractor or a nail punch. For rusted screws, applying penetrating oil beforehand can help. As a last resort, you can cut around the fastener head with a multi-tool and then try removing the remaining shaft.
What’s the most common mistake people make during deck board removal?
One frequent mistake is applying too much force and splintering the deck boards, especially near the fasteners. Another is damaging the underlying deck framing by using improper tools or aggressive techniques. Take your time and be patient during deck board removal to prevent these issues.
So, there you have it! Deck board removal doesn’t have to be a nightmare. Just remember these tips, avoid the common mistakes, and you’ll be enjoying your refreshed deck in no time. Good luck with your deck board removal project!