Cutting metal roofing demands precision, so understanding proper techniques is crucial. The Metal Roofing Alliance provides comprehensive resources on best practices within the industry. Consider the gauge of your metal; thicker materials require specialized blades designed for cutting metal roofing. Furthermore, selecting the appropriate power tool, such as a nibbler or shears, greatly influences the outcome of the project. Finally, always prioritize safety by wearing the correct personal protective equipment, which reduces the risks involved in cutting metal roofing.
Metal roofing has surged in popularity, driven by its exceptional durability, longevity, and striking aesthetics. This roofing option presents a compelling alternative to traditional materials, promising decades of reliable protection and enhanced curb appeal.
For the ambitious DIY enthusiast, metal roofing offers an exciting opportunity to elevate their home’s value and resilience. However, a successful metal roofing project hinges on precision – and that precision starts with the cut.
Improperly cut metal panels can lead to a host of problems, including leaks, unsightly seams, and compromised structural integrity. A clean, accurate cut is essential for a weathertight seal and a professional-looking finish.
This guide is your comprehensive resource for mastering the art of cutting metal roofing. We will equip you with the knowledge and skills necessary to tackle your DIY project with confidence.
The Allure of Metal Roofing
Metal roofing’s appeal stems from a potent combination of practical and aesthetic advantages.
-
Durability: Metal roofs can withstand extreme weather conditions. They resist fire, insects, and rot, ensuring lasting protection.
-
Longevity: With proper installation and maintenance, a metal roof can last for 50 years or more. This makes it a worthwhile long-term investment.
-
Aesthetics: Metal roofing comes in various styles, colors, and finishes. It enhances the architectural character of any home.
The Cutting Edge: Why Precision Matters
The importance of precise cutting in metal roofing cannot be overstated. Accurate cuts are the foundation of a successful installation. They directly impact the roof’s performance and appearance.
-
Watertight Seal: Precise cuts ensure that panels fit together snugly. This prevents water infiltration and potential leaks.
-
Professional Finish: Clean, straight cuts contribute to a polished, professional look. They elevate the overall aesthetic of the roof.
-
Structural Integrity: Properly cut panels maintain the roof’s structural integrity. This ensures long-term stability and resistance to the elements.
Your DIY Metal Roofing Roadmap
This guide will navigate you through the essential aspects of cutting metal roofing for DIY projects. We’ll cover the following:
-
Tool Selection: We’ll explore various cutting tools. We’ll outline their pros and cons, empowering you to choose the best tool.
-
Safety First: We’ll emphasize the critical safety measures. You’ll learn how to protect yourself from potential hazards.
-
Cutting Techniques: We’ll provide step-by-step instructions. These will guide you through various cutting methods.
-
Expert Tips: We’ll share valuable tips and tricks. These will help you achieve professional-quality results.
Equipped with this knowledge, you’ll be well-prepared to tackle your DIY metal roofing project. You’ll be able to cut with confidence and achieve a beautiful, durable, and long-lasting roof.
Safety First: Your Shield Against Hazards
The allure of a DIY metal roofing project is undeniable. The satisfaction of enhancing your home’s value and resilience with your own hands is a powerful motivator. Yet, before you even think about making that first cut, a crucial aspect demands your undivided attention: safety.
Working with metal roofing and power tools is inherently risky. Underestimating these dangers can lead to severe injuries. Prioritizing safety isn’t just a recommendation; it’s an absolute necessity. It’s the foundation upon which a successful and injury-free project is built.
The Unwavering Importance of Safety
Metal roofing projects often involve sharp materials, heavy equipment, and power tools. Each of these elements presents a potential hazard. A lapse in concentration, a moment of carelessness, or a failure to use the proper safety gear can result in cuts, abrasions, eye injuries, or worse.
Complacency is your enemy. It’s easy to become comfortable and let your guard down. However, maintaining a vigilant focus on safety throughout the entire project is crucial. Remember, your well-being is paramount.
Personal Protective Equipment (PPE): Your First Line of Defense
Personal Protective Equipment, or PPE, forms your first line of defense against potential hazards. Donning the right gear is non-negotiable. Think of it as equipping yourself for battle – the battle against potential injuries.
Safety Glasses: Protecting Your Vision
Your eyes are incredibly vulnerable. Flying metal debris, whether it’s small shavings or larger fragments, poses a significant risk. Safety glasses are essential to shield your eyes from these projectiles.
Ensure your safety glasses meet ANSI Z87.1 standards. These standards guarantee they provide adequate impact protection. Wear them at all times when cutting, grinding, or handling metal.
Gloves: Guarding Your Hands
Metal roofing materials often have sharp edges and burrs. These can easily cause cuts and abrasions. Gloves provide a crucial barrier. They protect your hands from these hazards.
Choose gloves that offer a good grip and dexterity. Leather or heavy-duty work gloves are excellent options. They balance protection with the ability to handle tools effectively.
Ear Protection: Minimizing Noise Exposure
Power tools used for cutting metal roofing, such as circular saws and shears, can generate significant noise. Prolonged exposure to loud noise can lead to hearing damage. Ear protection is vital to safeguard your hearing.
Earplugs or earmuffs with a Noise Reduction Rating (NRR) of 20 or higher are recommended. Wear them whenever you are operating power tools or working in a noisy environment.
Safe Work Practices: A Proactive Approach
Beyond PPE, adopting safe work practices is crucial. These practices involve proactively minimizing risks and creating a safer working environment.
Proper Grounding and Electrical Safety
Electricity and metal can be a dangerous combination. Always ensure that power tools are properly grounded. Use Ground Fault Circuit Interrupters (GFCIs) to prevent electrical shocks. Never work in wet or damp conditions.
Regularly inspect power cords for damage. Replace any cords that are frayed or worn. Unplug tools before making adjustments or changing blades.
Securely Clamping Materials
Vibrations from power tools can cause metal sheets to shift or move unexpectedly. This can lead to inaccurate cuts and potential injuries.
Always securely clamp the material to a stable work surface before cutting. Use clamps that are appropriately sized and rated for the task. Ensure the material is firmly held in place.
Working in a Well-Ventilated Area
Cutting metal can release fumes and dust particles. These can be harmful if inhaled.
Always work in a well-ventilated area to minimize exposure. Open windows and doors to promote airflow. Consider using a respirator or dust mask for added protection.
Prioritizing safety is not just a procedural step; it’s a mindset. By understanding the risks, using appropriate PPE, and following safe work practices, you can protect yourself from harm. This allows you to focus on crafting a beautiful and durable metal roof.
Tool Selection: Arming Yourself for Success
Having understood the crucial importance of safety, the next vital step in your DIY metal roofing journey is selecting the right tools. The effectiveness and efficiency of your project hinge significantly on this decision. Choosing the appropriate cutting tool can streamline the process, improve the quality of your cuts, and, ultimately, ensure a professional-looking finished product. Let’s delve into the world of metal roofing cutting tools and equip you with the knowledge to make informed choices.
An Overview of Metal Roofing Cutting Tools
The market offers a variety of tools suitable for cutting metal roofing, each with its own strengths and weaknesses. From manual hand shears to powerful electric nibblers and circular saws, the options can seem overwhelming. This section provides a comprehensive overview, helping you understand the purpose and capabilities of each tool.
Detailed Tool Explanation: Pros and Cons
Shears: The Versatile Cutter
Shears are a popular choice for cutting metal roofing due to their versatility and relatively low cost. They come in various forms, each suited for different tasks:
-
Hand Shears: These manual shears are ideal for small projects and making precise, curved cuts. They are relatively inexpensive, but can be tiring to use for extended periods.
- Pros: Affordable, suitable for curved cuts, precise.
- Cons: Can be tiring for large projects, slower cutting speed.
-
Electric Shears: Powered electric shears significantly speed up the cutting process, making them suitable for larger projects.
- Pros: Faster cutting speed, less tiring than hand shears.
- Cons: More expensive than hand shears, may not be as precise for intricate curves.
-
Pneumatic Shears: These shears use compressed air to power the cutting action. They offer even more power and speed than electric shears, but require an air compressor.
- Pros: Powerful, fast cutting speed.
- Cons: Requires an air compressor, less portable.
Nibblers: Precision for Intricate Cuts
Nibblers are specialized tools that create cuts by taking small "bites" out of the metal. This makes them particularly well-suited for creating intricate shapes, tight curves, and accessing hard-to-reach areas.
- Pros: Excellent for intricate shapes and curves, clean cuts.
- Cons: Slower cutting speed than shears, can be more expensive.
Circular Saw: Power and Speed
Using a circular saw to cut metal roofing requires a specialized metal-cutting blade. While offering speed and efficiency, this method demands caution and precision. Choosing the correct blade is critical for the best results.
- Pros: Fast cutting for straight lines.
- Cons: Can produce sparks and metal shavings, requires specialized blades, not suitable for curves.
Factors to Consider When Selecting a Tool
Choosing the right tool isn’t just about personal preference; it’s about matching the tool to the task. Here are several key factors to consider:
-
Type of Metal Roofing: Different types of metal roofing, such as corrugated metal roofing or standing seam metal roofing, may require specific cutting tools. For example, shears might be better suited for corrugated metal due to their ability to follow the contours of the material.
-
Thickness of the Metal: Thicker metal requires more powerful tools. Hand shears may struggle with thicker gauges, while electric or pneumatic shears would be more appropriate.
-
Type of Cut Required: Straight cuts are easily accomplished with shears or a circular saw, while intricate curves demand the precision of a nibbler.
-
Project Budget and Scale: The cost of the tool is a significant factor. Hand shears are the most budget-friendly option, while electric and pneumatic tools represent a larger investment. Consider the size of your project; investing in a more efficient tool might be worthwhile for a large-scale roofing project.
Tool selection plays a crucial role, but the mastery truly lies in the execution. The right technique not only ensures clean and accurate cuts but also contributes significantly to the overall safety and longevity of your metal roofing project. Let’s now turn our attention to mastering the art of cutting.
Mastering the Cut: Step-by-Step Techniques
Achieving a professional-looking metal roof demands more than just the right tools; it requires skillful execution. This section will guide you through the essential techniques for preparing your metal sheets and executing precise cuts using shears, nibblers, and circular saws. We’ll also cover the critical final step: removing those pesky metal burrs.
Preparing the Metal Roofing Sheet: The Foundation for Precision
Preparation is paramount in any DIY project, and metal roofing is no exception. Taking the time to properly prepare your metal sheet will significantly impact the accuracy and cleanliness of your cuts.
First, you’ll need to accurately measure and mark the desired cut lines. Use a high-quality measuring tape to ensure precise measurements. Then, use appropriate markers to clearly define your cut lines on the metal surface. Consider using different colored markers for different types of cuts or folds.
Next, securely clamp the metal roofing sheet to a stable work surface. This is a critical step for safety and accuracy. A wobbly or unstable sheet can lead to inaccurate cuts and potentially dangerous situations. Use clamps that are appropriate for the thickness and type of metal you are working with. Ensure the clamps are tightened securely before beginning to cut.
Cutting with Shears: Accuracy and Control
Shears are a versatile cutting tool that allows for both straight and curved cuts. Mastering the technique for using shears is essential for any DIY metal roofing project.
Hand Shears: Precision for Smaller Projects
Hand shears are ideal for small projects or for making precise, curved cuts. The key to using hand shears effectively is to maintain a steady hand and consistent pressure.
Follow these steps for achieving clean, straight cuts with hand shears:
- Position the shears along the marked cut line.
- Grip the handles firmly and apply even pressure.
- Slowly advance the shears along the line, making small, controlled cuts.
- Avoid forcing the shears, as this can result in jagged or uneven cuts.
Electric Shears: Efficiency for Larger Projects
Electric shears significantly speed up the cutting process, making them suitable for larger projects. These shears require a different approach than hand shears, focusing on guiding the tool rather than applying brute force.
Follow these steps for efficient cuts with electric shears:
- Position the shears on the marked cut line, ensuring the blade is aligned correctly.
- Turn on the shears and let the tool do the work.
- Gently guide the shears along the cut line, maintaining a steady pace.
- Avoid pushing or pulling the shears, as this can damage the tool or the metal.
Regardless of the type of shears you’re using, always prioritize following the marked lines precisely. Any deviation from the line will result in an inaccurate cut, which can compromise the overall look and functionality of your metal roof.
Cutting with Nibblers: Intricate Shapes and Tight Curves
Nibblers are the tool of choice for creating precise cuts and intricate shapes in metal roofing. They work by taking small "bites" out of the metal, allowing for greater control and maneuverability.
To effectively use a nibbler:
- Start by positioning the nibbler on the marked cut line.
- Engage the tool and allow it to begin removing small pieces of metal.
- Slowly guide the nibbler along the line, following the desired shape.
- For curves and corners, use smooth, controlled movements to avoid jagged edges.
Practice on scrap metal is highly recommended to get a feel for how the nibbler operates and how to achieve the desired results.
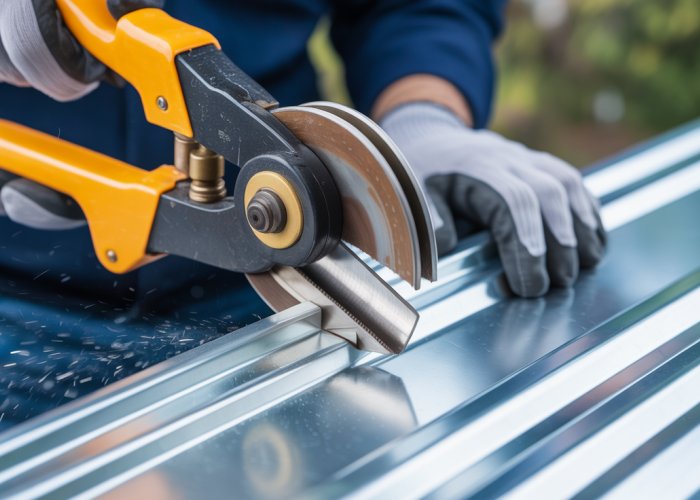
Cutting with a Circular Saw: Abrasive Cutting
Cutting metal with a circular saw uses abrasive blades or specialized metal cutting blades, making it a suitable option, but requires caution.
Follow these steps to cut metal with a circular saw:
- Ensure you have the appropriate safety eyewear, gloves, and hearing protection.
- Secure the metal roofing sheet to a stable surface.
- Select the correct blade for metal cutting.
- Set the blade depth so that it extends only slightly beyond the thickness of the metal.
- Make the cut slowly and steadily, letting the blade do the work.
- Wear appropriate PPE to protect against sparks and metal fragments.
- Apply cutting fluid or lubricant to reduce friction and heat.
- Securely clamp the metal sheet to prevent movement.
Dealing with Metal Burrs: Achieving a Smooth, Safe Finish
After cutting, you’ll likely encounter sharp edges and metal burrs. These burrs can be dangerous and detract from the professional appearance of your metal roof. Removing these burrs is an essential final step.
There are several methods for removing metal burrs:
- Using a File: A metal file can be used to smooth out sharp edges and remove small burrs. Hold the file at a slight angle and run it along the edge of the metal, applying even pressure.
- Using a Deburring Tool: A deburring tool is specifically designed to remove burrs quickly and efficiently. Simply run the tool along the edge of the metal, and it will shave off any sharp edges.
Regardless of the method you choose, always wear gloves to protect your hands from cuts and abrasions. A smooth, burr-free edge not only enhances the appearance of your metal roof but also ensures safety during installation and maintenance.
Tool selection plays a crucial role, but the mastery truly lies in the execution. The right technique not only ensures clean and accurate cuts but also contributes significantly to the overall safety and longevity of your metal roofing project. Let’s now turn our attention to mastering the art of cutting.
Metal Matters: Tailoring Techniques to Specific Materials
While the fundamental cutting techniques remain consistent, the specific type of metal roofing you’re working with necessitates nuanced adjustments. Each material possesses unique properties that influence the cutting process, requiring tailored approaches to achieve optimal results. This section delves into the specific considerations for galvanized steel, aluminum, and standard steel, providing insights to ensure a flawless finish regardless of your chosen material.
Cutting Galvanized Steel: Minimizing Zinc Displacement
Galvanized steel, prized for its corrosion resistance, presents a unique challenge due to its zinc coating. The primary concern when cutting galvanized steel is minimizing damage to this protective layer, as compromised galvanization can lead to premature rust.
Heat Reduction Strategies
High heat can vaporize the zinc coating along the cut line, leaving the underlying steel vulnerable. To mitigate this:
- Use cutting methods that generate minimal heat, such as high-quality shears or nibblers.
- If using a circular saw, opt for a blade specifically designed for cutting metal, and use it at a lower speed.
- Apply cutting oil to reduce friction and dissipate heat.
Addressing Zinc Fumes
Cutting galvanized steel can release zinc fumes, which, while generally not dangerous in small amounts, can cause a temporary flu-like illness known as "zinc chills" or "metal fume fever" with prolonged exposure in poorly ventilated areas.
- Always work in a well-ventilated area or use a respirator specifically designed for metal fumes.
- Consider using cold-cutting methods, such as shears or nibblers, to minimize fume generation.
Cutting Aluminum: Preventing Binding and Galling
Aluminum, known for its lightweight and corrosion-resistant properties, requires a different set of considerations. Its softness can lead to binding and galling (material buildup on the cutting tool), which can compromise the cut quality and damage your tools.
Lubrication is Key
- Generous lubrication is essential when cutting aluminum. Use a cutting fluid specifically formulated for aluminum to prevent binding and galling.
- Apply the lubricant frequently and liberally to both the blade and the cutting surface.
Choosing the Right Blade
- When using a circular saw, choose a blade with triple chip grind (TCG) teeth. These blades are designed to shear the aluminum cleanly, reducing the risk of material buildup.
- Ensure the blade is sharp to further minimize friction and prevent the aluminum from sticking to the teeth.
Controlled Cutting Speed
- Cut at a moderate and consistent speed. Avoid forcing the tool, as this can lead to binding and a rough cut.
- Let the tool do the work and maintain a steady hand.
Cutting Steel: Achieving a Smooth, Clean Finish
Cutting steel requires a balance of power and precision to achieve a smooth, clean finish. While steel is more robust than aluminum, it can still produce burrs and sharp edges if not cut properly.
Selecting the Appropriate Cutting Method
- For thin-gauge steel, shears or nibblers can provide clean and accurate cuts.
- For thicker steel, a circular saw with a metal-cutting blade is often necessary.
Managing Heat and Burrs
- Use cutting oil to reduce friction and heat, preventing the steel from work hardening.
- After cutting, deburr the edges using a file, deburring tool, or rotary tool to remove any sharp edges or burrs.
Secure Clamping
- Ensure the steel sheet is securely clamped to a stable work surface to prevent movement and vibration during cutting. This is crucial for achieving accurate and clean cuts.
Tool selection plays a crucial role, but the mastery truly lies in the execution. The right technique not only ensures clean and accurate cuts but also contributes significantly to the overall safety and longevity of your metal roofing project. Let’s now turn our attention to mastering the art of cutting.
The Professional Touch: Tips and Tricks for Perfection
Achieving a truly professional metal roofing finish goes beyond simply making a cut. It’s about attention to detail, employing proven techniques, and understanding the nuances that elevate your work from adequate to exceptional. These insider tips and tricks will help you achieve that coveted level of perfection, ensuring your metal roofing project looks impeccable and stands the test of time.
The Lubricating Power of Cutting Oil
Cutting oil isn’t just an optional extra; it’s a critical component for achieving clean, efficient cuts and prolonging the life of your tools. Its benefits extend far beyond simple lubrication.
Reducing Friction and Heat: Cutting oil dramatically reduces friction between the blade and the metal. This, in turn, minimizes heat buildup, preventing warping of the metal and extending the life of your cutting blades.
Excessive heat can also compromise the metal’s finish, leading to discoloration or even weakening the material.
Minimizing Metal Burrs: One of the most frustrating aspects of cutting metal is dealing with those sharp, jagged edges known as burrs. Cutting oil helps to minimize their formation, saving you time and effort in the cleanup process.
Extending Tool Life: By reducing friction and heat, cutting oil significantly extends the life of your blades and cutting tools. This translates to cost savings in the long run.
Application is Key: Apply a thin, even layer of cutting oil along the cut line before you begin. Reapply as needed during the cutting process to maintain optimal lubrication.
The Edge of Excellence: Maintaining Sharp Blades
A dull blade is not only inefficient but also dangerous. It requires more force to cut, increasing the risk of slippage and potential injury.
Clean Cuts, Less Effort: Sharp blades effortlessly slice through metal, resulting in clean, precise cuts with minimal effort. This reduces the likelihood of errors and improves the overall quality of your work.
Preventing Damage: Dull blades tend to tear or distort the metal, leaving behind ragged edges and potential weak spots. Sharp blades, on the other hand, create smooth, even cuts that preserve the integrity of the material.
Regular Inspection and Sharpening: Inspect your blades regularly for signs of wear and tear. If you notice any dullness or damage, sharpen or replace the blade immediately.
Professional Sharpening Services: For optimal results, consider using professional blade sharpening services. They have the expertise and equipment to restore your blades to their original sharpness.
Investing in Quality Blades: Opt for high-quality blades made from durable materials. While they may cost more upfront, they will last longer and provide superior performance.
Guarding Against Imperfections: Minimizing Scratches
Metal roofing is a significant investment, and preserving its aesthetic appeal is crucial. Scratches can detract from its beauty and even compromise its protective coating.
Protective Layers: Before cutting, apply a layer of protective film or tape to the metal surface along the cut line. This will shield the metal from scratches and abrasions.
Gentle Handling: Handle the metal roofing sheets with care, avoiding any unnecessary dragging or rubbing against abrasive surfaces.
Clean Work Surfaces: Ensure your work surfaces are clean and free of debris that could scratch the metal. Use a soft cloth or brush to remove any particles.
Specialized Tools: Utilizing tools specifically designed for metal cutting such as shears or nibblers, can help reduce potential scratching caused by saw blades.
Deburring for Damage Control: Immediately deburr edges to reduce the likelihood of incidental scratches to panels or people.
By following these tips and tricks, you can elevate your metal roofing project to a professional level, ensuring a flawless finish that enhances the beauty and longevity of your investment.
And that’s a wrap! Hopefully, this guide gave you the confidence to tackle cutting metal roofing like a pro. Happy DIY-ing, and remember to measure twice, cut once!