Pipe corrosion presents a significant challenge for homeowners and necessitates prompt action. Galvanic corrosion, a common type, affects pipes due to dissimilar metals coming into contact. The Environmental Protection Agency (EPA) recommends regular inspections to prevent extensive damage and potential health hazards from contaminated water supplies. Understanding the techniques outlined in this guide ensures effective corroded pipe repair, leading to a safer and more efficient plumbing system.
Corroded Pipe Repair: Your Ultimate DIY Guide! – Article Layout
This document outlines the ideal layout for an article focused on "corroded pipe repair", offering readers a comprehensive DIY guide. The structure is designed to be informative, authoritative, and easily understood by homeowners with varying levels of plumbing experience.
1. Introduction: Identifying Corrosion and Its Consequences
The introduction should grab the reader’s attention by highlighting the importance of addressing corrosion promptly.
- Hook: Start with a relatable scenario (e.g., a homeowner noticing a slow leak or discolored water).
- Define Corrosion: Briefly explain what pipe corrosion is and the chemical processes behind it, without getting overly technical. Focus on common types like rust (iron pipes) and the white/green buildup on copper pipes.
- Explain the Risks: Emphasize the dangers of ignoring corroded pipes, including:
- Water damage to property
- Health risks from contaminated water
- Lower water pressure
- Potential for catastrophic pipe failure and flooding
- Introduce the Article’s Purpose: Clearly state that the article provides a step-by-step guide to common DIY repair methods, while also cautioning when to call a professional.
2. Assessing the Damage: When DIY is Appropriate
This section focuses on helping readers determine if they can handle the repair themselves.
2.1. Visual Inspection: Signs of Corrosion
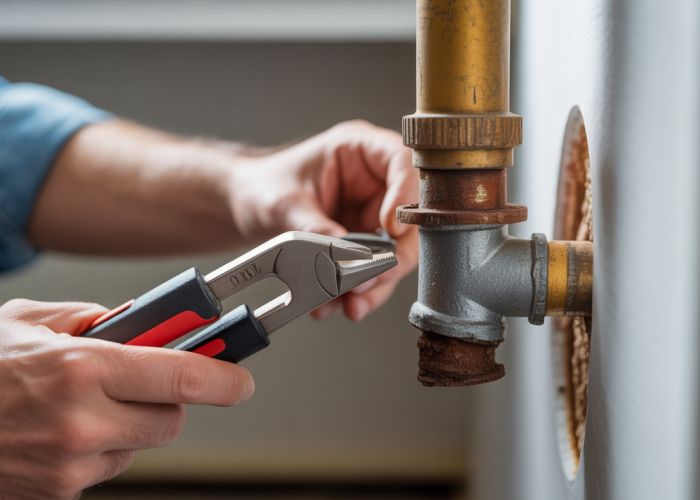
- Focus on visual cues: Leaks, discoloration (rust, green/white deposits), pitting, bulging, scaling.
- Illustrative Examples: Use images of different levels of corrosion – minor surface rust versus severe pipe degradation.
-
Table: Corrosion Severity Levels
Severity Level Description DIY Suitability Action Required Mild Surface rust or slight discoloration Likely Cleaning, surface treatment Moderate Pitting, noticeable corrosion buildup Possibly Patching, pipe clamps, limited section replacement Severe Large leaks, significant weakening, bulging Unlikely Call a Plumber Immediately
2.2. Pipe Material Identification
- Explain how to identify common pipe materials (copper, steel/iron, PVC, PEX).
- Include photos of each type with distinct markings.
- Explain that different materials require different repair methods.
2.3. Understanding Your Plumbing System
- Briefly describe the importance of knowing the location of shut-off valves.
- Advise on testing the water supply after any repair to ensure it is safe.
3. DIY Repair Methods: Step-by-Step Guides
This is the core of the article, providing detailed instructions for various repair options.
3.1. Cleaning Corroded Pipes (Mild Corrosion)
- Tools and Materials: List everything needed (wire brush, sandpaper, cleaning solution, safety glasses, gloves).
- Step-by-Step Instructions: Use numbered lists with clear, concise directions and corresponding images.
- Shut off the water supply.
- Dry the pipe thoroughly.
- Scrub away corrosion with a wire brush.
- Apply a cleaning solution.
- Rinse and dry again.
- Consider applying a protective coating (rust inhibitor).
3.2. Pipe Clamps for Leaks (Moderate Corrosion)
- Tools and Materials: List everything needed (pipe clamp of appropriate size, screwdriver, wrench).
- Step-by-Step Instructions:
- Shut off the water supply.
- Clean the pipe surface around the leak.
- Position the pipe clamp over the leak.
- Tighten the clamp securely.
- Turn on the water supply and check for leaks.
3.3. Patching Corroded Pipes (Moderate Corrosion – Small Holes)
- Tools and Materials: List everything needed (epoxy putty, sandpaper, mixing tools, gloves).
- Step-by-Step Instructions:
- Shut off the water supply.
- Dry and clean the area around the hole thoroughly.
- Sand the area to create a rough surface for adhesion.
- Mix the epoxy putty according to the manufacturer’s instructions.
- Apply the putty to the hole, pressing firmly.
- Allow the putty to cure completely (follow manufacturer’s directions).
- Sand the putty smooth, if desired.
- Turn on the water supply and check for leaks.
3.4. Replacing a Section of Pipe (Moderate Corrosion – Localized)
- Tools and Materials: List everything needed (pipe cutter, replacement pipe section, fittings, flux, soldering torch (for copper), pipe wrench, Teflon tape). Note: Emphasize the higher skill level required for soldering.
- Step-by-Step Instructions:
- Shut off the water supply.
- Drain the pipe section.
- Cut out the corroded section using a pipe cutter.
- Prepare the new pipe section and fittings.
- For copper: Clean, flux, and solder the fittings.
- For threaded pipe: Apply Teflon tape to the threads.
- Install the new section, ensuring tight connections.
- Turn on the water supply and check for leaks.
4. Prevention: Protecting Your Pipes
This section shifts from repair to prevention.
4.1. Water Quality and pH Levels
- Explain how acidic water (low pH) can accelerate corrosion.
- Suggest water testing and potential solutions (e.g., pH neutralizers).
4.2. Insulation
- Explain how insulation prevents condensation, which can contribute to corrosion.
- Recommend insulating pipes in unheated areas (e.g., basements, crawl spaces).
4.3. Regular Inspections
- Advise homeowners to regularly inspect their pipes for signs of corrosion.
- Encourage prompt action when any issues are identified.
5. When to Call a Professional Plumber
This section is crucial for ethical and safety reasons.
- Severe Corrosion: Reinforce the dangers of DIY repair on severely corroded pipes.
- Extensive Damage: If multiple sections are affected or the problem is widespread.
- Uncertainty: If the homeowner is unsure about their skills or the severity of the problem.
- Code Compliance: Plumbers ensure work meets local building codes, which is important for safety and property value.
- Complex Systems: Working on main water lines or complicated plumbing configurations.
Corroded Pipe Repair FAQ
Here are some frequently asked questions regarding corroded pipe repair to help you better understand the DIY process outlined in our guide.
When is corroded pipe repair a MUST, versus a simple patch?
If the corrosion has significantly weakened the pipe wall, resulting in leaks or a visibly deteriorated section, immediate corroded pipe repair is essential. Patching is a temporary fix only suitable for minor surface corrosion without structural damage. Serious corrosion requires pipe replacement or a more robust repair method.
What tools are absolutely necessary for a basic corroded pipe repair?
Beyond the replacement pipe and fittings, you’ll need a pipe cutter or saw, sandpaper or a wire brush for cleaning, flux and solder (for copper), or pipe joint compound (for threaded connections). Safety glasses and gloves are also vital for protection during corroded pipe repair.
Can I do corroded pipe repair on galvanized steel pipes myself?
Repairing galvanized steel pipes requires more expertise and tools than copper or PVC. Cutting, threading, and properly sealing galvanized pipes can be challenging. If you’re unsure, consulting a plumber for corroded pipe repair is highly recommended.
How can I prevent pipes from corroding in the future?
Several methods exist to prevent future pipe corrosion. Using corrosion-resistant piping materials, installing a water softener to reduce mineral content, and ensuring proper grounding of your plumbing system are all effective strategies to protect against future corroded pipe repair.
So, that’s the lowdown on corroded pipe repair! Hopefully, you’re feeling confident enough to tackle that leaky pipe yourself. Remember to stay safe, and good luck with your DIY project!