Concrete block repair is a manageable task for the dedicated homeowner. The durability of your structure depends on sound blocks, and understanding the properties of mortar is critical for long-lasting repairs. Many homeowners rely on Quikrete products for reliable patching, while proper mixing techniques contribute to successful concrete block repair. In this guide, you’ll find all the steps you need for effective concrete block repair.
Embracing DIY Concrete Block Repair
Concrete block structures are ubiquitous, forming the foundations of our homes, the walls of our gardens, and countless other essential elements of our built environment. Over time, these sturdy components can succumb to wear and tear, presenting homeowners with a choice: hire a professional or tackle the repairs themselves. The prospect of DIY concrete block repair can seem daunting, but with the right knowledge and approach, it becomes an achievable and rewarding endeavor.
The Allure of DIY Repair
Many homeowners are drawn to the DIY approach for very valid reasons.
First and foremost, is the potential for significant cost savings. Professional masonry work can be expensive, especially for larger projects. By undertaking the repairs yourself, you eliminate labor costs, which often constitute a substantial portion of the total expense.
Beyond the financial benefits, there’s the satisfaction of learning a new skill and taking ownership of your property’s upkeep. The sense of accomplishment that comes from successfully repairing a damaged wall or foundation can be incredibly fulfilling.
Why Maintaining Concrete Block Structures Matters
Neglecting damage to concrete block structures can lead to a host of problems.
Cracks and crumbling can compromise structural integrity, potentially leading to safety hazards.
Water infiltration through damaged blocks can cause further deterioration, as well as mold growth and other moisture-related issues. Addressing minor damage promptly can prevent these problems from escalating into more costly and complex repairs down the line.
The Importance of Safety and Knowing Your Limits
While DIY concrete block repair offers numerous advantages, it’s crucial to approach it with caution and awareness.
Safety should always be your top priority. Working with concrete and masonry tools can be hazardous if proper precautions are not taken.
Always wear safety glasses, gloves, and a dust mask to protect yourself from flying debris and harmful dust particles.
It’s also essential to be realistic about your skills and abilities. Some repairs, particularly those involving significant structural damage, are best left to qualified professionals.
Attempting to tackle a project that is beyond your capabilities can result in further damage and potentially dangerous situations.
If you are unsure about any aspect of the repair process, consult with a professional before proceeding. Recognizing the limits of your DIY skills is a sign of wisdom, not weakness, and it can ultimately save you time, money, and potential headaches.
Neglecting concrete block damage only allows it to worsen, leading to potentially hazardous conditions and escalating repair costs. But before diving into the hands-on work, it’s crucial to understand the nature and causes of the damage you’re facing. This knowledge will empower you to choose the right repair techniques and prevent future problems.
Decoding Concrete Block Damage: Recognizing the Enemy
Just as a doctor diagnoses an illness before prescribing treatment, you must first accurately identify the type and extent of damage affecting your concrete blocks. This section will guide you through recognizing common types of damage, understanding their root causes, and assessing the severity of the problem to determine the best course of action.
Identifying the Usual Suspects: Types of Concrete Block Damage
Concrete blocks, while durable, are susceptible to a range of damage types. Recognizing these is the first step toward effective repair.
-
Cracks: These are perhaps the most common type of damage. They can range from hairline fractures to wider, more significant breaks.
- Hairline cracks are often superficial, but wider cracks may indicate structural issues.
- Spalling: This refers to the flaking or chipping away of the concrete surface. It’s often caused by moisture penetration and freeze-thaw cycles.
- Crumbling: This is a more advanced stage of deterioration where the concrete block material breaks down into smaller pieces.
- Water Damage: This can manifest in several ways, including staining, discoloration, and the growth of mold or mildew.
- Efflorescence: This is a white, powdery deposit that appears on the surface of concrete blocks. It’s caused by soluble salts being carried to the surface by water and then left behind as the water evaporates. While efflorescence itself isn’t structurally damaging, it indicates the presence of moisture, which can lead to other problems.
Digging Deeper: Uncovering the Root Causes
Identifying the type of damage is important, but understanding why it occurred is even more crucial. Addressing the underlying cause will prevent the damage from recurring after repairs.
- Poor Construction: Inadequate mortar joints, improper block alignment, or the use of low-quality materials can all contribute to premature deterioration.
- Ground Movement: Shifting soil, settling foundations, or seismic activity can exert stress on concrete block structures, leading to cracks and other damage.
- Environmental Factors: Exposure to harsh weather conditions, such as freeze-thaw cycles, excessive moisture, and prolonged sunlight, can accelerate the breakdown of concrete blocks. Saltwater exposure is particularly damaging in coastal areas.
- Lack of Maintenance: Neglecting minor repairs can allow them to escalate into more significant problems over time.
Assessing the Damage: Determining the Right Repair Strategy
Once you’ve identified the type of damage and its likely cause, it’s time to assess the extent of the problem. This will help you determine the appropriate repair strategy and whether you can handle the job yourself or need to call in a professional.
- Superficial Damage: Hairline cracks, minor spalling, and efflorescence often fall into this category. These can usually be repaired with patching compounds and sealants.
- Moderate Damage: Wider cracks, more extensive spalling, and water damage may require more involved repairs, such as mortar replacement or patching with concrete mix.
- Severe Damage: Crumbling blocks, significant structural cracks, and extensive water damage may indicate serious underlying problems. In these cases, it’s best to consult with a qualified mason or contractor.
By carefully evaluating the damage, you can make informed decisions about the best way to restore your concrete block structures and protect them from future deterioration. Remember, a thorough assessment is the foundation for a successful and long-lasting repair.
Decoding the extent and cause of the damage to your concrete blocks is only half the battle. Now, you need to properly equip yourself with the right tools and materials. Choosing the correct supplies will significantly impact the durability and appearance of your repair. The goal is to make the repair blend seamlessly with the existing structure and stand the test of time.
Arming Yourself: Gathering Essential Tools and Materials
Like any skilled artisan, a successful concrete block repair hinges on having the right tools and materials at your disposal. Skimping on quality here is a false economy; investing in appropriate materials and reliable tools will not only make the job easier but will also ensure a lasting repair. Let’s break down what you’ll need.
Essential Materials for Concrete Block Repair
The selection of materials depends on the nature and extent of the damage. Here’s a detailed look at the key ingredients for a successful repair:
Concrete Blocks: Choosing the Right Type
When replacing entire blocks, it’s crucial to match the existing blocks in size, shape, and composition.
Different types of concrete blocks exist, including solid, hollow, and lightweight varieties. Consider the structural requirements of the wall or structure you’re repairing. Hollow blocks are typically used for non-load-bearing walls, while solid blocks offer greater strength for load-bearing applications.
Mortar: The Binding Agent
Mortar is the glue that holds concrete blocks together. Choosing the right mortar mix is essential for a strong and durable bond.
Mortar is classified by type (e.g., Type M, S, N, O), each with varying compressive strengths and applications.
- Type M mortar is the strongest and is suitable for heavy-load-bearing walls.
- Type S mortar is a good choice for general-purpose use.
- Type N mortar is used for above-grade, non-load-bearing applications.
- Type O mortar is typically used for interior, non-load-bearing applications.
Pre-mixed mortar is convenient, but mixing your own allows for greater control over the consistency and ingredients. Always follow the manufacturer’s instructions carefully when mixing mortar.
Patching Compound: For Minor Imperfections
For superficial damage like small chips or cracks, a concrete patching compound is ideal.
These compounds are designed to adhere well to concrete and provide a smooth, seamless finish. Choose a patching compound that is specifically formulated for exterior use if the repair is exposed to the elements.
Concrete Mix: Filling Larger Voids
When dealing with larger voids or significant damage, a high-quality concrete mix is necessary.
Choose a mix that is appropriate for the specific application, considering factors like compressive strength and curing time. Fiber-reinforced concrete mix can add extra durability and crack resistance.
Sealant and Waterproofing: Preventing Future Damage
Water is a concrete block’s worst enemy. After completing repairs, applying a sealant or waterproofing solution is crucial to prevent future damage.
Choose a product that is specifically designed for concrete and is suitable for the climate in your region. Consider breathable sealants that allow moisture to escape from the concrete while preventing water from penetrating.
Essential Tools for Concrete Block Repair
Having the right tools on hand will make the repair process smoother, safer, and more efficient.
Trowel: The Mortar Maestro
A trowel is your primary tool for applying mortar and patching compound.
Choose a trowel that is comfortable to hold and has a blade size appropriate for the size of the repair. Pointed trowels are useful for filling narrow cracks, while larger trowels are better for applying mortar to larger areas.
Chisel and Hammer: Demolition and Preparation
A chisel and hammer are essential for removing damaged concrete and preparing the surface for repair.
Use a cold chisel specifically designed for masonry work. Wear safety glasses when using a chisel and hammer to protect your eyes from flying debris.
Masonry Brush: Surface Preparation is Key
A stiff masonry brush is used to clean the damaged area and remove loose debris.
Proper surface preparation is essential for ensuring that the repair material adheres properly.
Mixing Tub: Mortar and Concrete Prep Station
A durable mixing tub is needed for preparing mortar and concrete mixes.
Choose a tub that is large enough to accommodate the amount of material you need to mix and is made of a material that is resistant to cracking and chipping.
Safety Gear: Protecting Yourself
Safety Glasses, Gloves, and a Dust Mask are non-negotiable.
Concrete dust can be harmful to your lungs, and mortar can irritate your skin. Always wear appropriate personal protective equipment when working with concrete and mortar.
By carefully selecting the right materials and tools, you’ll be well-equipped to tackle your concrete block repair project with confidence and achieve lasting results.
Decoding the extent and cause of the damage to your concrete blocks is only half the battle. Now, you need to properly equip yourself with the right tools and materials. Choosing the correct supplies will significantly impact the durability and appearance of your repair. The goal is to make the repair blend seamlessly with the existing structure and stand the test of time.
With the right materials and tools assembled, it’s time to put your plan into action. Repairing concrete blocks requires careful execution, following proven techniques to ensure a strong and lasting result. Let’s delve into the step-by-step process of concrete block repair, from surface preparation to mortar application and patching.
Battle Plan: Step-by-Step Concrete Block Repair Techniques
A successful concrete block repair hinges on a systematic approach. Rushing any step can compromise the integrity of the entire repair. From meticulous surface preparation to precise mortar application, each stage contributes to a durable and aesthetically pleasing outcome.
Preparing the Battlefield: Surface Preparation
Surface preparation is arguably the most critical step in concrete block repair. A clean, sound surface ensures proper adhesion of the repair materials, maximizing the lifespan of your work.
-
Cleaning the Area: Begin by thoroughly cleaning the damaged area with a masonry brush and water. This removes loose dirt, dust, and any surface contaminants that could impede bonding. A pressure washer can be used for larger areas, but be careful not to further damage weakened blocks.
-
Removing Debris and Unsound Material: Next, use a chisel and hammer to carefully remove any loose debris and unsound concrete. Work from the center of the damaged area outwards, removing any material that crumbles easily or sounds hollow when tapped. The goal is to create a solid, stable base for the repair.
- Safety First: Wear safety glasses and gloves during this step to protect yourself from flying debris and sharp edges.
-
Dust Removal: After chiseling, remove the dust thoroughly from the prepared surface using a brush or vacuum.
Mortar Magic: Repairing Cracks and Joints
Mortar is the binding agent that holds concrete blocks together. Properly mixed and applied mortar ensures a strong, weathertight seal.
-
Mixing the Mortar: The correct consistency is key. Follow the manufacturer’s instructions carefully. Add water gradually to the dry mortar mix, until it achieves a plastic, workable consistency similar to thick peanut butter.
- Avoid adding too much water, as this will weaken the mortar.
-
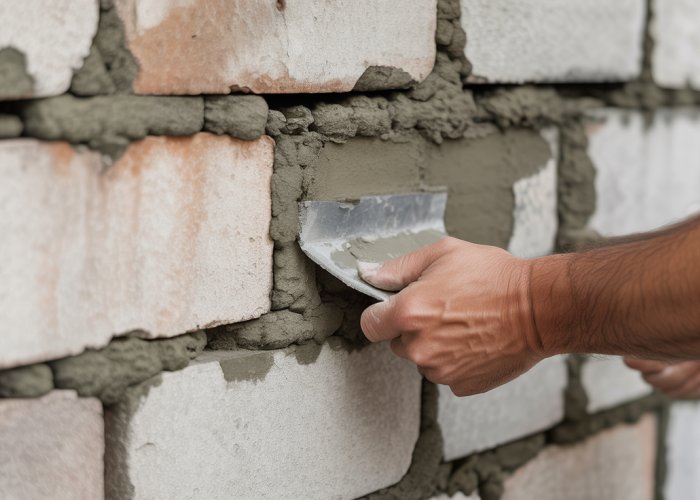
Applying the Mortar: Using a trowel, apply the mortar to the prepared joint or crack. Press the mortar firmly into the gap, ensuring complete filling and proper bonding with the existing concrete blocks.
- For wider cracks, apply the mortar in layers, allowing each layer to partially set before applying the next.
-
Finishing the Joint: Once the mortar has been applied, use the trowel to create a smooth, flush finish.
- Match the existing joint profile for a seamless appearance.
-
Curing the Mortar: Curing is essential for proper mortar strength. Keep the repaired area moist for at least 24-48 hours by misting it with water regularly. This allows the mortar to hydrate fully and achieve its maximum strength.
Patching Larger Holes and Spalled Areas
When dealing with larger holes and spalled areas, patching compound provides a durable and aesthetically pleasing solution.
-
Applying the Patching Compound: Apply the patching compound to the damaged area using a trowel. Overfill the area slightly to allow for shrinkage during drying.
-
Smoothing and Finishing: Once the patching compound has partially set, use a clean trowel to smooth and finish the surface.
-
Blend the patch seamlessly with the surrounding concrete blocks for a uniform appearance.
-
For textured surfaces, use a sponge or brush to replicate the existing texture.
-
Concrete Mix for Larger Repairs
For extensive damage that requires filling larger volumes, concrete mix offers a robust solution.
-
Mixing the Concrete: Prepare the concrete mix according to the manufacturer’s instructions. Pay close attention to the water-to-cement ratio to achieve the desired consistency and strength. The mix should be workable but not too runny.
-
Applying the Concrete: Apply the concrete mix to the prepared area, ensuring it fills all voids and crevices. Use a trowel or float to consolidate the concrete and remove any air pockets.
-
Leveling and Shaping: Use a straightedge and trowel to level the concrete surface and shape it to match the surrounding blocks. Ensure a smooth transition between the repair and the existing structure.
-
Curing the Concrete: Curing is crucial for the concrete to gain strength and durability. Keep the repaired area moist for at least 3-7 days by covering it with plastic sheeting or burlap and misting it with water regularly.
Advanced Strategies: Tackling Water Damage and Rebuilding
While patching and repairing cracks can address surface-level issues, some concrete block damage demands more advanced techniques. Water damage, in particular, can compromise the structural integrity of your concrete. More extensive damage may require partial or complete rebuilding of sections.
Understanding and Addressing Water Damage
Water is a relentless enemy of concrete structures. Its intrusion can lead to a host of problems, from efflorescence and staining to freeze-thaw damage and structural weakening. Effectively addressing water damage involves identifying the source, mitigating further penetration, and protecting repaired areas.
Pinpointing the Source of Moisture
The first step in combating water damage is to locate the source of the moisture. Common culprits include:
- Poor drainage: Water pooling around the foundation can seep through concrete blocks.
- Leaking gutters and downspouts: These can direct water towards the foundation wall.
- Cracks and joints: These provide easy entry points for water.
- Groundwater: High water tables can saturate the surrounding soil, leading to moisture wicking through the blocks.
Thoroughly inspect the area around the damaged blocks, paying attention to drainage patterns, potential leaks, and the overall condition of the surrounding landscape.
Applying Waterproofing Solutions
Once the source of moisture is identified and addressed, it’s crucial to apply waterproofing solutions to prevent future water penetration. Several options are available, including:
- Waterproof coatings: These create a barrier on the surface of the concrete blocks, preventing water from entering. Choose a coating specifically designed for masonry surfaces.
- Silane-siloxane sealers: These penetrate the concrete blocks, creating a hydrophobic barrier that repels water.
- Exterior waterproofing membranes: For below-grade applications, these membranes provide a robust barrier against groundwater.
Apply the chosen waterproofing solution according to the manufacturer’s instructions, ensuring thorough coverage of the affected area.
Utilizing Sealants for Enhanced Protection
Sealants play a vital role in protecting repaired areas from water damage. They are particularly useful for sealing cracks, joints, and other potential entry points for moisture.
- Choose a sealant specifically designed for concrete and masonry.
- Ensure the surface is clean and dry before application.
- Apply the sealant according to the manufacturer’s instructions.
Regularly inspect sealant for any signs of deterioration, such as cracking or peeling, and reapply as needed.
Rebuilding Sections of Concrete Block
In cases of extensive damage, such as severely cracked, crumbling, or displaced blocks, rebuilding sections of the wall may be necessary. This requires careful removal of the damaged blocks and replacement with new ones, ensuring proper alignment and bonding.
Removing Damaged Blocks
Before beginning the removal process, ensure you have the necessary safety equipment, including safety glasses, gloves, and a dust mask.
- Carefully chisel away the mortar surrounding the damaged blocks. Use a cold chisel and hammer to avoid damaging adjacent blocks.
- Once the mortar is removed, gently pry the damaged blocks out of the wall. If the blocks are heavily damaged, they may crumble during removal.
- Clean the surrounding area, removing any loose debris or mortar. This will ensure proper bonding of the new blocks.
Ensuring Proper Alignment and Bonding
The key to a successful rebuild lies in proper alignment and bonding of the new blocks.
- Apply a generous layer of mortar to the surrounding blocks and the base where the new blocks will sit. Use a trowel to ensure even coverage.
- Carefully place the new blocks into the opening, ensuring they are level and plumb. Use a level to check the alignment and make adjustments as needed.
- Apply mortar to the joints between the new blocks and the surrounding blocks. Use a trowel to fill the joints completely and create a smooth, even surface.
- Tool the joints to match the existing mortar joints. This will help the repair blend seamlessly with the surrounding wall.
- Cure the mortar by keeping it moist for the recommended time. This will ensure the mortar sets properly and achieves maximum strength.
Rebuilding sections of concrete block requires patience, precision, and attention to detail. By following these steps carefully, you can restore the structural integrity and appearance of your concrete block structure.
While addressing existing damage is crucial, the true key to longevity lies in proactive prevention and consistent maintenance. Think of it as preventative medicine for your concrete block structures. By implementing sound strategies, you can significantly extend their lifespan, minimizing future repairs and safeguarding their structural integrity.
Fortification: Prevention and Maintenance for Long-Term Protection
The best approach to concrete block repair is to avoid needing it in the first place. Implementing proactive preventative measures, coupled with consistent maintenance, not only saves you time and money in the long run but also ensures the long-term stability and safety of your structures. Neglecting preventative care can lead to accelerated deterioration and costly repairs down the line.
Strategies for Preventing Future Damage
Prevention is always better, and less expensive, than cure. Simple changes in the environment surrounding your concrete block structures, coupled with regular check-ups, can make a big difference.
Improving Drainage Around Foundations
Water is a primary culprit in concrete block deterioration. Excess moisture around foundations leads to a multitude of problems, including hydrostatic pressure, freeze-thaw damage, and efflorescence.
Improving drainage is paramount. Ensure that the ground slopes away from the foundation to direct water away from the structure. Clean gutters and downspouts regularly to prevent overflows and direct water effectively. Consider installing French drains or other drainage systems in areas prone to water accumulation.
Regularly Inspecting and Maintaining Walls and Other Concrete Block Structures
Regular inspections are vital for early detection of potential problems. At least twice a year—ideally in the spring and fall—conduct a thorough visual examination of your concrete block structures.
Look for cracks (even hairline ones), spalling, crumbling, efflorescence, and any signs of water damage.
Early detection allows for timely intervention, preventing minor issues from escalating into major problems.
Addressing Minor Issues Promptly
Don’t ignore minor cracks or signs of efflorescence. Address these issues promptly using appropriate repair techniques. Small cracks can be easily filled with mortar or patching compound, preventing water penetration and further damage. Efflorescence can be removed with a masonry brush and a mild acidic solution.
Maintaining Sealants and Waterproofing
Regularly inspect and maintain any sealants or waterproofing coatings applied to your concrete block structures. Reapply sealants as needed to ensure continuous protection against water penetration. Remember that these protective layers degrade over time, so periodic reapplications are essential.
The Importance of Structural Integrity
Structural integrity is paramount for the safety and longevity of any concrete block structure. Maintaining this integrity requires ongoing vigilance and a commitment to preventative care.
Ignoring signs of damage or neglecting maintenance can have serious consequences, potentially compromising the stability of the entire structure.
Safety First
Remember, concrete block structures often bear significant loads. Compromised integrity can lead to instability and even collapse, posing a serious safety risk. Prioritize safety by addressing any structural concerns promptly and thoroughly.
Long-Term Savings
While preventative maintenance may seem like an added expense, it’s an investment that pays off in the long run. By preventing major damage and extending the lifespan of your concrete block structures, you’ll avoid costly repairs and replacements in the future. Think of it as a long-term insurance policy for your property.
While vigilance and careful execution can empower you to address many concrete block issues, there are times when DIY solutions are simply insufficient. Recognizing the limitations of your skills, tools, and knowledge is crucial for ensuring the safety and structural integrity of your property. Knowing when to call in a professional mason or contractor can prevent further damage and potentially dangerous situations.
Knowing When to Retreat: Recognizing the Need for Professional Help
Even with the best DIY approach, certain concrete block problems demand the expertise of a professional. Identifying these situations early can save you from making the problem worse and potentially endangering yourself or others. The key is understanding the difference between cosmetic repairs and issues that compromise the structural integrity of your building.
Recognizing Signs of Serious Structural Issues
Several telltale signs indicate that a concrete block structure needs professional attention. Ignoring these warnings can lead to severe consequences.
-
Significant Cracking: Hairline cracks are often superficial and easily repaired. However, large cracks (wider than ¼ inch), especially those that are jagged, stair-step patterned, or growing over time, indicate significant stress and potential foundation problems. These types of cracks require immediate professional assessment.
-
Bulging or Bowing Walls: Any visible bulging or bowing in a concrete block wall is a serious sign of structural instability. This often indicates excessive pressure from soil, water, or settling. Do not attempt to fix this yourself. Contact a structural engineer or experienced mason immediately.
-
Foundation Settlement: Uneven settling of the foundation can manifest as tilted floors, sticking doors and windows, and significant cracking in walls and ceilings. These are all signs of underlying foundation issues and require professional diagnosis and repair.
-
Water Intrusion: Persistent water leaks, especially if they are accompanied by mold growth or efflorescence, can weaken concrete block structures over time. Addressing the source of the water intrusion requires specialized knowledge and equipment.
-
Compromised Support: If concrete blocks are supporting significant loads, such as a roof or upper floors, any damage to these blocks should be evaluated by a professional. Replacing load-bearing blocks requires specialized techniques to ensure structural stability during the repair process.
-
Extensive Spalling or Crumbling: Widespread spalling (surface flaking) or crumbling of concrete blocks indicates advanced deterioration. It suggests that the underlying concrete has been severely compromised, and a simple patch will not suffice.
Guidance on Hiring a Qualified Mason or Contractor for Complex Repairs
Finding the right professional is crucial for ensuring a successful and safe repair. Here’s how to approach the hiring process.
-
Seek Recommendations: Ask friends, family, neighbors, or colleagues for referrals. Online review sites can also provide valuable insights, but be sure to read reviews critically and look for patterns of both positive and negative feedback.
-
Verify Credentials and Licensing: Ensure the mason or contractor is licensed and insured in your area. This protects you from liability in case of accidents or substandard workmanship. Always verify their license status with your local licensing board.
-
Check Experience and Expertise: Look for a mason or contractor with specific experience in concrete block repair. Ask about their previous projects and request references from past clients. A reputable professional will be happy to provide this information.
-
Obtain Multiple Bids: Get at least three bids from different contractors. This allows you to compare pricing, scope of work, and proposed materials. Be wary of bids that are significantly lower than others, as this could indicate cutting corners or inexperience.
-
Review the Contract Carefully: Before signing anything, carefully review the contract. Make sure it clearly outlines the scope of work, materials to be used, payment schedule, and warranty information. Don’t hesitate to ask questions or negotiate terms before signing.
-
Trust Your Gut: Ultimately, choose a mason or contractor you feel comfortable working with. Trust your instincts and select someone who is knowledgeable, professional, and responsive to your concerns. Communication is key to a successful project.
Knowing when to call in a professional is paramount, but equally important is recognizing the significant accomplishment of completing a concrete block repair project yourself. The knowledge and skills you’ve gained will not only save you money but also empower you to maintain and improve your property for years to come.
Mission Accomplished: Concluding Your Concrete Block Repair Journey
With your tools cleaned and the mortar dust settled, it’s time to reflect on the journey of concrete block repair. From identifying the initial damage to applying the final sealant, you’ve taken on a challenging but rewarding task.
A Recap of the Repair Process
Let’s briefly revisit the core steps that brought you to this point:
-
Diagnosis was key. You started by carefully assessing the damage, identifying the type and extent of the problem.
-
Preparation was paramount. This involved cleaning the area, removing loose debris, and ensuring a sound surface for repair.
-
Mortar and patching techniques were applied. Depending on the damage, you expertly mixed and applied mortar or patching compound, filling cracks and restoring the surface.
-
Sealing offered protection. Finally, you applied sealant to protect your work from future water damage and prolong the life of your repair.
Each of these steps, executed with care and precision, contributed to the overall success of your project.
The Enduring Importance of Maintenance
Repairing concrete blocks isn’t just a one-time fix; it’s part of an ongoing maintenance strategy. Concrete block structures are constantly exposed to the elements, making regular inspection and upkeep essential.
Consider these preventative measures:
-
Ensure proper drainage around your foundation to minimize water exposure.
-
Regularly inspect walls for signs of cracking or damage. Early detection allows for prompt repair, preventing minor issues from escalating into major problems.
-
Reapply sealant as needed to maintain a waterproof barrier.
By proactively addressing potential problems, you can significantly extend the lifespan of your concrete block structures.
Embrace Your Newfound Skills
You’ve now equipped yourself with the knowledge and hands-on experience to tackle future concrete block repairs with confidence. This newfound capability translates into significant cost savings and the satisfaction of knowing you can maintain and improve your property independently.
Remember these final points:
-
Prioritize safety. Always wear appropriate protective gear and follow safety guidelines.
-
Strive for quality workmanship. Take your time and pay attention to detail, ensuring a lasting repair.
-
Don’t hesitate to seek professional help. If you encounter a problem that exceeds your skill level, consult a qualified mason or contractor.
With these principles in mind, you can confidently embark on future concrete block repair projects, knowing that you have the skills and knowledge to achieve successful results.
FAQs: Concrete Block Repair
[These frequently asked questions will address common concerns and clarify key aspects of concrete block repair, helping you confidently tackle your DIY project.]
How do I identify if a concrete block needs repair or replacement?
Look for cracks wider than 1/8 inch, crumbling concrete, spalling (flaking), or significant displacement of the block. If the damage compromises structural integrity, replacement is usually necessary. Minor surface cracks may be suitable for repair with patching compounds.
What type of patching compound is best for concrete block repair?
For small cracks and surface imperfections, use a pre-mixed concrete patching compound or hydraulic cement. For larger repairs, consider a concrete mix designed for patching and bonding, or a masonry crack filler, ensuring compatibility with existing concrete.
Can I paint over repaired concrete blocks?
Yes, but allow the patching compound or concrete to fully cure according to the manufacturer’s instructions before painting. Use a masonry primer designed for concrete surfaces to promote adhesion and prevent moisture damage. Then, apply a high-quality exterior paint.
How do I prevent future damage to my concrete blocks?
Ensure proper drainage away from the foundation to minimize moisture exposure. Apply a concrete sealer to protect against water penetration, freeze-thaw cycles, and salt damage. Regularly inspect your concrete blocks for early signs of damage and address them promptly.
So, grab your tools and get started! Tackling concrete block repair yourself can save you money and give you a real sense of accomplishment. Good luck, and happy building!