Understanding how weather affects your home’s energy efficiency begins with assessing your windows, where proper caulking window trim is crucial. DAP Products, a leading manufacturer of sealants, offers solutions to help you achieve a weathertight seal. When tackling this project, remember that using the correct caulking gun will significantly impact the precision of your work. Finally, ensuring a professional-looking finish often involves techniques championed by skilled contractors, who understand the nuances of caulking window trim for optimal results and long-lasting protection against the elements.
Caulking Window Trim: The Ultimate Guide – Article Layout Breakdown
This breakdown outlines the best layout for an article titled "Caulking Window Trim: The Ultimate Guide You Need!" focusing on providing clear, informative instructions to readers.
Understanding the Importance of Caulking Window Trim
Before diving into the how-to, establish why caulking is important. This section convinces readers the effort is worthwhile.
- What is Caulking, and Why Use It?: Define caulking in simple terms and explain its primary function (sealing gaps). Highlight benefits like preventing drafts, water damage, and insect intrusion.
- The Downsides of Neglecting Caulking: Describe the problems that arise from failing caulk: increased energy bills, mold growth, structural damage, and pest infestations. Use compelling imagery to illustrate this.
- Signs Your Window Trim Needs Caulking: A practical section for self-assessment. List visual indicators such as cracks, peeling, or crumbling caulk, discolored areas, and visible gaps.
Preparing for Caulking Window Trim
This section details everything needed before applying caulk, covering safety and materials.
- Safety First: Stress the importance of safety glasses and gloves. Consider mentioning a respirator if dealing with mold.
-
Tools and Materials Checklist: A comprehensive list of necessary items:
-
Caulk Gun: Explain the different types (ratchet, smooth-rod) and their pros/cons.
-
Caulk: Discuss types (silicone, acrylic latex, polyurethane) and their best uses for window trim. A table comparing features and benefits would be helpful.
Caulk Type Pros Cons Best For Silicone Waterproof, flexible, durable, good for exterior Difficult to paint, strong odor Areas exposed to water Acrylic Latex Paintable, easy to apply, lower odor Less waterproof and flexible than silicone Interior window trim Polyurethane Excellent adhesion, very durable Can be difficult to work with, requires mineral spirits for cleanup Exterior joints needing strength -
Caulk Removal Tools: Scrapers, utility knives, caulk removal tools. Explain which tools are best for different caulk types and situations.
-
Cleaning Supplies: Mild soap, water, cloths, sponges.
-
Painter’s Tape: Explain how it helps create clean lines.
-
Putty Knife/Small Trowel (Optional): For smoothing caulk.
-
- Prepping the Area:
- Cleaning: Detail the process of removing dirt, debris, and mold.
- Removing Old Caulk: Provide step-by-step instructions for effectively removing old caulk without damaging the window trim. Explain different removal methods.
Caulking Window Trim: A Step-by-Step Guide
The core of the article – providing clear, concise instructions.
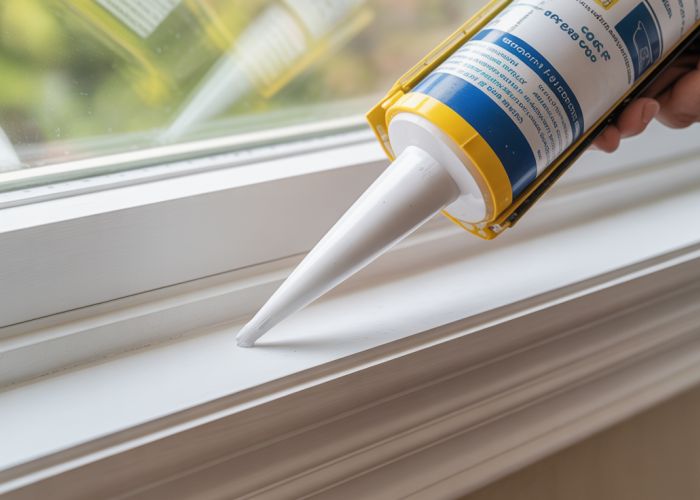
- Loading the Caulk Gun: Explain the process, including cutting the caulk tube tip at the correct angle and puncturing the inner seal.
- Applying the Caulk:
- Angle and Speed: Explain the optimal angle for the caulk gun and the appropriate speed for consistent application.
- Consistent Bead: Emphasize the importance of a smooth, unbroken bead of caulk.
- Filling Gaps: Address how to handle larger gaps. Possibly suggest using backer rod.
- Smoothing the Caulk:
- Using a Finger (with Water): Describe the technique and the importance of keeping your finger wet.
- Using a Smoothing Tool: Explain how to use a caulk smoothing tool or putty knife for a professional finish.
- Removing Painter’s Tape: Explain when to remove the tape for best results (before the caulk fully dries).
Troubleshooting Common Caulking Problems
Addressing potential issues and offering solutions enhances the guide’s value.
- Uneven Caulk Lines: Provide tips on achieving straight lines, such as practicing on scrap material.
- Air Bubbles: Explain how to minimize air bubbles during application.
- Caulk Not Adhering: Discuss potential causes (dirty surfaces, incompatible caulk) and solutions.
- Caulk Cracking or Peeling: Explain potential causes (improper application, incorrect caulk type) and preventative measures.
- Dealing with Mold: Describe how to kill mold before caulking and how to prevent future mold growth.
Maintaining Your Caulked Window Trim
This section details preventative steps to prolong the lifespan of your caulk job.
- Regular Inspections: Encourage regular visual checks for cracks or damage.
- Cleaning: Recommend periodic cleaning with mild soap and water.
- Re-caulking as Needed: Explain when and why re-caulking is necessary. Provide a general timeframe (e.g., every 5-10 years, depending on the caulk type and weather exposure).
Caulking Window Trim: Frequently Asked Questions
Hopefully, this guide has provided you with all the information you need to successfully caulk your window trim. Here are some frequently asked questions to further clarify the process:
How often should I caulk my window trim?
The lifespan of caulk varies depending on the type used and the environmental conditions it’s exposed to. Generally, you should inspect your caulking window trim at least once a year. Look for cracks, gaps, or peeling, and re-caulk as needed.
What type of caulk is best for window trim?
Acrylic latex caulk is a good general-purpose choice for interior caulking window trim due to its paintability and ease of use. For exterior applications, opt for a higher-quality silicone or polyurethane caulk, which offers better weather resistance and flexibility.
Can I caulk over old caulk?
It’s generally not recommended to caulk over old caulk. The new caulk might not properly adhere to the old layer, leading to cracking and peeling. Ideally, remove the old caulk completely before applying a fresh bead for a more durable and professional finish on your caulking window trim.
What tools do I need for caulking window trim?
You’ll need a caulk gun, a utility knife or caulk removal tool, a damp cloth or sponge, and potentially some painter’s tape. A smoothing tool can also help create a clean and professional caulk bead. Remember proper ventilation!
So there you have it! Hopefully, you’re feeling confident and ready to tackle that caulking window trim job. Remember, a little effort with your caulking window trim can make a big difference. Happy caulking!