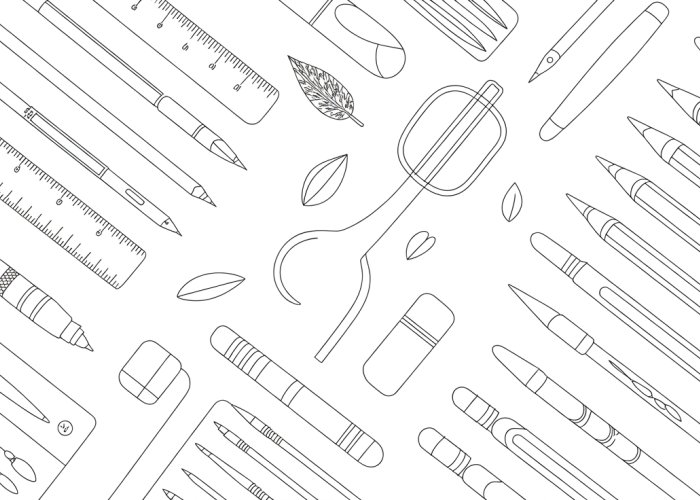
Digital artists often seek enhanced precision and control, attributes critical for creating impactful visuals, which is why understanding various line art tools is fundamental. Adobe Photoshop, a leading image editing software, offers a robust suite of brushes and vector tools utilized for creating diverse linework styles. Wacom tablets, recognized in the design industry, allow for nuanced pressure sensitivity that directly influences line thickness, enabling expressive artistic interpretation. Mastery of these line art tools allows artists to create professional looking work.
Line art, in its simplest form, is the cornerstone of countless visual creations. From the intricate details of a comic book panel to the elegant simplicity of a technical illustration, lines define form, convey emotion, and guide the viewer’s eye.
In the digital age, the possibilities for line art have exploded. We’re no longer limited to traditional pens and paper.
Digital tools offer unparalleled flexibility, precision, and the ability to easily correct mistakes. But with so many options available, choosing the right tools can feel overwhelming.
This guide aims to cut through the noise and provide artists with the knowledge they need to make informed decisions about their digital line art toolkit.
We’ll explore the vast landscape of digital art software, hardware, and techniques, ultimately empowering you to create stunning line art that reflects your unique artistic vision.
What is Line Art?
At its core, line art is any image composed primarily of distinct straight or curved lines placed against a (usually plain) background, without gradations in shade (darkness) or color to represent two-dimensional or three-dimensional objects.
It’s about defining shapes and forms with lines. Think of it as the skeleton upon which a more complex illustration or painting is built.
Line art’s significance in digital art is multifaceted. It serves as:
- The foundation: A solid line art base ensures accurate proportions and a clear composition.
- A stylistic choice: Line art can be the final product, offering a clean and graphic aesthetic.
- A guide for coloring and shading: Clearly defined lines make the coloring process more efficient and precise.
Navigating the Digital Line Art Landscape: Our Objective
The sheer volume of digital art tools can be daunting. Our primary objective is to demystify the selection process.
We aim to equip you with the knowledge to choose the best tools for your specific needs. This isn’t about declaring one tool superior to all others.
It’s about understanding the strengths and weaknesses of each option and aligning them with your artistic goals.
A Glimpse at the Digital Toolkit
The digital line art toolkit encompasses a wide range of elements, which can be broadly categorized as follows:
- Software: Digital art programs like Adobe Photoshop, Clip Studio Paint, Procreate, and Krita provide the canvas and brushes for your line art.
- Hardware: Drawing tablets and styluses serve as the interface between you and the digital canvas, mimicking the feel of traditional drawing tools.
- Techniques: Mastering techniques like line weight variation, brush stabilization, and perspective drawing is crucial for creating compelling line art.
Finding Your Perfect Fit: Key Considerations
Choosing the right tools isn’t a one-size-fits-all endeavor. Several factors will influence your decision:
- Artist Style: Are you drawn to clean, precise lines, or do you prefer a more textured and expressive approach?
- Project Requirements: Are you creating illustrations for print, web, or animation? The intended use will dictate the necessary resolution and file format.
- Budget: Digital art tools range from free and open-source options to professional-grade software and hardware.
Ultimately, the best tools are the ones that feel most comfortable and intuitive for you, and that enable you to bring your artistic vision to life. We are here to help you find that perfect fit.
Line art, in its simplest form, is the cornerstone of countless visual creations. From the intricate details of a comic book panel to the elegant simplicity of a technical illustration, lines define form, convey emotion, and guide the viewer’s eye.
In the digital age, the possibilities for line art have exploded. We’re no longer limited to traditional pens and paper. Digital tools offer unparalleled flexibility, precision, and the ability to easily correct mistakes. But with so many options available, choosing the right tools can feel overwhelming. This guide aims to cut through the noise and provide artists with the knowledge they need to make informed decisions about their digital line art toolkit. We’ll explore the vast landscape of digital art software, hardware, and techniques, ultimately empowering you to create stunning line art that reflects your unique artistic vision.
What is Line Art? At its core, line art is any image composed primarily of distinct straight or curved lines placed against a (usually plain) background, without gradations in shade (darkness) or color to represent two-dimensional or three-dimensional objects. It’s about defining shapes and forms with lines. Think of it as the skeleton upon which a more complex illustration or painting is built.
Line art’s significance in digital art is multifaceted. It serves as: The foundation: A solid line art base ensures accurate proportions and a clear composition. A stylistic choice: Line art can be the final product, offering a clean and graphic aesthetic. A guide for coloring and shading: Clearly defined lines… And with a firm grasp of what line art is and how it’s used, we can now step into the digital realm, where the choices for creation are truly vast.
Digital Art Software: The Foundation of Your Line Art
The software you choose is the bedrock of your digital line art workflow. It determines the tools at your disposal, the efficiency of your process, and ultimately, the quality of your final product. Selecting the right software requires careful consideration of your artistic style, project requirements, and budget.
Let’s delve into some of the most popular digital art software options available today and assess their strengths and weaknesses for creating compelling line art.
An Overview of Popular Digital Art Software
The digital art world is populated by a diverse range of software, each catering to different needs and skill levels. Here, we’ll examine a few of the leading contenders: Adobe Photoshop, Clip Studio Paint, Procreate, and Krita.
Adobe Photoshop: The Industry Standard
Photoshop is a behemoth in the digital art world, renowned for its versatility and powerful image manipulation capabilities.
However, for purely line art purposes, its raster-based nature can be a limitation. Raster images are composed of pixels, meaning that lines can appear pixelated when zoomed in or scaled up significantly.
While Photoshop offers excellent brush customization, it might be considered overkill for artists primarily focused on line art. Its vast array of features can be overwhelming, and the subscription-based pricing model may not be ideal for everyone.
Clip Studio Paint: The Line Art Specialist
Clip Studio Paint (CSP) is a software package specifically designed for artists creating comics, manga, and illustrations.
Its strengths lie in its excellent brush engine, offering a wide range of customizable brushes perfect for achieving various line art styles. CSP also boasts specialized tools like perspective rulers, which are invaluable for creating backgrounds and environments with accurate perspective.
CSP is generally regarded as the best value for digital line art creation.
Procreate: The iPad Powerhouse
Procreate is a powerful and intuitive painting app exclusively available for iPad.
It’s favored by artists who enjoy the tactile experience of drawing directly on a screen with the Apple Pencil. Procreate’s intuitive interface makes it easy to learn, and its responsive brush engine delivers a natural drawing feel.
However, Procreate is limited to iOS and lacks some of the advanced features found in desktop software like Photoshop or Clip Studio Paint.
Krita: The Free and Open-Source Alternative
Krita is a free and open-source digital painting program with a focus on animation and visual effects. It offers a comprehensive set of tools for creating line art, including customizable brushes, layer management, and vector support.
While it might not have the industry recognition of Photoshop or the specialized features of Clip Studio Paint, Krita is a fantastic option for artists on a budget who are looking for a capable and versatile digital art tool.
Key Software Features for Line Art
Beyond the software itself, certain key features are essential for efficient and high-quality line art creation.
These include brush customization, layer management, and vector support. Understanding these features will empower you to choose the software that best aligns with your workflow.
Brush Customization: Tailoring Your Tools
The ability to customize brushes is paramount for achieving the desired line art style.
Key settings to consider include:
-
Size: Controls the thickness of the line.
-
Pressure Sensitivity: Allows line weight to vary based on the pressure applied to the stylus. This is crucial for creating dynamic and expressive lines.
-
Texture: Adds surface detail to the lines, mimicking the feel of traditional media.
Layer Management: Organizing Your Artwork
Layer management is essential for non-destructive editing and organizing complex artwork.
Layers allow you to separate different elements of your drawing, making it easy to make adjustments without affecting other parts of the image.
For line art, you might use separate layers for the sketch, the final lines, and any details or embellishments.
Vector Support: Scalability and Precision
Vector graphics are composed of mathematical equations rather than pixels.
This means that vector line art can be scaled infinitely without losing quality, making it ideal for logos, illustrations that need to be printed at various sizes, and designs that require clean, crisp lines.
Raster vs. Vector: Understanding the Difference
A raster image (like a photograph or something created in Photoshop without using vector tools) is made up of a grid of pixels. When you zoom in too far, you start to see the individual squares, resulting in a blurry or pixelated image. Raster images are resolution-dependent.
A vector image, on the other hand, is created using mathematical formulas that define points, lines, curves, and shapes. Because these elements are mathematically defined, they can be scaled up or down infinitely without any loss of quality. Vector images are resolution-independent.
Line art’s clarity and precision are vital, but the software alone doesn’t create magic. The tactile experience of drawing remains crucial, and that’s where drawing tablets and styluses come into play, acting as the vital bridge between your artistic intent and the digital canvas. The right hardware setup can drastically impact your workflow, comfort, and ultimately, the quality of your line art.
Drawing Tablets and Styluses: The Connection to the Canvas
The world of digital art is built on the synergy between software and hardware, and when it comes to line art, the choice of drawing tablet and stylus is paramount.
Think of your tablet and stylus as extensions of yourself, allowing you to translate the vision in your mind onto the screen with accuracy and nuance.
This section explores the different types of drawing tablets available, delves into the essential features of styluses, and offers recommendations to help you find the perfect match for your artistic needs.
Types of Drawing Tablets: Finding Your Ideal Surface
The market offers a diverse range of drawing tablets, each with its own set of advantages and disadvantages. Understanding the nuances of each type will guide you towards the option that best suits your workflow and budget.
The key is to find the device that feels most intuitive and comfortable for you.
Pen Displays: Drawing Directly on the Screen
Pen displays, such as the Wacom Cintiq and Huion Kamvas, offer the most natural drawing experience by allowing you to draw directly on the screen. This eliminates the disconnect between hand and eye that can be present with other tablet types.
This direct interaction often translates to more fluid and precise line work.
However, pen displays tend to be more expensive than pen tablets, representing a significant investment for artists.
They also require more desk space due to their larger size.
Pen Tablets: Mastering the Indirect Approach
Pen tablets, like the Wacom Intuos and Huion Inspiroy, require you to draw on a separate surface while looking at your computer screen.
This indirect approach takes some getting used to, as the hand-eye coordination differs from traditional drawing.
However, pen tablets are generally more affordable and portable than pen displays, making them a great option for beginners or artists on the go.
iPad Pro & Surface Pro: Versatility and Mobility
The iPad Pro and Surface Pro, when paired with their respective styluses, offer a versatile and mobile drawing experience.
These devices are not solely dedicated to drawing; they can be used for a wide range of tasks, making them valuable tools for artists who need flexibility.
They excel in portability, allowing you to create line art anywhere, anytime.
However, the drawing experience may not be as refined as with dedicated pen displays, and the cost can be comparable.
Stylus Features: Precision at Your Fingertips
The stylus is your primary tool for creating digital line art, and its features can significantly impact your control and expressiveness. Two key features to consider are pressure sensitivity and tilt recognition.
Pressure Sensitivity: The Weight of the Line
Pressure sensitivity allows you to control the line weight based on the amount of pressure you apply to the stylus.
A light touch creates thin lines, while a firm press produces thicker lines.
This dynamic control is crucial for creating visually interesting and expressive line art.
A higher level of pressure sensitivity allows for finer gradations in line weight, giving you more control over your strokes.
Tilt Recognition: Adding Dimension and Texture
Tilt recognition allows the software to detect the angle at which you are holding the stylus. This information can be used to affect the brush shape and texture.
For example, tilting the stylus may broaden the brush stroke or add a textured edge.
Tilt recognition opens up new possibilities for creating nuanced and expressive line art.
Stylus Recommendations: Choosing the Right Tool
With so many styluses on the market, it can be difficult to know where to start. Here are a few recommendations to consider, based on the type of device you are using:
Apple Pencil: The iPad Pro’s Perfect Partner
The Apple Pencil is specifically designed for iPads and offers excellent pressure sensitivity and tilt recognition.
Its seamless integration with the iPad Pro makes it a top choice for digital artists who prefer the iOS ecosystem.
Wacom Pen: The Industry Standard
Wacom pens are widely regarded as the industry standard for digital art. Various models are available, each designed to work with specific Wacom tablets.
The Wacom Pro Pen 2 is known for its exceptional accuracy and comfortable grip.
Generic Stylus Pens: Budget-Friendly Alternatives
Generic stylus pens can be a cheaper alternative to brand-name options. However, they may lack advanced features like pressure sensitivity and tilt recognition.
While they might be suitable for basic tasks, they are generally not recommended for serious line art creation. Consider compatibility and user reviews before opting for a generic stylus.
Essential Line Art Techniques and Settings
Line art, at its core, is about more than just drawing lines. It’s about crafting a visual language that communicates form, depth, and emotion. Mastering this language requires not only the right tools but also a deep understanding of the techniques that transform simple lines into compelling art.
This section explores the fundamental techniques and software settings that elevate line art from basic outlines to captivating illustrations. By delving into line weight variation, brush stabilization, perspective guides, and layering techniques, we’ll uncover how to breathe life and dimension into your digital creations.
Line Weight Variation: Adding Depth and Visual Interest
Line weight variation is perhaps the most fundamental technique for creating dynamic and visually engaging line art. It involves deliberately changing the thickness of lines to suggest form, depth, and light.
Thicker lines can indicate areas that are closer to the viewer, in shadow, or where objects overlap. Thinner lines, conversely, can represent areas that are further away, in highlight, or areas of delicate detail.
By thoughtfully varying line weight, you can create the illusion of three-dimensionality on a two-dimensional surface. The interplay of thick and thin lines directs the viewer’s eye, creating a more dynamic and captivating composition.
Experiment with different levels of pressure sensitivity on your stylus to achieve varying line weights. Practice creating smooth transitions between thick and thin lines for a polished and professional look.
Brush Stabilization: Achieving Smooth and Confident Lines
One of the challenges of digital line art is achieving smooth, confident lines, especially at higher resolutions. The inherent wobble of hand-drawn lines can be exacerbated by the unforgiving nature of the digital canvas. This is where brush stabilization comes in.
Most digital art software offers brush stabilization settings that help to smooth out imperfections in your lines. These settings work by averaging the input from your stylus, reducing jitter and creating a more polished result.
Experiment with different levels of stabilization to find the sweet spot that works best for your drawing style. Too much stabilization can make your lines feel stiff and unnatural.
Too little stabilization may leave you with wobbly lines. The goal is to find a balance that allows for both smoothness and expressiveness.
Perspective Guides: Creating Realistic Environments
Perspective is crucial for creating realistic and believable environments in your line art. Maintaining accurate perspective can be challenging, especially when drawing complex scenes with multiple vanishing points. This is where perspective guides come in handy.
Digital art software often includes built-in perspective guides that help you to establish and maintain accurate perspective. These guides typically consist of vanishing points and lines that radiate out from them, providing a visual framework for your line art.
By aligning your lines with the perspective guides, you can ensure that your buildings, objects, and characters recede realistically into the distance.
Learning to use perspective guides effectively is essential for creating immersive and believable environments in your digital line art.
Layering Techniques: Building Complexity and Control
Layering is a fundamental concept in digital art, and it’s especially useful for creating complex and detailed line art. By building up your line art in stages on different layers, you gain greater control over individual elements and can make adjustments without affecting other parts of your artwork.
For example, you might create separate layers for the background, foreground, and characters in your scene. You could then use different line weights, brush settings, and perspective guides for each layer.
Layering also allows you to experiment with different effects without committing to permanent changes. You can easily adjust the opacity of a layer, apply filters, or even delete a layer entirely without affecting the rest of your artwork.
By mastering layering techniques, you can unlock a new level of complexity and control in your digital line art.
Brush Settings: Customizing Your Digital Inking Tools
The beauty of digital line art lies not just in the software and hardware, but in the profound level of control you have over the very tools you use. Unlike traditional media, digital art allows for the complete customization of your brushes, empowering you to create effects that range from the hyper-realistic to the wildly experimental.
This section dives deep into the art of crafting custom brushes, exploring the core settings that define their behavior and how these settings can be manipulated to achieve a wide array of line art styles. Understanding these settings is key to unlocking the full potential of your digital inking tools and creating a truly unique artistic voice.
Understanding Brush Settings: The Building Blocks of Digital Inking
Every digital brush is built upon a foundation of adjustable parameters. Mastering these parameters is essential for creating line art that is both expressive and precisely controlled. Let’s explore some of the most critical settings:
Size: Defining Line Thickness
Size is arguably the most fundamental brush setting. It directly controls the thickness of the line produced by the brush. The size setting is typically measured in pixels and can be adjusted dynamically using pen pressure, allowing for fluid line weight variation.
Experimenting with different size ranges and pressure sensitivities is crucial for developing a personal style. For example, a larger size range with high pressure sensitivity might be ideal for creating bold, dynamic lines, while a smaller range with low sensitivity could be better suited for intricate detail work.
Opacity: Adjusting Transparency
Opacity determines the transparency of the brush stroke. A brush with 100% opacity will lay down a solid, opaque line, while a brush with lower opacity will allow the underlying canvas to show through.
Opacity can be used to create subtle shading effects, build up tones gradually, or even mimic the look of traditional watercolor washes. Similar to size, opacity can also be linked to pen pressure for expressive variations in tone.
Hardness: Controlling Line Sharpness
The hardness setting controls the sharpness of the brush’s edge. A hard brush will produce crisp, well-defined lines, while a soft brush will create a feathered, diffused effect.
Hardness is particularly important for creating clean, precise line art. A high hardness setting ensures that your lines remain sharp and distinct, even at high resolutions. Softer brushes, on the other hand, can be useful for creating smoother transitions, blending colors, or simulating the look of traditional pencil strokes.
Texture: Adding Surface Detail to Lines
Texture adds surface detail to your lines. This can be achieved by incorporating pre-made texture patterns into the brush or by using a textured brush tip.
Texture can be used to simulate the look of different paper types, add a gritty or rough feel to your lines, or even create unique and abstract effects. The possibilities are truly endless.
Creating Custom Brushes: Tailoring Your Tools to Your Style
The real power of digital line art lies in the ability to create custom brushes tailored to your specific artistic needs and preferences.
For Different Line Art Styles
-
Clean Line Art: For a clean, crisp style, start with a hard, round brush with high opacity. Experiment with pressure sensitivity to control line weight, ensuring smooth transitions between thick and thin strokes.
-
Textured Line Art: To add texture, incorporate a subtle texture pattern into your brush settings or use a textured brush tip. Adjust the size and opacity of the texture to achieve the desired effect.
-
Sketchy Line Art: Create a sketchy feel by using a brush with a slightly irregular shape and lower opacity. Vary your stroke direction and pressure to create a sense of spontaneity and energy.
Using Custom Shapes and Textures
Most digital art software allows you to import custom shapes and textures to use as brush tips. This opens up a world of creative possibilities, allowing you to create truly unique and personalized brushes.
Experiment with different shapes and textures to see what effects you can achieve. You can even scan in your own hand-drawn textures or create custom shapes in vector editing software.
Brush settings open up a world of possibilities, allowing you to precisely control every aspect of your digital inking tools. But what about emulating the look and feel of traditional media? How can you bring the charm of tangible tools into the digital space?
Bridging the Gap: Traditional Techniques in the Digital Space
The beauty of digital art lies in its versatility, not just in creating entirely new styles, but also in recreating traditional ones. Many artists seek to replicate the look and feel of traditional line art within their digital workflows. This section explores how to bridge that gap, bringing the warmth and character of traditional tools into your digital creations.
Emulating Traditional Tools with Digital Brushes
One of the most direct ways to incorporate traditional techniques is by using digital brushes that mimic the behavior of physical tools.
Fineliner and technical pens are beloved for their consistent line weight and clean precision. Digital brushes can emulate this with settings that prioritize consistent thickness and sharp edges.
Experiment with round brushes with 100% hardness and minimal pressure sensitivity for a similar effect.
Different brush textures can simulate the subtle imperfections of ink on paper.
Paper Texture Brushes: Adding Organic Realism
Even the smoothest digital lines can sometimes feel sterile. Adding a paper texture is a subtle yet effective way to infuse your digital line art with a more organic and tactile feel.
Paper texture brushes overlay a subtle pattern onto your artwork, simulating the texture of paper fibers.
These brushes often use scanned images of real paper. Experiment with different paper textures to find one that complements your style. Subtle textures are often the most effective.
You can create your own paper texture brushes by scanning paper, or find free textures online. A little texture goes a long way!
Scanning and Refining: A Hybrid Approach
Sometimes, the best way to incorporate traditional techniques is to start with traditional media itself.
Scanning your traditional line art allows you to combine the best of both worlds.
You can create your initial linework using your favorite traditional tools and then scan it into your computer for further refinement.
Digital tools can then be used to clean up imperfections, adjust line weights, and add color.
This approach offers a unique blend of the organic feel of traditional art with the precision and flexibility of digital editing.
File Formats and Resolution: Optimizing Your Line Art for Different Purposes
After meticulously crafting your digital line art, one crucial step remains: choosing the correct file format and resolution. This decision directly impacts how your work is displayed, shared, and ultimately, its overall quality. Understanding the nuances of raster and vector formats, along with resolution considerations, is essential for any digital artist.
Raster vs. Vector: Understanding the Core Difference
At its heart, the choice between raster and vector formats boils down to how the image is constructed. Raster images are composed of a grid of pixels, each holding color information. Think of it like a mosaic; the more tiles (pixels), the smoother the image.
Vector images, on the other hand, are based on mathematical equations that define lines, curves, and shapes. They are resolution-independent, meaning they can be scaled infinitely without losing quality.
Choosing the right format depends on your specific needs. Raster images are better suited for complex artwork with subtle gradations and textures, while vector images excel at clean, scalable line art.
Recommended File Formats: A Practical Guide
Several file formats are commonly used for digital line art, each with its own strengths and weaknesses.
.PSD (Adobe Photoshop)
The PSD format is the native file format for Adobe Photoshop. Its primary advantage is its ability to preserve layers, allowing for non-destructive editing. This is incredibly useful for making adjustments to individual elements of your line art.
PSD is generally used as a master file for works in progress.
It is not ideal for final delivery due to its large file size and the need for specific software to open it.
.TIFF (Tagged Image File Format)
TIFF is a high-quality raster format often used for printing. It supports lossless compression, meaning no image data is lost when the file is saved.
This makes it an excellent choice for archiving your line art or submitting it to print services.
TIFF files tend to be larger than other raster formats, but the image quality is superior.
.PNG (Portable Network Graphics)
PNG is a raster format that supports transparency, making it ideal for web graphics. It uses lossless compression, preserving image quality while keeping file sizes relatively small.
PNG is a great option for displaying your line art online, especially if it contains transparent elements like logos or watermarks. It is also suitable for situations when you need to preserve fine detail and sharp lines.
.SVG (Scalable Vector Graphics)
SVG is a vector format specifically designed for web graphics. Its key advantage is its scalability; SVG images can be scaled up or down without any loss of quality.
This makes it perfect for responsive websites and applications. SVG is also editable in text editors, allowing for advanced customization.
Resolution Considerations: Printing vs. Web Display
Resolution, measured in dots per inch (DPI) or pixels per inch (PPI), determines the level of detail in a raster image. Choosing the appropriate resolution is crucial for achieving optimal results, whether you’re printing your line art or displaying it on the web.
Resolution for Printing
For printing, a resolution of at least 300 DPI is generally recommended. This ensures that your line art will appear sharp and detailed when printed.
For large format prints, such as posters or banners, a lower resolution (e.g., 150 DPI) may be acceptable, as the viewing distance is typically greater.
Resolution for Web Display
For web display, a resolution of 72 DPI is typically sufficient. This is because most computer monitors have a screen resolution of around 72 DPI. Using a higher resolution will only result in larger file sizes without any noticeable improvement in image quality.
However, you might consider using a higher resolution for retina or high-definition displays, where a higher pixel density can be appreciated.
Consider the intended use of your line art when selecting the resolution. Overly high resolution will lead to unnecessarily large files, while a resolution that’s too low will make your work appear blurry or pixelated. Experimentation is key, and always keep the final output in mind.
Showcase and Inspiration: Artists Renowned for Line Art
After delving into the tools and techniques that empower digital line art, it’s time to turn to the masters. Examining the work of renowned line artists provides invaluable inspiration and unlocks a deeper understanding of the art form’s potential.
By studying their styles and techniques, we can gain insights into how to elevate our own line art and develop a unique visual voice.
A Gallery of Masters: Diverse Styles and Techniques
Line art is a vast and varied field, encompassing styles from delicate and flowing to bold and dynamic. To illustrate this diversity, let’s explore the work of a few influential artists who have left an indelible mark on the art world.
Alphonse Mucha: The Elegance of Art Nouveau
Alphonse Mucha, a central figure in the Art Nouveau movement, is celebrated for his intricate and flowing lines. His posters and decorative panels are characterized by elegant figures, swirling floral motifs, and a sense of ethereal beauty.
Mucha’s masterful use of line weight creates depth and visual interest, guiding the viewer’s eye through the composition. He often employed long, sinuous lines to define the contours of his figures, emphasizing their grace and fluidity.
His work demonstrates the power of line art to evoke a sense of romance, fantasy, and timeless beauty.
Frank Miller: Gritty Realism in Comics
In stark contrast to Mucha’s delicate elegance, Frank Miller’s work in comic books is known for its raw energy and gritty realism. His distinctive line style is characterized by bold, angular lines, heavy shadows, and a sense of dynamic movement.
Miller’s use of thick, black lines creates a sense of weight and impact, while his hatching and cross-hatching techniques add depth and texture to his illustrations. His work on titles like Sin City and Batman: The Dark Knight Returns revolutionized the comic book industry, demonstrating the power of line art to convey a sense of urban decay, violence, and moral ambiguity.
Contemporary Line Art Innovators
Beyond these historical figures, many contemporary artists are pushing the boundaries of line art in exciting new ways. These artists often blend traditional techniques with digital tools, creating unique and innovative styles.
Consider Loish, for example, whose character designs boast elegance and charm, enhanced by a unique colour palette.
Another noteworthy artist is Samuel Youn, who is praised for his detailed and expressive linework.
Exploring the work of these contemporary artists can provide inspiration and insights into the latest trends and techniques in line art.
Deconstructing the Masters: Analyzing Techniques and Styles
To truly learn from these artists, it’s essential to analyze their techniques and styles in detail. Consider the following aspects:
- Line Weight: How do they vary the thickness of their lines to create depth and visual interest?
- Line Quality: Are their lines smooth and flowing, or rough and textured?
- Composition: How do they use lines to guide the viewer’s eye and create a sense of balance and harmony?
- Subject Matter: What subjects do they choose to depict, and how does their line art style complement their chosen themes?
By carefully studying these elements, we can gain a deeper appreciation for the artistry and skill involved in creating compelling line art. Experiment with emulating their styles, not to copy, but to understand the nuances of their craft. This allows you to discover elements that resonate with your own artistic vision.
Ultimately, studying the masters is not about imitation, but about inspiration. By immersing ourselves in the work of talented line artists, we can expand our creative horizons and develop our own unique artistic voice.
FAQs: Choosing the Right Line Art Tools
Here are some frequently asked questions about choosing the best line art tools for your digital artwork. Hopefully, these answers will help you make an informed decision.
What’s the difference between raster and vector-based line art tools?
Raster-based tools, like those in Photoshop, use pixels. This can result in blurry lines when zoomed in, especially after scaling.
Vector-based tools, like those in Illustrator or Affinity Designer, use mathematical equations to create lines. This means lines stay sharp at any size.
Which line art tools are best for beginners?
Clip Studio Paint is a popular choice due to its robust features and relatively gentle learning curve. It’s designed specifically for illustration and offers many helpful tools.
Other options include Krita (free and open source) and Procreate (iPad only). Experiment to see what suits your workflow.
How important is pressure sensitivity when selecting line art tools?
Pressure sensitivity is crucial for creating dynamic line art with varying line weights. Many tablets offer excellent pressure sensitivity.
Software like Clip Studio Paint and Procreate are designed to take full advantage of this feature, giving you greater control over your lines.
Can I use free line art tools for professional work?
Yes, you can. Krita, for example, is a powerful, free, and open-source option that can produce professional-quality line art.
The right line art tools for professional work often come down to workflow preference and specific project needs, not necessarily price.
So, go forth and experiment! Finding the right line art tools is all about playing around and discovering what works best for you and your unique style. Happy drawing!