Embarking on a kitchen renovation? Installing beaded cabinet doors yourself is easier than you think! Cabinet door replacement, a key aspect of DIY projects, often involves learning how to work with woodworking tools like a router, essential for achieving professional-looking results. Understanding the face frame construction, a common feature of many cabinets, is also vital for a smooth installation. With this step-by-step guide, you’ll be confident enough to transform your space and learn the basics like the face frame construction while installing your new beaded cabinet doors.
Crafting the Perfect "Beaded Cabinet Doors: Easy DIY Install Guide in 6 Steps" Article Layout
This guide outlines the ideal article structure for a comprehensive DIY guide on installing "beaded cabinet doors," ensuring clarity, engagement, and usability for readers.
Introduction: Hook and Context
The introduction should immediately grab the reader’s attention and establish the purpose of the guide.
- Hook: Start with a compelling opening. Consider using a question, a relatable scenario (e.g., "Tired of your outdated kitchen cabinets?"), or a statement showcasing the impact of beaded cabinet doors.
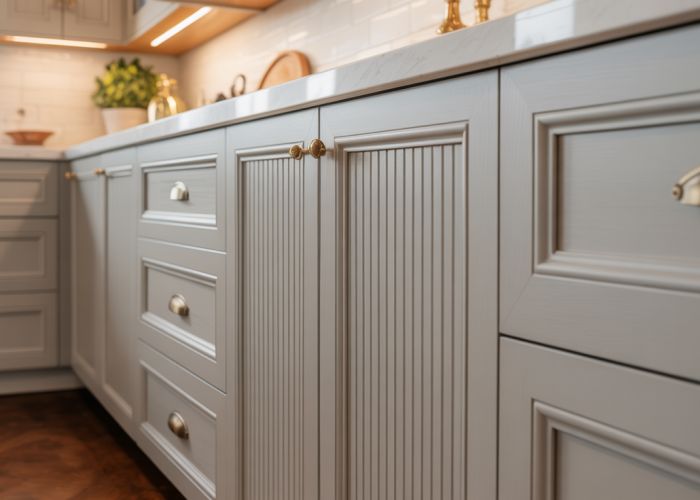
- Define "Beaded Cabinet Doors": Clearly and concisely explain what beaded cabinet doors are. Include an image illustrating the key feature: the decorative beading.
- Highlight Benefits: Outline the advantages of choosing beaded cabinet doors and undertaking a DIY installation. This could include:
- Enhanced aesthetics
- Cost savings compared to professional installation
- Increased home value
- Personal satisfaction of completing a DIY project
- Brief Overview of Steps: Briefly introduce the 6 steps that will be covered in the guide. This serves as a roadmap for the reader.
- Target Audience: Identify who this guide is for (e.g., beginner to intermediate DIYers). This sets expectations for the skill level required.
Essential Tools and Materials
This section is crucial for preparation. Use a combination of bullet points and a table for clarity.
-
Headline: "Tools and Materials You’ll Need"
-
Introductory Paragraph: Briefly explain why proper preparation is essential for a successful installation.
-
Bulleted List of Tools:
- Screwdriver (manual and/or power)
- Drill (for pilot holes)
- Measuring tape
- Level
- Pencil
- Safety glasses
- Optional: Clamps, shims
-
Bulleted List of Materials:
- New beaded cabinet doors (correct size and quantity)
- New hinges (if replacing)
- Screws (appropriate size for hinges and cabinet frames)
- Optional: Wood filler (for patching existing screw holes), sandpaper, paint or stain (for touch-ups)
-
Table (Optional but Recommended): A table can visually organize tools and materials, including quantities and notes.
Item Quantity Notes Beaded Cabinet Doors X Ensure correct measurements and swing direction Hinges 2 per door Check compatibility with doors and frames Screws Y Should be the correct length and type
Step-by-Step Installation Guide (6 Steps)
Each step should be clearly explained with detailed instructions and visual aids.
-
Structure for Each Step:
Step [Number]: [Descriptive Title, e.g., "Removing the Old Cabinet Doors"]
- Brief Introduction: Start with a sentence explaining the purpose of this step.
- Detailed Instructions: Provide clear, concise, and numbered instructions. Use active voice and avoid ambiguity.
- Image/Video: Include a high-quality image or short video demonstrating the step. Visual aids are extremely important for DIY guides.
- Troubleshooting Tips: Include common problems and solutions within each step, labeled clearly (e.g., "Troubleshooting: Stripped Screw Holes").
- Safety Precautions: Remind readers of relevant safety measures within each step (e.g., "Wear safety glasses when using power tools").
-
Example Step 1: Removing the Old Cabinet Doors
- Open the existing cabinet door completely.
- Using a screwdriver, carefully loosen the screws connecting the hinges to the cabinet frame.
- Support the door with one hand as you fully remove the screws.
- Gently detach the door and set it aside.
- Repeat for all doors you are replacing.
(Image/Video: Showing the process of removing a cabinet door)
Troubleshooting: If screws are stripped, try using a rubber band or steel wool between the screwdriver and the screw head for better grip.
-
Example Step 2: Preparing the Cabinet Frames
- Inspect the cabinet frames for any damage or loose screws.
- If necessary, tighten existing screws or replace them.
- If old screw holes are stripped, fill them with wood filler, let it dry completely, and sand smooth.
(Image/Video: Demonstrating wood filler application)
-
Example Step 3: Installing the New Hinges (if needed)
- If you’re using new hinges, align them with the pre-drilled holes on the cabinet frame.
- Use a drill to create pilot holes if necessary. This will prevent the wood from splitting.
- Secure the hinges to the frame with the provided screws. Ensure they are firmly attached.
(Image/Video: Showing hinge installation on the cabinet frame)
-
Example Step 4: Attaching the Beaded Cabinet Doors
- Position the beaded cabinet door against the cabinet frame, aligning the hinges.
- Use a pencil to mark the hinge locations on the door.
- Drill pilot holes into the door at the marked locations.
- Secure the hinges to the door with screws.
(Image/Video: Showing hinge attachment to the beaded cabinet door)
-
Example Step 5: Checking Alignment and Adjustments
- Open and close the beaded cabinet door to check for proper alignment.
- If the door is misaligned, loosen the screws slightly and adjust the position of the hinges.
- Use shims if necessary to achieve a perfectly aligned door.
(Image/Video: Showing alignment adjustments using shims)
-
Example Step 6: Final Touches
- Tighten all screws securely.
- Inspect the installation for any gaps or imperfections.
- Touch up any scratches or blemishes with paint or stain.
- Clean the beaded cabinet doors with a soft cloth.
(Image/Video: Showing final inspection and cleaning)
Post-Installation Tips and Maintenance
- Headline: "Maintaining Your New Beaded Cabinet Doors"
- Cleaning Instructions: Provide guidelines on how to properly clean beaded cabinet doors without damaging the finish or beading.
- Preventative Measures: Suggest ways to prevent damage (e.g., avoiding harsh chemicals, using felt pads on contact points).
- Troubleshooting: Address common issues that may arise after installation (e.g., loose hinges, sticking doors).
FAQs: Installing Beaded Cabinet Doors
Hopefully, the guide covered everything, but here are a few frequently asked questions to help further clarify the beaded cabinet door installation process.
Can I use this guide for any type of beaded cabinet door?
This guide provides a general overview. The specific steps may vary slightly depending on the type of hinges included with your beaded cabinet doors and the construction of your cabinet frames. Always refer to the manufacturer’s instructions.
What if my cabinet frames aren’t perfectly square?
Slight imperfections are common. Use shims behind the hinges to compensate for any minor out-of-squareness. This will ensure your beaded cabinet doors hang properly and close flush.
Do I need special tools to install beaded cabinet doors?
Generally, no. You’ll need a drill, screwdriver (often a power screwdriver is helpful), level, measuring tape, and possibly a pencil. A countersinking bit can also be useful for preventing the screws from splitting the wood.
Where can I purchase beaded cabinet doors?
Beaded cabinet doors are available at most home improvement stores, online retailers, and custom cabinet shops. Compare prices and styles to find the best fit for your budget and design preferences.
And there you have it! Installing beaded cabinet doors is totally doable with a little patience and the right guidance. Now go on and give those cabinets a fresh, stylish look. Happy DIY-ing!