Achieving a flawless finish with ash wood stain requires understanding several key aspects. The wood’s open grain, a notable attribute, significantly impacts stain absorption. Proper preparation, including the selection of the correct sandpaper grit, is crucial for achieving uniform color. Minwax, a recognized organization in wood finishing, offers a range of stains suitable for ash. Consider consulting with seasoned woodworkers and their collected wisdom when selecting the right stain for your specific ash wood stain project; their insights can be invaluable.
Unlocking the Beauty of Ash Wood with Stain
Ash wood, with its distinctive grain patterns and light, neutral tone, presents a beautiful canvas for woodworking enthusiasts. When finished well, ash exhibits a captivating elegance.
But more than just aesthetics, staining ash wood properly unlocks its full potential, transforming ordinary pieces into showstopping projects.
This guide provides a comprehensive, step-by-step approach to achieving a flawless stained finish on ash wood, empowering you to elevate your woodworking creations.
Enhancing Wood Grain Through Staining
The process of staining ash wood is more than just applying color; it’s an art form that accentuates the wood’s natural character.
The stain seeps into the wood’s open grain, highlighting the unique patterns and textures inherent in ash.
This transformation creates depth and dimension, enhancing the visual appeal of your finished piece.
Benefits of Staining Ash Wood in Woodworking Projects
Staining ash wood offers a multitude of benefits beyond mere aesthetic enhancement:
- Aesthetic Appeal: Stain allows you to customize the color of the wood to perfectly complement your project and existing décor.
- Protection: Certain stains offer a degree of protection against moisture, UV damage, and everyday wear and tear.
- Highlighting Natural Beauty: As mentioned, a stain can make the natural grain of the wood "pop."
- Increased Value: A well-stained piece often appears more high-end than an unstained one.
Whether you’re building furniture, crafting cabinets, or creating intricate trim work, staining adds a touch of sophistication and lasting durability to your woodworking projects.
Mastering Ash Wood Stain: A Path to Perfection
Mastering the art of staining ash wood requires a holistic approach, encompassing several key elements:
- Understanding the Wood: Recognizing the unique characteristics of ash wood, including its open grain and light color.
- Proper Preparation: Ensuring a smooth, clean surface through meticulous sanding and dust removal.
- Selecting the Right Stain: Choosing the appropriate stain type and color to achieve the desired aesthetic.
- Employing the Right Application Techniques: Applying the stain evenly and effectively, using techniques that enhance the wood grain.
- Sealing for Long-Lasting Beauty: Protecting the stained finish with a topcoat that provides durability and enhances the color.
By mastering these elements, you can unlock the full potential of ash wood and create stunning, lasting woodworking masterpieces.
Enhancing Wood Grain Through Staining
The process of staining ash wood is more than just applying color; it’s an art form that accentuates the wood’s natural character.
The stain seeps into the wood’s open grain, highlighting the unique patterns and textures inherent in ash.
This transformation creates depth and dimension, enhancing the visual appeal of your finished piece.
Benefits of Staining Ash Wood in Woodworking Projects
Staining ash wood offers a multitude of benefits beyond mere aesthetic enhancement:
Aesthetic Appeal: Stain allows you to customize the color of the wood to perfectly complement your project and existing décor.
Protection: Certain stains offer a degree of protection against moisture, UV damage, and everyday wear and tear.
Highlighting Natural Beauty: As mentioned, a stain can make the natural grain of the wood "pop."
Increased Value: A well-stained piece often appears more high-end than an unstained one.
Whether you’re building furniture, crafting cabinets, or creating intricate trim work, staining adds a touch of sophistication and lasting durability to your woodworking projects. But before you even pop open that can of stain, it’s essential to deeply understand your canvas – the ash wood itself.
Understanding Ash Wood: A Staining Canvas
Ash wood isn’t just any wood; it possesses a unique set of characteristics that both enable and inform the staining process. Knowing these traits is crucial for achieving the best possible results. Think of it as getting to know your artistic medium before you create your masterpiece.
Defining Ash Wood Characteristics
Ash wood is prized for several key properties:
Open Grain:
Unlike woods with tight, closed pores, ash features a distinct, open grain pattern. This allows stain to penetrate deeply, enhancing the wood’s natural texture.
Light Color:
Ash typically presents with a light, creamy white to pale yellow hue. This neutral base makes it incredibly receptive to a wide range of stain colors. From light and airy washes to deep, rich tones, ash can handle them all.
Hardness:
Classified as a hardwood, ash is durable and resilient, making it suitable for projects that endure daily use.
This hardness also means it can withstand the staining process without excessive warping or damage.
Workability:
Ash is known for being relatively easy to work with, accepting screws and glue well.
It machines cleanly and sands smoothly, facilitating a flawless staining preparation.
The Grain’s Impact on Staining
The wood grain isn’t just a visual element; it dictates how the stain interacts with the wood. Consider these points:
Absorption Rates:
The open grain of ash results in varied absorption rates across the surface. Denser areas absorb less stain, while more porous sections drink it in.
Color Variation:
Due to these differing absorption rates, the grain pattern becomes more pronounced after staining.
This creates a beautiful contrast that showcases the wood’s inherent character, so preparation & stain choice is important to consider.
Enhancing Beauty:
When staining is done correctly, the grain is not obscured but rather brought to the forefront.
The stain accentuates the natural flow and patterns of the wood, adding depth and visual interest to the piece.
Ash Wood in Popular Projects
Ash is a staple in many woodworking projects, thanks to its strength, beauty, and workability. Here are some common applications:
Furniture:
From elegant dining tables to sturdy chairs and bed frames, ash is frequently used in furniture construction.
Its ability to accept stain allows for customization to match any décor.
Cabinets:
Ash cabinets offer a blend of durability and aesthetic appeal.
The wood’s grain pattern adds visual interest to kitchen and bathroom designs, especially when stained to complement the surrounding elements.
Trim:
Ash trim provides a sophisticated touch to interior spaces.
Stained ash moldings, baseboards, and door frames can elevate the overall look and feel of a room.
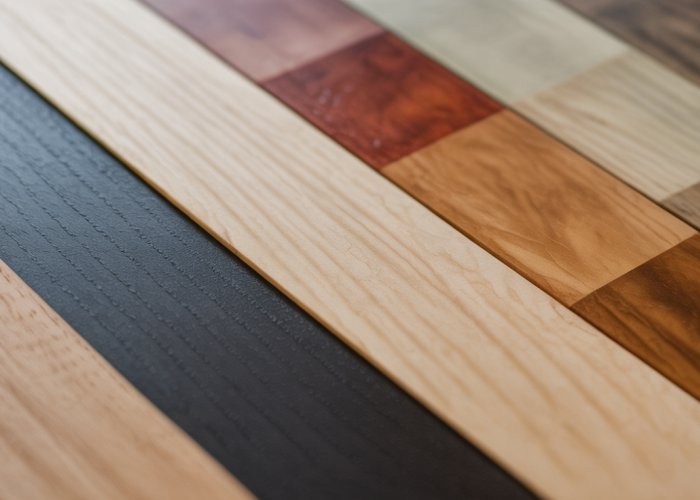
Flooring:
While perhaps less common than oak or maple, ash flooring provides a unique alternative.
Its distinctive grain and stainability make it a visually striking choice for homeowners seeking a distinctive look.
Understanding ash wood and appreciating its unique characteristics sets the stage for a successful staining project, but the next step is arguably the most critical. It’s the foundation upon which the entire finish is built: surface preparation.
Preparation is Paramount: Setting the Stage for Success
The quality of your final stained ash wood project hinges significantly on the preparation you invest upfront. Proper surface preparation isn’t just about aesthetics; it’s about ensuring the stain adheres correctly, penetrates evenly, and ultimately showcases the wood’s natural beauty. Think of it as creating the perfect canvas for your masterpiece. Rushing this stage or cutting corners will inevitably lead to unsatisfactory results, no matter how skilled you are with the stain itself.
The Sanding Saga: Achieving a Smooth Foundation
Sanding is the cornerstone of surface preparation. It levels the playing field, removing imperfections and creating a uniform surface that’s receptive to stain. The key is to understand the importance of grit numbers and how they impact the final finish.
-
Choosing the Right Grit: The sanding process typically involves a sequence of grits, starting with a coarser grit to remove any initial imperfections or mill marks, and gradually progressing to finer grits to refine the surface.
-
For raw ash wood, start with an 80-grit sandpaper to smooth out rough spots.
-
Follow with 120-grit to remove the scratches from the 80-grit and further refine the surface.
-
Finally, use 220-grit to create a silky smooth surface that’s ready to accept the stain.
-
-
Why Grit Matters: The lower the grit number, the coarser the sandpaper. Coarse grits remove material quickly but leave behind noticeable scratches. Finer grits, on the other hand, polish the surface and minimize scratches. Skipping grits or using excessively coarse sandpaper can lead to uneven stain absorption and a poor final finish.
-
Sanding Techniques: Always sand with the grain of the wood to avoid creating cross-grain scratches. Use a sanding block or orbital sander for even pressure and consistent results. Avoid excessive pressure, which can lead to uneven sanding and swirl marks.
Dust Removal: A Crucial Step Often Overlooked
Once you’ve completed the sanding process, it’s imperative to remove all traces of sanding dust. Dust particles can interfere with stain adhesion, causing blotchiness and an uneven finish.
-
The Tack Cloth Triumphs: The most effective way to remove sanding dust is with a tack cloth. These cloths are treated with a slightly sticky substance that attracts and traps dust particles.
-
Vacuuming is Vital: Before using a tack cloth, vacuum the surface thoroughly to remove the bulk of the dust. This will prevent the tack cloth from becoming overloaded and losing its effectiveness.
-
The Blow-Off Alternative: Compressed air can be used to blow dust out of crevices and hard-to-reach areas, but be sure to do this in a well-ventilated area to avoid inhaling the dust.
Addressing Imperfections: Filling the Gaps and Healing the Wounds
Even the most carefully selected piece of ash wood may have minor imperfections, such as small holes, dents, or scratches. Addressing these imperfections before staining is essential for achieving a flawless finish.
-
Wood Filler to the Rescue: Wood filler is a paste-like substance used to fill holes, cracks, and other imperfections in wood. Choose a wood filler that matches the color of your ash wood as closely as possible.
-
Applying Wood Filler: Apply the wood filler with a putty knife, pressing it firmly into the imperfection. Overfill slightly to allow for sanding. Once the filler is dry, sand it flush with the surrounding wood surface using fine-grit sandpaper.
-
Repairing Minor Damage: Minor dents can sometimes be raised by steaming the wood with a damp cloth and a hot iron. For deeper scratches, consider using a wood repair kit that contains various colored fillers and touch-up markers.
Understanding ash wood and appreciating its unique characteristics sets the stage for a successful staining project, but the next step is arguably the most critical. It’s the foundation upon which the entire finish is built: surface preparation.
Selecting the Right Stain: Matching Color to Canvas
Choosing the right stain is like selecting the perfect paint for an artist’s canvas. It’s where your creative vision truly begins to take shape.
The type of stain you choose, its color pigments, and the use of pre-stain conditioners all play vital roles in the final appearance of your ash wood project.
Making informed decisions here can elevate your project from ordinary to extraordinary.
Understanding Wood Stain Types
The world of wood stains can seem overwhelming at first.
However, understanding the key differences between the main types – oil-based, water-based, and gel stains – is crucial for making the right choice for your project.
Each type offers distinct advantages and disadvantages.
Oil-Based Stains
Oil-based stains are renowned for their rich color saturation and their ability to penetrate deeply into the wood grain.
They offer a longer open time, which means you have more time to work with the stain before it starts to dry.
This can be particularly helpful for larger projects or for those who are new to staining.
However, oil-based stains have a longer drying time and require mineral spirits for cleanup.
They also emit stronger odors and contain higher levels of VOCs (volatile organic compounds), so proper ventilation is essential.
Water-Based Stains
Water-based stains are gaining popularity due to their low odor, low VOC content, and easy cleanup with water.
They dry much faster than oil-based stains, which can be an advantage for projects with tight timelines.
However, this also means you need to work quickly to avoid lap marks or uneven color.
Water-based stains tend to raise the wood grain more than oil-based stains, so a light sanding with a fine-grit sandpaper (e.g., 320-grit) after the first coat is recommended.
Gel Stains
Gel stains are thicker than oil-based and water-based stains and are ideal for staining non-porous surfaces like veneer or fiberglass.
They sit on top of the wood rather than penetrating it, providing a more uniform color.
Gel stains are also useful for achieving consistent color on woods that tend to stain unevenly.
However, they may not highlight the wood grain as dramatically as penetrating stains.
The Role of Color Pigments
The color of your stain is determined by the pigments it contains.
Understanding how these pigments work is essential for achieving the desired aesthetic.
Color pigments influence the final look, undertones, and opacity of your stained wood.
Some pigments are more transparent, allowing the wood grain to show through, while others are more opaque, providing a more solid color.
Consider the undertones of the stain.
For example, a stain with warm undertones (red, orange, yellow) will create a cozy and inviting feel, while a stain with cool undertones (blue, green, gray) will create a more modern and sophisticated look.
Always test the stain on a scrap piece of ash wood before applying it to your project to ensure you are happy with the color.
Pre-Stain Conditioner: Preventing Blotchy Finishes
Ash wood, with its open grain structure, is prone to blotchy staining if not properly prepared.
This is where pre-stain conditioner comes in.
Pre-stain conditioner is a clear liquid that you apply to the wood before staining.
It seals the wood pores, creating a more uniform surface that absorbs the stain evenly.
This helps to prevent blotchiness and ensures a consistent color across the entire project.
Applying pre-stain conditioner is a simple but crucial step for achieving a professional-looking finish on ash wood.
Follow the manufacturer’s instructions for application and drying times.
Allow the conditioner to dry completely before applying your chosen stain.
Selecting the perfect stain sets the stage, but the true magic happens during the application process. It’s where your vision transforms from concept to reality, infusing the ash wood with the color and character you’ve carefully chosen. Understanding the tools, techniques, and nuances of stain application is paramount to achieving a flawless finish.
The Staining Process: A Step-by-Step Guide to Perfection
The staining process, while seemingly straightforward, requires careful attention to detail. From gathering the right tools to mastering various application techniques, each step plays a crucial role in achieving a professional-looking finish on ash wood. This comprehensive guide will walk you through each stage, ensuring your project achieves its full potential.
Assembling Your Arsenal: Essential Tools and Materials
Before you even crack open the stain can, ensure you have all the necessary tools and materials at your disposal. This preparation will streamline the process and prevent frustrating interruptions down the line.
-
Stain Applicators: Your primary tool for applying the stain. Options include:
- Brushes: Ideal for detailed work and achieving a smooth, even coat. Opt for natural bristle brushes for oil-based stains and synthetic brushes for water-based stains.
- Rags: Perfect for wiping stain, creating a more rustic look, and layering colors. Use lint-free cotton rags for best results.
- Foam Applicators: A budget-friendly option for applying stain to large, flat surfaces.
- Sandpaper: Essential for surface preparation and light sanding between coats. Have a range of grits on hand (220-grit to 400-grit).
- Mineral Spirits: Used for thinning oil-based stains and cleaning brushes and spills.
- Gloves: Protect your hands from stain and chemicals.
- Tack Cloth: For removing dust particles after sanding.
- Paint Tray or Container: For holding stain during application.
- Stir Sticks: To properly mix the stain before and during use.
- Safety Glasses: To protect your eyes from splashes.
Applying the Stain: A Symphony of Even Strokes
With your materials ready, it’s time to apply the stain. The key here is consistency and patience.
- Stir the Stain Thoroughly: Before you begin, stir the stain well to ensure the color pigments are evenly distributed. This will prevent inconsistencies in the finish.
- Apply the Stain: Using your chosen applicator, apply the stain in long, even strokes, working with the grain of the wood. Avoid applying too much stain at once, as this can lead to blotchiness.
- Work in Sections: For larger surfaces, work in manageable sections to prevent the stain from drying unevenly.
- Observe the Wood Grain: As you stain, pay close attention to how the wood grain is absorbing the stain. Adjust your technique as needed to ensure even coverage.
The Art of Wiping: Achieving the Perfect Color Depth
Wiping off excess stain is just as important as applying it. This step allows you to control the color depth and ensure an even, consistent finish.
- Timing is Key: The amount of time you let the stain sit before wiping will affect the final color. The longer you wait, the darker the color will be. Start by wiping after a few minutes and adjust as needed.
- Wipe with the Grain: Using a clean, lint-free rag, wipe off the excess stain with the grain of the wood.
- Apply Even Pressure: Apply even pressure as you wipe to remove the stain consistently.
- Inspect and Adjust: After wiping, inspect the surface for any unevenness or streaks. Re-wipe as needed until you achieve the desired color and evenness.
Mastering Application Techniques: Beyond the Basics
While basic application is sufficient for many projects, exploring different techniques can add depth and character to your work.
- Layering: Applying multiple thin coats of stain, allowing each coat to dry before applying the next.
- It allows for greater control over the final color and can create a richer, more complex finish.
- Dry Brushing: Using a dry brush with minimal stain to create a textured, weathered look.
- Dip the tips of the brush in the stain, then wipe off most of the stain onto a paper towel before applying to the wood.
- Rag Wiping: Applying stain with a rag, then using a clean rag to blend and manipulate the color.
- Can create a softer, more natural look.
- Experimenting with these techniques allows you to personalize your projects and achieve unique results.
Cleaning Up: The Importance of Mineral Spirits
Once you’ve completed the staining process, proper cleanup is essential.
- Cleaning Brushes: For oil-based stains, use mineral spirits to thoroughly clean your brushes. Rinse with soap and water after cleaning with mineral spirits.
- Removing Spills: Mineral spirits can also be used to remove stain spills from surfaces.
- Safe Disposal: Dispose of used rags and mineral spirits properly to prevent fire hazards. Allow rags soaked in oil-based stain or mineral spirits to dry completely and harden outdoors, spread out, away from any source of ignition, before disposal, or submerge them in water in a closed metal container. Check your local regulations for proper disposal methods.
By following these steps and practicing diligently, you can master the art of staining ash wood and achieve stunning, professional-quality results. Remember that patience and attention to detail are key to unlocking the full beauty of this remarkable wood.
Selecting the perfect stain sets the stage, but the true magic happens during the application process. It’s where your vision transforms from concept to reality, infusing the ash wood with the color and character you’ve carefully chosen. Understanding the tools, techniques, and nuances of stain application is paramount to achieving a flawless finish.
Sealing and Protection: Preserving Your Masterpiece
The effort invested in meticulously staining ash wood deserves to be protected. A topcoat or sealer acts as a shield, safeguarding the stained surface from everyday wear and tear. It enhances the wood’s durability and ensures that the beautiful finish you’ve achieved endures for years to come.
Choosing the right topcoat is crucial, and applying it correctly can make all the difference. The section that follows dives into the specifics of sealers, their application, and the importance of proper technique.
Navigating the World of Topcoats and Sealers
Several types of topcoats and sealers are available, each with its unique characteristics, advantages, and disadvantages. The most common options include polyurethane, varnish, and lacquer. Understanding their properties is key to selecting the best fit for your project.
Polyurethane: The Durable Workhorse
Polyurethane is known for its exceptional durability and resistance to scratches, water, and chemicals. It’s an excellent choice for surfaces that will see heavy use, such as tabletops and floors.
- Pros: High durability, water resistance, available in oil-based and water-based formulas.
- Cons: Can appear slightly plastic-like, oil-based versions yellow over time, difficult to repair.
- Application: Apply with a brush, foam applicator, or spray gun. Requires multiple thin coats for optimal protection.
Varnish: The Classic Choice
Varnish offers a warm, traditional look and good durability. It’s a versatile option suitable for various projects, from furniture to cabinets.
- Pros: Rich, amber tone, good scratch resistance, easier to repair than polyurethane.
- Cons: Less water-resistant than polyurethane, longer drying times, can be brittle.
- Application: Apply with a brush, being mindful of brush strokes. Self-leveling varnishes can minimize this issue.
Lacquer: The Fast-Drying Option
Lacquer dries incredibly quickly, making it ideal for projects where speed is essential. It provides a smooth, elegant finish, but it’s less durable than polyurethane or varnish.
- Pros: Fast drying time, smooth finish, easy to spray.
- Cons: Lower durability, susceptible to scratches and water damage, requires specialized spray equipment for best results.
- Application: Best applied with a spray gun in thin, even coats. Requires excellent ventilation due to strong fumes.
The Art of Applying a Topcoat
Applying a topcoat is not merely slapping on a layer of protection. It is about finesse and attention to detail. Following these guidelines ensures a smooth, durable, and professional finish.
- Preparation is Key: Ensure the stained surface is clean, dry, and free of dust or debris. A tack cloth works wonders for this.
- Apply Thin Coats: Multiple thin coats are always better than one thick coat. This prevents drips, runs, and ensures proper curing.
- Proper Drying Times: Adhere to the manufacturer’s recommended drying times between coats. This allows the finish to fully cure and bond properly.
- Consistent Environment: Maintain a consistent temperature and humidity level in your workspace. Extreme fluctuations can affect the drying and curing process.
The Beauty of Sanding Between Coats
Sanding between coats of topcoat might seem tedious, but it’s a crucial step for achieving a glass-smooth, professional-looking finish.
-
Why Sand? Sanding removes any imperfections, dust nibs, or brushstrokes that may have accumulated during the application process.
-
How to Sand: Use fine-grit sandpaper (320-400 grit) and lightly sand the surface, being careful not to sand through the finish.
A sanding block can help maintain even pressure.
-
Cleaning Up: After sanding, remove all dust with a tack cloth before applying the next coat.
By following these steps and carefully selecting the right topcoat, you can ensure that your stained ash wood project remains beautiful and protected for years to come. Remember, patience and attention to detail are your greatest allies in achieving a flawless finish.
Navigating the world of topcoats and sealers equips you with the tools to protect your work, but it’s equally critical to remember that safety comes first. Working with wood stains and sealers involves handling chemicals that require respect and caution. Creating a safe working environment is not just a recommendation; it’s an essential part of the wood finishing process.
Safety First: Protecting Yourself and Your Workspace
Working with wood finishes can transform your projects, but it’s essential to prioritize your well-being. Ignoring safety precautions can lead to health risks, fire hazards, and environmental concerns. A safe workspace is a productive workspace, and protecting yourself ensures you can continue to enjoy your craft for years to come.
The Importance of Ventilation
Ventilation is paramount when working with wood stains, sealers, and their associated solvents. Many of these products release volatile organic compounds (VOCs) into the air.
VOCs can cause a range of health issues, from headaches and dizziness to more severe respiratory problems.
Working in a well-ventilated area helps to dissipate these fumes, reducing your exposure and minimizing the risk of adverse health effects.
Whenever possible, work outdoors or in a space with open windows and fans to circulate fresh air. If working indoors is unavoidable, consider using an exhaust fan to draw fumes away from your breathing zone.
Essential Personal Protective Equipment (PPE)
Beyond ventilation, personal protective equipment (PPE) is your first line of defense against harmful chemicals. The right PPE can prevent skin contact, inhalation, and eye irritation.
Gloves: Shielding Your Skin
Always wear chemical-resistant gloves when handling stains, sealers, and solvents. Nitrile gloves are a good option as they resist many common chemicals used in wood finishing.
Gloves protect your skin from direct contact with potentially irritating or harmful substances.
Respirators: Protecting Your Lungs
A respirator is crucial for preventing the inhalation of harmful vapors and particles. A simple dust mask is insufficient for VOCs; you need a respirator equipped with cartridges designed to filter organic vapors.
Make sure the respirator fits properly and is rated for the specific chemicals you’re working with. Replace cartridges regularly, following the manufacturer’s recommendations.
Eye Protection: A Clear View to Safety
Safety glasses or goggles are essential to protect your eyes from splashes and fumes. Even small amounts of chemicals can cause severe irritation or damage.
Choose eye protection that provides a secure fit and a wide field of vision.
Responsible Disposal of Materials
Proper disposal of used materials is not only environmentally responsible but also crucial for preventing fire hazards.
Rags and Solvents: A Fire Risk
Oil-based stains and solvents can spontaneously combust if not disposed of properly. Rags soaked with these materials should be laid flat to dry in a well-ventilated area before disposal.
Alternatively, store them in a tightly sealed, water-filled metal container to prevent oxidation and the buildup of heat. Never toss solvent-soaked rags into a pile or a trash can.
Leftover Finishes
Dispose of leftover stains and sealers according to local regulations. Many communities have hazardous waste collection programs for these types of materials.
Never pour leftover finishes down the drain or into the ground.
Empty Containers
Empty containers may still contain residual chemicals. Follow the manufacturer’s instructions for proper disposal, which may involve rinsing the container and recycling it or disposing of it as hazardous waste.
By taking these safety precautions, you can protect yourself, your workspace, and the environment, ensuring that your wood finishing projects are both beautiful and safe.
Navigating the world of topcoats and sealers equips you with the tools to protect your work, but it’s equally critical to remember that safety comes first. Working with wood stains and sealers involves handling chemicals that require respect and caution. Creating a safe working environment is not just a recommendation; it’s an essential part of the wood finishing process.
Troubleshooting Common Problems: Solving Staining Challenges
Even with meticulous preparation and application, staining wood can sometimes present unexpected challenges. Uneven color, blotchiness, or a finish that refuses to dry can be frustrating. Fortunately, most of these issues are solvable with the right knowledge and techniques. Addressing these problems promptly will help salvage your project and achieve the beautiful, professional finish you envisioned.
Uneven Stain Absorption: Diagnosing and Rectifying
Uneven stain absorption is a common headache in woodworking. It manifests as areas of the wood appearing darker or lighter than others, disrupting the uniformity of the finish. Understanding the root causes is the first step toward a solution.
Causes of Uneven Absorption
-
Inconsistent Sanding: This is the most frequent culprit. If some areas of the wood are sanded more thoroughly than others, they will absorb stain differently. Pay close attention to your sanding technique, ensuring every area receives consistent treatment.
-
Residual Glue or Contaminants: Glue squeeze-out from joints, fingerprints, or other surface contaminants can create a barrier that prevents the stain from penetrating evenly. Meticulously clean the wood surface before staining to remove any traces of these substances.
-
Variations in Wood Density: Wood is a natural material, and its density can vary within the same piece. Softer areas tend to absorb more stain than harder areas, leading to unevenness.
Solutions for Uneven Absorption
-
Re-Sanding: Often, the best approach is to lightly re-sand the affected areas, feathering the edges to blend them seamlessly with the surrounding wood. Start with a fine-grit sandpaper (220 or higher) and work your way finer if needed.
-
Pre-Stain Conditioner: As previously mentioned, a pre-stain wood conditioner is crucial for woods like ash with open grains. It helps to equalize the wood’s porosity, promoting more even stain absorption. Apply the conditioner according to the manufacturer’s instructions before staining.
-
Strategic Stain Application: In areas where the stain is absorbing too quickly, apply a lighter coat. Conversely, apply slightly more stain to areas that appear too light. Use a soft cloth to blend the stain carefully, feathering the edges to avoid harsh lines.
Tackling Blotchy Finishes: Prevention and Correction
Blotchiness, characterized by irregular patches of dark and light stain, can ruin the appearance of an otherwise well-executed project. Preventing blotchiness is easier than fixing it, but even blotchy finishes can often be salvaged.
Preventing Blotchy Finishes
-
Embrace Pre-Stain Conditioner: This is your first line of defense against blotchiness, especially on woods prone to uneven absorption.
-
Use a Gel Stain: Gel stains sit on the surface of the wood rather than penetrating deeply, minimizing the impact of variations in wood density. They are a good option for woods that are particularly prone to blotching.
-
Apply Multiple Light Coats: Instead of one heavy coat of stain, apply several thin coats, allowing each coat to dry completely before applying the next. This allows you to build up the color gradually and control the absorption process.
Correcting Blotchy Finishes
-
Mineral Spirits Wipe-Down: Sometimes, a blotchy finish can be improved by wiping the surface with a clean cloth dampened with mineral spirits. This can help to lift some of the excess stain from the darker areas.
-
Light Sanding and Re-Staining: For more severe blotchiness, lightly sand the affected areas to remove some of the stain, and then re-stain, paying close attention to applying the stain evenly and blending the edges.
-
Consider a Toner or Glaze: A toner or glaze can be used to even out the color variations in a blotchy finish. These products are typically applied over the stain and then wiped back to achieve a uniform color.
Stain That Won’t Dry: Identifying and Resolving the Issue
A sticky or tacky finish long after the recommended drying time is a sign that the stain is not drying properly. This can be caused by several factors, and addressing the issue promptly is crucial to avoid further complications.
Common Causes of Slow-Drying Stain
-
Excessive Application: Applying too much stain at once can prevent it from drying properly. The surface may skin over, trapping the wet stain underneath.
-
Inadequate Ventilation: Stains need proper ventilation to dry effectively. High humidity or a lack of airflow can significantly slow down the drying process.
-
Incorrect Stain Type: Using the wrong type of stain for the wood or the environment can also cause drying problems. For example, an oil-based stain may not dry properly in a very humid environment.
-
Contaminated Wood: As with uneven absorption, contaminants on the wood’s surface can prevent the stain from adhering and drying correctly.
Remedies for Stain Drying Problems
-
Increase Ventilation and Wait: Often, simply improving ventilation and allowing more time for drying is sufficient. Place a fan in the room to circulate air and ensure the temperature is within the recommended range for the stain.
-
Wipe Off Excess Stain: If the stain is still wet after a reasonable drying time, wipe off as much excess as possible with a clean cloth.
-
Apply a Drying Agent: In some cases, adding a drying agent to the stain can help to speed up the drying process. Follow the manufacturer’s instructions carefully when using these products.
-
Complete Removal and Reapplication: In severe cases, it may be necessary to completely remove the stain and start over. Use a paint stripper or sand the wood down to bare and follow proper steps.
Frequently Asked Questions About Ash Wood Stain
Looking for quick answers about staining ash wood? Here’s a breakdown of common questions to help you achieve a perfect finish.
Why is ash wood sometimes difficult to stain evenly?
Ash wood has open pores, which can absorb stain unevenly. This can lead to a blotchy or inconsistent finish if not properly addressed with a pre-stain wood conditioner. Using a gel stain can also help control absorption.
What kind of pre-stain wood conditioner works best for ash wood?
An oil-based pre-stain wood conditioner is generally recommended for ash. It helps seal the pores and create a more uniform surface for the ash wood stain to adhere to. Always follow the manufacturer’s instructions for application.
Can I use any type of stain on ash wood?
While you can use various types of stain, gel stains and oil-based stains often perform best on ash. These types of ash wood stain tend to penetrate more evenly than water-based stains, leading to richer, less blotchy color. Always test the stain in an inconspicuous area first.
How many coats of stain should I apply to ash wood?
Generally, one or two coats of ash wood stain are sufficient. Applying too many coats can oversaturate the wood and obscure the grain. Wait for each coat to dry completely before applying the next, and wipe off any excess stain after a few minutes.
So, there you have it! Hopefully, you’re now armed with the knowledge to tackle your own ash wood stain project with confidence. Get out there, experiment, and create something beautiful!